
SOLAR BATTERY BACK-UP USER’S MANUAL
Design for solar fountain pump
Item No.: Aquajet-Pro-Kit-24V-Battery
1. OVERVIEW
) This special solar battery back-up is designed specifically for solar fountain pump. It can
store solar energy for day or night use.
2) The input power should be from a solar module or DC power supply with an output
voltage of 8V.
3) The battery back-up has build-in functions of overcharging and over discharging
protection.
4) There is a bicolor LED light indicating the working status of the battery back-up. Green
shows the battery is in normal operating status, while red shows the battery is in low
voltage status, which requires the battery to be recharged.
5) Timing function is added to the battery back-up to decrease the energy consumption in
cloudy days or winter. The pump works 0 minutes every hour if the timing function is
enabled by placing the timer switch to “Timer On” position.
6) To get different pump performances, the output voltage can be adjusted in the range of
2V-24V through the potentiometer.
2. ASSEMBLING & OPERATION
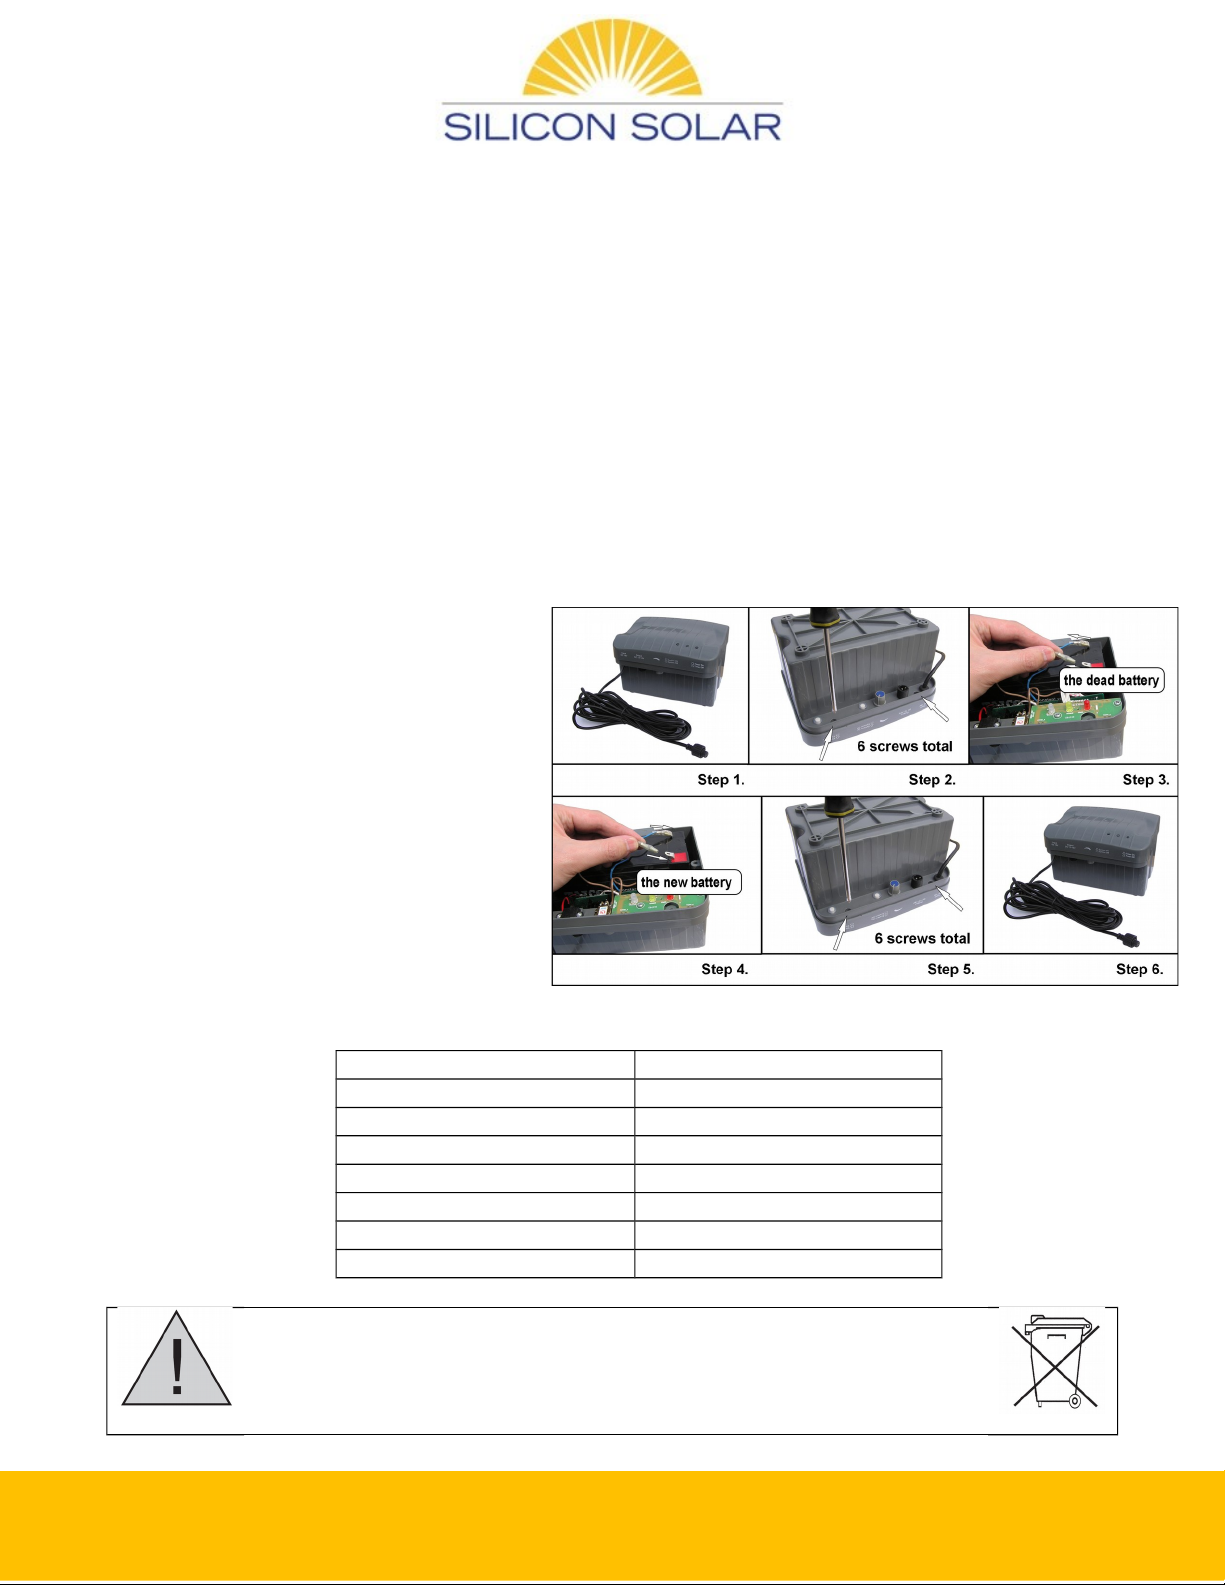
) Loosen the screws on the underside of the housing and remove the cover from the battery box.
2) Place the electrical connector on the red (brown) cable onto the positive terminal of the rechargeable battery. See
the figure above.
3) Place the cover back on the battery box and tighten the screws.
4) Connect the “Input” cable of the battery back-up to a solar module or a DC power supply, and tighten the protection
screw if applicable.
5) Insert the pump plug to the “Output” socket of the battery back-up, and also tighten the protection screw.
6) Make sure to keep the pump fully underwater when it operates.
7) Turn the “On/Off” switch on the battery to the “ON” position, then the “G-normal/R-low” status LED on the battery
shows green and the solar pump starts to operate. The pump m y not work nd the st tus LED m y show red
when the b ttery oper tes for the first time, since the b ttery m y lose its energy in the inventory. It just
needs to be ch rged for 2 to 3 hours in the sunshine by f cing the sol r p nel tow rds the sun, then the
st tus LED shows green nd the pump st rts to work.
8) The pump will automatically stop running while the battery is discharged to its low voltage limit, and the status LED
shows red in the meantime.
9) The “G-normal/R-low” status LED stays in red before the battery is recharged to its starting voltage. After recharged
to its starting voltage, the battery shall continue to be charged for an extra half hour with the status LED flashing
red-green twice every 0 seconds. Then the pump automatically operates and the status LED shows green again.
0) The “Timer on/Timer off” switch switches the pump running mode between "intermittent mode" and "continuous
mode". In the “intermittent mode” (i.e., “Timer On”), a build-in timer is enabled to run the pump 0 minutes per hour
to save the energy, and it is especially useful in winter or on cloudy days. In the "continuous mode" mode, the build
in timer is disabled and the pump shall run continuously.
) If you want the pump to have longer operating time in the evenings or on cloudy days, then turn the ”On/Off” switch
Silicon Solar Inc | 2917 State Hwy 7, Bainbridge, N.Y. 13733 | Ph 800.786.0329 | www.SiliconSolar.com


 Plus Startup manual")


