SILKLINE 68.0171 User manual
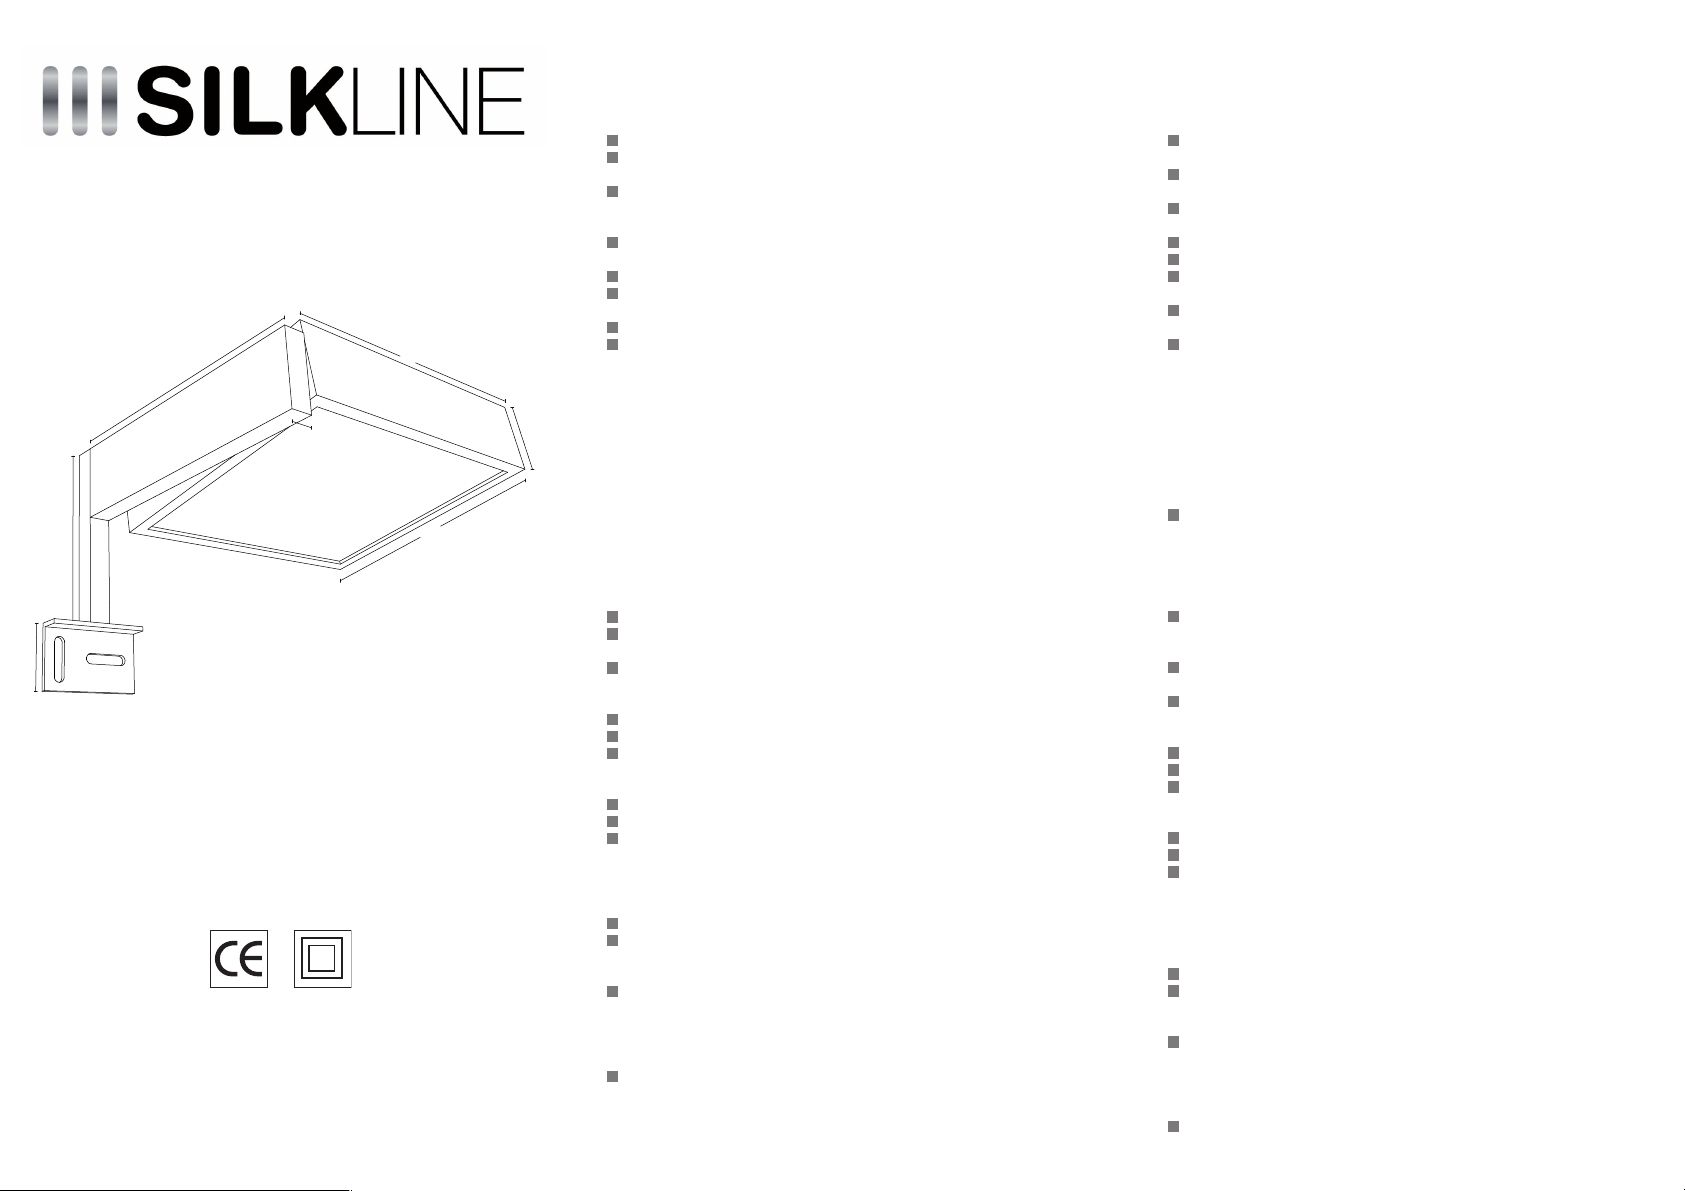
50 mm
35 mm
140 mm
85 mm
10 mm
100 mm
100 mm
MOUNTING INSTRUCTIONS
IMPORTANT
Switch of electricity before any operation on electrical installation.
Place the lamp according to the norms regulating
the safety distances as indicated.
When installing the ftting avoid contact between
metal parts and the electrical installation
connected to the heart connection.
When installing avoid contact between metal/brass
parts of the lamp and mirror.
This lamp is suitable for indoor use only.
Use only bulbs of power inferior or equal to the
maximum prescribed power (G9 40W).
Insulate the electric wires using the connection box included.
This product is suitable for combination with SILKLINE mirrors
series 60 and 61, equiped with SILKLINE concealed hanging
systems, or Silkline aluminium proles art. nr. 80.0177, 80.0178,
80.0179 and 68.0066, 68.0067, 68.0068.
INSTALLATION
Install the lamp always oriented as showed in the picture.
For a correct mounting of the lamp behind the mirror,
place the top of the light at 3÷4 cm above the edge of the mirror de-
pending on model and taste.
This also with regards to placing the mirror over the
wall hooks which needs about 1-2 cm.
Make the holes with a drill Ø 6 mm.
Fix the lamp with the screws and the plugs provided.
Remove the cover of the safety insulating protection C.
Connect the cable of the lamp to the terminal board.
Ensure that the extremity of the cable remains inside the protection.
Insert the cables of the main line to the cable cover B
provided and connect them to the terminal board A.
Put back the cover of the protection C.
REPLACE THE BULB
Switch of electricity.
Wait till the lamp has cooled down.
Remove the glass diuser carefully, with the tool (enclosed)
by practise light pressure on the glass diuser. The two small
springs will come loose.
Remove the transparent capsule glass.
Change the G9 40W bulb.
Place the transparent capsule glass again, than the glass
diuser. Make sure that the two springs are correctly
positioned so that the glass shield is slotted.
CLEANING
Clean the light with a soft dry cloth.
Do not use chemicals or detergents!
RESPONSABILITY
Responsability due to non-compliance with mounting
instructions and use is disclaimed.
We decline every responsability other then the redelivery of a de-
cient product. This specially applies to damages resulting from in-
correct mounting and or use.We refer to our general terms of sales.
Please keep these mounting instructions carefully.
MOUNTING INSTRUCTIONS
MONTAGE INSTRUCTIE
Art.68.0171 - MOVE
max 1x40W G9 - 230V - IP44
1
2
3
4
MONTAGE INSTRUCTIE
LET OP
Schakel de stroom uit voordat u begint met
werkzaamheden aan de elektrische inrichting.
Verzeker u ervan dat de gekozen plaats van installatie voldoet aan
de vermelde veiligheidsnormen voordat u met de installatie begint.
Installeer de lamp zo, dat de metalen delen niet in verbinding staan
met de randaarde van het elektriciteitsnet.
Voorkom contact tussen de lamp en de spiegel.
De lamp is alleen geschikt voor gebruik binnenshuis.
Gebruik geen lampen met een groter vermogen dan het aangege-
ven maximum van G9 40W.
Isoleer de draden van het elektriciteitsnet met het
meegeleverde omhulsel.
Dit product past op SILKLINE-spiegels serie 60 en 61, mits voorzien
van SILKLINE verborgen ophanging art.nr. 80.0175, 80.0176, 80.0181
of SILKLINE alu-ophangprofelen art.nr. 80.0177, 80.0178, 80.0179
en 68.0066, 68.0067, 68.0068.
INSTALLATIE
Monteer de lamp zoals aangegeven op de foto.
Kies de plaats van de bevestingingsbeugel achter de
spiegel zo, dat afhankelijk van model en smaak de
lamp 3÷5 cm boven de rand van de spiegel uitsteekt.
Dit mede in verband met de ruimte die u nodig hebt
om de spiegel over de bevestigingshaken van de
spiegelophanging heen te laten zakken.
Boor gaten in de muur met een boortje Ø 6 mm.
Bevestig de lamp met de meegeleverde schroeven en pluggen.
Verwijder het deksel van de lasdoos C.
Sluit de voedingskabel van de lamp aan op het
kroonsteentje A en zorg dat het uiteinde van de
kabelhuls in de contactdoos steekt.
Trek de elektriciteitsdraden (uit de muur) door de
meegeleverde huls B en sluit ze aan op het kroonsteentje A.
Bevestig het deksel op de lasdoos C.
VERVANGING VAN DE LICHTBRON
Schakel de stroom uit.
Wacht tot de lamp afgekoeld is.
Demonteer voorzichtig het glaskapje door hierop druk uit te oefe-
nen. Gebruik hiervoor meegeleverd gereedschap. De twee veren
zullen hierdoor loskomen.
Trek voorzicht het glaskapje van de lichtbron af.
Vervang de lichtbron G9 40W.
Plaatse het ronde glaspkapje over de lichtbron en daarna het witte
glasplaatje met de veren.
Zorg ervoor dat de veren correct gepositioneerd zijn zodat het glas-
plaatje opgesloten wordt.
REINIGING
De lamp dient met een zachte droge doek gereinigd te worden.
Geen chemicaliën of reinigingsmiddelen gebruiken!
AANSPRAKELIJKHEID
Garantie is niet geldig in geval van onzorgvuldig gebruik of
montage. Wij wijzen elke aansprakelijkheid af die verder gaat dan
het vervangen van een foutief product. Dit geldt in het bijzonder
voor schades, veroorzaakt door foutieve montage en/of gebruik.
Let hierbij ook op onze algemene leveringsvoorwaarden.
Bewaar deze gebruiksaanwijzing zorgvuldig.
1
2
3
4

1
3
2
cm. 60
3
2
cm. 60
cm. 60
3
2
1
ZONE
NO - NEE
NO - NEE
YES - JA
PLACE OF INSTALLATION
PLAATS VAN INSTALLATIE
OFF
3
2
1
4
Ømm. 6
art. 68.0171
68.0171
220/250V
cm.8
C
B
A
1
Other SILKLINE Home Lighting manuals


