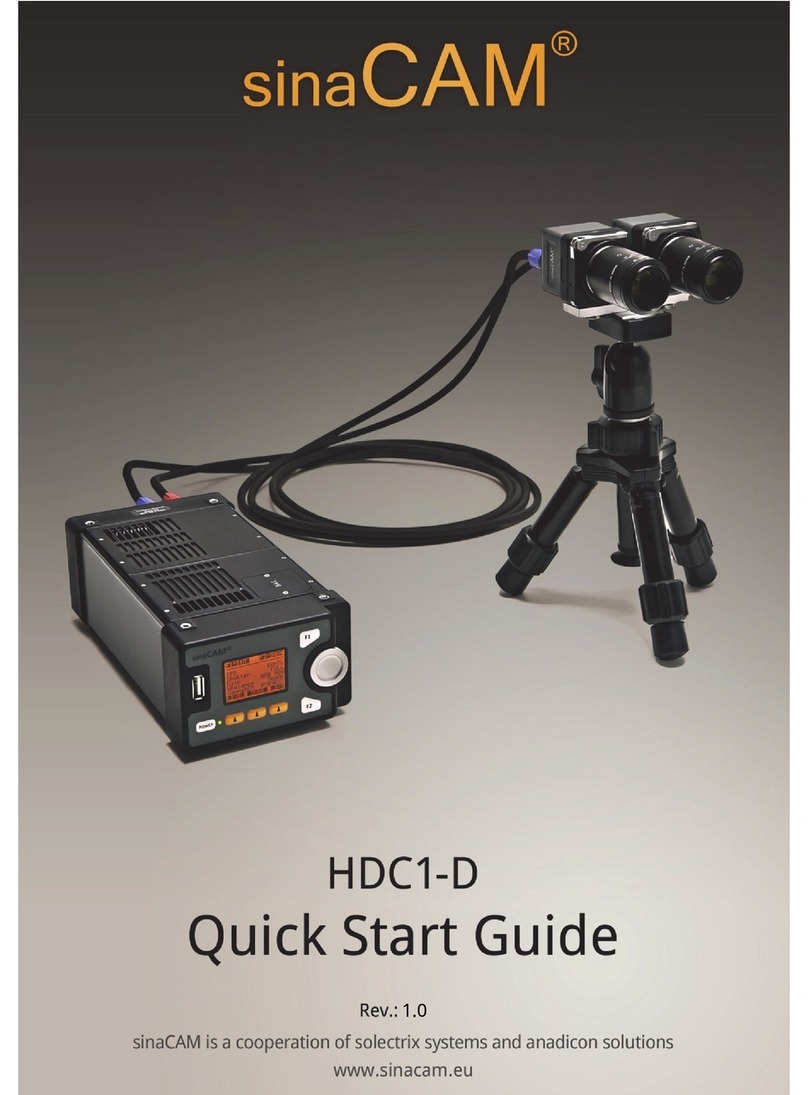
sinaCam HDC1-D User manual

sinaCAM About This Document
User Manual Rev.: E 1
E

About This Document sinaCAM
2 Rev.: E User Manual
Content
1. About This Document.................................................................................................................................... 6
2. Safety Instructions......................................................................................................................................... 8
2.1 Warning Signs and Indications .......................................................................................................... 8
2.2 General Safety..................................................................................................................................... 8
2.3 Specific Safety ..................................................................................................................................... 8
3. Regulatory Compliance................................................................................................................................. 9
4. Disposal.......................................................................................................................................................... 9
5. Introduction to sinaCAM............................................................................................................................. 10
6. Description................................................................................................................................................... 10
6.1 Remote Head HDC1-100................................................................................................................... 10
6.2 Base Unit HDC1-200 ......................................................................................................................... 11
6.2.1 The Control Panel ............................................................................................................... 12
6.2.2 The Rear Panel .................................................................................................................... 13
7. Installation ................................................................................................................................................... 14
7.1 Minimum System Requirements ..................................................................................................... 14
7.2 Power Supply .................................................................................................................................... 14
7.3 Remote Camera Head Connection.................................................................................................. 14
7.4 Calculation of Maximum Cable Length ........................................................................................... 15
7.5 Connecting the Hardware ................................................................................................................ 15
7.6 Connecting AUX Devices................................................................................................................... 16
7.6.1 Pin Assignment of the 10-Pin AUX Terminal..................................................................... 16
7.6.2 UART Interface .................................................................................................................... 17
7.6.3 Timecode Interface............................................................................................................. 17
7.6.4 Exposure Trigger Interface................................................................................................. 18
7.7 sinaCAM as Part of a GenLock Chain .............................................................................................. 19
7.8 Connection Examples....................................................................................................................... 20
7.9 Installing Lenses ............................................................................................................................... 21
7.10 Adjusting the Lens Scale Position.................................................................................................... 21
7.11 Adjusting the Flange Back Distance................................................................................................. 22
8. Operation ..................................................................................................................................................... 23
8.1 Switching ON and OFF...................................................................................................................... 23
8.2 Using the Menus ............................................................................................................................... 23
8.3 Toggling between Standard/Alternative Memory .......................................................................... 24
8.4 Saving of New Settings ..................................................................................................................... 24
8.5 Frame Grabbing to USB Storage Device.......................................................................................... 24
9. The Menus.................................................................................................................................................... 25
9.1 The Menus at a Glance..................................................................................................................... 25
9.2 HOME Menu ...................................................................................................................................... 26
9.2.1 FPS (Frames Per Second).................................................................................................... 26
9.2.2 Shutter ................................................................................................................................. 27
9.2.3 Gain (Exposure Control) ..................................................................................................... 28
9.2.4 WBalance (White Balance) ................................................................................................. 28
9.2.5 Gamma & CM (Color Management) .................................................................................. 30
9.3 LEVEL Menu....................................................................................................................................... 33
9.3.1 White Level .......................................................................................................................... 33
9.3.2 Black Level........................................................................................................................... 33
9.3.3 BBalance Red (Black Balance Red) .................................................................................... 33

sinaCAM About This Document
User Manual Rev.: E 3
9.3.4 BBalance Blue (Black Balance Blue) .................................................................................. 33
9.4 MODE Menu ...................................................................................................................................... 34
9.4.1 DVI-Mode............................................................................................................................. 34
9.4.2 H-Flip (Horizontal Flip)........................................................................................................ 35
9.4.3 GenLock ............................................................................................................................... 35
9.4.4 Sharpen ............................................................................................................................... 37
9.4.5 IrisMode .............................................................................................................................. 38
9.4.6 RecFlag................................................................................................................................. 38
9.5 SYSTEM Menu.................................................................................................................................... 39
9.5.1 INFO Screen ........................................................................................................................ 39
9.5.2 SERVICE Menu..................................................................................................................... 40
9.5.3 USB Menu............................................................................................................................ 41
10. The Web Interface ....................................................................................................................................... 42
10.1 Getting Started.................................................................................................................................. 42
10.1.1 Required Tools .................................................................................................................... 42
10.1.2 Connecting to sinaCAM ...................................................................................................... 42
10.2 Setup Menu ....................................................................................................................................... 43
10.2.1 Summary ............................................................................................................................. 43
10.2.2 Network Settings................................................................................................................. 43
10.2.3 Date & Time......................................................................................................................... 44
10.2.4 Capture................................................................................................................................ 45
10.2.5 Change Gamma LUT........................................................................................................... 45
10.2.6 Paint..................................................................................................................................... 46
10.3 Updating the Firmware .................................................................................................................... 47
11. Remote Head System LED Indications....................................................................................................... 49
12. Measurements............................................................................................................................................. 50
13. Technical Specifications .............................................................................................................................. 51

About This Document sinaCAM
4 Rev.: E User Manual
List of Figures
Figure 1: The Remote Head ............................................................................................................................. 10
Figure 2: The Base Unit .................................................................................................................................... 11
Figure 3: The Control Panel ............................................................................................................................. 12
Figure 4: Arrangement of the Terminals ........................................................................................................ 13
Figure 5: Pin Assignment of the 10-Pin AUX Terminal................................................................................... 16
Figure 6: AUX Connection Example –Remote Control Panel........................................................................ 17
Figure 7: AUX Connection Example –External Timecode Generator ........................................................... 17
Figure 8: AUX Connection Example –External Exposure Trigger ................................................................. 18
Figure 9: GenLock Example Setup with two sinaCAM Base Units................................................................. 19
Figure 10: Standard Single-Link Setup .............................................................................................................. 20
Figure 11: Advanced Dual-Link Setup ............................................................................................................... 20
Figure 12: Broadcast Setup................................................................................................................................ 20
Figure 13: Adjusting the Lens Scale Position.................................................................................................... 21
Figure 14: Flange Back Distance Adjustment ................................................................................................... 22
Figure 15: The Scroll Wheel ............................................................................................................................... 23
Figure 16: Standard/Alternative Setting............................................................................................................ 24
Figure 17: Saving of New Settings ..................................................................................................................... 24
Figure 18: The Menus at a Glance..................................................................................................................... 25
Figure 19: HOME Menu ...................................................................................................................................... 26
Figure 20: White Balance Adjustment Screen .................................................................................................. 28
Figure 21: Manual White Balance Adjustment Screen..................................................................................... 29
Figure 22: Rec. 709 Gamma Curves .................................................................................................................. 32
Figure 23: 2Bas Gamma Curves (based on S-Log) ........................................................................................... 32
Figure 24: sina Gamma Curves (based on S-Log)............................................................................................. 32
Figure 25: LEVEL Menu....................................................................................................................................... 33
Figure 26: MODE Menu ...................................................................................................................................... 34
Figure 27: GenLock Example Setup with two sinaCAM Base Units and their Settings.................................. 36
Figure 28: MTF Graph for Sharpening Function............................................................................................... 37
Figure 29: SYSTEM Menu.................................................................................................................................... 39
Figure 30: INFO Screen ...................................................................................................................................... 39
Figure 31: SERVICE Menu................................................................................................................................... 40
Figure 32: Base Bars test image with camera head 1/2 indicator field highlighted...................................... 40
Figure 33: USB Menu.......................................................................................................................................... 41
Figure 34: Web Manager - Login........................................................................................................................ 42
Figure 35: Web Manager - Summary ................................................................................................................ 43
Figure 36: Web Manager - Network Settings.................................................................................................... 44
Figure 37: Web Manager - Clock Adjust ............................................................................................................ 44
Figure 38: Web Manager - Update Gamma LUT............................................................................................... 45
Figure 39: Web Manager - Paint ........................................................................................................................ 46
Figure 40: Web Manager - Update Firmware ................................................................................................... 47
Figure 41: Web Manager - Firmware Now Updating ....................................................................................... 47
Figure 42: Web Manager - Firmware Update Successful................................................................................. 48
Figure 43: Base Unit Measurements................................................................................................................. 50
Figure 44: Remote Camera Head Measurements............................................................................................ 50

sinaCAM About This Document
User Manual Rev.: E 5
List of Tables
Table 1: Revision History .................................................................................................................................. 6
Table 2: Elements and Controls of the Remote Head .................................................................................. 10
Table 3: Elements of the Base Unit................................................................................................................ 11
Table 4: Controls and their Functions ........................................................................................................... 12
Table 5: Terminals on the Rear Panel............................................................................................................ 13
Table 6: Pin Assignment of the 10-Pin AUX Terminal................................................................................... 16
Table 7: Available gamma settings, ASA/ISO and color space combinations............................................. 31
Table 8: Iris Mode settings and their effect .................................................................................................. 38
Table 9: Remote Head System LED Indications ............................................................................................ 49
Table 10: Technical Specifications –Remote Camera Head HDC1-100 ........................................................ 51
Table 11: Technical Specifications –Base Unit HDC1-200 ............................................................................. 51

About This Document sinaCAM
6 Rev.: E User Manual
1. About This Document
Document Revision History
Table 1:
Revision History
Revision
Date
Description
A
2012-07-09
First edition
B
2012-07-25
Added list of supported Sony Remote Control Panel features to
Technical Specifications.
Corrected description of AUX connector pin 4.
C
2012-11-12
Added list of supported Sony Remote Control Panel models to UART
Interface chapter and Technical Specifications.
D
2012-12-12
Updated user manual to cover new functions added with December
2012 firmware update:
USB port can now also be used for software/firmware updates.
Pin 6 of AUX Terminal now used for Iris Control.
Expanded frame grabbing section with new method and “Auto Grab”
disable option.
Updated “The Menus at a Glance”.
Added SERVICE and USB menu, updated SYSTEM menu section.
E
2013-03-27
Updated “The Menus at a Glance”.
Incorporated new list of Gamma settings (sina, 2Bas, 4LOG, 6LOG,
8LOG), added Gamma settings overview table and new gamma curves.
Added description of IrisMode and RecFlag to Mode Menu chapter.
Sharpening setting now supports negative values.
Updated Web Interface chapter with new screenshots, added Paint
submenu, removed Wireless Settings submenu.

sinaCAM About This Document
User Manual Rev.: E 7
Copyright
© 2013 by Solectrix Systems and anadicon solutions, all rights reserved.
All text, graphics, design and other works contained herein are copyrighted works of Solectrix Systems
and anadicon solutions. Any redistribution or reproduction of any materials contained herein is strictly
prohibited without the written consent of the copyright holders.
sinaCAM®is a registered trademark of Solectrix Systems and anadicon solutions and is their sole and
exclusive property. On the following pages of this document the (®) mark is no longer used.
Information
Due to continuous product development, the information within this document is subject to change
without notice.
If you find any problems or inaccuracies in this document, please report them to us in writing.
Solectrix Systems GmbH
Fuerther Str. 244b
“Auf AEG”
90429 Nuremberg
Germany mailto: info@sinacam.eu
www.sinacam.eu
anadicon solutions GmbH
Kammergasse 34
85354 Freising
Germany

Safety Instructions sinaCAM
8 Rev.: E User Manual
2. Safety Instructions
2.1 Warning Signs and Indications
CAUTION
Indicates a hazardous situation which, if not avoided, could result in minor or moderate injury.
NOTICE
Indicates a potentially hazardous situation which, if not avoided, may result in property damage.
2.2 General Safety
Read and follow all safety and operating instructions before installing and operating the camera
system.
2.3 Specific Safety
Only use the type of power source specified for this camera system. The use of a wrong power source
could damage the camera system and/or cause fire or electric shock!
Do not open the housing of the camera system. Risk of electric shock!
Do not open the housing or attempt to repair or modify any part of the camera system. Repairs must
only be carried out by authorized sinaCAM service centers.
Do not store the camera system near a strong magnetic field, or in areas where it would be subjected
to direct sunlight, extreme temperatures, high levels of humidity or severe vibrations.
Do not use the camera system outside the specified operating temperature range.
Keep all liquids away from the camera system. Do not place containers with liquids on top of the
camera housing. Risk of fire, electric shock and/or damage!
Do not use the camera system in places where it could come in contact with water, moisture, steam
or dust. This could damage the camera system and/or cause fire or electric shock!
Unplug the power cable by the plug, do not pull the cable.
Unplug all cables before transporting the camera system or storing it inside a camera case.
Always put the protection cap onto the lens mount when transporting the remote camera heads
without lenses.
Do not allow laser beams to enter the camera lens or the lens mount opening, as this could cause
damage to the CCD sensor.

sinaCAM Regulatory Compliance
User Manual Rev.: E 9
3. Regulatory Compliance
The sinaCAM base station and the sinaCAM remote heads comply with the
following regulations:
RoHS
Low Voltage Directive (LVD), 2006/95/EC
Electromagnetic compatibility (EMC):
–2004/108/EC
–FCC 47 CFR Part 15 Subpart B Class B
FCC NOTE
This equipment has been tested and found to comply with the limits for a Class B digital device, pursuant
to part 15 of the FCC Rules. These limits are designed to provide reasonable protection against harmful
interference in a residential installation. This equipment generates, uses and can radiate radio frequency
energy and, if not installed and used in accordance with the instructions, may cause harmful interference
to radio communications. However, there is no guarantee that interference will not occur in a particular
installation. If this equipment does cause harmful interference to radio or television reception, which can
be determined by turning the equipment off and on, the user is encouraged to try to correct the interfer-
ence by one or more of the following measures:
–Reorient or relocate the receiving antenna.
–Increase the separation between the equipment and receiver.
–Connect the equipment into an outlet on a circuit different from the one the receiver is connected to.
–Consult the dealer or an experienced radio/TV technician for help.
The user is cautioned that changes or modifications not expressly approved by the party responsible for
compliance could void the user’s authority to operate this equipment.
4. Disposal
For European Union member states only:
The use of this symbol indicates that this product must not be disposed of with household waste.
By ensuring this product is disposed of correctly, you will help prevent negative consequences for
the environment and human health. At the end of its lifespan, take the product to an appropriate recycling
station. For more information about correct disposal of electrical and electronic equipment please contact
your local authorities or your supplier where you purchased the product.

Introduction to sinaCAM sinaCAM
10 Rev.: E User Manual
5. Introduction to sinaCAM
sinaCAM is a small remote head HD studio camera system for professional 2D/3D broadcast and
cinema production.
Two signals of two sinaCAM remote heads are processed by the same image processor. This enables:
–Pixel synchronous 3D output
–Identical image properties, like white balance, brightness and contrast
C-mount threads and the option to adjust the back focus by changing the flange back distance make it
possible to use C-mount lenses for professional production.
A choice of professional accessories, such as different battery adaptors, lens adaptors, lens accesso-
ries, handles, mounting plates and a carrying case increases application possibilities.
6. Description
6.1 Remote Head HDC1-100
Figure 1:
The Remote Head
Table 2:
Elements and Controls of the Remote Head
Item
Designation
Description
A
Locking lever
Locking/unlocking the adjustment ring (B)
B
Flange back
adjustment ring
Flange back distance adjustment ring rotates independently of
C-mount and lens
C
Lens mount
Standard C-mount thread
D
Lens mount lock
Allows for lens scale position alignment in 30° steps
E
System LED
Glows continuously when on, flashes while link detection is in
progress and in case of malfunction
F
CoaXPress
interface
Remote head connection with base unit
(via 75Ωcoaxial cable with BNC plug)
G
Bottom mount
¼”thread for attaching a tripod, handle, base-plate, holder, etc.

sinaCAM Description
User Manual Rev.: E 11
6.2 Base Unit HDC1-200
Figure 2:
The Base Unit
Table 3:
Elements of the Base Unit
Item
Designation
Description
A
Control panel
Controls and graphical user interface display
B
Mounting points
M4 thread for attaching a handle or to fix the base unit to a
mounting plate
C
System battery com-
partment
The system battery supplies power to the internal clock only. It
does not supply the camera with power. Do not open the system
battery compartment. Replacement of the system battery must
only be carried out by authorized sinaCAM service centers.
D
Rear panel
Panel with all terminals to connect equipment

Description sinaCAM
12 Rev.: E User Manual
6.2.1 The Control Panel
Figure 3:
The Control Panel
Table 4:
Controls and their Functions
Item
Designation
Description
A
USB 2.0 port
For frame grabbing to a USB stick and software/firmware updates
(update functionality only with December 2012 firmware or later)
B
Display
Graphical user interface display
C
F1 button
To select a menu item as displayed
D
Power switch
Turns power ON or OFF
E
Power LED
Glows red when the unit is connected to the power supply, and
glows green when the unit is powered on
F
Arrow buttons
To select a menu item as displayed
G
F2 button
To select a menu item as displayed
H
Scroll wheel
Scroll wheel and pushing button to navigate through the menus and
select options

sinaCAM Description
User Manual Rev.: E 13
6.2.2 The Rear Panel
Figure 4:
Arrangement of the Terminals
Table 5:
Terminals on the Rear Panel
Item
Designation
Description
A
Remote head
terminals (1, 2)
CoaXPress interface with 18V power supply for the remote camera
heads, connection via 75Ωcoaxial cable with BNC plug
B
SYNC
(OUT, IN)
Terminals for, e.g.,
–an additional camera
–an external sync generator
C
HD-SDI output
(1A, 1B)
Terminals for, e.g., an HD-SDI monitor, a recording device or a
2D/3D converter; 1A/1B provides the image signal coming from
remote head terminal 1
D
HD-SDI output
(2A, 2B)
For the same equipment as listed next to item C; 2A/2B provides
the image signal coming from remote head terminal 2
E
LAN
100MBit Ethernet service communication port
F
DVI output
Connection of a digital HD monitor
G
AUX
10-pin terminal, auxiliary signals for remote control unit,
iris control device, timecode or exposure trigger
H
Power input
12 –24 V
Connection of a power supply adapter,
12 –24V DC, minimum 30W

Installation sinaCAM
14 Rev.: E User Manual
7. Installation
7.1 Minimum System Requirements
Shooting with sinaCAM requires the below listed minimum equipment:
A sinaCAM camera system, consisting of
–sinaCAM base unit
–one or two sinaCAM remote heads (depending on shooting in 2D or 3D)
Further equipment, like
–C-mount lens suitable for 2/3”CCD cameras
–Remote head cable, 75Ωcoaxial cable with BNC plugs
–Video output cable for DVI and/or HD-SDI
–Digital HD monitor, able to display the desired output format and frame rate
–Digital recording device
–DC power supply for the sinaCAM base unit
7.2 Power Supply
It is recommended to only use official sinaCAM accessories as a power supply.
For official sinaCAM accessories please refer to www.sinacam.eu
CAUTION
The use of a wrong power supply can cause fire or electric shock.
NOTICE
The use of a wrong power supply may cause damage to the camera system.
7.3 Remote Camera Head Connection
The base unit supplies 18 V power to the remote camera head terminals 1 and 2.
NOTICE
Connect only sinaCAM remote camera heads to terminals 1 and 2 of the base unit. Connection of any
other equipment to terminal 1 or 2 may not only cause damage to the camera system, but also to the
connected equipment.

sinaCAM Installation
User Manual Rev.: E 15
7.4 Calculation of Maximum Cable Length
The maximum cable length between remote camera heads and base unit is limited by the signal
attenuation and the conductor DC resistance of the used cable type.
Maximum cable length as limited by signal attenuation (rule of thumb):
Max. cable length = 25dB / attenuation at 1.5GHz
Maximum cable length as limited by conductor DC resistance (rule of thumb):
Max. cable length = 8Ω/ conductor DC resistance
Example calculation for Belden 1505F Flexible cable:
–Nom. attenuation at 1.5GHz: 13.300dB / 100ft
–Nom. conductor DC resistance: 12.2Ω/ 1000ft
Max. cable length = 25 dB / (13.300dB /100ft) = ~188ft (57m)
Max. cable length = 8Ω/ (12.2Ω/ 1000ft) = ~656ft (200m)
The lower of the two values determines the approximate maximum cable length, in this example 188 ft
(57m).
7.5 Connecting the Hardware
Make sure that all hardware to be installed is switched off.
Connect all hardware to the base unit.
Switch on all hardware and the base unit.

Installation sinaCAM
16 Rev.: E User Manual
7.6 Connecting AUX Devices
The 10-pin AUX terminal enables the connection of a remote control unit, iris control devices, timecode
signals or an exposure trigger signal.
7.6.1 Pin Assignment of the 10-Pin AUX Terminal
Figure 5:
Pin Assignment of the 10-Pin AUX Terminal
Table 6:
Pin Assignment of the 10-Pin AUX Terminal
Pin no.
Assignment
1
5V out
2
GND
3
TxD (RS-232) or Tx+ (RS-485)
4
RxD (RS-232) or Rx+ (RS-485)
5
Trigger Out
6
Iris Control (PWM)
7
Trigger In
8
Timecode In
9
CTS (RS-232) or Rx- (RS-485)
10
RTS (RS-232) or Tx- (RS-485)
Connector type:
ODU MINI-SNAP G51L0C-P10QC00-A000
Mating connector:
E.g., ODU MINI-SNAP S11L0C-P10MCC0-6200

sinaCAM Installation
User Manual Rev.: E 17
7.6.2 UART Interface
The UART interface (via pins 3, 4, 9 and 10) is designed for connection of a Remote Control Panel. Both
RS-232 and RS-485 are supported. sinaCAM is compatible with Sony’s Master Setup Units (MSU) and
Remote Control Panels (RCP) using 700 Protocol, for example:
Sony MSU-700/700A/750/900/1000/1500
Sony RCP-700/701/720/721/730/731/740/741/750/751/920/921/1000/1001/1500/1501/1530
Sony RM-B150/B750
This flexibility allows for comprehensive camera systems or simple point-to-point systems. For a detailed
list of supported RCP features, please refer to chapter 13, Technical Specifications.
Figure 6:
AUX Connection Example –Remote Control Panel
7.6.3 Timecode Interface
sinaCAM can be connected to an external timecode generator.
Figure 7:
AUX Connection Example –External Timecode Generator

Installation sinaCAM
18 Rev.: E User Manual
7.6.4 Exposure Trigger Interface
sinaCAM can be connected to an external exposure trigger generator. This is useful for, e.g., rotating
mirror shutter integration or other applications where exact sensor timing is essential.
Note: The "GenLock"-mode must be set to "ExpTrgIn" to enable this feature (see chapter 9.4.3
GenLock).
A falling edge on the Trigger In pin triggers the start of sensor exposure, a rising edge stops the sensor
exposure. In other words: The exposure length is controlled via the negative pulse with of the Trigger In
signal while the frame rate is controlled via the frequency.
Max. ratings:
Vhigh: 2.0 to 5.0V
Vlow: 0 to 0.8V
Negative pulse width: min. 1us
Positive pulse width: min. 10ms
Frequency: max. 60Hz (60fps)
Slew Rate: max. 2.5ns
sinaCAM signals the current sensor timing on the Trigger Out pin with the same meaning of the edges as
described above.
Figure 8:
AUX Connection Example –External Exposure Trigger

sinaCAM Installation
User Manual Rev.: E 19
7.7 sinaCAM as Part of a GenLock Chain
GenLock is used to synchronize multiple cameras to ensure that all cameras in a synchronization chain
begin reading the first pixel of an image from the sensor at the same time. The system needs a clocking
component that provides the synchronization data –currently, sinaCAM cannot provide a clock itself.
Multiple sinaCAMs can be daisy-chained. The last camera in a chain must terminate the signal.
The input accepts standard analog SD/HD video signals (NTSC, PAL, 480p, 576p, 720p, and
1080i/p/psF) with either bi-level (black bursts) or tri-level sync.
sinaCAM supports GenLock for CVBS, Y (luma) from Y/C and YPbPr and G (sync on green) from GBR
as specified in the following video standards:
Composite Video (CVBS) and S-Video (Y/C):
–SDTV: SMPTE 170M (NTSC), ITU-R BT.470 (PAL)
Component Video (YPbPr/GBR):
–SDTV: SMPTE 125M, SMPTE 267M, ITU-R BT.601 (480i, 576i)
–EDTV: ITU-R BT.1358 (480p, 576p)
–HDTV: SMPTE 296M (720p), SMPTE 274M (1080i/p), SMPTE RP 211 (1080psf)
Supported input formats (automatically detected):
480i
480p59.94
576i
576p50
720p60, 720p59.94, 720p50, 720p30, 720p29.97, 720p25, 720p24, 720p23.98
1080i60, 1080i59.94, 1080i50
1080p60, 1080p59.94, 1080p50, 1080p(sf)30, 1080p(sf)29.97, 1080p(sf)25, 1080p(sf)24,
1080p(sf)23.98
Figure 9:
GenLock Example Setup with two sinaCAM Base Units
Please refer to chapter 9.4.3 GenLock on how to configure the system in a GenLock chain.

Installation sinaCAM
20 Rev.: E User Manual
7.8 Connection Examples
Figure 10:
Standard Single-Link Setup
Figure 11:
Advanced Dual-Link Setup
Figure 12:
Broadcast Setup
Other manuals for HDC1-D
2
Table of contents
Other sinaCam Digital Camera manuals
