Table of Contents Previous Page | Next Page
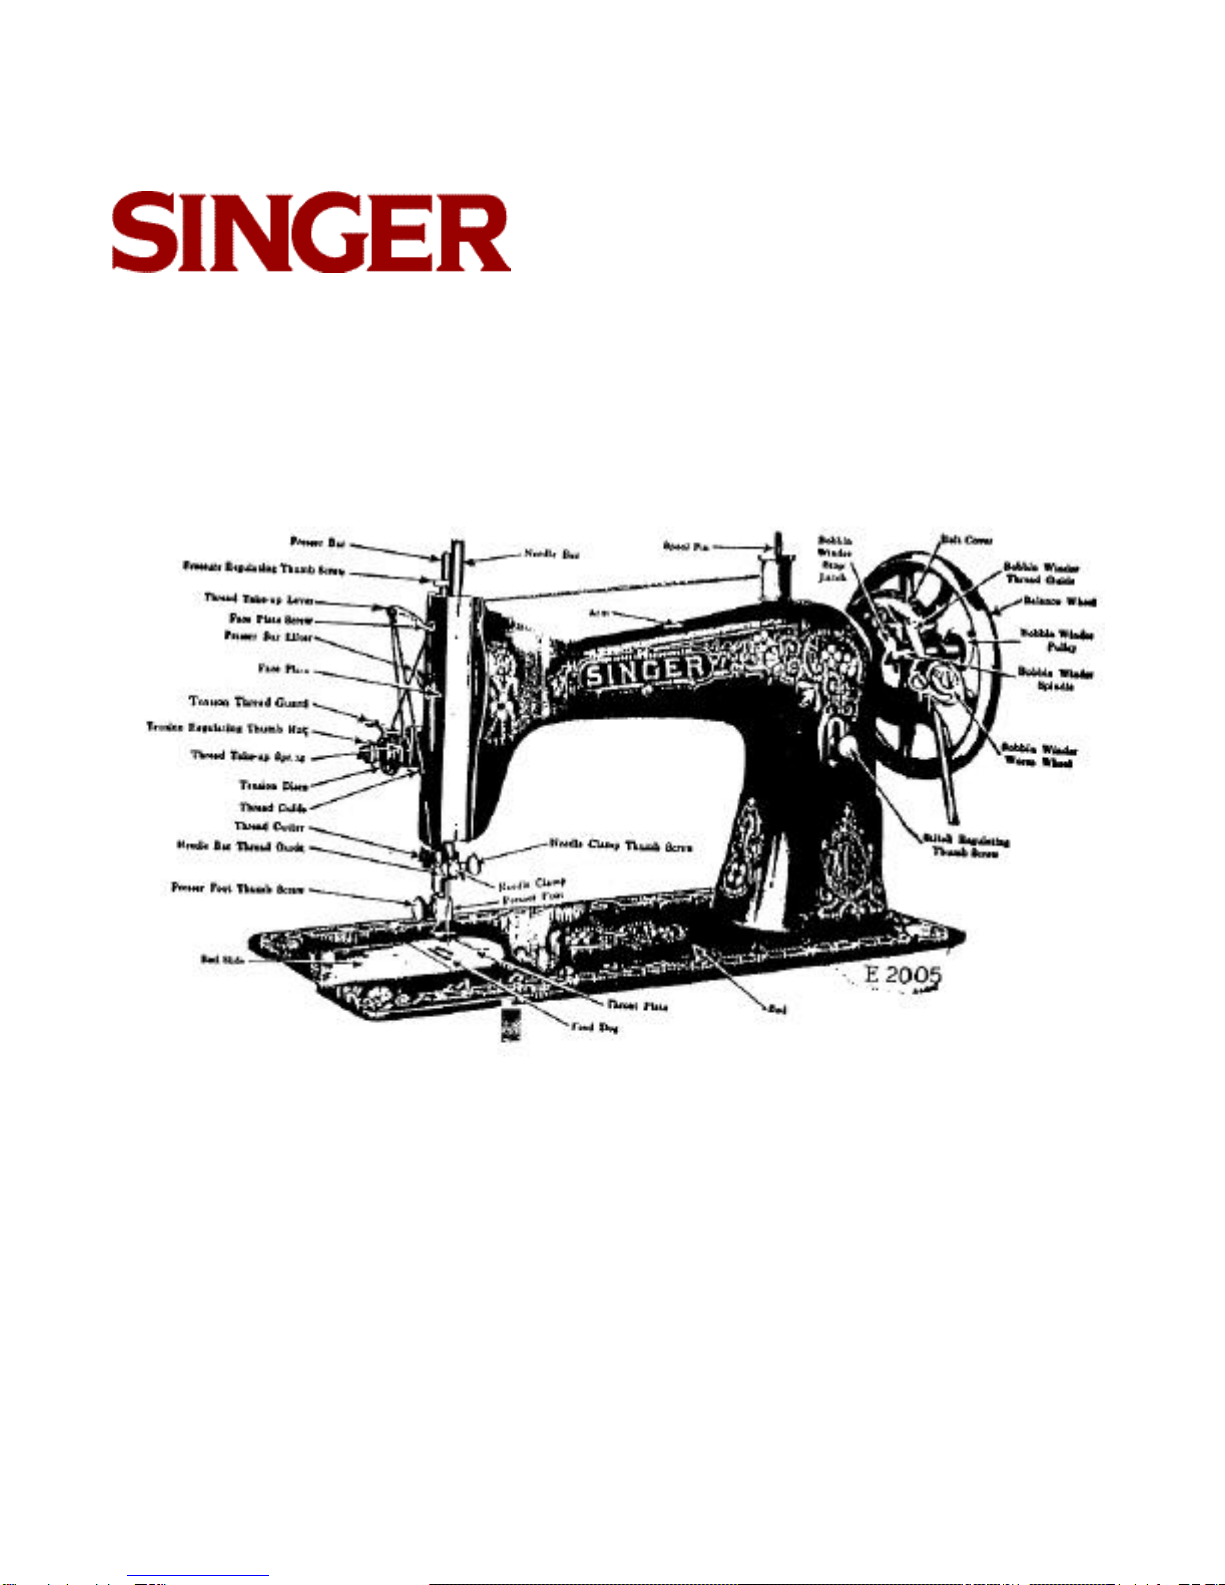
Sewing Machine No. 15
5
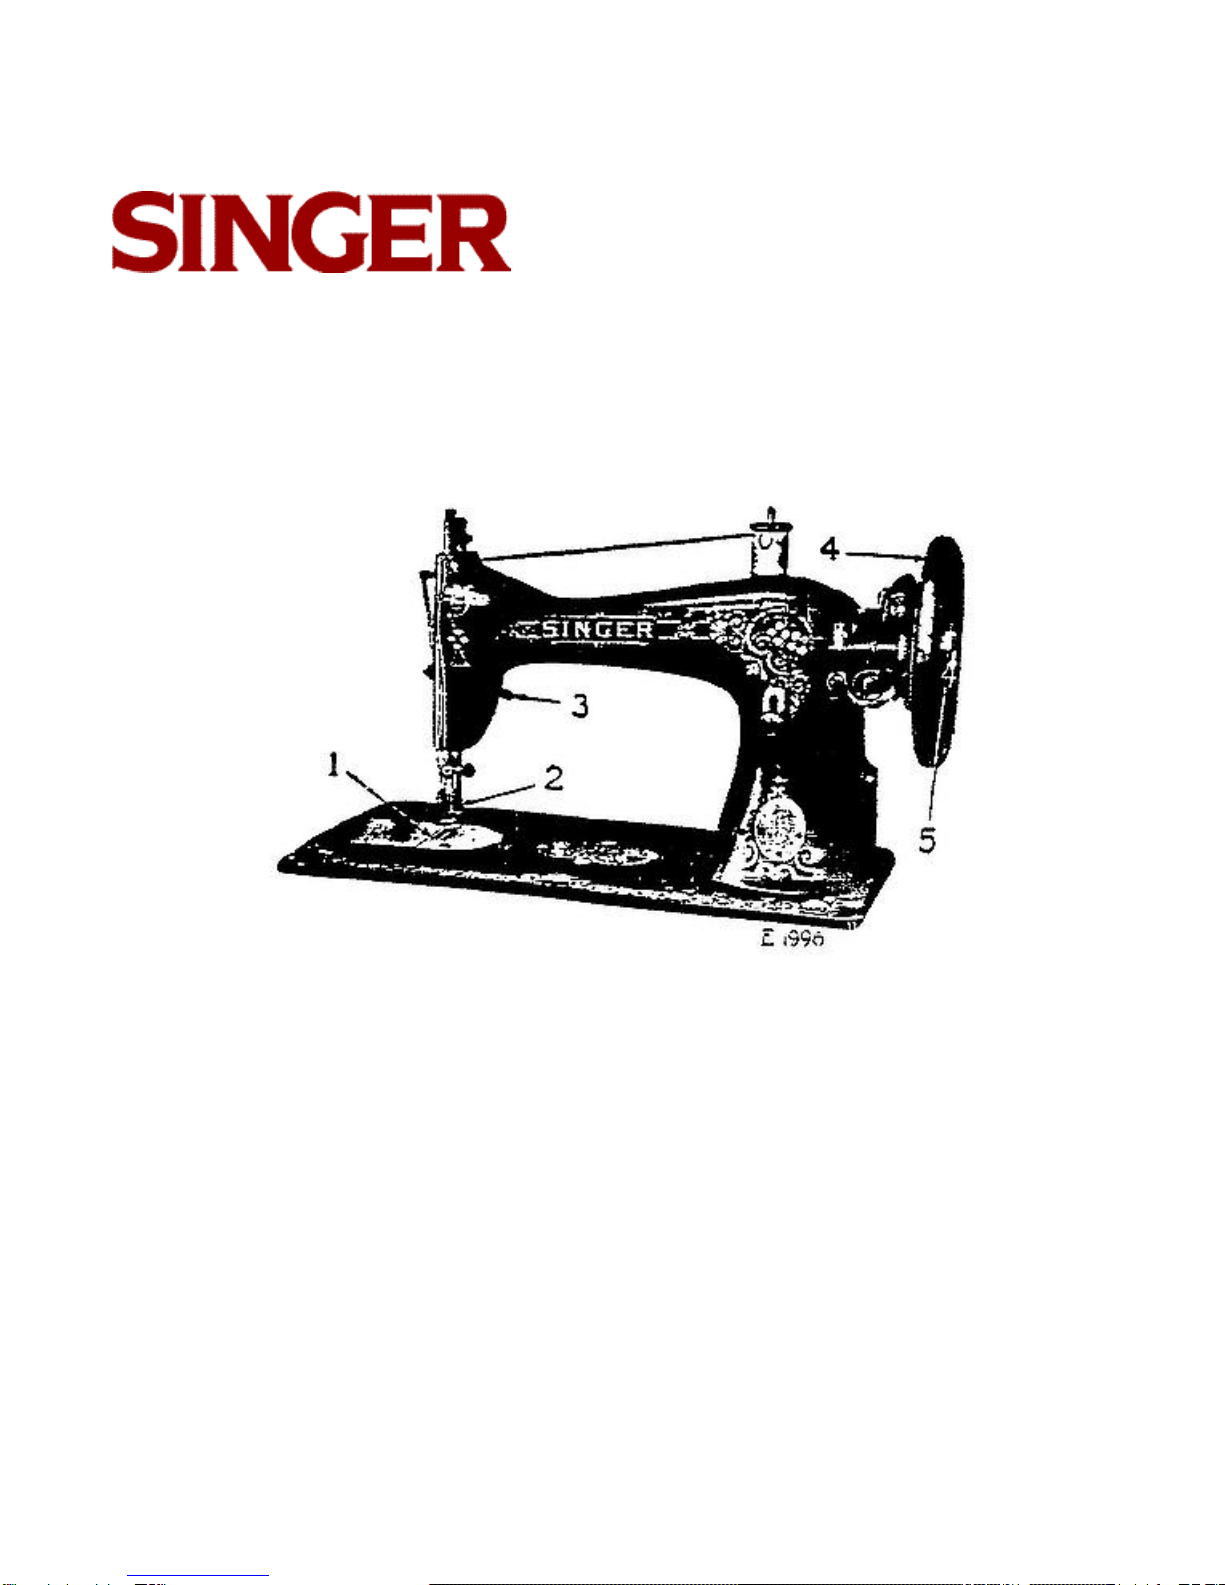
To release the balance wheel (4, Fig. 3, page 3) turn the stop motion screw (5, Fig. 3, page 3)
over toward you. It will be necessary to hold the balance wheel while loosening the stop
motion screw.
After releasing the balance wheel, place your feet upon the treadle and with the right hand
turn the balance wheel over toward you. This will start the band wheel, treadle and pitman,
the sewing mechanism having been disconnected.
Continue the motion thus begun by an alternate pressure of heel and toe, until a regular and
easy movement is acquired, and the balance wheel kept continuous rotation by use of the
feet alone.
When you are thoroughly familiar with the treadle movement, and can restart the machine
without turning the balance wheel in the wrong direction tighten the stop motion screw to
connect the balance wheel with the stitching: mechanism.
Place a piece of cloth under the presser foot, let the foot down upon it, and operate the
machine in this way without being threaded, until you have become accustomed to guiding
the material.
To Ensure Perfect Action of the Machine
The balance wheel must always turn over toward the operator.
Do not run the machine with the presser foot resting on the feed without cloth under the
presser foot.
Do not run the machine when both bobbin case and needle are threaded unless there is
material under the presser foot.
Do not try to help the machine by pulling the fabric lest you bend the needle. The machine
feeds the work without assistance.
The slide over the bobbin case should be kept closed when the machine is in operation.