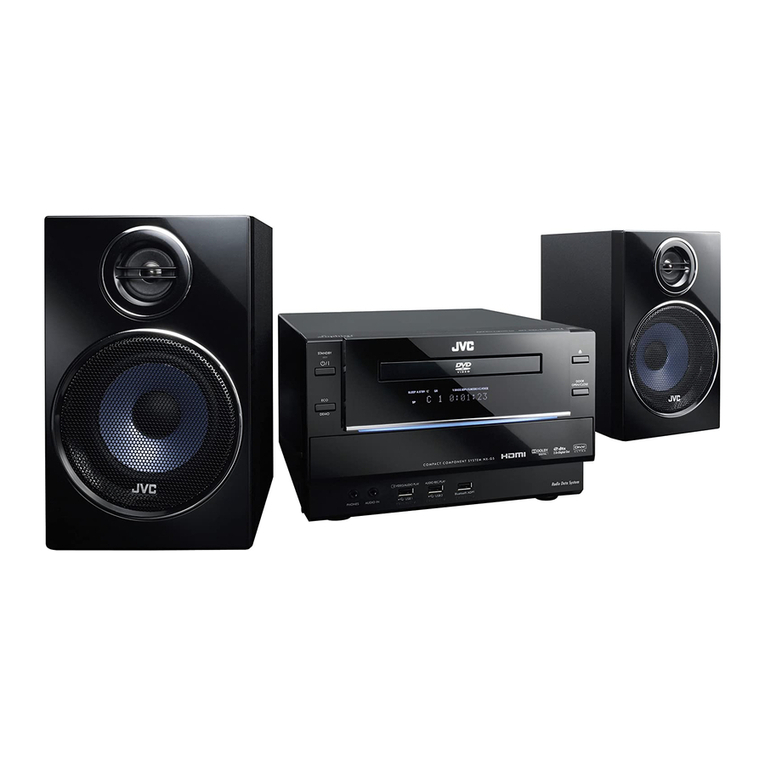
Sinotec MDHF-900 User manual

USER MANUAL
DVD COMPONENT HIFI SYSTEM
MDHF-900

FOREWORD
ACCESSORIES
Part 1: Speaker X2
DVD COMPONENT HIFI SYSTEM
Part 5: User Manual X1
Part 4: Six-headed Audio&
Video Lotus Wire X1
Part 3: Remote Control X1
Part 2: FM Antenna X1
MDHF-900
CONTENT .......................................................................................................................1
WARNING .......................................................................................................................2
PANELS INSTRUCTION ...................................................................................................3
REMOTE CONTROL .........................................................................................................4
CONNECTION WITH TV ..................................................................................................5
CONNECTION WITH AMPLIFIER ..................................................................................6
SYSTEM CONNECTION ..................................................................................................7
...........................................................................................................8-15
MENU SETUP ..............................................................................................................17-20
SPECIFICATION ................................................................................................................21
TROUBLE SHOOTING .....................................................................................................22
FM OPERATION
BASIC OPERATION...........................................................................................................16
TROUBLE SHOOTING
For your convenience, we have listed some methods to solve common problems you
may encounter when using this system. If the problem is not solved please contact the
nearest service center.
Operation incorrect
Possible cause Solution
Power supply does
not work
Power plug is not fully
inserted into the socket
Fully insert the power plug
into the socket
Remote does not work
The batteries are exhausted Replace them with new ones
The remote control unit is not
directed at the remote control
sensor
Please aim at the remote
control correctly
No image on the TV
screen
The unit is not connected
properly
Reconnect the system
according to the illustration
TV not set in the video mode Set the TV in video mode
The scanning mode does not
match to the TV scanning
mode
Reset the scanning mode
Play is unavailable
No disc Insert a disc
Disc incorrectly inserted Replace the disc with the
picture upward
Disc is not compatible for
this device
No sound from
speakers
Audio wire is not connected
correctly Connect the audio wire
correctly
Wrong operation with amplifier Operating the amplifier
referring to the illustration
Discontinuous sound
or distorted pictures
Disc is not clean
Disc is scratched
Disc is distorted
Replace with a clean disc or
clean the disc with a soft cloth
Replace with a new one
Invalid display on the
screen Please refer to the user manual
Use a compatible disc
Problem
Correct Disposal of this product.
To prevent possible harm to the environment or human health from uncontrolled waste
disposal, recycle it responsibly to promote the sustainable reuse of material resources.
To return your used device, please use the return and collection systems or contact
the retailer where the product was purchased. They can take this product for safe
environmental recycling.
22

CONTENT
21
SPECIFICATION
Disc Type
DVD
VCD SVCD
MP3
MPEG 4
CD-RW
DVCD
Video Format MPEG 2 for DVD, MPEG 1 for VCD
Audio Format MPEG 1, MPEG 2, STEREO
Signal Output Video system: NTSC, PAL, AUTO
Video output: 1.0 V p-p
Audio: Stereo
Output Joint
Outer Facilities
Power Supply AC~240V/50Hz
Max. Power 120W
Audio S/N 80 dB Weight A
Operating Condition Temperature: 5--35
Operating status: flat horizontal surface
Frequency Response + 3 dB (20 Hz--20 KHz)
_
C
Chromatic aberration output,
Video output, optical fiber output,
coaxial output
USB, Microphone
Note:
Some MPEG 4 discs are the specification of *. rm/*. ra/ * .ram/* .rmm/ etc in the market that
this device might not support. Please select carefully when you purchase.
The product specifications may be subject to change and no additional notices will be given.
IMPORTANT SAFETY INSTRUCTIONS
1. Read these instructions - All the safety and operating instructions should be read before this product
is operated.
2. Keep these instructions - The safety and operating instructions should be retained for future reference.
3. Note all warnings - All warnings on the appliance and in the operating instructions should be adhered to.
5. Do not use this apparatus near water - The appliance should not be used near water or moisture, for
example, in a wet basement or near a swimming pool and the like.
6. Clean only with a dry cloth.
7. Do not block any ventilation openings. Install in accordance with the manufacture’ s instructions.
8. Do not install near any heat sources such as radiators, heat registers, stoves, or other apparatus
(including amplifiers) that produce heat.
9. Do not defect the safety purpose of the polarized or grounding plug. A polarized plug has two blades
with one wider than the other. A grounding plug has two blades and a third grounding prong. The
wide blade or the third prong is provided for your safety. If the provided plug does not fit into your
outlet, consult an electrician for replacement of the obsolete outlet.
10. Protect the power cord from being walked on or pinched, particularly at the plugs, convenience
receptacles, and at the point where they exit from the apparatus.
11. Only use attachments/accessories specified by the manufacturer.
12. Use only with the cart, stand, tripod, bracket, or table specified by the manufacturer, or sold with
the apparatus. When a cart or rack is used, use caution when moving the cart/apparatus combination
to avoid injury from tip-over.
13. Unplug the apparatus during lightning storms or when unused for long periods of time.
14. Refer all servicing to qualified personnel. Servicing is required when the apparatus has been
damaged in any way, such as power supply cord or plug is damaged, liquid has been spilled or
objects have fallen into the apparatus has been exposed to rain or moisture, does not operate
normally, or has been dropped.
15. Please keep the unit in a well ventilated environment.
16. CAUTION: These servicing instructions are for use by qualified service personnel only. To reduce
the risk of electric shock, do not perform any servicing other than that contained in the operating
instructions unless you are qualified to do so.
17. WARNING: The MAINS PLUG is used as a disconnect device, the disconnect device shall remain
readily operable.
- This lightning flash with arrowhead symbol within an equilateral triangle is
intended to alert the user to the presence of non-insulated dangerous
voltage within the product’s enclosure that may be of sufficient magnitude
to suffer a risk of electric shock.
18. This equipment is a Class II or double insulated electrical appliance. It has been
designed in such a way that it does not require a safety connection to electrical earth.
19.
RISK OF ELECTRIC SHOCK
DO NOT OPEN
RISQUE DE CHOC ELECTRIQUE
NE PAS OVURIR
CAUTION/PRUDENCE
- Warning: To reduce the risk of electric shock, do not remove cover (or back) as there are
no user-serviceable parts inside. Refer servicing to qualified personnel.
- The exclamation point within an equilateral triangle is intended to alert the user to the
presence of important operating and maintenance instructions in the literature
accompanying the appliance.

PANELS INSTRUCTION
20
2
3
4
5
10
1
12
1314
15 16
17
18
19
20
1. FREQUENCY LIGHT
2. STANDBY
3. L/R/LANGUAGE
4. SEARCH
5. PREVIOUS
6. TONE
7. DSP
8. FAST REWIND
9. STOP
10. DVD
11. DISPLAY SCREEN
12. USB
13. REMOTE CONTROL SENSOR
14. FM
15. PLAY/PAUSE
16. AUX IN
17. NEXT
18. OPEN/CLOSE
19. FAST FORWARD
20.
22. MIC SOCKET
23. USB PORT
24. PANEL LIGHT
VOLUME KNOB
21. DISC DOOR
1
4
7
8
10
3
6
2
9
5
1.
COMPONENT OUTPUT
2.VIDEO OUTPUT
3. FM ANTENNA INTERFACE
4.
5.
6.
7. POWER ON/OFF
8. L/R SPEAKERS OUTPUT
9.
10.
Y, Pb/Cb, Pr/Cr
L/R AUDIO INPUT
COAXIAL OUTPUT
L/R AUDIO OUTPUT
POWER SUPPLY INPUT
OPTICAL FIBER OUTPUT
Parental Control Setup Page
Parental Control
This unit has 8 different age ratings for selection. You can move the cursor to select one of them, then
press Play/Enter button on the remote control to enter. You will be reminded to enter the password.
Password
The original password of this unit is “1389” and you can change it to a new one.
(This page is available while in EJECT or NO DISC status.)
PARENTAL
PASSWORD
PARENTAL CTRL SETUP
6
7
8
9
11
21
22
MENU SETUP
23
24
GOTO PREFERENCE PAGE

4
19
REMOTE CONTROL
NOTE:
1. Turn on the player and install batteries in the remote control. Put the emitter against the
sensor of player for remote control.
2. The distance of remote control should not exceed 7 meters, or else, it will not work.
3. If the sensor or remote controller emitter is stuck with foreign matters, it may result in the mal-
function in signal reception or not at all.
4. The remote control function may be affected under the strong interference signals, such as power
supply and other strong high-frequency signals.
STANDBY
TIME/FREQUENCY
DISPLAY
TITLE
DIRECTION
SETUP
F.FWD/TUNE+
F.RWD/TUNE-
SEARCH/
SUBTITLE
PROGRAM
OK ON/OFF
DSP
TONE
OK MENU
OPEN/CLOSE
NUMBER
BUTTONS
CD RIP. /ANGLE
PLAY/ENTER
MUTE
PAUSE
/LANGUAGE
MONO/STEREO
VOLUME+/-
ZOOM
STOP
A-B REPEAT
USB
SAVE/MENU
NEXT/CH+
PREV./CH-
MENU SETUP
Angle Mark
When the disc has multi-angle pictures, setting the Angle Mark displays a multi-angle mark on
the screen. This option has two settings:
ON: Display multi-angle mark
OFF: Multi-angle mark is not displayed
Close Caption
When playing DVD discs, set this option OFF to close caption, choose the ON option to open
the caption.
Screen Saver
To set screen saver on or off.
Last Memory
When the option is set to ON, the system remember the played disc content.
The disc content is not remembered when the OFF option is selected.
Version
This option is used to display the model of this system and its factory name.
Default
In the status of Eject or no disc, choose this option to resume to the DVD player’s original setup.
DVD
FM
CLEAR
REPEAT
AUX IN
General Setup Page
ANGLE MARK ON
CLOSE CAPTION OFF
SCREEN SAVER OFF
LAST MEMORY OFF
VERSION
DEFAULT
GENERAL SETUP
RESET
GOTO GENERAL SETUP PAGE

518
CONNECTION WITH TV
1. If your TV-set has AV terminal, connect this unit to TV-set with A/V cables, and set
TV-set to AV status after confirming that the connection is correct. (Figure 1)
2. If your TV-set has a chromatism output terminal, please use three connection cables to
connect the player and TV-set. This connection offers a more vivid image. (Figure 2)
Note:
1. Before connecting the player to the TV-set, turn off and unplug both the units.
2. You may adjust the corresponding system according to your TV system while watching various
discs.
3. If there are multiple connections between video player and TV, please select one and unplug
others so as not to affect the quality of images and sound.
4. Do not switch on and off or press power switch frequently, switching on and off each time
must have an interval of 3 seconds.
5. Do not connect the digital optical or coaxial output jack of this player with the analogue signal
input terminal for reception.
MENU SETUP
TV
AC Power
Audio/Video cable accessories
Audio R Audio L Video Input
Y Pb/Cb Pr/Cr
2
11
Surround
LT/RT: left and right soundtrack audio output
Stereo: Stereo audio signal output
Dual Mono
This option is used to set the mode of audio output: L-Mono, R-Mono, Mix-Mono and Stereo.
Analog audio Setup
Digital Audio setup
When playing MPEG discs, the coaxial and optical terminal outputs in SPDIF/RAW format.
Meanwhile the connected amplifier must be able to decode the MPEG.
SPDIF/PCM may be selected when the player is connected with a 2CH digital stereo amplifier.
Digital Output
Audio Setup Page
ANALOG AUDIO SETUP
DIGITAL AUDIO
KARAOKE SETUP
EQUALIZER
AUDIO SETUP
LPCM Output
GOTO AUDIO SETUP PAGE
LPCM (linear pulse code modulation) is a non-compressed audio digital technology.
There are two output mode: 48KHz, 96KHz.
Equalizer
1) Equalizer Mode
This option is used to select the different balanced effect, such as OFF, ROCK, POP, LIVE, DANCE,
TECHNO, CLASSIC, SOFT.
2) Bass Boost
It is used to adjust the sound effect of Bass boost to ON or OFF.
3) Super Bass
ON: set the super bass on, and adjust the super bass effect. OFF: set the super bass off.
4) Treble Boost
ON: set the treble boost on and adjust the treble effect. OFF: set the super treble boost off.
Karaoke Setup
Mic Setup
Set Microphone off or on; adjust the volume of microphone; adjust the Echo level.
Threshold
Adjust the threshold of the Microphone.

6
17
CONNECTION WITH AMPLIFIER
Setup of Digital Audio Output
Connect the optical and coaxial output jack to the amplifier. In the status of play or stop, press
SETUP button on the remote controller to open the system setup page. Switch to the audio setup page
by pressing the direction buttons, then move the cursor to Digital Audio Output. Select digital output,
then choose SPDIF/RAW or SPDIF/PCM and press the PLAY/ENTER button to finish. Press the
SETUP button again to exit this setup.
MENU SETUP
Video connecting cable
Connected to video input
Left channel Right channel
TV
( Select one of the two digital
connecting wires)
Dolby Amplifier
Coaxial output
Optical output
2
1
TV Display (4:3PS, 4:3LB, 16:9)
• No matter which format you select, if the screen is 4:3 display, the image is displayed in 4:3.
• The DVD screen format is changeable.
• When the screen is displayed in 4:3, the image will be compressed horizontally to display the
DVD format in 16:9.
TV Mode
This option is used to select the scan mode: P-scan and interlaced.
Note: When the Video output is CVBS, this option is unavailable.
Video Output
This option is used to select the video output mode: CVBS, YPbPr.
Note: Make sure that you set the player to the correct video mode.
Video Setup Page
TV Type
This system supports such formats: PAL, AUTO, NTSC.
VIDEO OUTPUT CVBS
TV DISPLAY 4:3PS
TV TYPE PAL
COLOR SETTING
TV MODE
FREQUENCY
PANEL LIGHT
VIDEO SETUP
GOTO VIDEO SETUP PAGE
Color Setting
You can adjust the video output of sharpness, brightness, contrast, gamma, hue, saturation
according to your preference.
The adjustable range of sharpness is: High, Middle and Low.
The adjustable range of brightness is:+/-20(the default is 0).
The adjustable range of contrast is: +/-16(the default is 0).
The adjustable range of hue and saturation are:+/-9(default is 0).
The adjustable range of gamma is: High, Medium, Low and None.
Frequency
This option is used to turn on or off the frequency light of front panel.
Panel Light
This option is used to turn the light of the front panel on or off.

716
SYSTEM CONNECTION
Please refer to the following figure to connect your acoustic equipment.
To keep all the connection correctly and firmly.
Power supply should be connected finally.
MENU SETUP
Left Speaker
Right Speaker
L channel R channel
TV
Audio Output
PC
Audio Output
DVD Menu Setup
To access the DVD menu :
1. Press the SETUP button .
2. Press the direction buttons to switch between the different setup pages .
3. Press the direction button to move the cursor to the position you want, then press the PLAY/ENTER
button again to enter the subdirectory.
4. Press the PLAY/ENTER buttons again to enter the next subdirectory.
Note: In any menu, you can press the up and down direction buttons to move the cursor and press the
PLAY/ENTER button to enter the selected items. Press the SETUP button to exit the system
setup page.
Language Setup Page
OSD Language
This option is used to select the language of all the screen displays and setup menus.
You can set OSD language to English.
Audio Language
When playing DVD discs, the player will automatically play the built-in language of the disc.
This unit could play such languages as: English, French, German, Spanish, Chinese, Japanese, Korean,
Thai and Others.
Subtitle Language
When playing DVD discs, the player will automatically play the built-in subtitle language of the disc.
This unit could play such built-in languages as: English, French, German, Spanish, Chinese, Japanese,
Korean, Thai and Others. You can select any one as the built-in subtitle or close the subtitle.
Disc Menu Language
This unit has the following menu language available: English, French, German, Spanish, Chinese,
Japanese, Korean, Thai and Others.
OSD LANGUAGE ENG
AUDIO ENG
SUBTITLE ENG
DISC MENU ENG
LANGUAGE SETUP
GOTO LANGUAGE PAGE
FM Antenna

8
15
BASIC OPERATION
PREPARATION
1) Before turning on, check whether all the connection are correct and reliable. Insert the power plug
into the corresponding power socket.
2) Press the STANDBY button on the front panel to turn on the player.
3) Press the OPEN/CLOSE button on the remote control or panel to carry the disc tray outside, put the disc
into the tray, press the OPEN/CLOSE button again, this unit starts reading and playing.
MUTE
In play status, if the MUTE button is pressed, there will be no audio output, the sound is eliminated, but the
image will still be played normally. Then press this button again or press the VOL. +/- button to exit the
mute status. The sound resumes to its normal status.
STATUS DISPLAY
In play status, press DISPLAY button, the TV screen will display the following data:
VCDitems: single elapsed, TR(track remain), total elapsed, DR(directory remain), display off.
CD items: single elapsed, TR(track remain), total elapsed, DR(directory remain).
DVD items: title elapsed, title remain, chapter elapsed, chapter remain, display off.
CHANNEL/LANGUAGE SELECTION
In playing VCD, DVCD, press L/R/LANG button to select the multiple output modes such as Mono L,
Mono R, Mix-mono, Stereo. Press the button once to switch one soundtrack.
In playing DVD, press L/R/LANG button can select multiple languages for playback.
(Only applies to the discs like DVD recorded in multiple languages. )
FAST FORWARD & FAST BACKWARD
In play status, press TUNE- 7button or TUNE+8, there will be different speeds of fast forward
and fast backward, as shown below:
FORWARD X 2, FORWARD X 4,
BACKWARD X 2, BACKWARD X4, BACKWARD X8, BACKWARD X16, BACKWARD X32, PLAY
FORWARD X8, FORWARD X16, FORWARD X32, PLAY
PREVIOUS & NEXT
In play status, press CH- 9 button, the song/item will skip to the previous one for playback,
press CH+: button, the song/item will skip to the next one.
SUBTITLE SELECTION
When the played DVD disc records multiple subtitles, you can make selection of subtitle language
by pressing SUBTITLE button, they are: English, French, Spanish, Chinese, Japanese,
Korean and Thai.
German,
BASIC OPERATION
FM RADIO OPERATION
1. Enter FM/AM Function
In the turn-on or play status, press the FM button on the front panel or on the remote control
to enter FM status. Press the FM button to switch to FM status.
2. Select Bands
1) Directly input frequency: press the T/F button on the remote controller, input the frequency
that you want directly.
2) Select band by pressing TUNE- or TUNE+ button. The frequency will go up or down.
Keep pressing these buttons and the device will switch to searching bands up or down
automatically.
3) Select band by pressing number buttons: you may select the bands that have been saved by
pressing the number buttons. For example: press 10+ button twice, 5 button once, you may
select the 25th band. Press the CH- or CH+ button, the band will be switched up or down.
4) Automatically search bands: press the SEARCH button and it will start to search bands
from lowest to highest automatically. Meanwhile the searched bands will be saved orderly.
Press this button again to stop searching.
3. Save Bands
Press the SAVE button, that means saving the current frequency of band. For example: if you
want to save 99.30MHz in 28th. Please press 10+ button twice, 8 button once, then press T/F
button to input 9 9 3, then press SAVE button to save this frequency.
4. Soundtrack Selection
Press MO/ST button, you may select Mono and Stereo soundtrack output in FM status. If the
signal is not strong enough, you can not select Stereo.
5. Exit FM Status
Press the DVD button to exit FM status and enter the disc playing.
Remark: FM Frequency range : 87.5-108.00 MHz
NOTE: You may adjust FM antenna until you get the best signal.

914
BASIC OPERATION
REPEAT
A-B REPEAT
STANDBY
TITLE
In play status, continuously press the Repeat button to select the different contents for repetition.
1) As for DVD, continuously press the Repeat button and the TV screen will display: Chapter,
Title, All, Repeat Off.
2) As for CD, VCD, CD-R, continuously press this button. The screen will display: Track, All.
3) As for MP3, JPEG, there are options: Single, Repeat one, Repeat folder, Repeat Off.
In play status, press REP. button to realize the specific section repeat, that is, press this
button once at the beginning of the section (i.e A), and press it again at the end of the section
(i.e B), this player will automatically return to A and starts to repeat playing the section from A
to B. Press the button again to exit.
AB
If the played DVD disc contains a directory column, press the TITLE button to take out the items
contained in this disc. Use the direction buttons to move the cursor to select the items you want to
play, or directly use the number button to select.
Press the Standby button on the remote control (or front panel) to switch to standby mode.
Before you perform the operation, make sure the main power is on.
Note: This standby function is one way of saving electricity. When the device is not used for a
long time, turn off the main power.
BASIC OPERATION
ZOOM
In play mode, press the Zoom button, the TV screen will be zoomed in 2 times, 3 times, 4 times,
1/2, 1/3, 1/4.
MODES SELECTION
1) Correctly connect the outer equipment (e.g. PC) with this unit, then press the AUX (Audio)
button on the front panel to enter the audio mode.
2) Press the FM button on the front panel to select tuner. Press this button again to switch to the
FM band.
3) Press DVD button on the front panel to select DVD mode. The unit will start playing if there
is a disc inserted.
CD RIPPING
While playing the CD disc, press CD RIP. button, and the prompt of operation will appears
on the TV screen. Following the prompt, the CD’s audio tracks that you have selected will
be ripped into MP3 format and stored in the USB device.
It is possible to listen to the Audio and watch Video/JPG files using the USB device interface of this unit.
1. Connect the USB device to the unit:
2. Press the USB button on the remote control to enter the USB mode. The player will play the contents
or menu of the USB file if it found the device.
3. When the folder appear on the TV screen; you can also press the direction buttons to select the files,
and press PLAY/ENTER button to confirm.
Note:
1) USB-Extension cable should have a max. length of 0.5m.
2) Depending on the amount of data and media speed, it may take longer for system to read the
contents of media device. In some cases, reading time may be as long as 60 seconds. This is not
a malfunction.
3) Even when they are in a supported format, some files may not play or display depending on the
content.
4. Press MENU to display the File browser, select the file you want and press PLAY/ENTER to start
playing.
Note: The method of playback for files which is saved on a media device is the same as for other discs.
For more information, see BASIC OPERATION.
5. To exit the USB mode: Press DVD button to the DVD mode.
USB

10
13
BASIC OPERATION
STOP
PAUSE
MENU
ANGLE SELECTION
VOLUME ADJUSTMENT
DIRECTION BUTTONS
In play status, press the STOP button once, the player will stop playing; the stop point will be
memorized. Then press the PLAY/ENTER button, the disc will be played from the previous stop point.
If you press the Stop button twice, the stop point will not be memorized; press the PLAY/ENTER
button and the disc will be played from the beginning.
In play status, press the PAUSE button, the player will pause, and press it again or press the PLAY/
ENTER button once to go on playing.
Pressing MENU button on the remote control can open or close PBC status.
Note: 1) The player will go into the root menu when playing DVD discs.
2) This function does not support some pirated discs.
In play status, continuously press the ANGLE button. You can enjoy the same action shot at different
angles. (The function depends on the discs.)
You can press the VOL-/+ button to turn the volume up or down.
Press the direction buttons3456to move the cursor to select pictures or menu.
BASIC OPERATION
2) Press the direction button 56to move the cursor to the corresponding directory and press the
PLAY/ENTER button to enter the next layer, and so on, until the desired picture is found to
play.
• During play, number buttons or 9: button can be used to select pictures.
• JPEG pictures may distort at the edges on some TV sets, this is not the unit’s fault.
• This unit can display the digital photo discs with extension name, JPEG and support the pictures
that is created in Adobe Photoshop.
• If you want to repeat playing some pictures, press the REPEAT button.
Press the ZOOM button then press the fast forward or fast rewind button to zoom into the
picture.
During browsing, press the STOP button can go back to main menu.
After going into the subdirectory when playing a MPEG4 disc, you can also fast backward,
fast forward, pause etc.
NUMBER BUTTONS
1) While playing songs, press NUMBER buttons to directly select the songs you need.
2) If the songs you want exceed 10 pieces, you may do it by pressing 1 button once, then press the
other number buttons (1--10). For example: If the 16th song is required, you can press 1 button
first and then press 6 button.
MPEG4/JPEG PICTURE DISC PLAYING FUNCTION
1) Place the MPEG4/JPEG disc and this unit will begin to read it. When the STOP button on the
remote control is pressed, the main directory will be displayed on the TV screen.
00:00 04:33
001/010
\
BMP
JPG
Root Directory Area
TONE ADJUSTMENT
With any audio source, you can adjust the volume, bass and treble according to your hearing comfort
by pressing TONE button on the remote control. For example: Press TONE button to select the
required item, then press VOL+/- button to adjust the effect of bass or treble.
SOUND-FIELD MODE
Press the DSP button on the remote control to select different sound fields: Jazz, Rock, Classic, Pop,
Live, Dance and Off.

BASIC OPERATION
12
BASIC OPERATION
PROGRAM
• In play VCD/CD, press PROGRAM
button, the TV screen shows:
• In play DVD, press PROGRAM
button, the TV screen shows:
1. If the player is in the PBC (Playback Control) ON status, playing the programmed songs
will result in the PBC turning off.
2. Input the number that you want at the place of the cursor; move the cursor to “Start”; press
the PLAY/ENTER button the songs will play in the specified order.
3. While programming, press the CLEAR button to eliminate the digits that you input.
4. To cancel programmed play: press the PROGRAM button again, the cursor will move to
“Stop” automatically; press the PLAY/ENTER button. The cursor will move to “Exit”
automatically. Press the PLAY/ENTER again to cancel programmed play.
CLEAR
Press CLEAR button to cancel the data you have entered. For example: the setting of
programmed songs.
TIME SELECTION
In play status, press T/F button, the TV screen displays the data of playing disc. Such as:
VCD disc display: DVD disc display:
CD disc display:
--:--
T:--/xx
MP3 disc display:
---/xx
--:--
MPEG4 disc display:
SELECT:---
GO TO:-:--:--
While playing CD, MP3 or MPEG4, press Time button to switch between the ``Time Selection (current
song/chapter)`` and ``Song/Charpter Selection``; then input the digital you want. The system begins
playing from the specified time/song/charpter.
TT:CH:
TT:CH:
TT:CH:
TT:CH:
TT:CH:
TT:CH:
TT:CH:
TT:CH:
TT:CH:
TT:CH:
01
02
03
04
05
06
07
08
09
01
02
03
04
05
06
07
08
09
MENU
COMPACT
DIGITAL VIDEO
BITRATE 72 TOTAL ELAPSED X:XX:XX
TRACK XX/XX
DISC TIME X:XX:XX
TRACK TIME X:XX:XX
REPEAT OFF
Current Playing Picture
MENU
BITRATE 72 TITLE ELAPSED X:XX:XX
TITLE XX/XX
CHAPTER XX/XX
AUDIO 2CH
SUBTITLE OFF
Current Playing Picture
DVD
VIDEO
You can press the direction key to move the cursor to the setting option according to the afore-
mentioned screen suggestions, then press the PLAY/ENTER button to confirm and use number keys
to input the corresponding time numbers, after it is done, DVD player will start to play according to the
setting time. When press the DOWN direction button, you can see the next item in the above screen.
1) There are 5 items in VCD screen: Track, Disc time, Track time, Repeat, Time DISP (Display);
2) There are 9 items in DVD screen: Title, Chapter, Audio, Subtitle, Angle, TT(Total) time, CH
(Chapter) time, Repeat, Time DISP(Display).
Note: The optional time range depends on the volume of discs.
OK ON/OFF
OK MENU
Press the OK ON/OFF button on the remote control to set the microphone on or off.
Please do not point the microphone at the speakers when you set the microphone ``on``.
Press the OK MENU button to adjust the Mic. Volume and Echo effect. For example: To turn
up the volume, press OK MENU button and switch to ``MIC``, then press the VOL + button.
DVD TITLE MENU SELECTION FUNCTION
DVD disc features high capacity, records more than one movie, background data and songs.
It is hereby given a name of TITLE, while more sections will be given under each TITLE,
which are called Chapters. There are some songs in one chapter.
During playing DVD discs, press the TITLE button, the TITLE menu will appear on the TV
screen. (Available for the DVD discs that contain more than one title menu)
You can use the direction buttons to move the cursor to the desired title menu, press the PLAY/
ENTER button to play it. If the title menu is represented by numbers, then press the number
buttons to select directly.
MP3 DISC PLAYING FUNCTION
1). Press the OPEN/CLOSE button on the panel or remote control to open the deck, put in an MP3 disc,
then press OPEN/CLOSE button to close the deck. This unit begins to read it, and the TV screen will
display the following figure,
00:00 04:33
001/010
\
01
02
03
04
128Kbps
Contents Area
2). Press the direction keys56to move the cursor to a certain directory, and press the PLAY/ENTER
button to enter the directory. Press the direction buttons to enter the subdirectory or the file area,
select a song with the cursor, press the PLAY/ENTER button to play the song.
• During playing, press : or 9 button to select other songs under the current directory.
• During playing, press the left direction button, the icon will skip to the directory symbol. Press
the up/down direction button to select other directories. Press Play/Enter button for confirmation.
Note: When playing MP3 discs, this unit also has functions such as mute, pause, previous and next
selection. The operations are identical with CD playing.
RESET
In No Disc or Eject status, press this button to return to the original setup or the default value.
Table of contents
Other Sinotec Stereo System manuals
