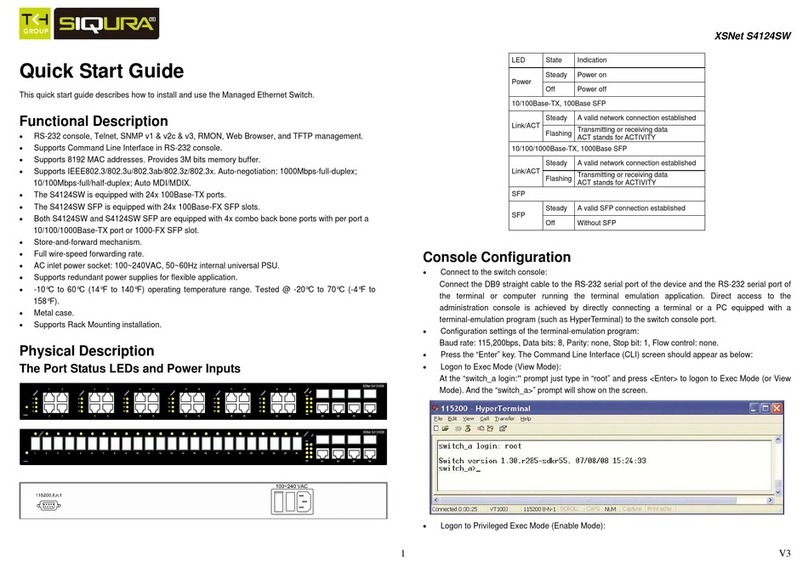
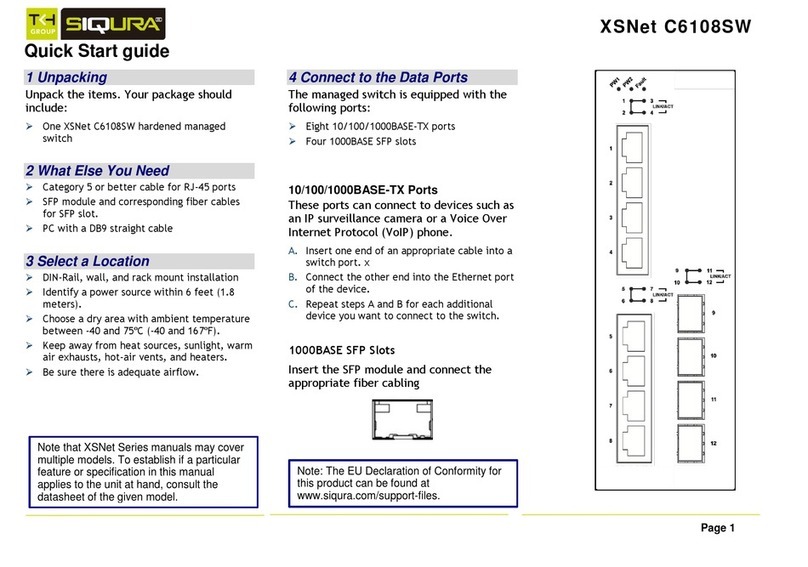
Siqura XSNet C6108SW User manual

XSNet C6108SW
Hardened Managed Gigabit Switch
User Manual
Quick Links:
Quick Start Guide
Table of Contents
Web Interface Configuration
CLI Configuration

XSNet C6108SW
2
Quick Start Guide
This quick start guide describes the basic steps needed to
install and start using the switch.
LED
State
Indication
Power 1
Power 2
Steady
Power on
Off
Power off
10/100/1000Base-TX
LINK/ACT
Steady
Valid network connection
established
Flashing
Transmitting or receiving data
ACT stands for ACTIVITY
100
Steady
Connection at 100Mbps
1000Base SFP
LINK/ACT
Steady
Valid network connection
established
Flashing
Transmitting or receiving data
ACT stands for ACTIVITY
1000
Steady
Connection at 1000Mbps speed

XSNet C6108SW
3
Power Input Assignment
Power 2
+
12-48VDC
5-Pin
Terminal
Block
-
Power Ground
Power 1
+
12-48VDC
-
Power Ground
Earth Ground
Relay Output Rating
1A @ 250VAC
Relay Alarm Assignment
FAULT
Normal state is relay open, alarm state is
closed. Alarm relay can be configured to
power input or port failure.
See: Diagnostics/Alarm Setting in web
interface.
Power Consumption: Max 17.3 Watts
The Fault LED indicator will light up to if either Power 1 or
Power 2 ceases to function. However, the switch will continue
to work normally even if the fault LED is lit, as long as the
other power source is functioning.
Relay Output Alarm
The switch provides relay output contacts for
signaling of a user-defined power or port
failure. The relay output can be connected to
an alarm signaling device. Current is 1A at
250VAC.
Console Configuration / Setting IP Address
Connect to the switch console:
Connect the DB9 straight cable to the RS-232 serial port
of the device and the RS-232 serial port of the terminal or
computer running the terminal emulation application.
Direct access to the administration console is achieved by

XSNet C6108SW
4
directly connecting a terminal or a PC equipped with a
terminal-emulation program (such as HyperTerminal or
Putty) to the switch console port.
Configuration settings of the terminal-emulation program:
Baud rate: 115,200bps
Data bits: 8
Parity: none
Stop bit: 1
Flow control: none
Press the “Enter”key. The Command Line Interface (CLI)
screen should appear.
Logon to Exec Mode (View Mode):
At the “switch_a login:” prompt, enter “root” and press
<Enter> to log on to Exec Mode (also called View Mode).
The “switch_a>” prompt will be displayed.
Logon to Privileged Exec Mode (Enable Mode):
At the “switch_a>” prompt type in “enable” and press
<Enter>. The “switch_a#” prompt will show on the screen.
Logon to Global Configuration Mode (Configure Terminal
Mode):
At the “switch_a#” prompt type in “configure terminal” and
press <Enter>. The “switch_a(config)#” prompt will show
on the screen.
Set new IP address and subnet mask for Switch:
At the “switch_a(config)#” prompt enter “ip address
A.B.C.D/M”, where “A.B.C.D” specifies the IP address
and “M”specifies the subnet mask. “M”= 8: 255.0.0.0,
16:255.255.0.0, and 24: 255.255.255.0.
Example: Enter IP address of 192.168.100.1/24 to set a
new IP address of 192.168.100.1 with a subnet mask of
255.255.255.0. (See example image below)
Save changes with the “write memory” command.

XSNet C6108SW
5
Web Configuration
Log in to the switch:
Specify the default IP address (192.168.1.10) of the
switch in the web browser. A login window will be shown
(see below).
Enter the factory default login ID: root.
Enter the factory default password (no password).
Click on the “Login”button to log on to the switch. The
System Information screen will display (see figure below).

XSNet C6108SW
6

XSNet C6108SW
7
Table of Contents
Quick Start Guide 2
Console Configuration / Setting IP Address 3
Web Configuration 5
Table of Contents 7
Introduction 9
Product Highlights 9
Switch Password Reset 10
Installation 11
Selecting a Site for the Switch 11
Connecting to Power 11
Connecting to a Network 13
Web-Based Browser Management 14
Logging on to the switch 14
Switch Management Using Browser Interface 15
System 15
Diagnostics 21
Port 25
Switching 30
Trunking 38
STP / Ring 40
VLAN 51
QoS 54
Access Lists 63
SNMP 65
802.1x 70
LLDP 73
ROUTING 78
RIP 81
Other Protocols 85
Command Line Console Management 95
Administration Console 95
Navigating the CLI Hierarchy 96
Management Interface Configuration 98
System 99

XSNet C6108SW
8
Diagnostics 104
Port 106
Switching 107
Trunking 111
STP / Ring 112
VLAN 119
QoS 121
IP ACL 128
SNMP 130
LLDP 133
Routing 135
RIP 137
Other Protocols 139

XSNet C6108SW
9
Introduction
This manual describes how to install and use the Hardened
Managed Ethernet Switch. This switch is a light Layer 3 full
Gigabit hardened managed switch in din-rail form factor,
featuring 8 ports of 10/100/1000BASE TX and 4 x 1000BASE
SFP/SC/ST ports.
To get the most out of this manual, you should have an
understanding of Ethernet networking concepts.
Product Highlights
Manageable via SNMP, Web-based, Telnet, and
RS-232 console port.
Supports 802.3/802.3u/802.3ab/802.3z/802.3x.
Auto-negotiation: 10/100/1000Mbps, full/half-duplex.
Auto MDI/MDIX
Equipped with 8x 10/100/1000BASE-TX slots
Equipped with 4x 1000Base- SFP slots
Supports 16K MAC addresses. Provides 12M bits
packet memory buffer
Alarms for power and port link failure by relay output
Power Supply: Redundant DC Terminal Block power
inputs
Operating Temperature: -40° to 75°C (-40° to 167°F)
Storage Temperature: -40° to 85°C (-40° to 185°F)
Supports DIN-Rail and Panel Mounting installation

XSNet C6108SW
10
Switch Password Reset
If the password to the switch is forgotten or lost, it can be
reset through the reset button
Press and hold the reset button, located next to the console
port, for ten seconds. The switch will reboot and reset the
switch password to the default: “root”. Other settings will not
be affected.
Use a narrow object such as a pencil tip
to press and hold the reset button.

XSNet C6108SW
11
Installation
Selecting a Site for the Switch
As with any electric device, you should place the switch
where it will not be subjected to extreme temperatures,
humidity, or electromagnetic interference. Specifically, the
site you select should meet the following requirements:
The relative humidity should be less than 95 percent,
non-condensing.
Surrounding electrical devices should not exceed the
electromagnetic field (RFC) standards.
Make sure that the switch receives adequate ventilation.
Do not block the ventilation holes on each side of the
switch.
Connecting to Power
Redundant DC Terminal Block Power Inputs
There are two pairs of power inputs for use with redundant
power sources. Only one power input is needed to run the
switch.
Connect the DC power cord to the plug-able terminal block on
the switch, and then plug it into a standard DC outlet.

XSNet C6108SW
12
Switch Top View
Power Input Assignment
Power2
+
12-48VDC
Terminal
Block
-
Power Ground
Power1
+
12-48VDC
-
Power Ground
Earth Ground
Relay Output Rating
1A @ 250VAC
Relay Alarm Assignment
FAULT
Normal state is relay open, alarm state is closed.
Alarm relay can be configured to power input or
port failure.
See: Diagnostics/Alarm Setting in web interface.
Relay Alarm for Power or Port Failure
The switch provides relay output contacts for signaling of a
user-defined power or port failure. The relay output can be
connected to an alarm signaling device. Current is 1A at
250VAC.
Special note:
Do not connect a power source to relay output terminal. Doing
so may result in shorting out the power supply.

XSNet C6108SW
13
Connecting to a Network
Cable Type & Length
Follow the cable specifications below when connecting the
switch to your network. Use appropriate cables that meet your
speed and cabling requirements.
Cable Specifications
Speed
Connector
Port
Speed
Half/Full
Duplex
Cable
Max.
Distance
10Base-T
RJ-45
10/20 Mbps
2-pair
UTP/STP
Cat. 3, 4, 5
100 m
100Base-TX
RJ-45
100/200
Mbps
2-pair
UTP/STP
Cat. 5
100 m
1000Base-T
RJ-45
2000 Mbps
4-pair
UTP/STP
Cat. 5
100 m
SFP
100Base-FX
Duplex LC
200 Mbps
MMF
(62.5μm)
2 km
100Base-FX
Duplex LC
200 Mbps
SMF (10μm)
20, 40, 75,
100 km
100Base-BX
Duplex LC
200 Mbps
MMF
(62.5μm)
2, 5 km
100Base-BX
Duplex LC
200 Mbps
SMF (10μm)
20, 40 km
1000Base-SX
Duplex LC
2000 Mbps
MMF
(62.5μm)
550 m
2 km
1000Base-LX
Duplex LC
2000 Mbps
SMF (9μm)
10, 40, 60
km
1000Base-BX
Duplex LC
2000 Mbps
SMF (9μm)
70 km

XSNet C6108SW
14
Web-Based Browser Management
The switch provides a web-based browser interface for
configuring and managing the switch. This interface allows
you to access the switch using a preferred web browser.
Logging on to the switch
SWITCH IP ADDRESS
In your web browser, specify the IP address of the switch.
Default IP address is 192.168.1.10.
LOGIN
Enter the factory default login ID: root.
PASSWORD
Enter the factory default password (no password).
Or enter a user-defined password if you followed the
instructions later and changed the factory default password.

XSNet C6108SW
15
Switch Management Using Browser Interface
The web browser interface provides groups of point-and-click
buttons at the left field of the screen for configuring and
managing the switch.
System
System Information
The System information page that shows the following:
System Name —The System name is typically used by
network administrators. If SNMP is enabled on the switch, the
system name can be found using MIB II (RFC1213) in the
sysName property.
Firmware Version —This displays the primary firmware
version and date of last update
System Time —System time can be changed using NTP
MAC Address —The hardware (MAC) address of the
Management interface
Default Gateway —The IP address of your networks
Gateway (Typically a Router on your network)
DNS Server —The Dynamic Name Server (DNS) for your
network

XSNet C6108SW
16
Alternate Firmware —This shows the firmware version
mirrored on the switch. If the switch becomes unbootable
from the primary firmware image, it will boot to this version on
the next boot.
VLAN ID —One or more listings depending on the number of
VLANs defined on the switch. Lists VLAN ID, IP address, and
subnet mask of the VLAN Interface(s)
System Name/Password
By default there is no password assigned to the switch. To
add or change a password:
1. System Name: Enter the new system name.
2. Update Setting: Click “Update Setting” button to save the
new system name.
3. Password: Enter new password, and re-enter in “Retype
Password” text box.
4. Update Setting: Click “Update Setting” button to update
your settings.

XSNet C6108SW
17
IP Address
1. Enter the desired IP address and subnet mask in the IP
Address/Subnet Mask fields associated with VLAN 1
2. You will need to enter the new IP address in the browser
and reconnect to the switch after IP or subnet mask are
changed.
3. DHCP Client: Click “DHCP Client”drop-down menu to
choose “Disable,”“VLAN1,”or other VLAN group from the
“DHCP Client”drop-down list to disable or enable DHCP
Client Setting for the switch. The management VLAN is
VLAN 1 by default. The managed IP Address will be
assigned by DHCP Server when VLAN 1 is chosen as
DHCP Client. DHCP Server can assign the Switch
another managed IP Address by choosing another VLAN
besides VLAN 1 as DHCP Client when Switch has
multiple VLANs. Then click “Submit.”
4. Default Gateway: Click “Default Gateway”drop-down
menu to choose “Disable”or “Enable” from the “Default
Gateway”drop-down list to disable or enable Default

XSNet C6108SW
18
Gateway Setting for the switch. Enter the address for the
Default Gateway. Then click “Submit.”
5. DNS Server: Click “DNS Server”drop-down menu to
choose “Disable”or “Enable” from the “DNS Server”
drop-down list to disable or enable DNS Server Setting
for the switch.
Click the text box and type a new address to change the
DNS Server. (Need to choose “Enable” from the “DNS
Server”drop-down menu.)
6. Submit: Click “Submit”button when finished.
Note: After making changes to settings in the IP address
section, the configuration needs to be saved using the
System/Save configuration page (See Save Configuration
below).
Management Interface
The Management Interface configuration page has three
settings that allow the user to configure the methods available
to manage the switch.
HTTPS (Hypertext Transfer Protocol Secure) allows the user
to determine what method, if any, is used to configure the
switch. The default is unencrypted HTTP.
To disable the Web interface:
1. Uncheck Http and Https.
2. Click on the Update setting button.

XSNet C6108SW
19
Warning! Once the Submit button is pressed, the Web
Console will no longer function. As a safety precaution, the
configuration is not saved by default. Rebooting the switch will
restore the Web Console. To save the configuration, connect
using the new IP address.
Telnet is a network protocol that allows a remote computer to
log into the switch to access its CLI (Command Line Interface).
The CLI can be access using Telnet, SSH and the serial port
on the switch. The secure method of accessing the CLI over a
network is SSH.
Secure Shell or SSH is a network protocol that allows data to
be exchanged using a secure channel between two
networked devices such as a computer and the switch. SSH
is disabled by default on the Switch.
Save Configuration
1. To load a configuration from a TFTP server:
Click in “TFTP Server”text box and type the TFTP server
IP address from where the file will be obtained.
Click in “FILE”text box and type the name of the file that
will be obtained.
Click “Load” button to load the file from the TFTP server.
2. To back up a configuration to TFTP server:

XSNet C6108SW
20
Click in “TFTP Server”text box and type the TFTP server
IP address to where the file will be backupped.
Click in “FILE”text box and type the name of the file that
will be backupped.
Click “Backup” button to backup the file to the TFTP
server.
3. To save current switch configuration: Click “Save
Configuration” button to save your configuration settings.
4. Restore default configuration: Click “Restore Default”
button to restore the default settings of the switch.
5. Auto save settings: Choose “Disable”or “Enable” from
the “Auto save”drop-down list to disable or enable Auto
save for the switch.
6. Auto save interval (5~65536 seconds): Click in “Auto
save interval” text box and enter a number between 5 and
65536.
7. Submit: Click “Submit”button when you have finished
Auto save configuration.
Firmware Upgrade
To upgrade the firmware, a TFTP server is required. The
firmware file for the switch is in a .TGZ or .IMG format. This is
a compressed file; however, it should not be decompressed
before updating the switch.
To update the firmware
1. Copy the firmware file to the correct directory for your
TFTP server. The correct directory depends on your
TFTP server settings
2. Enter the filename of the firmware in the Filename text
box.
Other manuals for XSNet C6108SW
1
Table of contents
Other Siqura Switch manuals
