siroca CAFE-BAKO PRO Installation guide

SC-CF2511
Automatic Coffee Machine
"CAFE-BAKO PRO"
Instruksi pengoperasian / Garansi
Terima kasih telah membeli produk siroca. Sebelum
menggunakan produk ini, silakan baca instruksi
pengoperasian ini dengan baik untuk mengerti
cara pengoperasian yang aman dan benar pada
produk ini. Setelah membaca dokumen ini, simpan
buku ini untuk referensi cepat.
*Instruksi pengoperasian ini dapat berubah setiap saat tanpa
pemberitahuan.
Produk ini hanya dapat digunakan untuk keperluan rumah
tangga. Jangan menggunakannya untuk tugas berat.
HANYA UNTUK PENGGUNAAN DI INDONESIA
ID
GB
Operating Instructions / Warranty
Thank you for purchasing the siroca product.
Before making use of this product, please read this
operating instructions carefully to understand safe
and proper operation of this product.
After reading this document, keep it at hand for
quick reference.
* This operating instructions is subject to change for
improvement without notice.
This product is for home use only.
Please never use it for duties use.
USE ONLY IN INDONESIA


1
GB
Table of contents
Table of contents······················································ 1
Coffee Basics ······························································ 2
Safety Precautions···················································· 4
Parts and Controls···················································· 8
Performing Initial Settings ···································· 11
How to Use·································································· 12
Using the Timer (scheduling)······························· 17
Cleaning······································································· 18
Troubleshooting ······················································· 20
Specification······························································· 22
Parts & Supplies ························································ 22
After-Sales Service ··················································· 23
Customer Service ····················································· 24

2GB
POINT 1: Purchase and storing coffee beans
Buy coffee beans as fresh as possible, in quantities that will be consumed in a week. After opening, seal tightly
and store in a cool, dark place.
For this coffee machine...
You can put up to around 200 g of coffee beans in the hopper on the top of the main unit.
POINT2: Roast levels
The flavor of coffee varies greatly depending on the roasting process. Generally, light roasting is more acidic and
less bitter. The darker the roast, the less acidic and the more pronounced the bitterness becomes.
Lightly roasted
Acidity
Bitterness
Deep roastedMedium roasted
Gentle
Gentle
Strong
Strong
POINT 3: Grinding coffee beans
The flavor of coffee beans starts to degrade within about 30 minutes after they're ground. To ensure a delicious
cup of coffee, it's crucial to grind the beans just before brewing.
When grinding coffee beans, it's also important to ensure that the grounds are of uniform size. Unevenly sized
grounds can result in uneven brewing, affecting the quality of your coffee. If you're using a hand-cranked coffee
mill, try to turn the handle at a consistent speed.
For this coffee machine...
A conical burr mill grinds the beans evenly just before brewing coffee.
This allows you to enjoy the freshly-ground aroma and fresh, delicious coffee.
POINT4: Effects of grind size on taste
Even a difference in the size of the coffee grounds can affect the taste. The finer the grain, the larger the surface
area of the grain and the greater the area in contact with hot water, so more of the coffee's components tend to
be brewed.
Coarse ground Fine groundMedium ground
Light and
pleasant flavor
A flavor emphasizing
bitterness and rich flavor
For this coffee machine...
The GRIND LEVEL dial on the top of the main unit allows stepless grinder adjustment from fine to coarse.
Adjust the grain size to your liking and enjoy the change in flavor.
Coffee Basics
To help you find the ideal cup, here is a little basic knowledge about coffee.
3
GB
POINT5: Filter type
Two common types of filters for making drip coffee are introduced below.
Paper filter: The paper absorbs oil and astringency, resulting in a clean flavor. After brewing coffee, simply
discard the entire filter for easy cleanup.
Stainless steel filter: The mesh is metal, which allows brewing of even the oil in the coffee. If you want to
taste the individuality of the beans directly, try using a stainless steel filter. Another advantage is that it is
hygienic and can be used repeatedly because it can be washed with detergent.
POINT6: Steeping time
In order to fully extract the flavorful components of coffee, it is important to allow sufficient steeping time. Wet
the coffee with a small amount of hot water before brewing and allow it to steep slowly. The gas contained in the
coffee is released, causing the coffee to swell. This process allows the coffee and hot water to blend and the
components in the coffee to be extracted more easily.
The same beans can have a different flavor depending on steeping time. With hand drip, a shorter steeping time
produces a relatively light flavor, while a longer steeping time produces a deeper, more robust flavor.
Rather short Rather longSteeping time
Light and
pleasant flavor
Deep and robust
flavor
For this coffee machine...
During the brewing process, the steeping process takes about 30 seconds.
POINT7: Temperature for brewing coffee
There are various theories, but the ideal temperature for brewing coffee is around 90°C. If the temperature is too
low it is difficult to extract flavor, and if it is too high, tastes other than umami will appear. This unit allows you to
select the ideal temperature range for the beans, [HIGH TEMP] for light roast and [LOW TEMP] for dark roast.
For hand drip brewing, the temperature of boiled water transferred to a kettle is considered to be just right.
Low temperature High temperatureIdeal temperature range
Hard to taste Off flavors may be extractedApprox. 90℃
When making decaf
Select [DECAF] with the “COURSE” button to brew at a slow, low temperature specifically for
decaf beans. Please use decaf beans or grounds (this function does not remove caffeine)
POINT 8: Enjoying your coffee
The drinking temperature of coffee should be 68-70°C. If the coffee is cooler than 60°C it is difficult to taste, so
drink the coffee after making it while it is still warm. Warm the cup in advance with boiling water for better taste.
Coffee preferences vary widely. Get the hang of changing the flavor to find your ideal cup.
Coffee Basics
4GB
4
Safety Precautions
Safety Precautions
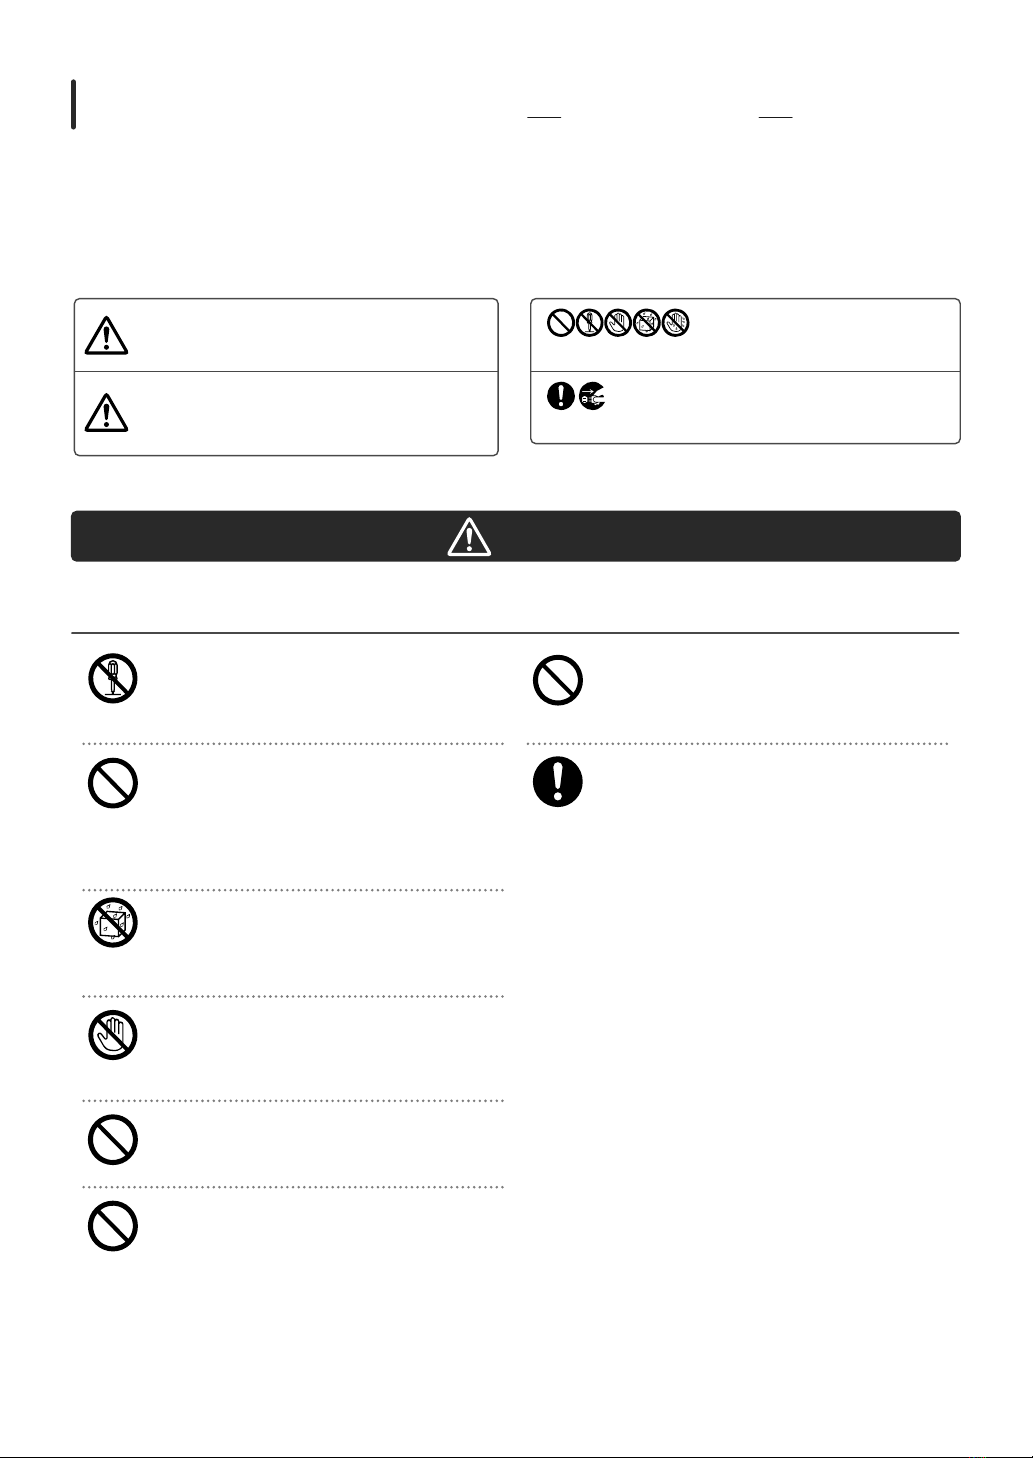
Warning
Handling this product
Never disassemble, repair or modify
This may cause fire, electric shock, or injury.
For repair, please contact the support center.
Do not allow children, those unfamiliar
with handling it, or those in need of
assistance, to use the product
unsupervised. Do not keep it within
reach of infants and toddlers
This may cause electric shock or injury.
Do not immerse the main unit in water
or splash water on the main unit or
operation section
This may cause a short circuit or electric shock.
Keep hands and face away from areas
that emit steam, and the warming plate
This can cause scalding. Make sure that infants and
toddlers do not touch.
Do not use without server, water tank, or
hopper lid
May cause scalding or injury.
Do not put fingers in holes, crevices, or
openings, or insert pins, wires, or other
metal objects
This may cause fire, electric shock, or burns.
Do not drop or subject to impact
Failure to do so may cause electric shock or
malfunction.
If a problem occurs, stop using it
immediately and unplug it from the
power supply
Continued use of the product with any problem
may cause smoke, fire, electric shock, electric
leakage, short circuit, or injury, etc.
<Examples of malfunctions/failures>
• Power cord or plug is deformed, discolored, or
damaged, or bulging
• Part of the power cord or the power plug is hotter
than usual
• Manipulating the power cord makes it power on
or off
• The main unit becomes unusually hot or has a
burning smell
• The main unit does not work
In the above cases, stop using the product
immediately, unplug the power plug from the
outlet, and ask the support center to inspect and
repair the product.
Disassembly
prohibited
Prohibit
No water
stained
No contact
Prohibit
Prohibit
Prohibit
The precautions listed here are important to prevent injury to the user or others and damage to property, and to ensure safe and proper use of
the product. Please read carefully and follow the instructions before use.
Display
Warning Improper use of this product may result in
death or serious injury.
Caution
Improper handling may result in injury or
property damage. The following indicate
the potential for physical injury or material
damage.
Figure Symbols
Indicates a prohibition (“must not be done”).
Indicates a mandatory (“must be done”).
Follow these directions
5
GB 5
Safety Precautions
Warning
Power cord and plug
Do not plug in or unplug with wet hands
This may cause electric shock or injury.
Do not use if the power cord is damaged
or plugged in loosely
This may cause electric shock, short circuit, or fire.
Securely plug in to the hilt
Incomplete plugging may cause electric shock or
fire due to overheating.
Wipe off any dust on the prongs or
mounting surface of the power plug
Dust can cause fire or electric shock.
Do not exceed the rating of the outlet or
wiring device, or use the device at a
voltage other than 220 VAC
Exceeding the rating using multi-outlet extension
cord may cause heat generation, ignition, fire,
electric shock, or malfunction.
Do not damage the power cord or power
plug
Using the power cord or power plug in the
following conditions may cause electric shock,
short circuit, or fire.
Damaged, modified, bent, located near heat sourc-
es, twisted, pulled, loaded, pinched, bundled.
When unplugging, hold the power plug
not the power cord
Failure to do so may cause electric shock or fire
due to short circuit.
Always unplug from the outlet before
cleaning.
Failure to do so may cause burns, electric shock, or
injury.
Caution
Precautions for installation
Not to be used in unstable places or on
heat-sensitive floor coverings
This may result in injury, malfunction, or fire. Do
not use on the following items.
Deep shag carpets, futons, plastic resins, etc.
Do not use near walls or furniture
Steam or heat can damage walls and furniture,
causing discoloration or deformation.
Do not use near a heat source or fire,
such as a stove or gas stove, or on an
induction cooktop.
This may cause deformation or damage.
Do not use the product in a place where
it is easily exposed to water or where the
bottom of the unit gets wet
This may cause short circuit, electric shock, or
malfunction.
Prohibit
Prohibit
Prohibit
Plug o
Plug o
Prohibit
Prohibit
Prohibit
No water
stained
ぬれ手禁止
No wet hand

6GB
6
Safety Precautions
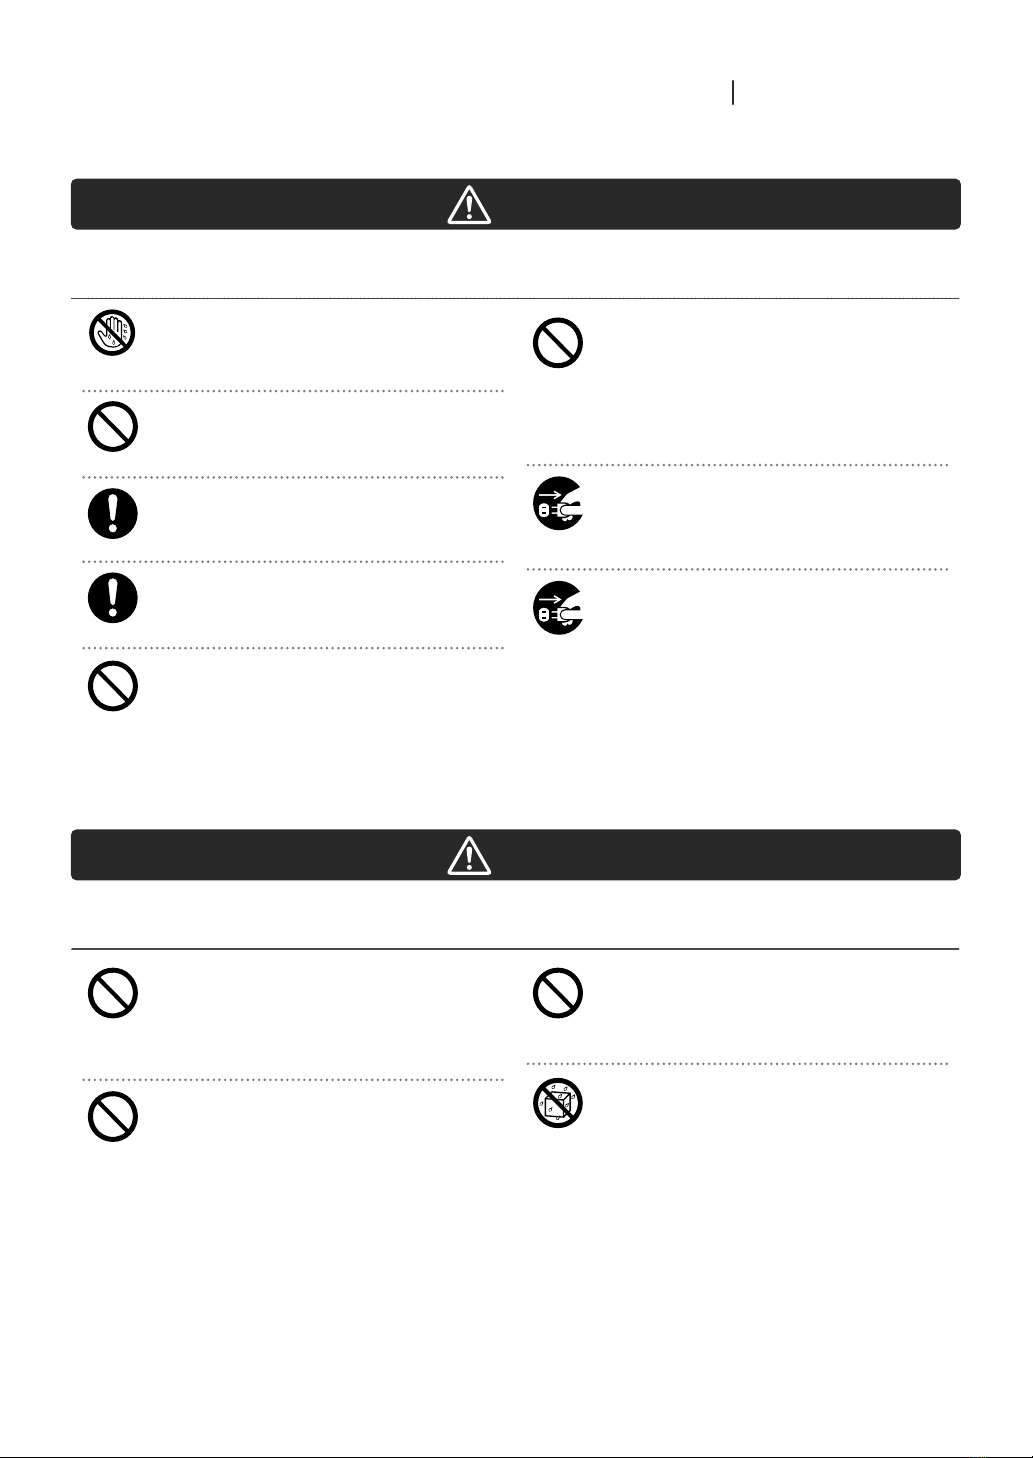
Caution
Usage Precautions
Avoid touching hot parts during or
shortly after use
The high temperature may cause scalding.
Use only the provided server
Failure to do so may cause fire, malfunction, or
scalding.
Do not detach the server/mug cup
during brewing
This can cause scalding.
Do not move the main unit while the
server/mug cup are in it
The server/mug cup may fall out, causing scalding
or injury.
Do not run dry
Using the water tank without water in it may cause
malfunction or fire.
Do not use without setting the server/
mug cup in it
This may cause malfunction or scalding.
Allow to cool before cleaning
Touching hot parts may cause scalding.
Unplug from the outlet when not in use
for a long time
Be sure to unplug the power plug from the outlet
when not in use for a long time.
Make sure the power plug is unplugged when not
in use for a long time. Insulation deterioration may
cause electric shock, leakage of electricity, or fire.
Always use fresh water. Do not leave the
water tank filled with water for a long
time, and clean the tank frequently
If left unattended for a long time, it may cause
decay, malfunction, discoloration, or odor. The unit
will display [CHANGE WATER] to notify you when
water has been left in the unit for 24 hours.
Do not fill with or boil anything other
than water
Using the cooker with milk, tea, liquor, or any other
non-water liquid will cause malfunction, staining,
or burning.
Do not drop the server or hit it against a
hard object
This can cause the glass to break. It may also cause
malfunction or fire.
Do not keep the server warm while it is
empty
This can cause the glass to break. It may also cause
malfunction or fire.
After two consecutive uses, stop
warming and let it rest for 30 minutes
before use
Excessive continuous use may cause malfunction.
Do not use the server on an open flame
(e.g. gas stove) or microwave
This may cause the glass to break, the handle to
deform, or sparking from the metal parts.
Do not put the server in the refrigerator
or freezer
This may cause the glass to break, resulting in
injury.
Do not put the hot server in water, pour
water, or place in a wet area
This may weaken the server. If it should break, be
very careful not to cut your hand when removing
the pieces.
When brewing coffee directly into a mug
or other cup, be sure to change the
setting and the MUG switching lever
While holding the basket by hand, switch the MUG
switching lever to the position of (in front).
No contact
Prohibit
Prohibit
Prohibit
Prohibit
Prohibit
Plug o
Prohibit
Prohibit
Prohibit
Prohibit
Prohibit
Prohibit

7
GB 7
Safety Precautions
Caution
Do not touch the mill blades
Be sure to use the supplied brush to clean the mill.
Failure to do so may cause injury.
If mineral water or alkaline ionized water
is used, clean frequently
Mineral scale can adhere to the inside of the main
unit, or the adhered mineral scale can drop off and
block the hot water and steam outlets in the main
unit, causing malfunction.
Do not place the power cord on the
warming plate immediately after use
when it is still hot
The power cord may be damaged, resulting in fire
or electric shock.
Do not fill the water tank above the full
water mark (MAX)
Hot water may spill or come out of the bottom of
the unit, causing scalding.
Do not use the power cord where it will
interfere with traffic or operation
The power cord may snag, causing the product to
fall, resulting in injury or malfunction.
Do not use exposed to direct sunlight for
a long time
This may cause malfunction.
Put nothing but coffee beans in the mill
This may cause malfunction.
Do not run the mill continuously without
water
This may cause malfunction.
Do not cover the main unit with a dish
towel or similar
This may cause deformation or malfunction.
Do not use in places where steam may
contact other electrical equipment
Steam may cause fire, malfunction, discoloration,
or deformation of electrical equipment.
Do not open the hopper lid or basket
during use
This may cause injury or scalding.
Do not touch the filter directly
immediately after brewing
This can cause scalding.
Do not detach the water tank during use
Do not use outside
This may cause malfunction.
Do not use it overhanging a table, etc.
This may cause injury or scalding.
Do not put your hands under the basket
during use or for a while after use
Dripping can cause scalding.
Do not use on carpets or fabric
tablecloths
Coffee splatters can stain carpets and tablecloths.
Prohibit
Prohibit
Prohibit
Prohibit
Prohibit
Prohibit
Prohibit
Prohibit
Prohibit
Prohibit
Prohibit
Prohibit
Prohibit
Prohibit
Prohibit
Prohibit

8GB
8
Parts and controls
Parts and Controls
4 5 732 61
8
粗びき 細びき
Operation section
X GRIND LEVEL dial
Coarse
ground
Fine
ground
Sets the grain size when grinding beans.
Set the grinding time according to the
grain size of the coffee grounds to set the
recommended coffee grind.
Page 16
Except during operation, if no operation is
performed, the display will turn off and enter
standby mode (clock display) in about 60
seconds. Press the button again to light up and
enable operation.
Operation Section Lights
This product comes with a stainless steel filter. If using a paper filter, please
purchase size "1x2" or "102" for the trapezoidal filter that can hold 2-4 cups.
Note
Name Description
1▲/ ▼buttons Press to select the number of cups, time, timer (program), and grinding time settings.
2(Timer) button
Turns timer on/off.
Press and hold when timer is“on”to switch to timer setting; press and hold when timer is “off”to
switch to time setting.
3COURSE button Set the coffee taste. Select from HIGH TEMP / LOW TEMP / DECAF
To set GRIND LEVEL, press for about 2 seconds.
Page 16
4SIZE button You can select the amount of coffee to be brewed (120ml/180ml), iced (60ml), or MUG (180ml).
MUG will automatically be one cup.
5MODE button Select “mode”. Select (BEANS)/ (GROUND)/ (MILL ONLY)/CLEANING/MILL CARE.
6Display section The menu, current process, and program times are displayed.
7START/CANCEL
button
Press to start or stop brewing, or to stop warming.
The button lights up during coffee brewing and warming. The light turns off when cancelled.
Handle
Steam
vent
Server
(Glass vessel)
Hopper lid
Hopper
Water tank
Operation and
display section
Hot water tap
Power plug
Power cord
Server detection
switch
Warming plate
Basket ring
GRIND LEVEL dial
Anti-leak valve
MUG
switching
lever
Basket
Stainless filter
9
GB 9
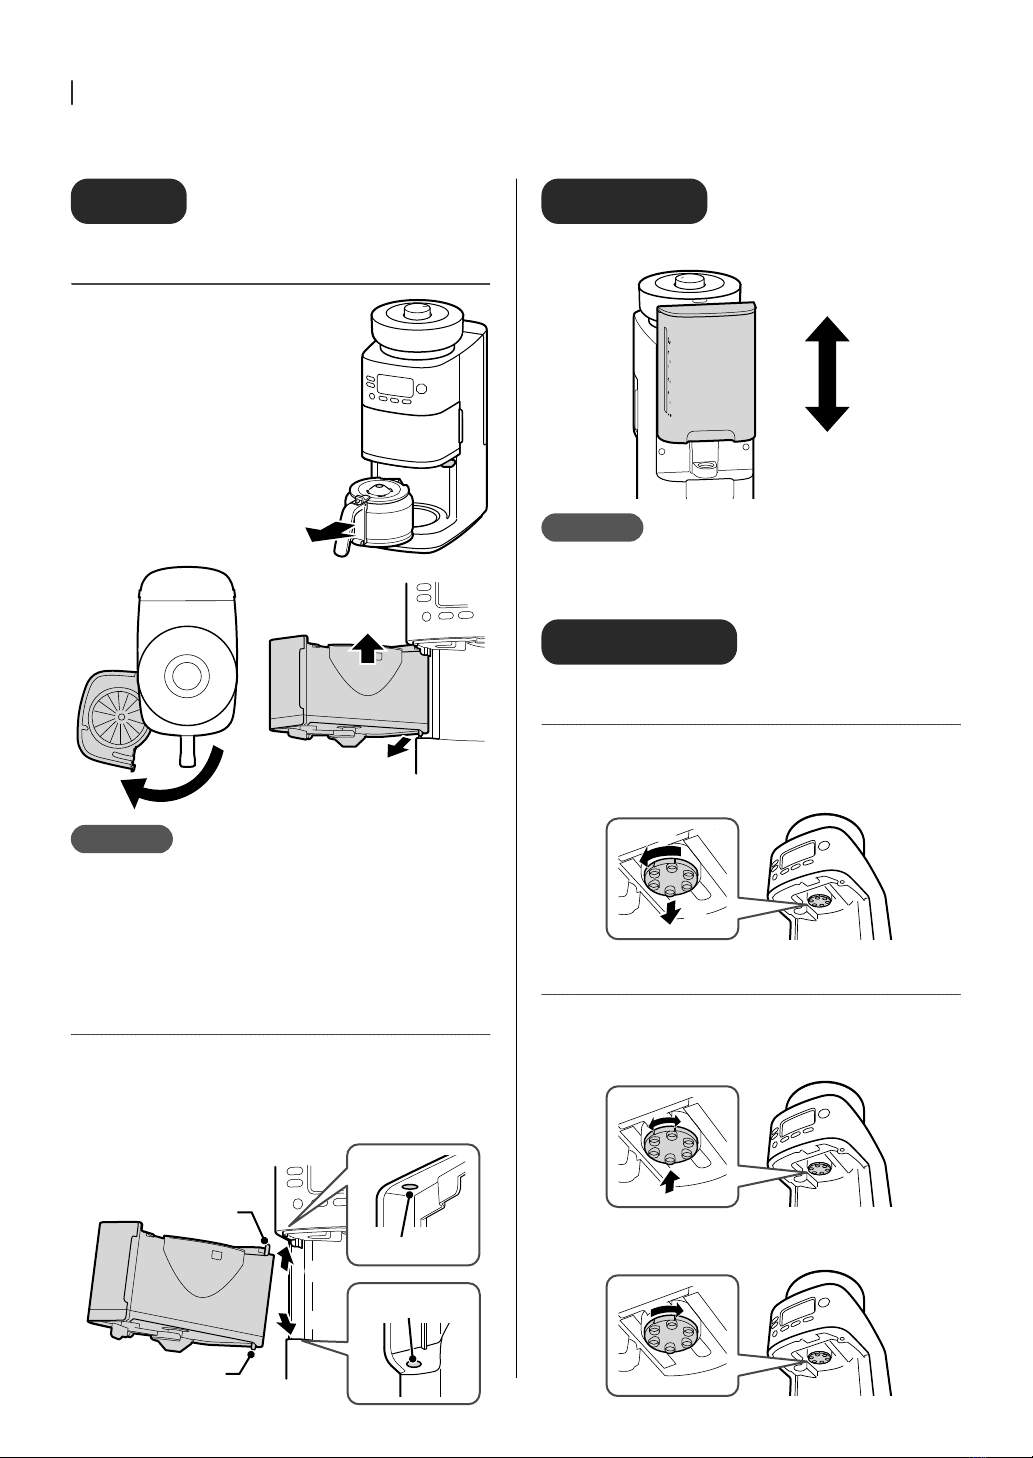
Parts and controls
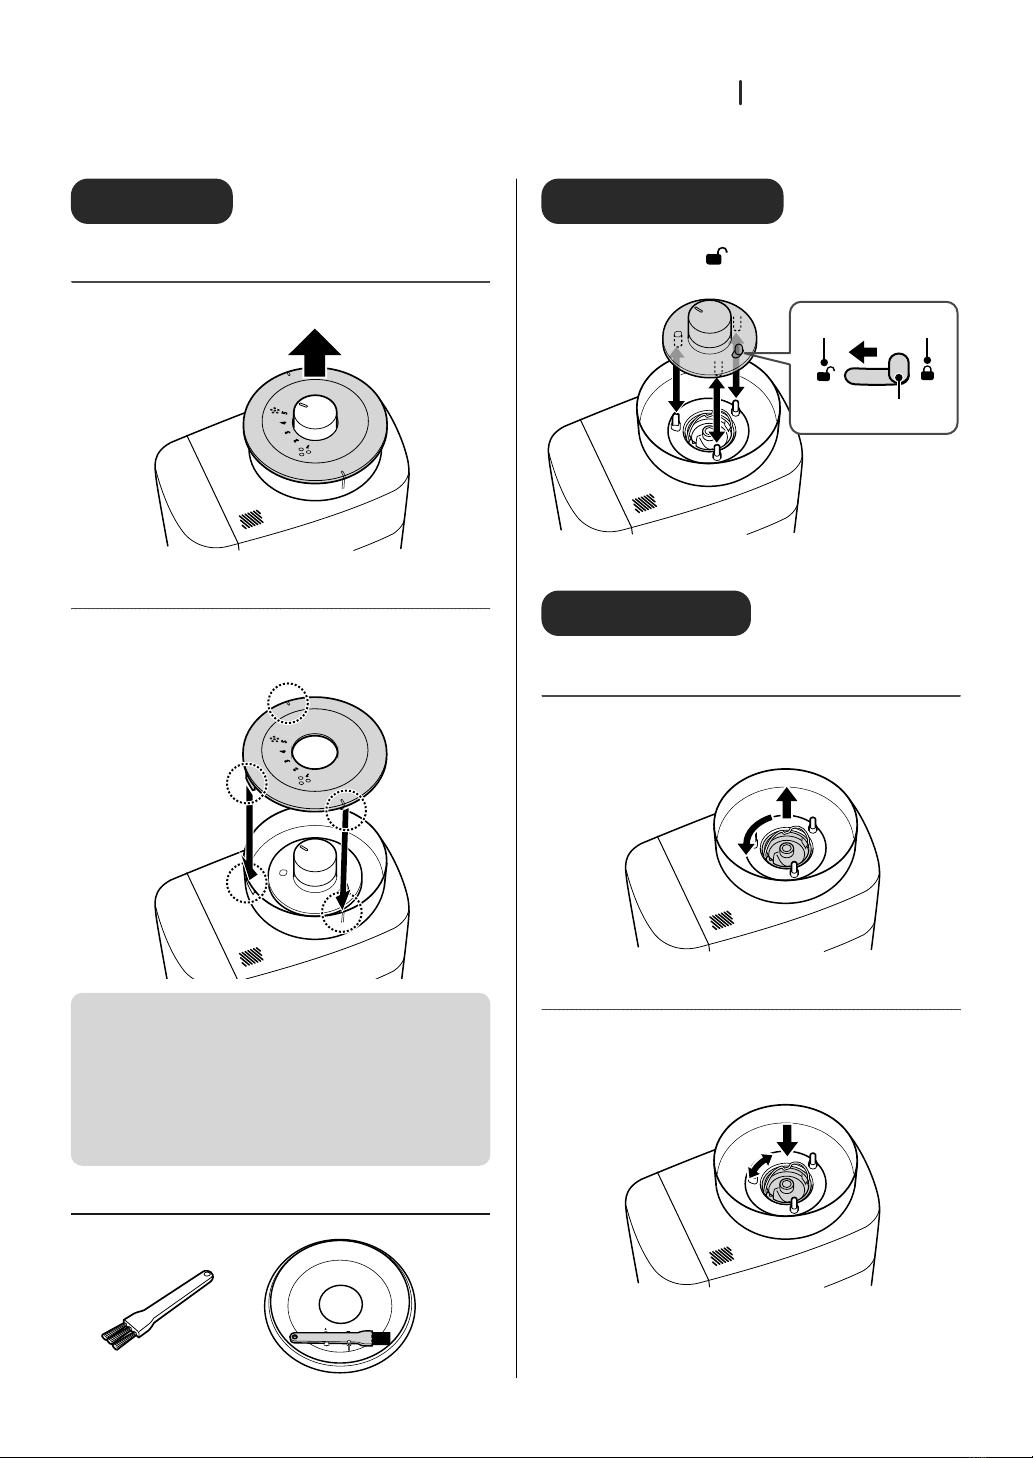
Hopper lid GRIND LEVEL dial
Move the stopper to (release) in order to attach /
detach.
Release Fix
Stopper
Attach firmly and deeply until it clicks into place.
Mill upper side
How to detach
Turn the handle on the upper side of the mill.
Counterclockwise until it stops and then lift it up.
How to attach
①Attach the upper of the mill into the inside of the
mill, then rotate it gently to align it with the
position where it fits all the way to the back.
②Turn the handle clockwise until it stops
Pull the handle gently to make sure the upper side
of the mill does not pull out.
How to detach
Lift up and detach.
How to attach
Align the side protrusions with the grooves and slide
them in.
Inside the hopper
This product is tested using coffee beans to confirm
performance, and all products are cleaned before shipping.
Coffee grounds may adhere to the inside of the hopper and
the fragrance of coffee may remain, but this does not affect
health.
X Cleaning brush
Can be kept inside the hopper lid
10 GB
10
Parts and controls
Basket
How to detach
①Detach the server from
the warming plate
②Open until it stops
③Push up
④Pull the bottom side
toward you
①
③
④
②
Note
When opening the basket, detach the server
from the warming plate first.
The server may get caught in the basket, causing the server
to fall from the warming plate, which may result in injury or
malfunction.
How to attach
①Attach the protrusion (upper side) of the basket
into the hole in the top of the main unit
②Attach the basket protrusion (lower side) to the
hole at the bottom of the main unit
①
②
Protrusion
(lower side)
Protrusion (upper side)
Hole (upper side)
Hole (lower part of
main unit)
Water tank
When attaching, push firmly all the way to the back.
Detach
Attach
Note
Attach the water tank securely all the way to the
back. Failure to do so may cause water leakage.
Hot water tap
How to detach
①Turn the hot water outlet in the direction of the
arrow until it stops
②Pull down
①
②
How to attach
①Attach the hot water supply port into the side of
the main unit, then turn it gently to align it with
the position where it fits all the way to the back
②Turn the hot water outlet in the direction of the
arrow until it stops
11
GB 11
How to use
Cleaning the unit
If you are using it for the first time or if you have not
used it for a while, please clean it before use.
①①Washable parts can be removed from the main
unit for cleaning
“Cleaning”
Page 18
②②Drain the washed parts thoroughly before
attaching them to the main unit
③③Fill the water tank with 6 cups of water and
attach it to the main unit
④④Set the server on the warming plate
⑤⑤Set mode, size, course, and number of cups
Press the“MODE” button to set (ground).
Press the“SIZE” button for 120 ml
Press the“COURSE” button to set [HIGH TEMP]
Press ▲/ ▼buttons for 6 cups
⑥⑥Press “START/CANCEL” button to start
⑦⑦Wait about 30 minutes for the unit to cool
down, then dump the hot water out of the
server and rinse with water
⑧⑧Repeat steps ③through ⑦once or twice
At the beginning of use, the plastic parts may have a plastic
odor due to the heat generated.
It will lessen with use, but if this is a concern, clean with water
or hot water once or twice before use.
If you are still concerned, perform a citric acid cleaning.
“Citric acid cleaning inside the main unit”
Page 19
About the plastic odor
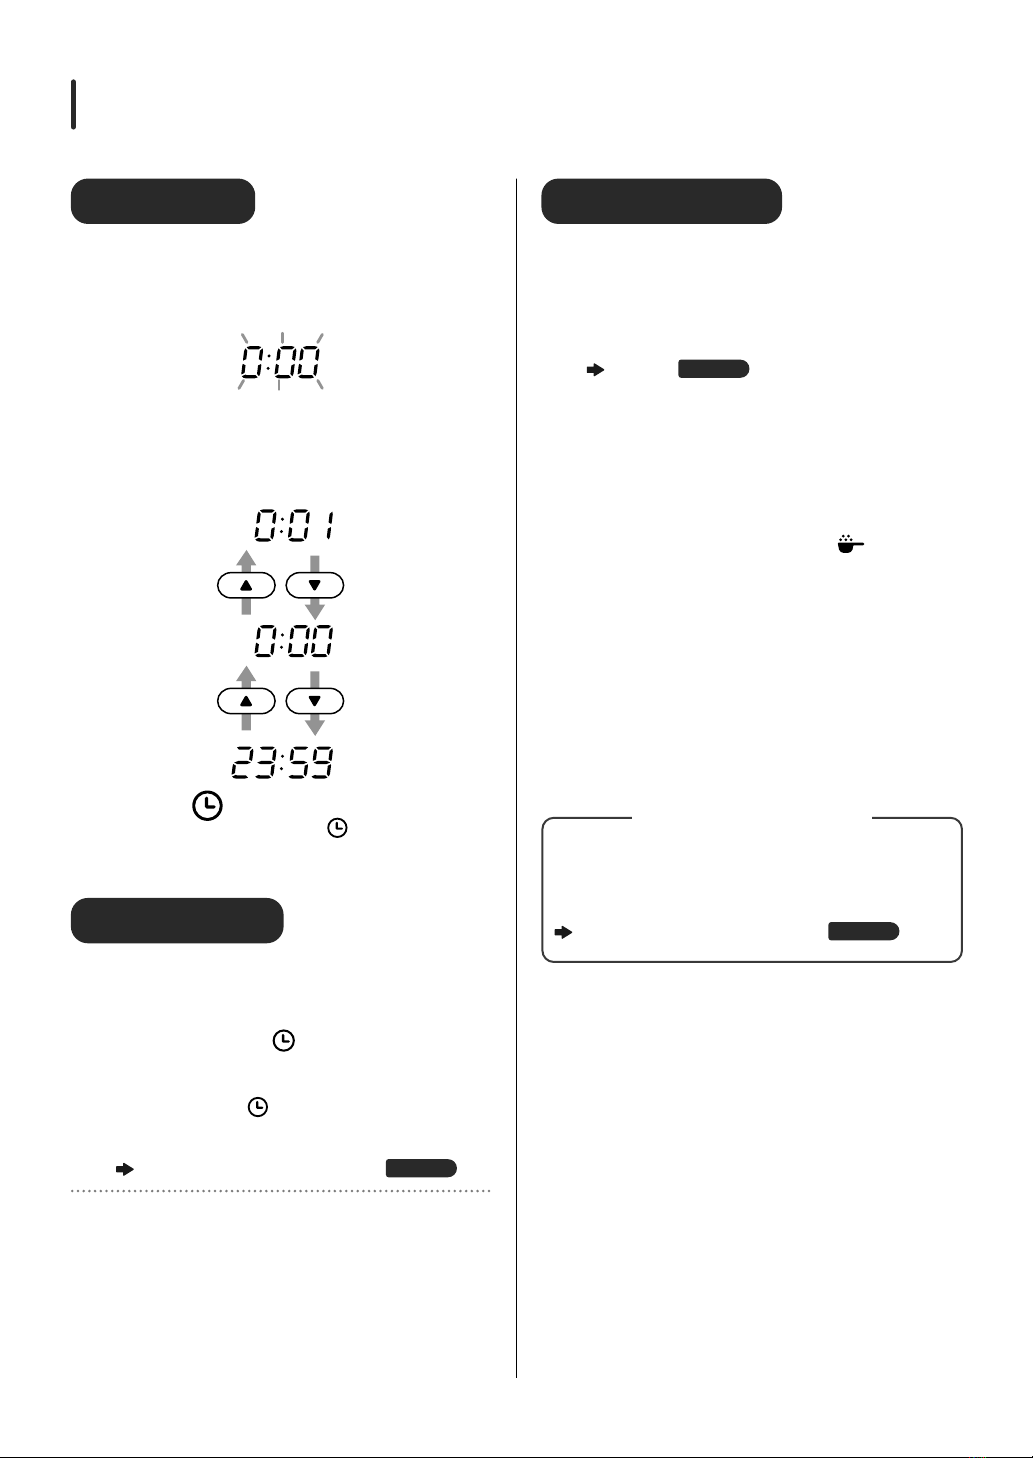
Performing Initial Settings
Set the clock
①①Insert the power plug securely all the way into
the outlet
The clock will automatically enter the clock setting
mode, and [0:00] will blink.
②②Set the clock
Press the ▲/▼buttons to change the time in one-
minute intervals. Press and hold (1 second or more) to
move up/down 10 minutes continuously.
③③Press the (timer) button to confirm
Once the clock is set, press the (timer) button to
confirm.
When only [ : ] blinks, the setting is complete.
Reset the clock
If the clock is out of sync, re-set it using the following
method.
①①Press and hold the (timer) button (approx.
3 seconds) while the operation/display is off to
switch to clock setting mode
Press and hold the (timer) button while the timer is
“on”to enter the timer setting mode.
②②Set the clock
“Set the clock” Step ②and thereafter
Page 11
X Clock Memory Retention
If the power plug is unplugged from the outlet for approximately
one week, the clock will reset to factory setting.

12 GB
12
How to use
How to Use
Prepare
11
Attach filter to basket and
place server or normal mug on
warming plate
①①
②②
③
③
④
④
Hopper lid
Warming plate
Server
Stainless filter or paper
filter (not included)
Mug cup
(not included)
Basket ring
Basket
①Open the basket
②Attach filter to basket and secure with
basket ring
③Close the basket
④Place server or mug on warming plate
Note
Be sure to set the filter.
Coffee cannot be brewed without setting.
Please use the following
size mug.
Diameter: approx. 6 to 9 cm
Height: approx. 9 cm or less
Capacity: 250 ml or more Approx. 9 cm
or less
Approx. 6-9 cm
Mug cup
Fold the side seal
part to the
opposite side of
the bottom
Fold the sealed
part at the
bottom
Open up the
inside
Use size“1 x 2”or“102”for 2 to 4 cup trapezoidal filters.
How to fold the paper filter
22
Add coffee beans or coffee
grounds
For coffee beans
①①Detach the hopper lid
②②Put coffee beans in the hopper
It can hold up to approximately 200 g of
coffee beans.
Depending on the amount of beans in the
hopper and the size of the beans, the amount
of beans drawn may be less or may not be
evenly distributed.
If the beans are light or oily (because
they will not fit inside the mill)
If beans are very hard
③③Attach the hopper lid
④④Turn the GRIND LEVEL dial to set the
grain coarseness
GRIND LEVEL dial
Coarse
ground
Fine
ground
⑤⑤Press and hold the COURSE button
(about 2 seconds) to set the grinding
time
“Set the grinding time”
Page
16
Note
If the inside of the hopper lid or hopper
is wet, thoroughly wipe off any oil or
moisture.
This can cause coffee beans to stick and remain
in the hopper.
Do not put in damp or moist coffee
beans.
13
GB 13
How to use
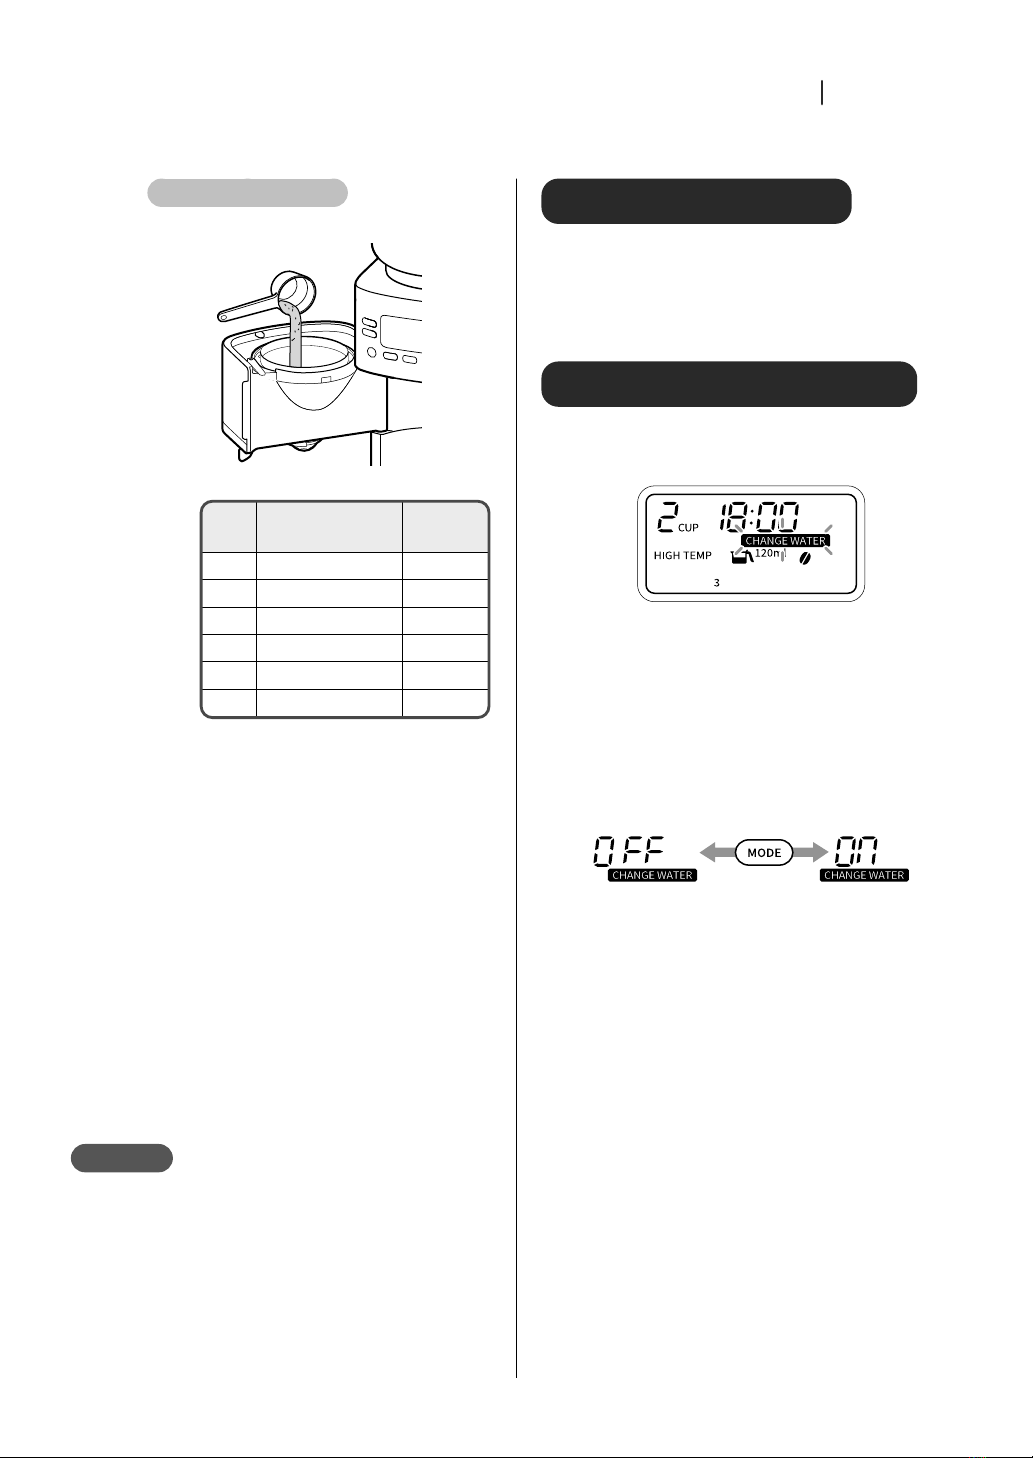
For coffee grounds
①①Put coffee grounds into the filter
Coffee grounds guide
120 ml
for iced 60 ml
For mug
180 ml
1 cup - 10 g
2 cups 16 g 20 g
3 cups 20 g 29 g
4 cups 27 g 35 g
5 cups 32 g -
6 cups 35 g -
②②Close the basket
33
Fill the water tank with water
and attach it to the main unit
The scale of the water tank is a guide. This
product discharges a volume of water
according to the number of cups.
After the water tank is attached to the
main unit, water may flow into the main
unit and the water level may drop below
the mark.
For iced coffee, add half as much water as
for hot coffee.
Note
Do not fill the water tank with anything other
than hot or cold water.
Do not fill the water tank with water while it is
attached to the main unit.
Water can get inside the unit and cause malfunction.
Add more water than the minimum mark (2 for
“120” and 1 for “180”).
This may cause malfunction.
Turn on/off mute mode
To mute, press and hold the “SIZE” button (approx. 5
seconds) while the main unit is not milling or
brewing (only the time is displayed on the display).
To unmute, press and hold the “SIZE” button again
(about 5 seconds).
About the water change sign
After 24 hours, [CHANGE WATER] on the display will
blink to notify you. Drain the water using the
following method.
①①Place the empty server on the warming plate,
press the “MODE” button, and select
[CLEANING]
②②Press “START/CANCEL” button
One server full of water is drained. If water remains in
the water tank, repeat the procedure from step ①.
Hide/show the water change sign confirmation
①Press and hold the“MODE”button (about 3 seconds) to turn on
the water change sign
②Press the“MODE”button to switch between [OFF] and [ON]
③Press and hold the“MODE”button (about 3 seconds) to set

14 GB
14
How to use
Brewing coffee
Warm the cup in advance with boiling water for
better taste.
11
Prepare a server or mug to
hold the coffee
X Using the server
①①Check the MUG switching lever
If the MUG switching lever is not in the
position (on the main unit side), switch it.
MUG switching
lever
②②Press the “SIZE” button and select the
amount of one cup to be brewed
Select from [120ml], [180ml], or [ICE 60ml].
X Using a mug
①①While holding the basket by hand,
switch the MUG switching lever
Switch the MUG selection lever to the
position (forward).
MUG switching
lever
②②Press “SIZE” button and select [MUG]
22
Press the“MODE” button to
select (bean mode) or
(grounds mode)
Make sure you have selected the (bean)
mode for brewing from coffee beans or
the (grounds) mode for brewing from
coffee grounds.
33
Press the ▲/▼buttons to set
the number of cups
The number of cups dispensed depends on
the size you choose.
[120ml] : 2 to 6 cups
[180ml] : 2 to 4 cups
[ICE 60ml] : 3 to 6 cups
[MUG] : 1 cup
44
Press the“COURSE” button to
select a course
Select from [HIGH TEMP], [LOW TEMP],
[DECAF].
55
Press “START/CANCEL” button
to start
The “START/CANCEL” button lights up, and
after about 30 seconds of steaming,
brewing begins. If you want to stop the
operation, press the“START/CANCEL”
button again.
When [MUG] is selected
[PULL THE LEVER] is displayed. Make sure
that the MUG switching lever is in the
(MUG) position and the mug is in place,
then press the “START/CANCEL” button
again.
15
GB 15
How to use
Note
Never open the basket or touch the steam
coming out of the basket during brewing.
Hot water and hot steam may cause scalding or injury.
After two consecutive uses, press the“START/
CANCEL” button to stop warming and let it rest
for 30 minutes before using again. Excessive
continuous use may cause malfunction.
When you have finished pouring the coffee into
the mug, set the MUG switching lever to the
position (on the side of the main unit).
MUG switching
lever
X Server Handling
Note
The server is hot immediately after brewing.
Always hold the server by the handle, and be
careful not to touch anything other than the
handle.
The server produces hot steam. Please be careful
not to get burnt.
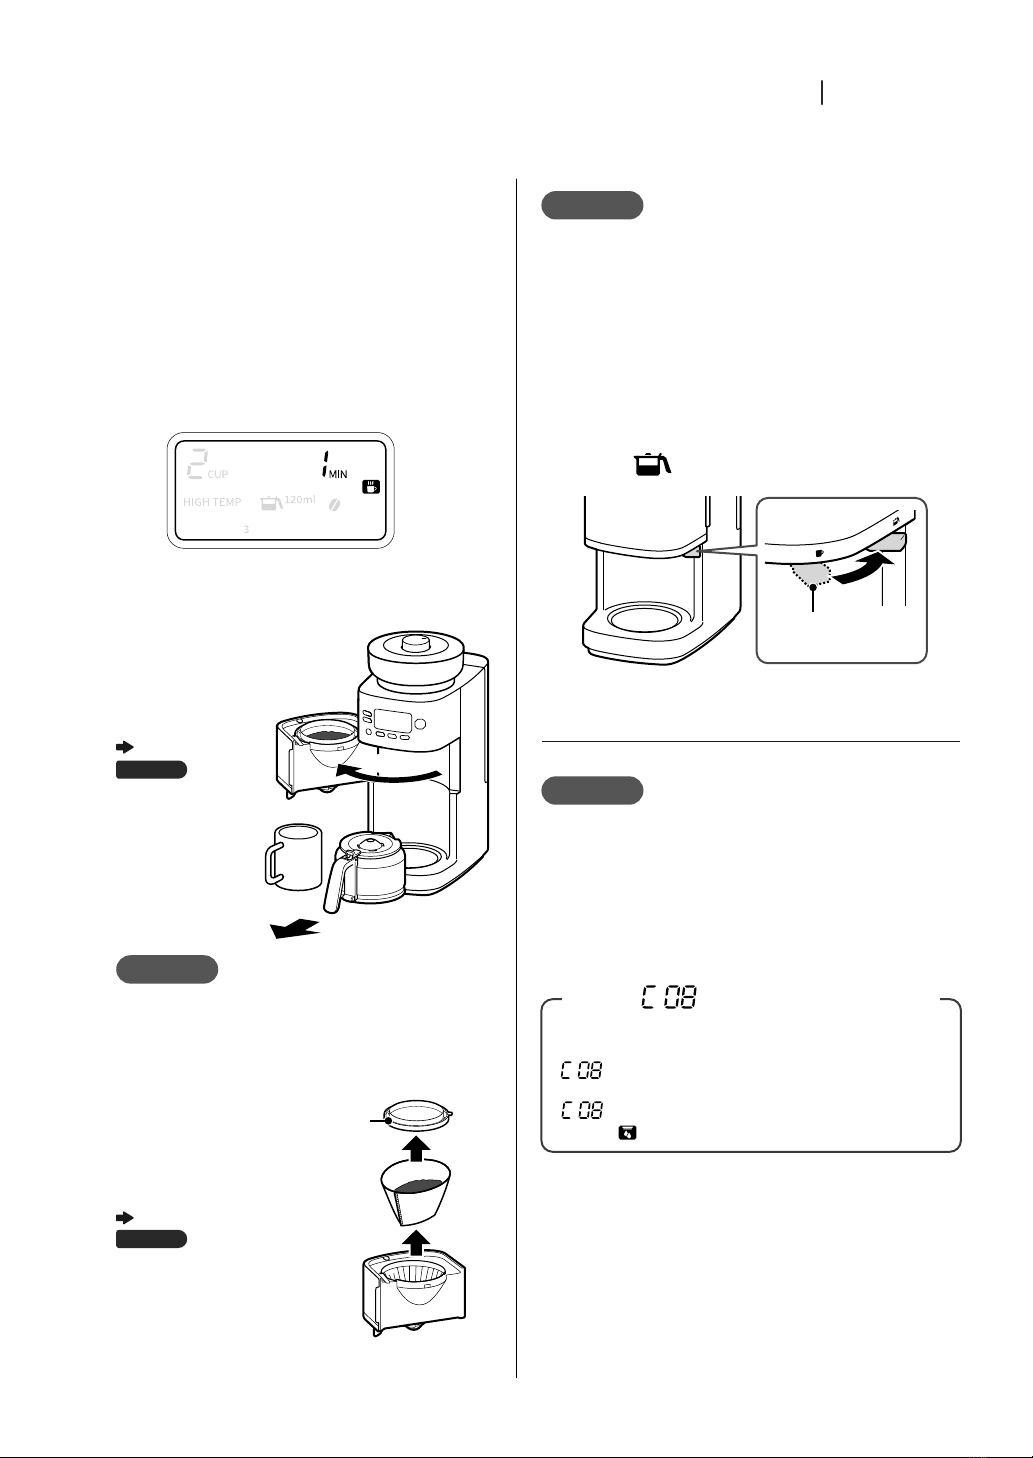
There is no water in the water tank.
If water is added to the water tank within 5 minutes after
[ ] is displayed, brewing will resume.
After pressing the“START/CANCEL” button to turn off the
[ ] display, press the “START/CANCEL” button again
while the (brewing) icon is displayed to resume brewing.
When [ ] appears on the display
X When the brewing is finished... (keeping
warm)
A sound will be made at the end of the brewing
process, and the main unit will automatically keep
the water warm for 30 minutes after the brewing
process is finished. The warming time display counts
up in intervals of one minute.
To stop warming, press the “START/CANCEL” button.
(It is not possible to use only the warming function.)
If coffee is made with [MUG] or [ICE 60ml], the
warming function will not activate.
X After use
Please let the unit cool down before cleaning
①①Remove the server
or mug from the
warming plate.
②②Remove the
basket
“How to detach”
Page
9
②②
①
Note
When opening the basket, detach the server
from the warming plate first.
The server may get caught in the basket, causing the
server to fall from the warming plate, which may result
in injury or malfunction.
③③Remove the
basket ring, and
the filter from the
basket.
④④Cleaning
“Cleaning”
Page 18
Basket ring
Washable parts must be washed after each use of the product. Do
not leave coffee beans or coffee grounds in the basket after
brewing. If left unattended, mold and bacteria can develop.

16 GB
16
How to use
Grinding beans (mill only mode)
11
Place a filter in the basket and
attach the basket to the main
unit
22
Press the“MODE” button to
select the mill only mode
Make sure that the mill only mode icon
appears on the display.
Mill only
mode
33
Press the“SIZE” button and
select the amount of brewing
In the mill only mode, “MUG” cannot be
selected by pressing the “SIZE” button.
44
Press the ▲/▼buttons to set
the number of cups
The number of cups dispensed depends on
the size you choose.
[120ml] : 2 to 6 cups
[180ml] : 2 to 4 cups
[ICE 60ml] : 3 to 6 cups
55
Press “START/CANCEL” button
to start
Start the mill and grind the beans. The
“START/CANCEL” button lights up during
operation.
66
Detach the basket from the
main unit
Detach the basket from the main unit, and
then take out the coffee grounds with the
filter.
Set the grinding time
The mill's operating time is set according to the number of cups.
The position of the GRIND LEVEL dial determines how much of the
coarse grind is applied. For coarse grind, grind more; for fine grind,
grind less.
If you set the grinding time in advance according to the position of
the GRIND LEVEL dial, you can set the amount of coffee grounds
close to the recommended amount.
①①Press and hold the “COURSE” button (about 2
seconds)
Grinding time will blink.
②②Select grinding time
Press the ▲/▼buttons to select 1-5. The longer the mill
runs, the more beans are ground.
Example: When the GRIND LEVEL dial is at the “4”
position
Set grinding time to [4]
③③Press the “COURSE” button to confirm
Grinding time lights up.
X The coffee seems too strong (too weak)
The mill's operating time can be adjusted to control how strong
the coffee is by the amount of beans being ground.
1
2
3
4
5
12345
DependingDepending
on the typeon the type
of beans, coffee groundsof beans, coffee grounds
may overflow.may overflow.
GRIND LEVEL dial
Grinding time
Set Coarse ground Fine ground
Long
Short
RecommendedRecommended
RecommendedRecommended
RecommendedRecommended
RecommendedRecommended
RecommendedRecommended
It is not possible to make a coarse grind coarser (less grounds) or
a fine grind finer (more grounds).
When the GRIND LEVEL dial is set to “1” to “2” for the coarse
grinding side and GRIND LEVEL is set to [4] to [5], coffee grounds
may overflow from the filter depending on the number of cups
and the type of beans. In case of a high number of cups (120 ml /
60 ml ice: more than 4 cups, 180 ml: more than 3 cups), shorten the
GRIND LEVEL to [3] or less and adjust the grinding time.

17
GB
Using the timer, operation can be started at a
scheduled time.
The clock must be set to use the timer.
“Set the clock”
Page
11
11
Attaching parts and preparing
coffee beans / grounds
See steps 1 through 3 of the procedure.
“How to Use”
Page 12
Note
Be sure to be prepared to brew coffee.
Failure to do so may cause coffee to overflow during
brewing, resulting in equipment failure and staining
of the surrounding area.
22
Setting up the brewing
See steps 1 through 5 of the procedure.
“Brewing coffee”
Page 14
33
Press the (timer) button
(timer) icon lights up and the timer
(scheduling) starts.
When the (timer) icon is displayed,
press the (timer) button again to
cancel the timer (scheduling).
44
Press and hold the (timer)
button (at least 3 seconds) to
switch to the timer setting
mode
When the mode is switched to the timer
setting mode, the time display blinks.
55
Set the time
Press the ▲/▼buttons
to set the time. Pressing
the button changes the
time in 5-minute
intervals. Press and
hold to count up/down
continuously.
66
Press the (timer) button to
set the time
The time changes from blinking to lit,
and the time is set. During the timer
(scheduling), the scheduled time is
displayed.
You can change the brewing settings
even during the timer (scheduling).
Note
If the power plug is unplugged from the power
outlet, the timer (scheduling) setting will be
reset and the timer (scheduling) will not be
executed.
While the (timer) icon is lit, pressing the
“START/CANCEL” button will not start the timer.
To brew coffee, press the (timer) button to
cancel the timer (scheduling).
To use the timer (scheduling) repeatedly
Once the timer is set, the set time is retained unless
the power plug is unplugged from the outlet.
①①Press one of the buttons to go to the display
for brewing coffee (the display showing the
number of cups and the size of the cup)
②②Press the (timer) button
(timer) icon lights up and the timer (scheduling)
starts.
When the (timer) icon is displayed, press the (timer)
button again to cancel the timer (scheduling).
Using the Timer (scheduling)

18 GB
1818
Cleaning
Cleaning
Be sure to clean the product after each use.
Unplug the power supply and allow the unit to cool
before cleaning.
Note
Be sure to unplug the power plug from the
power outlet and allow the unit to cool down
before cleaning or attaching/detaching parts.
Touching hot parts may cause electric shock, scalding, or
injury.
Do not use abrasive detergents, polish,
scrubbers, or nylon or metal scrubbing brushes.
Doing so can cause damage to surfaces.
Do not use detergents such as thinner or
benzene. Only use a neutral kitchen dish
detergent.
Doing so can cause damage to surfaces.
Do not use a dishwasher or dish dryer.
Each cleaned part should be thoroughly dried
before attaching it in the main unit.
Storing the product while it is still moist can cause mold or
bacteria to grow.
Care of the Mill
①①Detach hopper lid and GRIND LEVEL dial
Page 9
②②Detach the upper of the mill, and
detach grounds and debris with
the cleaning brush
Page 9
③③Sweep grounds and debris
from the underside of the
mill and surrounding area
into the mill with the
cleaning brush
④④Attach the upper of the
mill, GRIND LEVEL dial, and hopper lid
⑤⑤Press the “MODE” button, select “MILL CARE”
and press the “START/CANCEL” button
Grounds and debris will fall into the basket.
⑥⑥Press the “START/CANCEL” button again to exit
[MILL CARE]
Even if you do not press the “START/CANCEL” button,
“MILL CARE” will end after about 5 minutes.
Note
Be sure to use the supplied brush to clean the mill.
Failure to do so may cause injury.
Wipe with a soft cloth
Inside of hopper, lower side of
operation section
If the surface is heavily soiled, wipe it with a tightly
wrung-out wet dishcloth.
Outside of main unit, warming plate
Wipe with a soft dishcloth.
If the surface is heavily soiled, wipe it with a tightly
wrung-out wet dishcloth with neutral kitchen dish
detergent.
Wash with a sponge and neutral detergent
Stainless filter
Hopper lid
Basket ring
GRIND LEVEL dial
Water tank
Server
Basket
Hot water tap
Wash with a sponge dipped in neutral detergent and
rinse with water.
Do not use strong force, scrubbers, or abrasive
detergents. Doing so may cause scratches or injury.
Do not use in a dish dryer or dishwasher.
This manual suits for next models
1
Table of contents
Languages:
Other siroca Coffee Maker manuals

Popular Coffee Maker manuals by other brands


Nuova Simonelli
Nuova Simonelli mac 2000 User handbook

Cusimax
Cusimax CMCM-100 instruction manual

DeLonghi
DeLonghi Nescafe Dolce Gusto Piccolo EDG100.W user manual

Gastroback
Gastroback DESIGN ESPRESSO PICCOLO PRO instruction manual

Tescoma
Tescoma MONTE CARLO Instructions for use

Curtis
Curtis D500GTH Specification sheet


