Skil 0650 User manual

Skil BV - Rithmeesterpark 22 A1 10/21 2610S01224
4838 GZ Breda - The Netherlands
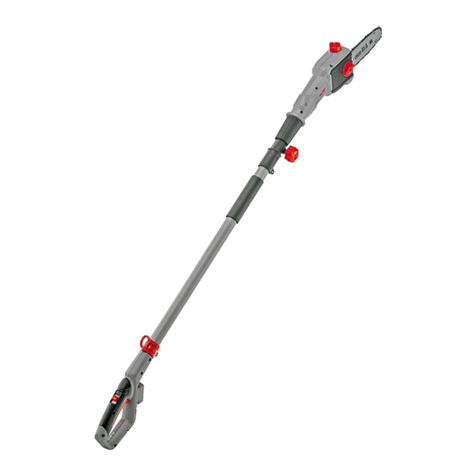
CORDLESS POLE SAW/PRUNER
0650 (GV1*0650**)
ORIGINAL INSTRUCTIONS
NOTICE ORIGINALE
ORIGINALBETRIEBSANLEITUNG
ORIGINELE GEBRUIKSAANWIJZING
BRUKSANVISNING I ORIGINAL
ORIGINAL BRUGSANVISNING
ORIGINAL BRUKSANVISNING
ALKUPERÄISET OHJEET
MANUAL ORIGINAL
MANUAL ORIGINAL
ISTRUZIONI ORIGINALI
EREDETI HASZNÁLATI UTASÍTÁS
INSTRUKCJA ORYGINALNA
ORIGINALE
ORIGINALNE UPUTE ZA RAD
ORIGINALNO UPUTSTVO ZA RAD
IZVIRNA NAVODILA
ALGUPÄRANE KASUTUSJUHEND
ORIGINALI INSTRUKCIJA
UDHËZIMET ORIGJINALE
11
16
22
29
35
40
46
51
57
63
69
75
81
87
92
99
106
112
119
125
132
138
143
149
154
160
166
171
178
194
190
www.skil.com

2
0650
EU Declaration of conformity
Cordless pole saw/pruner Article number
We declare under our sole responsibility that the stated products comply with all
applicable provisions of the directives and regulations listed below and are in
conformity with the following standards.
Déclaration de conformité UE
Élagueuse sur perche sans fil Numéro d’article
Nous déclarons sous notre propre responsabilité que les produits décrits sont en
conformité avec les directives, règlements normatifs et normes énumérés
ci-dessous.
EU-Konformitätserklärung
Akku-Hochentaster Sachnummer
Wir erklären in alleiniger Verantwortung, dass die genannten Produkte allen
einschlägigen Bestimmungen der nachfolgend aufgeführten Richtlinien und
Verordnungen entsprechen und mit folgenden Normen übereinstimmen.
EU-conformiteitsverklaring
Accu paalzaag/snoeier Productnummer
Wij verklaren op eigen verantwoordelijkheid dat de genoemde producten voldoen
verordeningen en overeenstemmen met de volgende normen.
EU-konformitetsförklaring
Sladdlös stångsåg/kvistsåg Produktnummer
Vi förklarar under eget ansvar att de nämnda produkterna uppfyller kraven i alla
gällande bestämmelser i de nedan angivna direktiven och förordningarnas och att
de stämmer överens med följande normer.
EU-overensstemmelseserklæring
Ledningsfri stangsav/grensav Typenummer
Vi erklærer som eneansvarlige, at det beskrevne produkt er i overensstemmelse
med alle gældende bestemmelser i følgende direktiver og forordninger og
opfylder følgende standarder.
EU-samsvarserklæring
Trådløs stavsag/beskjærer Produktnummer
Vi erklærer under eneansvar at de nevnte produktene er i overensstemmelse med
alle relevante bestemmelser i direktivene og forordningene nedenfor og med
følgende standarder.
EU-vaatimustenmukaisuusvakuutus
Akkukäyttöinen
varsisaha/raivaussaha Tuotenumero
Vakuutamme täten, että mainitut tuotteet vastaavat kaikkia seuraavien direktiivien
ja asetusten asiaankuuluvia vaatimuksia ja ovat seuraavien standardien
vaatimusten mukaisia.
Declaración de conformidad UE
Sierra/podadora telescópica
inalámbrica Número de artículo
Declaramos bajo nuestra exclusiva responsabilidad, que los productos
nombrados cumplen con todas las disposiciones correspondientes de las
directivas y los reglamentos mencionados a continuación y están en conformidad
con las siguientes normas.
Declaração de conformidade CE
Podadora sem fios
Número do produto
Declaramos sob nossa exclusiva responsabilidade que os produtos mencionados
cumprem todas as disposições e os regulamentos indicados e estão em
conformidade com as seguintes normas.
Dichiarazione di conformità UE
Potatore telescopico cordless Codice prodotto
Dichiariamo sotto la nostra piena responsabilità che i prodotti indicati sono
conformi a tutte le disposizioni pertinenti delle direttive e dei regolamenti elencati
di seguito, nonché alle seguenti normative.
EU konformitási nyilatkozat
Akkumulátoros teleszkópos
Cikkszám
Akumulátorová
následujícími normami.
Kablosuz yüksek dal
Ürün kodu
ederiz.
Akumulatorowa
Numer katalogowy

3
0650
EU vyhlásenie o zhode
nasledujúcimi normami.
EU izjava o sukladnosti
Akumulatorska štapna
Kataloški broj
relevantnim odredbama direktiva i propisima navedenima u nastavku i da su
EU-izjava o usaglašenosti
Broj predmeta
Na sopstvenu odgovornost izjavljujemo, da navedeni proizvodi odgovaraju svim
Izjava o skladnosti ES
obrezovalnik/obrezovalni
drog
standardom.
EL-vastavusdeklaratsioon
Juhtmeta
teleskoopoksasaag/
-oksalõikur Tootenumber
Kinnitame ainuvastutajatena, et nimetatud tooted vastavad järgnevalt loetletud
direktiivide ja määruste kõikidele asjaomastele nõuetele ja on kooskõlas järgmiste
normidega.
Bezvadu augsto zaru
sekojošiem standartiem.
ES atitikties deklaracija
Gaminio numeris
Atsakingai pareiškiame, kad išvardyti gaminiai atitinka visus privalomus
standartus.
EU Deklarata e konformitetit
Krasitëse/gërshërë me bateri Numri i nenit
Ne deklarojmë me përgjegjësinë tonë të vetme se produktet e paraqitura janë në
përputhje me të gjitha dispozitat e zbatueshme të direktivave dhe rregulloreve të
listuara më poshtë dhe janë në përputhje me standardet si më poshtë.
0650 GV1*0650** 2006/42/EC
2014/30/EU
2011/65/EU
2000/14/EC
EN 62841-1:2015
EN ISO 11680-1:2011
EN 55014-1:2017
EN 55014-2:2015
EN 63000:2018

4
0650
2000/14/EC: Measured sound power level 92.3 dB(A), uncertainty K = 2.4 dB, guaranteed sound power level 95 dB(A); conformity
assessment procedure in accordance with annex V
Product category: 6
Technical le at:*
2000/14/CE : Niveau de puissance acoustique mesuré 92,3 dB(A), incertitude K = 2,4 dB, niveau de puissance acoustique garanti 95
dB(A) ; procédure d’évaluation de conformité selon l’annexe V
Catégorie de produit: 6
Dossier technique auprès de:*
2000/14/EG: Gemessener Schallleistungspegel 92,3 dB(A), Unsicherheit K = 2,4 dB, garantierter Schallleistungspegel 95 dB(A);
Bewertungsverfahren der Konformität gemäß Anhang V
Produktkategorie: 6
Technische Unterlagen bei:*
2000/14/EG: Gemeten geluidsvermogensniveau 92,3 dB(A), onzekerheid K = 2,4 dB, gegarandeerd geluidsvermogensniveau 95 dB(A);
beoordelingsmethode van de overeenstemming volgens bijlage V
Productcategorie: 6
Technisch dossier bij:*
2000/14/EG: Uppmätt bullernivå 92,3 dB(A), osäkerhet K = 2,4 dB, garanterad bullernivå 95 dB(A); konformitetens bedömningsmetod
enligt bilaga V Produktkategori: 6
Teknisk dokumentation:*
2000/14/EG: Målt lydeffektniveau 92,3 dB(A), usikkerhed K = 2,4 dB, garanteret lydeffektniveau 95 dB(A);
overensstemmelsesvurderingsprocedure som omhandlet i
bilag V Produktkategori: 6
Tekniske bilag ved:*
henhold til vedlegg V
Produktkategori: 6
Teknisk dokumentasjon hos:*
2000/14/EY: Mitattu äänitehotaso 92,3 dB(A), epävarmuus K = 2,4 dB, taattu äänitehotaso 95 dB(A); vaatimustenmukaisuuden
arVointimenetelmä liitteen V mukaisesti
Tuotekategoria: 6
Tekniset asiakirjat saatavana:*
2000/14/CE: Nivel medido de la potencia acústica 92,3 dB(A), tolerancia K =2,4 dB, nivel garantizado de la potencia acústica 95 dB(A);
método de evaluación de la conformidad según anexo V
Categoría de producto: 6
Documentos técnicos de:*
2000/14/CE: Nível de potência acústica medido
92,3
dB(A), insegurança K =
2,4
dB, nível de potência acústica garantido 95 dB(A); processo de
avaliação da conformidade de acordo com o anexo V
Categoria de produto: 6
Documentação técnica pertencente à:*
2000/14/CE: Livello di potenza sonora misurato 92,3 dB(A), incertezza K = 2,4 dB, livello di potenza sonora garantito 95 dB(A);
procedimento di valutazione della conformità secondo l’allegato V
Categoria prodotto: 6
70565, Stuttgart, Germany Documentazione tecnica presso:*
2000/14/EK: Mért hangteljesítmény-szint 92,3 dB(A), K szórás = 2,4 dB, garantált hangteljesítmény-szint 95 dB(A); a konformitás
kiértékelési eljárást lásd a V függelékben
Termékkategória: 6
Műszaki dokumentumok megőrzési pontja:*
metoda posouzení shody podle
dodatku V
Technické podklady u:*
2000/14/AT: Ölçülen ses gücü seviyesi 92,3 dB(A), tolerans K = 2,4 dB, garanti edilen ses gücü seviyesi 95 dB(A); uygunluk
Ürün kategorisi: 6
Teknik belgelerin bulunduğu yer:*
2000/14/WE: Pomierzony poziom mocy akustycznej 92,32,4 dB, gwarantowany poziom mocy akustycznej 95
Kategoria produktów: 6
Dokumentacja techniczna:*
Техническая документация хранится у:*
Технічна документація зберігається у:*

5
0650
92,2,4
Τεχνικά έγγραφα στη:*
92,3 dB(A), incertitudine K = 2,4
Categorie produs: 6
Documentaţie tehnică la:*
92,2,4
Техническа документация при:*
2000/14/ES: Odmeraná hladina akustického výkonu 92,3 dB(A), neistota K = 2,4
Kategória produktu: 6
Technické podklady má spoločnosť:*
92,3 dB(A), nesigurnost K = 2,4
ocjenjivanja sukladnosti prema
dodatku VI
Kategorija proizvoda: 6
Tehnička dokumentacija se može dobiti kod:*
2000/14/EG: Izmereni nivo ostvarene buke 92,3 dB(A), nepouzdanost K = 2,4 dB, garantovani nivo ostvarene buke 95 dB(A); postupak
ocenjivanja usaglašenosti prema prilogu VI
Kategorija proizvoda: 6
Tehnička dokumentacija kod:*
92,3 dB(A), negotovost K = 2,4
presojo skladnosti v skladu s prilogo VI
Kategorija izdelka: 6
Tehnična dokumentacija pri:*
2000/14/EÜ: Mõõdetud helivõimsustase 92,3 dB(A), mõõtemääramatus K = 2,4 dB, garanteeritud helivõimsustase 95 dB(A); vastavuse
hindamise meetod vastavalt lisale VI Teavitatud asutus
Tootekategooria: 6
Tehnilised dokumendid saadaval:*
2000/14/EG: Išmatuotas garso galios lygis 92,3 dB(A), paklaida K = 2,4 dB, garantuotas garso galios lygis 95 dB(A); atitikties
Produkto kategorija: 6
Tehniskā dokumentācija no:*
92,2,4
Techninė dokumentacija saugoma:*
92,2,4
Техничка документација кај:*
2000/14/EC: Niveli i fuqisë së zërit i matur 92,3 dB(A), pasiguria K = 2,4 dB, niveli i fuqisë së zërit i garantuar 95 dB(A); procedura e
vlerësimit të konformitetit në përputhje me shtojcën VI
Kategori produkti: 6
Dosja teknike në:*
*Skil BV
Rithmeesterpark 22 A1
4838 GZ Breda
The Netherlands
Skil BV, Rithmeesterpark 22 A1, 4838 GZ Breda, NL
Olaf Dijkgraaf
Approval Manager
14.10.2021

6
A B C D E G
M N
Q HP
RS(2) T
K
L
J
P U V W X Y
N
AA AB AC AD AE AG AH
Z
H
2
ˆƓ˂ÅÅ
ƼˀƯ˅Ƥƽ
ˁƓˀÿ
ʿƓʽÀ
ʿƓ˂À
ˁƓ˃ÿ
ˁƓʽÀ
˂ƓʽÀ
ʾ˅
ÇÄÌ
ʿʽ¹Ð
0650
ʾƓʾÅÅ
ƼʽƓʽˁˀƤƽ
ʿʽ»Å
Ƽ˅Ƥƽ
˅ƓˁÅƯË
Ðˀˀ
1

7
3
8
r
4
9
5
q
6
w
7
e
B
AAH
AE
AG
C
C
D
1
2
3
4
5
6

8
y
uua
ub
uc
AB
t
G Q V
i+67.5o
-67.5o-90o
+45o
-45o
+22.5o
-22.5o
0o
1
1
1
2
2
2
3
3
Click
Click

9
4 mm
oC
C
J
a
W
X
p
AA Z
1
46
5
23
1
2

10
ACCESSORIES ➞WWW.SKIL.COM
sa
dMin
50’(15m)
50’
(15m)
g
T
Q
sc
J
f
A
AH
sb
2
1
3

11
-WARNING Read all safety warnings, instructions,
power tool.
.
Save all warnings and instructions for future reference.
The term “power tool” in the warnings refers to your mains
operated (corded) power tool or battery-operated (cordless)
power tool.
1) WORK AREA SAFETY
a) Keep work area clean and well lit. Cluttered or dark
areas invite accidents.
b) Do not operate power tools in explosive
liquids, gases or dust. Power tools create sparks which
may ignite the dust or fumes.
c) Keep children and bystanders away while operating
a power tool. Distractions can cause you to lose control.
2) ELECTRICAL SAFETY
a) Power tool plugs must match the outlet. Never
modify the plug in any way. Do not use any adapter
plugs with earthed (grounded) power tools.
electric shock.
b) Avoid body contact with earthed or grounded
surfaces such as pipes, radiators, ranges and
refrigerators. There is an increased risk of electric
shock if your body is earthed or grounded.
c) Do not expose power tools to rain or wet conditions.
Water entering a power tool will increase the risk of
electric shock.
d) Do not abuse the cord. Never use the cord for
carrying, pulling or unplugging the power tool. Keep
cord away from heat, oil, sharp edges or moving
parts. Damaged or entangled cords increase the risk of
electric shock.
e) When operating a power tool outdoors, use an
extension cord suitable for outdoor use. Use of a
cord suitable for outdoor use reduces the risk of electric
shock.
f) If operating a power tool in a damp location is
unavoidable, use a residual current device (RCD)
protected supply. Use of an RCD reduces the risk of
electric shock.
3) PERSONAL SAFETY
a) Stay alert, watch what you are doing and use
common sense when operating a power tool. Do not
use a power tool while you are tired or under the
A moment
of inattention while operating power tools may result in
serious personal injury.
b) Use personal protective equipment. Always wear
eye protection. Protective equipment such as a dust
mask, non-skid safety shoes, hard hat, or hearing
protection used for appropriate conditions will reduce
personal injuries.
c) Prevent unintentional starting. Ensure the switch
source and/or battery pack, picking up or carrying
the tool.
switch or energising power tools that have the switch on
a
Cordless pole saw/pruner 0650
INTRODUCTION
• The power tool is intended to be used for limbing and
pruning of trees
• This tool is not intended for professional use
• Check whether the packaging contains all parts as
illustrated in drawing 2
• When parts are missing or damaged, please contact your
dealer
• Read and save this instruction manual 3
• Pay special attention to the safety instructions
and warnings; failure to follow these may result in
serious injury
TECHNICAL DATA 1
Replacement chain: 90PX033* (the * is a character that only
determines the packaging method, e.g. carton, blister, bag,
etc., not relevant)
Replacement chain bar: 084MLEA041
TOOL ELEMENTS 2
A Guide bar
B Saw chain
C Locking knob
D Cover plate
E Ventilation slots
F Pivoting head
G
H Threaded sleeve (2)
J Chain tensioning sleeve
K Gripping teeth
L Chain guard
M Pivoting-head release button
N Easy storage hook (2)
P Threaded connector (2)
Q Extension pole
R Shoulder strap
S Easy storage rail (2)
T U link
U
V Rear pole
W Safety switch
X Trigger switch
Y Rear handle
Z Minimum mark
AA Oil reservoir cap
AB Battery level indicator
AC Oil outlet
AD Symbol for rotation and cutting direction
AE
AF
AG Drive sprocket
AH Metal plate
SAFETY
GENERAL POWER TOOL SAFETY WARNINGS

12
battery packs. Use of any other battery packs may
c) When battery pack is not in use, keep it away from
other metal objects like paper clips, coins, keys,
nails, screws, or other small metal objects that can
make a connection from one terminal to another.
Shorting the battery terminals together may cause burns
d) Under abusive conditions, liquid may be ejected
from the battery; avoid contact. If contact
contacts eyes, additionally seek medical help. Liquid
ejected from the battery may cause irritation or burns.
e) Do not use a battery pack or tool that is damaged
of injury.
f)
excessive temperature.
g) Follow all charging instructions and do not charge
the battery pack or tool outside the temperature
Charging
6) SERVICE
a)
person using only identical replacement parts. This
will ensure that the safety of the power tool is maintained.
b) Never service damaged battery packs. Service
of battery packs should only be performed by the
manufacturer or authorized service providers.
POLE PRUNER SAFETY WARNINGS
a) Keep all parts of the body away from the saw chain.
Do not remove cut material nor hold material to be
cut when saw chain is moving. Make sure the tool
clearing jammed material. A moment of inattention
while operating the pole pruner may result in serious
personal injury.
b) Hold the power tool by insulated gripping surfaces
only, because the saw chain may contact hidden
wiring. Saw chains contacting a “live” wire may make
exposed metal parts of the power tool “live” and could
give the operator an electric shock.
c)
pruner and position your body and arm to allow you
tomresist any kickback forces. Kickback forces can
be controlled by the operator, if proper precautions are
taken. Do not let go of the pole pruner.
d) When cutting a branch be alert for kickback. When
the branch is broached it can bend down and jam the
saw chain.
e)
from you. Proper handling of the pole pruner will reduce
the likelihood of accidental contact with the moving saw
chain.
f) Do not operate a pole pruner in a tree. Operation of a
pole pruner while climbing or situated in a tree may result
in personal injury.
invites accidents.
d) Remove any adjusting key or wrench before turning
the power tool on. A wrench or a key left attached to
a rotating part of the power tool may result in personal
injury.
e) Do not overreach. Keep proper footing and balance
at all times. This enables better control of the power tool
in unexpected situations.
f) Dress properly. Do not wear loose clothing or
jewellery. Keep your hair and clothing away from
moving parts. Loose clothes, jewellery or long hair can
be caught in moving parts.
g) If devices are provided for the connection of dust
extraction and collection facilities, ensure these are
connected and properly used. Use of dust collection
can reduce dust-related hazards.
h) Do not let familiarity gained from frequent use of
tools allow you to become complacent and ignore
tool safety principles. A careless action can cause
severe injury within a fraction of a second.
4) POWER TOOL USE AND CARE
a) Do not force the power tool. Use the correct power
tool for your application. The correct power tool will
do the job better and safer at the rate for which it was
designed.
b) Do not use the power tool if the switch does not turn
Any power tool that cannot be controlled
with the switch is dangerous and must be repaired.
c) Disconnect the plug from the power source and/
or remove the battery pack, if detachable, from
the power tool before making any adjustments,
changing accessories, or storing power tools. Such
preventive safety measures reduce the risk of starting the
power tool accidentally.
d) Store idle power tools out of the reach of children
and do not allow persons unfamiliar with the power
tool or these instructions to operate the power tool.
Power tools are dangerous in the hands of untrained
users.
e) Maintain power tools and accessories. Check for
misalignment or binding of moving parts, breakage
power tool’s operation. If damaged, have the power
tool repaired before use. Many accidents are caused
by poorly maintained power tools.
f) Keep cutting tools sharp and clean. Properly
maintained cutting tools with sharp cutting edges are less
likely to bind and are easier to control.
g) Use the power tool, accessories and tool bits etc.,
in accordance with these instructions, taking into
account the working conditions and the work to be
performed.
from those intended could result in a hazardous situation.
h) Keep handles and grasping surfaces dry, clean
and free from oil and grease. Slippery handles and
grasping surfaces do not allow for safe handling and
control of the tool in unexpected situations.
5) BATTERY TOOL USE AND CARE
a)
manufacturer. A charger that is suitable for one type
another battery pack.
b)

13
BATTERIES
• The battery supplied is partially charged (to ensure
full capacity of the battery, completely charge the battery
in the battery charger before using your power tool for the
• Only use the following batteries and chargers with
this tool
-SKIL battery: BR1*31****
-SKIL charger: CR1*31****
• Do not use the battery when damaged; it should be
replaced
• Do not disassemble the battery
• Do not expose tool/battery to rain
• Permitted ambient temperature (tool/charger/battery):
-
-
-
EXPLANATION OF SYMBOLS ON TOOL/BATTERY
3Read the instruction manual before use
4
burn battery for any reason
5Do not expose tool to rain
6Wear protective glasses and hearing protection
7Store tool/charger/battery in locations where temperature
8Do not dispose of electric tools and batteries together
with household waste material
9Wear head protection
qWear protective gloves
wWear safety footwear
e
USE
• Assembly instructions
! remove battery from tool
! always use gloves when handling the chain
• Assembling bar and chain r
-
remove cover plate D by turning locking knob C
counter-clockwise
-slide chain B in the slot around chain bar A
! ensure chain and bar have the same rotation
directions, and metal plate AH of bar should face
up
-
keyway of chain bar A
! ensure chain is in correct running direction by
comparing with chain symbol AD
-check if all parts are seated properly and hold chain
and chain bar in a level position
-mount cover plate D as illustrated
-Lightly tighten the locking knob C by turning it
clockwise.Do not fully tighten the locking knob until
after you have adjusted the chain tension
• Attaching the poles t
-
extension pole Q , tighten them together with the
threaded sleeve H by rotating it.Make sure that both
-Repeat this process to attach the other end of the
extension pole Q to the rear pole V
• Attaching the shoulder strap y
g) Always keep proper footing and operate the pruner
level surface. Slippery or unstable surfaces such as
ladders may cause a loss of balance or control of the
pruner.
h) Follow instructions for oiling, chain tensioning
and changing accessories. Improperly tensioned or
lubricated chain may either break or increase the chance
for kickback.
i) Keep handles dry, clean, and free from oil and
grease. Greasy, oily handles are slippery causing loss
of control.
j) Cut wood only. Don’t use pole pruner for purposes
not intended. For example: do not use pole pruner
for cutting plastic, masonry or non-wood building
materials.
than intended could result in a hazardous situation.
k) Causes and operator prevention of kickback:
-Kickback may occur when the nose or tip of the guide
bar touches an object, or when the wood closes in and
pinches the saw chain in the cut.
-Tip contact in some cases may cause a sudden reverse
reaction, kicking the guide bar up and back towards the
operator.
-Pinching the saw chain along the top of the guide
bar may push the guide bar rapidly back towards the
operator.
-Either of these reactions may cause you to lose
control of the pole pruner which could result in serious
personal injury. As a pole pruner user, you should
take several steps to keep your cutting jobs free from
accident or injury. Kickback is the result of tool misuse
and/or incorrect operating procedures or conditions
and can be avoided by taking proper precautions as
given below:
l) When cutting a branch be alert for kickback. When
the branch is broached it can bend down and jam the
saw chain.
m) Only use replacement saw chains and bars
Incorrect replacement
of saw chains and bars may cause chain breakage and/
or kickback.
n) Always wait until the machine has come to a
complete stop, and remove the battery before
placing it down. The saw chain can jam or kickback and
lead to loss of control over the garden tool.
o)
position.
Some regions have regulations that restrict the use of the
product. Check with your local authority for advice.
AFTER USE
•
-whenever leaving the tool unattended
-before clearing jammed material
-before checking, cleaning or working on the tool
-after striking a foreign object
-whenever the tool starts vibrating abnormally
• Store the tool indoors in a dry and locked-up place, out of
reach of children
-store the battery pack separately from the tool

14
the chain to become overtensioned when it cools down
• Lubrication p
Chain life and cutting capacity depend on optimum
lubrication; therefore the chain is automatically oiled
during operation via oil outlet AC 2
!
! never operate the pole saw without chain oil or at
an empty oil reservoir level, as this will result in
extensive damage to the product
-set pole saw on any suitable surface with oil reservoir
cap AA facing upward
-unscrew cap and add pole saw oil (not included) until
reservoir is full
-avoid dirt or debris entering oil reservoir
-mount oil reservoir cap and tighten
! check oil level prior to starting and regularly
indicator Z
-
depending on sawing intensity and stops
-never use recycled/old oil
! use only readily biodegradable chain saw oil
• a
-
pulling trigger switch X
-
• Operating the tool
-always Hold the pole saw with both hands: with one
hand on the rear handle Y and the otherhand on the
front handle U;
! the pole saw must be running at full speed before
it makes contact with the wood
-do not force the chain while cutting; let the chain do
the work
-use the pole saw only with secure footing
-sawing is optimized when the chain speed remains
steady during cutting
! Be certain the threaded sleeves of the poles are
fully tightened before operating the tool. Check
it periodically for tightness during use to avoid
serious personal injury.
! Ensure the pivoting head is properly locked before
operating the tool.
! beware the object being cut does not exceed the
usable cutting length of the pole saw.The tip of
guide bar shall always extend at least 2” (50mm)
outside the outline of the wood log
! beware the saw chain is not touching the ground
or any other objects
! always remove the saw from a wood cut while the
saw is running
• Basic Cutting sa
-
the underside of the limb, close to the main limb or
trunk sb
-Make a second cut from the top side of the limb,
through the limb until the limb separates from the tree.
Be prepared to balance the weight of the tool when the
limb falls sb
-sb
-Attach the shoulder-strap hooks onto the shoulder-
strap loops located in the handling areas
• Charging battery
! read the safety warnings and instructions
provided with the charger
• Removing/installing the battery 2
• Battery level indicator u
-press the battery level indicator button AB to show the
current battery level ua
! when the lowest level of the battery indicator
AB ub, the
battery is empty
!
after pressing button AB uc, the battery is not
within the allowable operating temperature range
• Battery protection
being switched on, when
-the load is too high --> remove load and restart
-the battery temperature is not within the allowable
operating temperature range of -20 to +50°C --> 2
pressing button AB uc; wait until battery has returned
within the allowable operating temperature range
-the battery is nearly empty (to protect against
deep discharge) -->
battery level ub is shown by the battery level indicator
when pressing button AB; charge battery
!
damaged
• Adjusting the pivoting head i
-Press the two pivoting-head release buttons M
simultaneously
-
-Release the pivoting-head release buttons M and make
-
• Tensioning chain o
! remove battery from tool
-
-check if the chain links are correctly located in the slot
around chain bar A
loosen locking knob C until it is just holding chain bar in
position (do not remove)
lift the chain bar somewhat and hold it in that position
turn chain tensioning sleeve J clockwise until the lowest
chain links come up and JUST touch the bottom of chain
bar A
tighten locking knob C by turning it clockwise
release chain bar
the correct chain tension is reached when the chain can
be raised approx. 4 mm from the chain bar in the centre
! always check the chain tension before use, after
every 10 minutes)
-upon initial operation, new chains can lengthen
considerably
-the chain life of the pole saw chain mainly depends
-avoid tensioning the chain if it is hot, as this will cause

15
-if there is no oil pattern, despite a full oil reservoir, see
“TROUBLESHOOTING” or contact your dealer
• Never sharpen the saw chain yourself. Replace the saw
chain or have the saw chain professionally resharpened
at a SKIL service station.
• If the tool should fail despite the care taken in
manufacturing and testing procedures, repair should
be carried out by an after-sales service centre for SKIL
power tools
-send the tool undismantled together with proof of
purchase to your dealer or the nearest SKIL service
station (addresses as well as the service diagram of the
tool are listed on www.skil.com)
! before returning, the oil reservoir must be
completely emptied
• Be aware that damage due to overload or improper
handling of the tool will be excluded from the warranty
(for the SKIL warranty conditions see www.skil.com or
ask your dealer)
• Storage g
-if the pole saw is to be stored for a longer period of
time, clean chain and chain bar
-when storing tool, the oil reservoir must be completely
emptied
-use chain guard L when storing the tool
-securely mount two storage rails S on the wall with 4
screws (not supplied) and horizontally leveled,one for
hanging extension pole together with rear handle by
using U link T,one for hanging power head
-store the tool indoors in a dry and locked-up place, out
of reach of children
When U link T is not in use, it can be inserted into storage
rail S
TROUBLESHOOTING
• The following listing shows problem symptoms, possible
causes and corrective actions (if these do not identify
and correct the problem, contact your dealer or service
station)
! in case of electrical or mechanical malfunction,
Tool does not operate
-empty battery -> charge battery
-hot battery -> let battery cool down
-internal fault -> contact dealer/service station
Tool operates intermittently
-internal wiring defective -> contact dealer/service
station
-
Dry chain
-
-vent in oil reservoir cap clogged -> clean cap
-oil passage clogged -> clean oil passage outlet
Brake does not stop chain
-run-down brake defective -> contact dealer/service
station
Chain/chain bar overheats
-
-vent in oil reservoir cap clogged -> clean cap
-oil passage clogged -> clean oil passage outlet
-chain is overtensioned -> adjust chain tension
-dull chain -> sharpen chain or replace
-Release the trigger switch as soon as the cut is
completed
-
or branch), hold the gripping teeth K against the limb
being cut.This will help to steady the limb and make it
easier to cut sc
• Limbing and Pruning d
-This pole saw is designed for trimming small branches
and limbs up to 175mm in diameter.
! Cut branches into parts to ensure that you
cannot be struck by falling branches or that fallen
branches can bounce up from the soil.
! Do not stand directly under the branch being cut.
-
-Remove long branches in several stages
-
room to fall
-
grip. Maintain secure footing and balance
-Keep the tree between you and the chain while limbing.
Cut from the side of the tree opposite the branch you
are cutting
! Do not cut from a ladder. Leave such operations
for professionals.
!
the weight.
! Do not use the pole saw for felling or bucking
! do not operate within 15m of overhead electrical
lines
! Keep bystanders at least 15m away
MAINTENANCE / SERVICE
• This tool is not intended for professional use
• Always keep tool clean (especially ventilation slots E 2)
! remove battery from tool before cleaning
-clean the moulded plastic housing of the pole saw
using a soft brush and clean cloth (do not use water,
solvents or polishes)
-remove and brush clean the cover plate, chain and
chain bar after 1 to 3 hours of use
-clean the area under cover plate, drive sprocket and
chain bar assembly using a soft brush and clean cloth
-clean oil outlet with a clean cloth
• Regularly check for obvious defects such as loose,
and worn or damaged components
• Changing chain bar A
-remove/mount metal plate AH of chain bar by
loosening/fastening screw with Phillips screwdriver(not
included) as illustrated f
! ensure the marked arrow side of chain bar should
face up when mounting
• Carry out necessary maintenance and repairs before
using the pole saw
• Proper functioning of the automatic oiler can be checked
by running the pole saw and pointing the tip of the chain
bar towards a piece of cardboard or paper on the ground
! do not touch the ground with the chain (ensure
safety clearance of 20 cm)
-if an increasing oil pattern developes, the automatic

16
caractère qui indique uniquement la méthode d’emballage,
par ex. carton, blister, sac, etc., non pertinent)
Guide de rechange 084MLEA041
PIÈCES DE L’OUTIL 2
A
B
C Bouton de blocage
D Capot
E
F Tête pivotante
G Perche avant
H
J
K Dents de prise
L
M Bouton de déblocage de la tête pivotante
N Crochet de rangement (2)
P
Q Perche d’extension
R Sangle d’épaule
S Rail de rangement (2)
T Raccord en U
U Poignée avant
V Perche arrière
W Interrupteur de sécurité
X Interrupteur marche/arrêt (gâchette)
Y Poignée arrière
Z Repère de niveau minimum
AA Capuchon de réservoir d’huile
AB Indicateur de niveau de charge de la batterie
AC Sortie d’huile
AD Symbole de direction de rotation et de coupe
AE
AF
AG
AH Plaque métallique
SECURITE
CONSIGNES DE SÉCURITÉ GÉNÉRALES POUR L’OUTIL
ÉLECTRIQUE
-AVERTISSEMENT Lisez toutes les consignes
de sécurité, les instructions, les illustrations et les
électrique.
dessous peut provoquer un choc électrique, un incendie et/
ou des blessures graves.
Conservez tous les consignes de sécurité et toutes les
instructions pour consultation ultérieure.
Le terme « outil électrique » utilisé dans les consignes de
sécurité désigne votre outil électrique fonctionnant sur le
1) SÉCURITÉ DE L’AIRE DE TRAVAIL
a) Maintenez l’aire de travail propre et bien éclairée.
Les endroits sombres ou désordonnés augmentent les
risques d’accident.
b) N’utilisez pas les outils électriques dans des
Tool vibrates abnormally
-chain tension too loose -> adjust chain tension
-dull chain -> sharpen chain or replace
-chain worn out -> replace chain
-chain teeth are facing in the wrong direction ->
reassemble with chain in correct direction
ENVIRONMENT
• Do not dispose of electric tools, batteries,
accessories and packaging together with household
waste material (only for EU countries)
-in observance of European Directive 2012/19/EC
on waste of electric and electronic equipment and
its implementation in accordance with national law,
electric tools that have reached the end of their life
must be collected separately and returned to an
environmentally compatible recycling facility
-symbol 8will remind you of this when the need for
disposing occurs
NOISE / VIBRATION
• Measured in accordance with EN 62841 the sound
pressure level of this tool is 77 dB(A) (uncertainty
K = 2.5 dB) and the sound power level 92.3 (A)
(uncertainty K = 2.4 dB), and the vibration <2.5 /s² (triax
vector sum; uncertainty K = 1.5 m/s²)
• The vibration emission level has been measured in
accordance with a standardised test given in EN 62841;
it may be used to compare one tool with another and as
a preliminary assessment of exposure to vibration when
using the tool for the applications mentioned
-
increase the exposure level
-
reduce the exposure level
!
maintaining the tool and its accessories, keeping
your hands warm, and organizing your work
patterns
b
Élagueuse sur perche
0650
INTRODUCTION
• Cet outil électrique est prévu pour ébrancher et élaguer
des arbres
• Cet outil n’est pas conçu pour un usage professionnel
•
sont contenues dans l’emballage 2
• Lorsque des pièces manquent ou sont endommagées,
veuillez contacter votre distributeur
• Lisez et conservez ce manuel d’instructions 3
• Prêtez particulièrement attention aux consignes de
sécurité et aux avertissements ; sinon, vous risquez
de subir des blessures graves
CARACTÉRISTIQUES TECHNIQUES 1

17
sur son interrupteur marche/arrêt ou le brancher dans
une alimentation électrique alors que son interrupteur
marche/arrêt est dans la position marche favorise les
accidents.
d) Retirez toutes les clés de réglage et de serrage
avant de mettre l’outil électrique en marche. Une
clé de réglage ou de serrage laissée sur une pièce
rotative de l’outil électrique peut provoquer des blessures
corporelles.
e)
à atteindre. Conservez en permanence des appuis
des pieds solides et un bon équilibre. Cela permet un
meilleur contrôle de l’outil électrique en cas de situations
inattendues.
f) Portez une tenue adaptée. Ne portez pas de
vêtements amples ni de bijoux. Maintenez vos
cheveux et vos vêtements éloignés des pièces
mobiles. Les vêtements amples, les bijoux et les
cheveux longs peuvent se prendre dans les pièces
mobiles.
g) Si un outil est conçu pour être utilisé avec des
dispositifs d’extraction et de récupération des
poussières, veillez à ce que ces dispositifs soient
raccordés et correctement utilisés. L’utilisation de
dispositifs de récupération des poussières permet de
réduire les risques liés aux poussières.
h) Veillez à ne pas devenir trop sûr de vous et ne
cessez pas de respecter les principes de sécurité
même si vous vous sentez familiarisé à l’utilisation
de l’outil. La négligence peut provoquer des blessures
graves en une fraction de seconde.
4) UTILISATION ET ENTRETIEN DE L’OUTIL
ÉLECTRIQUE
a) Ne forcez pas l’outil électrique. Utilisez l’outil
électrique qui convient au travail que vous voulez
L’utilisation d’un outil qui convient au travail à
avec une sécurité accrue et au rythme pour lequel l’outil
a été conçu.
b) N’utilisez pas l’outil électrique si son interrupteur
marche/arrêt ne permet pas de l’allumer et de
l’éteindre. Tout outil électrique qui ne peut pas être
contrôlé par son interrupteur marche/arrêt est dangereux
et doit être réparé.
c)
et/ou retirez la batterie, si amovible, de l’outil
électrique avant tout réglage ou changement
d’accessoire, et avant de ranger l’outil électrique.
Cette mesure de sécurité préventive réduit le risque de
démarrage accidentel de l’outil électrique.
d) Rangez les outils électriques non utilisés hors de
portée des enfants. N’autorisez pas les personnes
non familiarisées avec l’outil électrique ou ce
manuel d’utilisation à l’utiliser. Les outils électriques
sont dangereux dans les mains de personnes
inexpérimentées.
e) Entretenez les outils électriques et les accessoires.
n’est grippée ou mal alignée, qu’aucune pièce n’est
cassée, et pour tout autre problème qui pourrait
est endommagé, il doit être réparé avant d’être
réutilisé. Beaucoup d’accidents sont dus à des outils
atmosphères explosives, par exemple en présence
Les
outils électriques génèrent des étincelles pouvant
c) Veillez à ce que les enfants et les autres personnes
restent éloignés pendant l’utilisation d’un outil
électrique. Un moment d’inattention peut vous faire
perdre le contrôle de l’outil.
2) SÉCURITÉ ÉLECTRIQUE
a)
de quelque manière que ce soit. N’utilisez jamais
d’adaptateur de prise avec les outils électriques
pourvus d’une mise à la terre ou à la masse.
appropriées réduisent le risque de choc électrique.
b) Évitez tout contact physique avec des surfaces mises
à la terre ou mises à la masse, telles que tuyaux,
radiateurs, fours et réfrigérateurs. Il y a un risque accru
de choc électrique si votre corps est relié à la terre ou à
la masse, directement ou indirectement.
c) N’exposez pas les outils électriques à la pluie ou à
un environnement mouillé. Si de l’eau pénètre dans un
d)
ou débrancher l’outil électrique.Veillez à ce que
avec de l’huile, des pièces mobiles, des arêtes
tranchantes, et ne soit jamais exposé à de la
chaleur. Les câbles d’alimentation endommagés ou
emmêlés augmentent le risque de choc électrique.
e) Quand vous utilisez un outil électrique en extérieur,
utilisez une rallonge électrique adaptée à un usage
en extérieur. L’utilisation d’une rallonge conçue pour un
usage en extérieur permet de réduire le risque de choc
électrique.
f) Si vous êtes obligé d’utiliser un outil électrique
dans un endroit humide, utilisez une alimentation
résiduel (DDR). L’utilisation d’un DDR réduit le risque de
choc électrique.
3) SÉCURITÉ DES PERSONNES
a) Restez vigilant, soyez attentif à ce que vous faites et
faites preuve de bon sens lors de l’utilisation d’un
outil électrique. N’utilisez pas un outil électrique
quand vous êtes fatigué ou sous l’emprise de
Un
moment d’inattention pendant l’utilisation des outils
électriques peut provoquer des blessures corporelles
graves.
b) Utilisez des équipements de protection individuelle.
Portez toujours une protection oculaire. L’utilisation
d’équipements de protection appropriés aux conditions
de travail, tels que masque antipoussières, chaussures
de sécurité antidérapantes, casque et protections
auditives, permet de réduire les risques de blessures
corporelles.
c)
l’interrupteur marche/arrêt est dans la position
arrêt avant de brancher l’outil dans une prise
électrique et/ou une batterie, de le saisir ou de le
transporter. Transporter un outil électrique les doigts

18
MISES EN GARDE RELATIVES À L’ÉLAGUEUSE SUR
PERCHE
a) Maintenez toutes les parties de votre corps
éloignées de la chaîne. N’essayez pas de retirer
du matériau coupé ni de tenir le matériau à couper
quand la chaîne est en mouvement.Veillez à
éteindre l’outil et à en retirer la batterie lorsque vous
retirez du matériau coincé. Un moment d’inattention
pendant l’utilisation de l’élagueuse sur perche peut
provoquer des blessures corporelles graves.
b) Tenez l’outil électrique exclusivement par ses
surfaces de préhension isolantes, car la chaîne
non visibles.
câble électrique sous tension, les parties métalliques
de l’outil électrique peuvent se retrouver sous tension et
l’opérateur risque de subir un choc électrique.
c) Tenez toujours fermement l’élagueuse sur perche
avec les deux mains et positionnez votre corps et
vos bras de façon à pouvoir résister aux forces
d’un rebond éventuel. L’opérateur peut contrôler
la puissance d’un rebond s’il a pris les précautions
adéquates. Ne lâchez pas l’élagueuse sur perche.
d) Lorsque vous coupez une branche, faites attention
aux rebonds. Quand la scie entame la branche, celle-ci
e) Éteignez l’élagueuse sur perche pour la porter,
maintenez-la toujours à deux mains et à l’écart
de votre corps et recouvrez la chaîne du protège-
chaîne. Manipuler correctement l’élagueuse sur perche
permet de réduire la possibilité de contact accidentel
f) N’utilisez pas une élagueuse sur perche dans
un arbre. L’utilisation d’une élagueuse sur perche en
grimpant ou en étant posté dans un arbre peut provoquer
des blessures corporelles.
g) L’utilisateur de l’élagueuse sur perche doit toujours
doit toujours garder l’équilibre. Les surfaces instables
ou glissantes (par exemple les échelles) peuvent faire
perdre l’équilibre ou le contrôle de l’élagueuse sur
perche.
h) Respectez les instructions de la notice d’utilisation
de la chaîne et le changement des accessoires. Si la
i) Maintenez les poignées propres, sèches et
exemptes d’huile et de graisse. Les poignées
huileuses ou grasses sont glissantes et peuvent vous
faire perdre le contrôle de l’outil.
j) Coupez exclusivement du bois. N’utilisez pas
Par exemple : n’utilisez pas l’élagueuse sur perche
pour couper du plastique, de la maçonnerie ou
des matériaux de construction autres que du bois.
Utiliser l’élagueuse sur perche pour des applications
situations dangereuses.
k) Les causes et la prévention des rebonds :
-Un rebond peut se produire quand le bout ou le nez
électriques mal entretenus.
f) Veillez à ce que les accessoires de coupe restent
Des accessoires de coupe bien
moins de se coincer
et sont plus faciles à contrôler.
g) Utilisez l’outil électrique, ses accessoires, mèches/
embouts et toutes les autres pièces conformément
aux présentes instructions, en prenant en compte
pour lesquelles il a été conçu peut engendrer des
situations dangereuses.
h) Maintenez les poignées et surfaces de préhension
propres, sèches et exemptes d’huile et de graisse.
Les poignées et surfaces de préhension glissantes ne
permettent pas de tenir et de contrôler l’outil de manière
5) UTILISATION ET ENTRETIEN DE L’OUTIL SUR
BATTERIE
a) Rechargez la batterie exclusivement avec le
Un chargeur
adapté à un type de batterie en particulier peut présenter
un risque d’incendie s’il est utilisé avec une batterie
b) Utilisez les outils électriques exclusivement avec les
L’utilisation de toute autre batterie
peut engendrer un risque de blessures et d’incendie.
c) Quand la batterie n’est pas utilisée, elle doit être
rangée à l’écart d’objets métalliques, tels que les
trombones, pièces de monnaie, clés, clous, vis et
tous les autres petits objets métalliques pouvant
mettre en contact ses bornes. Mettre en court-circuit
un incendie.
d) Si la batterie est soumise à des conditions
d’utilisation excessives, du liquide peut s’en
échapper. Évitez tout contact avec ce liquide. En
cas de contact accidentel, rincez à grande eau. En
cas de contact avec les yeux, vous devez en outre
consulter un médecin. Le liquide qui s’échappe des
e) N’utilisez pas une batterie ou un outil endommagé
peuvent avoir un comportement imprévisible provoquant
un incendie, une explosion ou un risque de blessure.
f)
ou à une température excessive. L’exposition au
feu ou à des températures supérieures à 130 °C peut
provoquer une explosion.
g) Respectez toutes les instructions de recharge et ne
rechargez pas la batterie ou l’outil hors de la plage
La
recharge incorrecte ou à des températures hors de la
le risque d’incendie.
6) RÉPARATION
a) Faites réparer votre outil électrique par un
pièces de rechange identiques. Ceci permet de
b) Ne réparez jamais les batteries endommagées. La
fabricant ou des réparateurs agréés.

19
BATTERI E
3Veuillez lire le mode d’emploi avant d’utiliser l’outil
4
en aucun cas
5N’exposez pas l’outil à l’humidité
6Utilisez des lunettes de protection et des casques
anti-bruit
7Rangez l’outil/le chargeur/la batterie dans des endroits
où la température n’excède pas 50°C
8Ne jetez pas les outils électriques et les batteries dans
les ordures ménagères
9Porter un casque de protection
qPorter des gants protecteurs
wPorter des chaussures de sécurité
e
électriques.
UTILISATION
• Instructions de montage
! retirez la batterie de l’outil
! utilisez toujours des gants pour manipuler la
chaîne
• r
-placez l’élagueuse sur perche sur une surface plane
adaptée, retirez le capot D en tournant le bouton de
blocage C sans le sens inverse des aiguilles d’une
montre
-
! veillez à ce que la chaîne et le guide aient la même
direction de rotation et que la plaque métallique
AH du guide soit orientée vers le haut
-
! veillez à ce que la chaîne soit dans la bonne
direction de rotation par rapport au symbole AD
-
-montez le capot D de la façon indiquée
-Serrez légèrement le bouton de blocage C en le
tournant dans le sens des aiguilles d’une montre. Ne
resserrez pas entièrement le bouton de blocage avant
• t
-Insérez la perche avant G sur l’une des extrémités de la
-
d’extension Q à la perche arrière V
• Attacher la sangle d’épaule y
-Attachez les crochets de la sangle d’épaule dans les
• Chargement de la batterie
! lisez les avertissements de sécurité et les
instructions fournies avec le chargeur
• Retirer/installer la batterie 2
• Indicateur de niveau de charge de la batterie u
-appuyez sur le bouton indicateur de niveau de charge
-Dans certains cas, un contact avec le bout du guide-
-
rapidement vers l’utilisateur.
-Chacune de ces réactions peut vous faire perdre le
contrôle de l’élagueuse sur perche et provoquer de
graves blessures corporelles. En tant qu’utilisateur
d’une élagueuse sur perche, vous devez prendre
plusieurs mesures pour que vos travaux de coupe
ne provoquent pas d’accidents ni de blessures. Les
rebonds sont dus à des utilisations impropres de l’outil
et/ou des procédures d’utilisation incorrectes et/ou
des conditions d’utilisation inadéquates. Il est possible
de les éviter en prenant les précautions appropriées
suivantes:
l) Lorsque vous coupez une branche, faites attention
aux rebonds. Quand la scie entame la branche, celle-ci
m) Utilisez exclusivement les guides et les chaînes de
des guides de rechange inappropriés peuvent provoquer
n) Attendez toujours que l’outil soit entièrement à
l’arrêt et retirez-en la batterie avant de le poser à
terre.
o) Éteignez l’élagueuse sur perche lorsque vous changez
de position de travail.
L’utilisation du produit est restreinte dans certains pays.
Contactez votre municipalité pour vous informer.
APRES L’USAGE
• Coupez toujours l’outil et retirez la batterie
-lorsque vous laissez l’outil sans surveillance
-avant d’enlever des matières coincées
-
-après avoir heurté un corps étranger
-chaque fois que l’outil commence à vibrer de façon
anormale
• Rangez l’outil à l’intérieur dans un endroit sec et fermé à
clé, hors de la portée des enfants
-conservez la batterie séparément de l’outil
BATTERIE
• La batterie fournie est partiellement chargée (pour
garantir la capacité totale de la batterie, chargez-la
intégralement dans le chargeur de batterie avant d’utiliser
l’outil électrique pour la première fois)
• Utilisez uniquement les batteries et les chargeurs
suivants avec l’outil
-Batterie SKIL : BR1*31****
-Chargeur SKIL : CR1*31****
• N’utilisez pas la batterie lorsque celle-ci est
endommagée ; remplacez-la
• Ne démontez pas la batterie
• N’exposez jamais l’outil/la batterie à la pluie
• Plage de températures autorisées (outil/chargeur/
batterie):
-pendant la charge 4...40°C
-pendant le fonctionnement -20...+50°C
-pour le stockage -20...+50°C
EXPLICATION DES SYMBOLES SUR L’OUTIL/LA

20
susceptible de s’allonger considérablement
-
-
qu’elle a refroidi
• p
fonctionnement via la sortie d’huile AC 2
! l’élagueuse sur perche n’est pas fournie remplie
d’huile ; il est nécessaire de remplir le réservoir
d’huile avant utilisation
! n’utilisez jamais l’élagueuse sur perche sans huile
de chaîne ou avec un réservoir presque vide, ceci
-placez l’élagueuse sur perche sur une surface adaptée,
le capuchon du réservoir d’huile AA orienté vers le haut
-dévissez le capuchon et ajoutez de l’huile pour
élagueuse sur perche (non fournie) jusqu’à ce que le
réservoir soit rempli
-évitez que des saletés ou des débris ne pénètrent dans
le réservoir d’huile
-revissez le capuchon du réservoir d’huile et serrez-le
!
faites-le régulièrement durant le fonctionnement
de l’appareil ; remplissez le réservoir d’huile
lorsque le niveau d’huile se trouve en-dessous du
repère Z
-un réservoir d’huile rempli durera env. 15 minutes, en
fonction de l’intensité de l’utilisation et du nombre de
pauses
-n’utilisez jamais d’huile recyclée/usagée
! utilisez uniquement de l’huile pour chaîne
biodégradable
• Marche/arrêt a
• mettez en marche l’outil en appuyant d’abord sur
l’interrupteur de sécurité W puis en appuyant sur la
gâchette X
• arrêtez l’outil en relâchant la gâchette X
• Utilisation de l’outil
-Tenez toujours l’élagueuse sur perche avec les deux
mains : une main sur la poignée arrière Y et l’autre sur
la poignée avant U
! l’élagueuse sur perche doit fonctionner à sa
vitesse maximale avant d’entamer le bois
-
-utilisez l’élagueuse sur perche uniquement lorsque vos
appuis sont stables
-
reste constante lors de la coupe
!
perches soient entièrement serrés avant d’utiliser
l’utilisation pour éviter tout risque de blessure
grave.
!
avant d’utiliser l’outil.
! faites attention à ne pas couper un objet dont la
longueur dépasse la longueur de coupe maximale
de l’élagueuse. L’extrémité du guide-chaîne doit
actuel ua
! si le niveau le plus bas de l’indicateur de batterie
se met à clignoter après appui sur le bouton AB
u
! si 2 niveaux de l’indicateur de batterie se mettent
à clignoter après appui sur le bouton AB uc, la
batterie n’est pas dans la plage de température de
fonctionnement autorisée
• Protection de la batterie
L’outil est soudainement mis hors tension ou la mise sous
tension est empêchée lorsque
-la charge est trop élevée --> retirez la charge et
recommencez
-la température de la batterie est hors de la plage
de températures de fonctionnement autorisée de
-20 à +50°C --> 2 niveaux de l’indicateur de niveau
de charge de la batterie se mettent à clignoter lorsque
vous appuyez sur le bouton AB uc ; attendez que la
batterie soit revenue dans la plage de température de
fonctionnement autorisée
-la batterie est presque déchargée (pour empêcher
qu’elle ne se décharge complètement) --> un
niveau de batterie faible ou un niveau de batterie
clignotant u
la batterie lorsque vous appuyez sur le bouton AB ;
chargez la batterie
! ne continuez pas à appuyer sur l’interrupteur
marche/arrêt après l’arrêt automatique de l’outil ;
cela pourrait endommager la batterie
• Ajuster la tête pivotante i
-Appuyez simultanément sur les deux boutons de
déblocage M de la tête pivotante
-
-Relâchez les boutons de déblocage M de la tête
verrouillée.
-
8 angles.
• o
! retirez la batterie de l’outil
-placez l’élagueuse sur perche sur une surface plane
adaptée
-
desserrez le bouton de blocage C jusqu’à ce qu’elle
maintienne juste le guide en place (ne pas l’enlever)
soulevez un peu le guide et maintenez-le dans cette
position
le sens des aiguilles d’une montre jusqu’à ce que les
bas du guide A
serrez le bouton de blocage C en le tournant dans le
sens des aiguilles d’une montre
relâchez le guide
soulevée d’env. 4 mm à partir du milieu du guide
!
utilisation, après les premières coupes et
régulièrement au cours de l’utilisation (env. toutes
les 10 minutes)
-
Table of contents
Languages:
Other Skil Pole Saw manuals