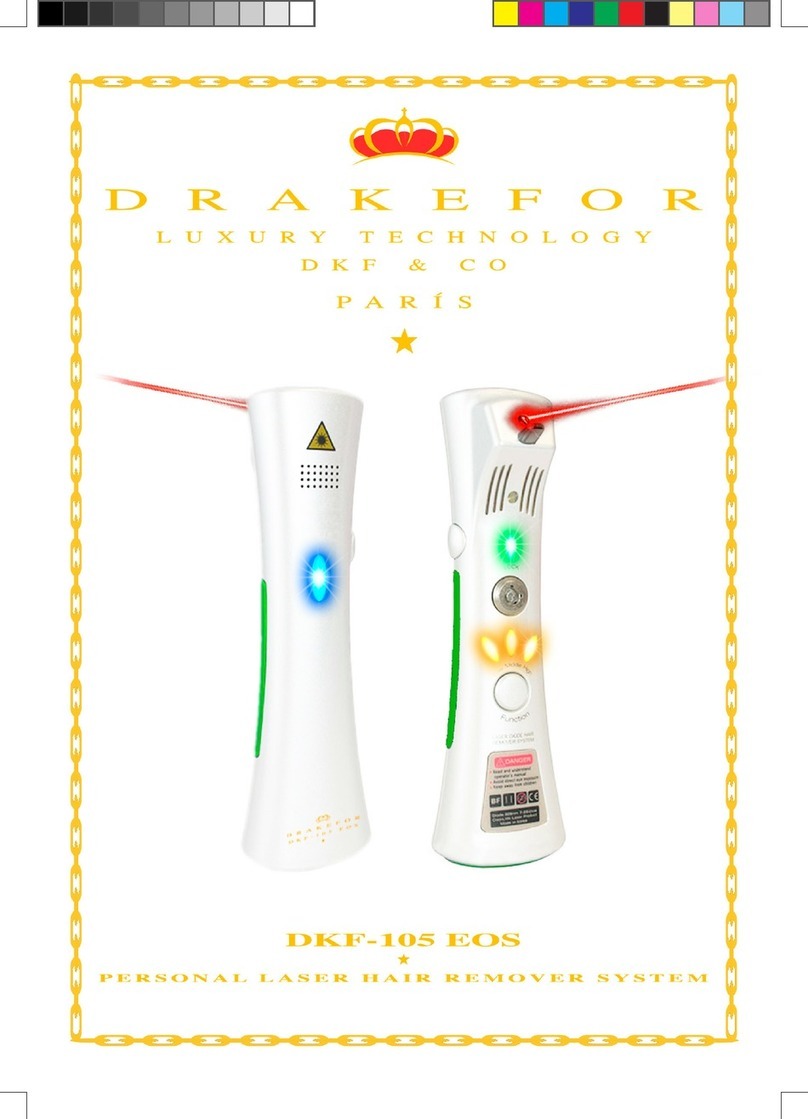
Skinact Spa & Equipment 24664 User manual

Toll Free: 1.800.418.0830 www.skinact.com
www.spaandequipment.com International: 818.834.6640
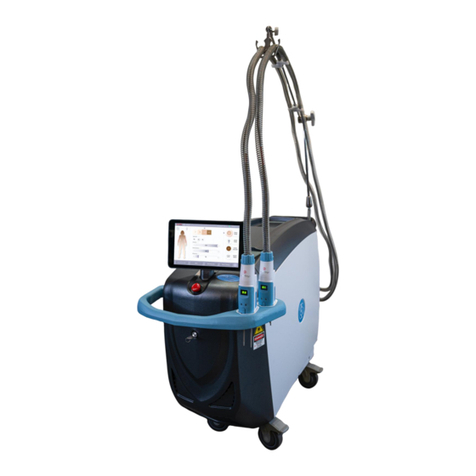
1200W Diode Laser Hair Removal
(SKU24664)

Toll Free: 1.800.418.0830 www.skinact.com
www.spaandequipment.com International: 818.834.6640
Copyright © 2024 Spa and Equipment, All Rights Reserved
NOTICE
No part of this document may be photocopied,
reproduced, or translated into any other language
without prior written consent of Spa and Equipment/
SkinAct.
The information in this document is subject to change
without notice at any time and should not be construed
as a commitment by Spa and Equipment/SkinAct.
Spa and Equipment/SkinAct assumes no responsibility for
any errors that may be in this document, nor does it make
expressed or implied warranty with regard to this material,
including, but not limited to, the implied warranties of
merchantability and fitness for a particular purpose.
Spa and Equipment/SkinAct shall not be liable for
incidental or consequential damages arising out of the
furnishing, performance, or use of this document and the
program material which it describes.
P.2

45” 36.75”
13” 14”
17.5”
15.5”
10”
18.5”
P.3
Measurements

This manual contains important information on the use and operation of this machine.
Please read all the information carefully for optimal performance to prevent any damage or
misuse of the machine. Any change or modication not expressly approved in this manual
could void the warranty for this equipment.
CONTENT
Basic Introduction
• Theory
• Advantage
• Application
• Contraindication
• Specication
Basic Introduction
• Accessory
• Installation step
Operation Instruction
• Before operation
• During operation
• After operation
• Recommended parameter
Other Information
• Precaution
• Warranty
• Troubleshooting
Following these instructions will help you use the equipment eciently and safely and will
prolong the machine life.
P.4
User Manual

Theory
The 1200W 808nm DIODE LASER Hair Removal integrates 808nm system(the golden stan-
dard wavelength for all hair types) and cooling plate into one device.
1200W 808nm DIODE LASER: Its technology is based on the selective absorption of light
and heat. The laser goes through the epidermis layer to reach the root of hair follicles. Laser
can be absorbed and converted into heat to destroy the hair follicle and the surrounding
oxygen tissue; Meanwhile, the particular super cooling system can creat certain anesthetic
eects, to protect the epidermis layer from burn by laser energy, which ensure a safe and
eective treatment.
At the same time, 1200w 808nm diode laser heats hair follicles to 48°C under lower energy
density mode, hair follicle cells will loss activity after continuous gliding of the handle, so as
to get the eect of permanent hair removal, fast, eective, safe and painless.
Step 1: 1200W powerful
808nmdiode laser energy targets
topigment of hair follicle.
Step 2: Hair follicle is damaged
under the 808nm diode laser
energy.
Step 3: The hair follicle is
completely damaged, and the hair
stops growing. Then the hair falls
out.
SKIN COOLING PLATE: Before and after treatment, skin cooling plate could be applied. This
plate can bring you a new hair removal experience, easing the pain, enhancing the eect.
P.5
Basic Introduction

Advantage
• The gold standard for permanent hair removal.
• Fast hair removal of all skin types (I, II, III, IV, V, VI) and hair colors.
• High output power 1200W with sucient and stable energy.
• 12 best-quality laser bars imported from “USA-COHERENT”. Long service life.
• Larger spot size. Higher laser power.
• Equipped with special skin cooling plate.
• Upgraded treatment handle with 5 removable treatment heads to meet the needs of
dierent parts of the body.
• Smart handpiece touch screen, easy to operate.
• Italy imported high-pressure water pump, maintains ecient water circulation and ex-
tend equipment service life.
• Double lters to keep water quality.
• Dual-channel cooling systems: TEC/Semiconductor + Sapphire contact cooling, bring a
• painless and comfortable treatment experience.
P.6

Application
• Permanent hair removal for all hair colors and skin types (I, II, III, IV, V, VI).
• Apply for most body areas, such as lip hair, beard, chest hair, armpit hair, back hair, arm
hair, leg hair, and unwanted hair outside the bikini line, etc..
Contraindication
• Patients with inherited high levels of triglycerides or absorbed at a high level.
• Patients who suer from serious infectious diseases like tuberculosis, heart diseases, fever,
liver disorders, high blood pressure, decompensated diabetes, etc.
• People with markers, allergies or women in pregnancy/vacation are strictly forbidden to
do laser hair removal.
• Some areas is prohibited, such as near the ears, auditory channels, the brain area, the
• central area of breasts, etc..
• It’s not suitable for varicose veins, acne and wounds, dermis or epidermis “infected” or
“traumatized”, etc..
• SKIN TYPE I: This is a very fair complexion. Those with light-colored eyes and blonde or reddish hair col-
or. Very sensitive to the sun and easily be burned whenever exposed to the sun, but never be tanned.
• SKIN TYPE II: This is a light complexion, light-colored eyes, blonde, reddish or light-brown hair color. Very
sensitive to the sun, and easily burned and gradually be tanned.
• SKIN TYPE III: This is a medium complexion. Those with light or dark eye color and usually brown or
darker hair color. Sensitive to the sun, rarely be burned and always be tanned.
• SKIN TYPE IV: This is a dark complexion. Those with dark eyes, usually dark brown to black hair color.
Moderately sensitive to the sun, rarely be burned and always be tanned.
• SKIN TYPE V: This is a darker complexion. Middle Eastern, Indian skin. Dark eye color, usually black hair
color. Minimally sensitiveto the sun and always be tanned.
• SKIN TYPE VI: This is a black complexion. Those with black eyes and hair color. The least sensitive to the
sun and never be burned.
P.7

Specication
P.8

Installation Instruction
Accessories
P.9

Installation Step
1. Cooling Plate Handle Installation
Put one end of the cooling plate handle into the right side slot of the machine, insert anoth-
er end into the preset slot marked A on the front of the machine, and then x it by turning
the rotary button clockwise.
Diode Handle Installation
Put one end of the diode handle into the left side slot of the machine, insert another end
into the preset slot marked B on the front of the machine, and then x it by turning the rota-
ry button clockwise.
2. Chain Safeguard Installation
Insert the chain safeguard directly into the reserved blue port on the back of the machine.
P.10

3. Foot Pedal Installation
Insert one end of the foot pedal into the reserved port(next to the blue port) on the back of
the machine.
4. Foot Pedal Installation
• Insert one end of the power cord into the rst black port on the right on the back of the
machine and another end into the power strip.
• Switch power button from “O” to “I” position.
5. Water Injection
• Plug the plastic connector into the reserved “WATER INLET”port and connect one end of
the tube to the connector.
• Plug another plastic connector into the reserved “SPILT WATER” port and inject some
puried water(Drinkable water) and change water about 1-2 months. Don’t stop injecting
until there is water owing out from “SPILT WATER” port.
• Unplug the water tube and the 2 plastic connectors.
P.11

P.12

Operation Introduction
Before Operation
• It’s necessary that users should read the manual carefully prior to the application of this
machine.
• Consult patients on whether they have any of the contraindications mentioned previously.
• It is suggested that this machine is operated in a separate room.
• Make sure the handle and power line are well connected into the machine.
• Try not to make up on the day of operation. If patients have done, please remove it to keep
the treatment area clean.
• Disinfect the treatment probe and other therapeutic devices.
• Shave the hairs on treatment areas and clean them up.
During Operation
1. Turn on the Machine:
• Turn the red emergency button clockwise and it will bounce up, which indicates that the
machine is unlocked. If the red emergency switch is pressed down, the power will be shut
o immediately. It should be released when you are trying to start the machine.
• Turn the key clockwise from OFF to ON and the machine starts working.
2. Ensure good water ow: Switch on and o the machine for two minutes respectively.
Repeat this cycle for 3 times to normalize the inside water circulation, and then add some
water again to make sure enough water in the machine.
3. After turning on the machine, you will see the initial interface as shown below. There
are 2 working modes available on the main screen: “1200w 808nm Diode Laser Hair
Removal” and “Cooling Plate”. P.13

• Click “ON”and“OFF” button on the initial interface to turn on and o the cooling plate.
• Click the “1200w 808nm Diode Laser Hair Removal” mode to enter into the
responding interface. And the interface will show 5 sets of “Spot Size Optional”,
“20mmx40mm”,“12mmx20mm”, “10mmx10mm”, “8mm”, “5mmx5mm”.
• Click the specific spot size icon , and the corresponding one will be
recognized and illuminated. And click the “Enter” button to enter the “1200w 808nm
Diode Laser Hair Removal” and “Cooling Plate” interface again.
Initial Interface
Spot Size Optional Interface
Initial Interface
P.14

4. Click the “1200w 808nm Diode Laser Hair Removal” button to enter the “HR Preset”
and “HR Professional” interface.
5. Click “HR Preset” button to enter the responding interface.
• Click AREA: Select “Face”, “Arm”, “Armpit”, “Back”, “Abdomen”, “Bikini”, “Leg” icon
• correspondingly.
• Choose SKIN TYPE: Select “I”, “II”, “III”, “IV”, “V”, “VI” correspondingly.
• Choose HAIR COLOR: Select “Black”, “Brown”, “Blond”, “Grey”, “White”
correspondingly.
• Choose HAIR DENSITY”: Select “Thin”, “Middle”, “Thick” correspondingly.
• Choose HAIR THICKNESS: Select “Light”, “Middle”, “Bold” optional.
• Adjust these parameters according to the actual treatment needs of the patient.
• Click the button “ CONFIRM ” to enter into the responding treatment interface.
P.15

• After the previous parameters are confirmed, the HR Preset Interface will show three
sets of default values: “FREQUENCY”, “PULSE WIDTH”, “LASER INTENSITY”.
• Click “FREQUENCY” (1~10Hz adjustable), “PULSE WIDTH” (10ms~200ms adjustable),
“LASER INTENSITY” (5%~100% adjustable) according to the actual treatment needs
of the patient(Please refer to the recommended parameters in the next part), and
the corresponding screen area will change from blue to orange(Orange means it is
selected). “Fluence” is energy density, which is affected by laser power, pulse width
and frequency. Any one changes, it will change automatically.
• Click on the and buttons to decrease and increase values respectively.
• Click on the button to start the operation. The original button turns into
button and
• click it to pause the operation.
6. Click “HR Professional” mode to enter into the responding interface.
P.16

Note: The “FREQUENCY”, “PULSE WIDTH”, “LASER INTENSITY” variable interval values are the same with that of HR
PRESET MODE.
7. Put on protective goggles for operator and patient to protect their eyes from the laser.
8. Apply the cooling gel approximately 3cm from the treatment area.
9. Click on the button on the home screen or the button on the handpiece and step on the foot pedal
or snap the mechanical switch on the handpiece continuously for laser output spectrum operation, easier
and quicker. Make the treatment head contact tightly with the skin and slide the handle at a constant speed
back and forth. At the same time, the treatment head also plays a cooling role.
• There are 3 parameters in the treatment interface needed to be set: “FREQUENCY”, “PULSE WIDTH”,
“LASER INTENSITY”.
• Click “FREQUENCY”, “PULSE WIDTH”, “LASER INTENSITY” according to the actual treatment needs of the
patient(Please refer to the recommended parameters in the next part) and the corresponding area will
change from blue to orange (Orange means it is selected).
• Click on the and buttons to decrease and increase values respectively.
• Click on the button to start the operation. The original button turns into button and click it to
pause the operation.
P.17

10. Secondary cooling with the Cooling Plate for the treatment area.
11. After treatment, clean the handle and cooling plate, etc.. Finally put the handle back into
the machine.
NOTE: Any sudden situations, please press the Emergency Button to stop working.
P.18

After Operation
The laser penetrates into deep skin and then delivery the energy into hair follicle to destroy it
directly, preventing hair from growing back.
Most people see a signicant reduction in hair after eight treatment sessions. Expect to
achieve 75%~85% hair removal.
After a day or two, the skin of the treated area may looks and feels as if sunburned, so you
might need to use cool compresses or a gentle moisturizer. If your face doesn’t feel irritated,
you’re safe to wear makeup the next day.
Take these tips for a smoother recovery:
• Avoid sun exposure. Any time you anticipate being out in the sun, apply sunscreen with a
SPF 30+.
• Avoid removing hair through threading, waxing, and tweezing during laser sessions. If
you’ve decided not to continue with the laser hair removal for the time being, you can go
ahead and use any method to remove hair in the interim.
• For the rst few days, avoid perfumes, deodorant (if you’ve lasered your underarms), and
hot showers or saunas. Take a cool shower instead.
• It’s common to experience some swelling, itching, and redness after laser hair removal
due to irritation of the hair follicles. You may try taking an antihistamine and applying
hydrocortisone a few times a day to relieve redness and itching.
• Wait for 24 hours after laser hair removal in the bikini area for the swelling to go down
before you have sex.
P.19

P.20
Table of contents
