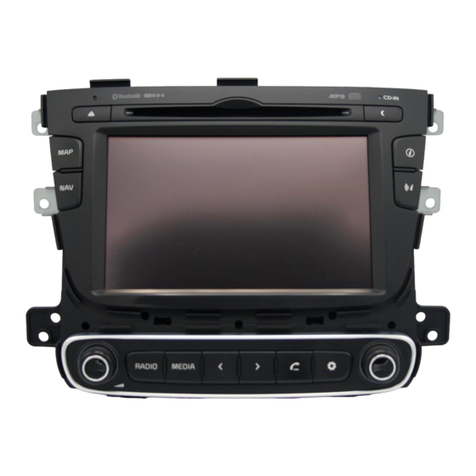
Sky Way GM-7300Navi User manual

GM-7300Navi ENGLISH
Copyright Information
©2007 SkyWay Network S.p.A.. All rights reserved.
This document may not in whole or in part be reproduced, stored in a retrieval
system, transmitteelectronic, mechanical, photocopying, recording, or otherwise,
or reduced to any electronic medium or machine-readable form without prior consent,
in writing, from Car Radio GmbH.
SkyWay is aregistered trademark of SkyWay Network S.p.A.. The logo’s, standards,
software, and/or product names mentioned herein are manufacturer and publisher
trademarks and are used only for the purpose of identification.
Disclaimer
The publishers and author assume no responsibility whatsoever for the uses made of this
material or for decisions based on its use. Further, SkyWay makes no warranties,
either expressed or implied, regarding the contents of this product, its completeness,
accuracy, merchantability, or fitness for any particular purpose. Neither the publisher
nor anyone else who has been involved with the creating, production, or delivery of the
material shall be liable for any reason. SkyWay may make improvements and/or
changes in the products and/or options described in this document at any time and
without notice.
All brand and product names used throughout this document are trademarks or
registered trademarks of their respective companies. The brand and product names are
used in editorial fashion only and for the benefit of such companies. No such use, or the
use of any trade name, is intended to convey endorsement or other affiliation with the
document.
Product specifications are subject to change without prior notice
www.skyway.it
WEEE (Waste Electrical and Electronic Equipment Directive)
If at any time in the future you should need to dispose of this product
please note that: Waste electrical products should not be disposed of with
household waste. Please recycle where facilities exist. Check with your
Local Authority or retailer for recycling advice.
Disposing of the battery / batteries
Please check local regulations for disposal of batteries or call your local city office or your
household waste disposal service or the shop where you purchased the product.
The battery / batteries should never be placed in municipal waste. Use a battery disposal
facility in your neighborhood or community, if available.

GM-7300Navi ENGLISH
Dear Customer,
We thank you for purchasing the GM-7300Navi. We wish you many pleasant hours of
listening to your favorite music and watching your favorite movies. Personal Safety has
been taken in consideration in the design and manufacturing this product; however any
improper use or operation may result in an electrical shock, fire and/or any other hazards.
To prevent these hazards it is strongly recommended to read this manual thoroughly
and adhere to the following precautions and safety instructions:
IMPORTANT PRECAUTIONS
SAFETY PRECAUTIONS
- Please read all of these instructions regarding your unit and retain them for future
reference and keep this manual handy as a reference for operating procedures and
safety information.
- Pay close attention to all warnings in this manual and follow the instructions
carefully.
- Do not allow other persons to use this system until they have read and understood
the operating instructions
- Do not install the display where it may (i) obstruct the driver’s vision, (ii) impair the
performance of any of the vehicle’s operating systems or safety features, including
air bags, hazard lamp buttons or (iii) impair the driver’s ability to safely operate the
vehicle.
- Do not operate this display if doing so in any way will divert your attention from the
safe operation of your vehicle. Always observe safe driving rules and follow all
existing traffic regulations. If you experience difficulty in operating the unit or
reading the display, park your vehicle in a safe location and make necessary
adjustments.
- To prevent an electrical shock, do not attempt to install or service this unit or display
by yourself. Installation or servicing of the unit or display by persons without
training and experience in electronic equipment and automotive accessories may
be dangerous and could expose you to the risk of electric shock or other hazards.
- Do not expose to any rain and moisture or spill any liquid onto or in the unit and do
not operate the product when your hands are wet, in a humid environment, near
places of water to prevent any electrical shock or shortage.
- Never operate the product if it is moved from a cold environment to a warm one and
vice versa. Moisture may form inside of the unit and as a result it may not operate
properly. In this case, turn on the power, take out the disc and wait at least 60-90
minutes for the moisture to evaporate.
- This device is a CLASS 1 Laser product and uses a visible laser beam which could
cause hazardous radiation exposure, be sure to operate the player correctly as
instructed. To prevent hazardous exposure to the laser beam, do not place your eyes
close to the openings to look into the inside of this player.
- Never put any foreign objects in the disc loader of the player and never put any
foreign objects into any other openings of the unit, to prevent any damage or
electrical shock.
- In any case of malfunctioning, only have the product serviced by an approved and
qualified service centre. Do not open the housing yourself.
- Do not clean with alcohol; clean the unit with a soft and dry cloth and only when the
unit is disconnected from the power source.
- For safe driving, keep the volume low or moderate in order to concentrate on traffic
and road conditions. Never set the volume so high that you cannot hear outside
traffic and emergency vehicles
- Never use headphones while driving.

GM-7300Navi ENGLISH
- Warning! To promote safety, certain functions are disabled unless the parking
brake is on. The Unit is designed to detect parked status and must be connected to
the power supply side of the parking brake switch. Improper connection or use of
his connection may violate applicable law and may result in serious injury or
damage. To avoid the risk of damage and injury and the potential violation of
applicable laws, this unit is not for use with a video screen that is visible to the
driver.
- To avoid the risk of accident and the potential violation of applicable laws, the front
Video image feature should never be used while the vehicle is being driven. Also,
other video displays should not be in a location where it is a visible distraction to
the driver. In some countries or states the viewing of images on a display inside a
vehicle even by persons other than the driver may be illegal. Where such
regulations apply, they must be obeyed and this unit’s DVD features should not be
used.
- Please remember to wear your seat belt at all times while operating your vehicle. If
you are ever in an accident, your injuries can be considerably more severe if your
seat belt is not properly buckled.
- The supplier waves any and all liability when these warnings are not followed.
OPERATION PRECAUTIONS
- Only connect to a 12Vdc battery and negative grounding.
- Avoid parking the car or placing the product in direct sunlight, in areas with high
levels of dust, high temperatures (over 40°C) or high humidity (over 90%). In case of
high temperatures, cool down the car interior by means of ventilation or air-
conditioning.
- Do not replace the fuse on the power cable without professional guidance. Using an
improper fuse may cause damage to the unit or even cause fire.
- Do not turn on or off the product in short intervals. When turning the unit off, wait for
at least 10 seconds prior to turning the unit on again.
- Do not operate the player with scratched, bended or broken discs and when a disc is
not loaded properly, do not force it into the player.
- The IR remote control operation may be hindered when the monitor is in its open
position. In this case, use the remote control at the similar level as the IR remote
receiver on the front of the unit.
NOTE
- All On Screen Displays (OSD) and Pictures will be based on the English version.
- Design and Specifications may vary in the manual from the actual product in use.

GM-7300Navi ENGLISH
TABLE OF CONTENTS
PREPARATION BEFORE USING THE GM-7300Navi.......................................................... 3
Unpacking and checking the contents ............................................................................... 3
CONTROL REFERENCE GUIDE.......................................................................................... 4
The GM-7300Navi control button description .................................................................... 4
The UNIT IR Remote Control ............................................................................................ 5
WIREDIAGRAM OF THE GM-7300Navi................................................................................ 6
INSTALLATION IN DASHBOARD......................................................................................... 8
BASIC OPERATIONS ........................................................................................................... 9
Power button (STANDBY Button on Remote Control) ....................................................... 9
Button [4-5-6] ~ [8-9-10] Radio Station Preset Button, Disc Play-mode Control ................. 9
Mute Button....................................................................................................................... 9
Mode Button .....................................................................................................................10
Eject button ......................................................................................................................10
Volume knob / Bass / Treble / Balance / Fader.................................................................10
Remote Sensor ................................................................................................................11
OPEN & CLOSE Button....................................................................................................11
PRESET SCAN ................................................................................................................11
PTY ..................................................................................................................................11
Band.................................................................................................................................11
5 WAY JOYSTICK Controller (Up / Down / Left / Right / Enter) ........................................11
AF / REG Button (Alternate Frequency / Regional)...........................................................12
TP / LOUD Button.............................................................................................................12
Mini LCD Display..............................................................................................................12
Disc Loading Slot..............................................................................................................12
TILT Button.......................................................................................................................13
IN / OUT Button................................................................................................................13
REL Button.......................................................................................................................13
DIS Button........................................................................................................................13
OSD Button ......................................................................................................................14
SOURCE MENU...........................................................................................................14
DUAL ZONE MENU......................................................................................................14
SETUP MENU ..............................................................................................................14
AUDIO MENU...............................................................................................................15
VIDEO MENU...............................................................................................................15
RDS MENU ..................................................................................................................15
SYSTEM MENU ...........................................................................................................16
MENU Button ...................................................................................................................16
Reverse Camera Display..................................................................................................17
RESET Button ..................................................................................................................17
SD/MMC card slot ............................................................................................................18
Invisible Touch screen commands....................................................................................18
SETUP Button ..................................................................................................................18
GENERAL SYSTEM SETTINGS..........................................................................................19
General Setup Page .........................................................................................................19
TV Display ....................................................................................................................19
Angle Mark ...................................................................................................................20
OSD Language.............................................................................................................20
Captions .......................................................................................................................20
Last memory.................................................................................................................20
Audio Setup page.............................................................................................................20
ANALOG AUDIO SETUP - DOWN MIX output mode: ..................................................20
DIGITAL AUDIO SETUP - SPDIF Setup.......................................................................20

GM-7300Navi ENGLISH
SPDIF Output ...............................................................................................................21
LPCM Output................................................................................................................21
Dolby Digital Setup .......................................................................................................21
Dual Mono (R+L) ..........................................................................................................21
Dynamic .......................................................................................................................21
Equalizer ......................................................................................................................21
3D Processing ..............................................................................................................21
HDCD ...........................................................................................................................21
Video Setup Page.............................................................................................................22
Color Setting Setup.......................................................................................................22
Preference Page ..............................................................................................................23
TV Type........................................................................................................................23
PBC..............................................................................................................................23
AUDIO ..........................................................................................................................23
SUBTITLE ....................................................................................................................23
DISC MENU .................................................................................................................23
PARENTAL ..................................................................................................................24
DEFAULT .....................................................................................................................24
Password Setup Page ......................................................................................................24
PASSWORD MODE .....................................................................................................24
PASSWORD.................................................................................................................24
EXIT .................................................................................................................................25
ADDITIONAL REMOTE CONTROL OPERATIONS .............................................................26
UNIT REMOTE.................................................................................................................26
NUMBER BUTTONS ....................................................................................................26
AUDIO button ...............................................................................................................26
SUBTITLE button .........................................................................................................26
A-B REPEAT / ZOOM button........................................................................................26
PROG button................................................................................................................26
RPT Button (Repeat) ....................................................................................................27
Remote For the Dual Zone rear seat monitor....................................................................28
MODE button................................................................................................................28
MUTE button ................................................................................................................28
PLAY / PAUSE button ..................................................................................................28
AUDIO, SUB(title), RPT (Repeat), MENU, P(reset) SCAN and number keys................28
DUAL ZONE ICONS.........................................................................................................28
MP3 - WMA - PLAYBACK ....................................................................................................29
Play mode ........................................................................................................................29
Other functions .................................................................................................................29
PICTURE (JPG) OPERATIONS ...........................................................................................30
View picture......................................................................................................................30
Rotate picture...................................................................................................................30
Mirror picture ....................................................................................................................30
Previous and Next selection .............................................................................................30
Zoom IN/OUT ...................................................................................................................30
TILE Image Selection .......................................................................................................30
Slideshow.........................................................................................................................30
Other functions .................................................................................................................30
RDS OPERATION AND DESCRIPTION ..............................................................................31
TECHNICAL SPECIFICATIONS ..........................................................................................33
GM-7300Navi...................................................................................................................33
ADDITIONAL IMPORTANT PRECAUTION NOTES.............................................................34

Page 3 of 35 pages
GM-7300Navi ENGLISH
PREPARATION BEFORE USING THE GM-7300Navi
Unpacking and checking the contents
Please check if the following items and accessories are included in the received package:
1x Mounting Bracket
1x Assemble Bar
1x Screw B15x16
4x Bolt M5
1x Nut M5
1x Flat washer
1x Spring washer
2x Unit ejection bars
1x UNIT IR-Remote
Control and 1x Dual
Zone IR-Remote
control. Both with one
CR2025 3Volt cell
battery.
GM-7300Navi (open and closed)
This User Manual.
1x ISO cable. (may vary from the picture above)
1x front panel protection sleeve

Page 4 of 35 pages
GM-7300Navi ENGLISH
CONTROL REFERENCE GUIDE
The GM-7300Navi control button description
1. Volume/Push Select /Second Menu
2. TP / Loudness
3. Mode
4. Preset 1 / Play-Pause
5. Preset 2 / Step Forward
6. Preset 3 / Step Backward
7. Power Button
8. Preset 4 / Stop / Repeat
9. Preset 5 / Fast Backward / Intro
10. Preset 6 / Fast Forward / Random
11. Mute
12. Eject
13. IR Remote Sensor Open
14. Joystick
Up/Down/Seek Up/Down/Enter
15. Band (AM/FM)
16. Open / Close LCD
17. Preset Scan
18. Disc Loading Slot
19. Information LCD Display
20. PTY
21. AF / REG
22. Release button
23. Touch screen TFT LCD
24. Band (AM/FM)
25. Dis (Display)
26. OSD
27. Menu
28. Setup
29. In/Out
30. Tilt Level Adjustment
31. Contacts
32. Reset
33. SD/MMC card slot

GM-7300Navi ENGLISH
The UNIT IR Remote Control
Note:
•The distance may vary according to the brightness of ambient light.
•If the remote is not used for an extended period of time, remove the battery to prevent
possible damage from battery leakage and corrosion.
•Do not place any objects between the remote control unit and the sensor on the unit.
•Do not drop the remote control onto the floor; it will damage it beyond repair.
•Do not use the remote control unit, while simultaneously operating the remote control
unit of any other equipment; they may interfere resulting in improper operation.
•The battery normally last for about one year although depending how often the
remote control is used. If the remote control unit isn’t working even when it is
operated near the unit, replace the battery with a new battery of the same make and
use only a lithium cell battery type: CR2025 (3V).
•Dispose empty batteries in accordance with your local governmental regulations.
•Do not short-circuit, disassemble, heat or dispose of into fire or flames the battery.
•Keep the battery out of reach of children, should the battery be swallowed,
immediately consult a doctor.
Point the remote control no more than
about 7 meters (approx. 21 feet) from
the remote control sensor on the front
of the unit and keep within a ± 30°
angle.
To install the battery, open the battery
compartment, insert the CR2025 3V cell battery
and observe that the correct “+” and “-“
polarities on the battery are matching the marks
inside the compartment.

Page 6 of 35 pages
GM-7300Navi ENGLISH
WIREDIAGRAM OF THE GM-7300Navi
The GM-7300Navi comes complete with an ISO connector and installation brackets and is easily
fitted into your car. Here under you will find the diagram of the ISO connection, which is used
in the majority of the cars. If your vehicle is not fitted with an ISO connection, you can
optionally use the separate wires and connect the wires according the description of the ISO
connector.
Note: Never connect cables to the system while it is connected to the battery power. Whenever the unit is
disconnected from the battery, the preset memory will be erased and the unit will go back to its factory defaults.
1) Antenna Input
2) Not in use
3) AUX Input L+R (brown)
4) Rear Output L+R (Gray)
5) Camera Input (Black)
6) Rear Video Output (Black)
7) Video Input (Black)
8) Cable connector
9) Optical 5.1CH output
10) Driver Safety wire
(Brown), MUST be connected
to the car’s parking break
switch-wire. The supplier
waves any and all liability
when this wire is NOT
connected as directed. Driver
can only watch a movie when
the parking brake is ON.
11) Subwoofer Output (Black)
12) Rear Line Output (Gray)
13) Front Line Output (Brown)
14) ISO connector
Note on ISO-A Connector: Some
car manufacturers, like VW, OPEL,
VAUXHALL, swap connection point
A7 and A4. The pin layout displayed
here is the most commonly used.
Please refer to your car manual for
correct connection of the ISO
connector in your car. If memory is
lost after the ignition key is switched
off, swapthe Red and Yellow cable.
ISO CONNECTOR
RCA
CONNECTORS
Left = White
Right = Red
Others = Yellow
ISO-A
A2 ORANGE To reverse back
light to switch automatically
to Rear Camera.
A4 YELLOW (B+).Always
12Vdc, direct to battery.
A5 BLUE To system control
terminal of an external
amplifier or Automatic
Antenna (max. 300mA /
12Vdc).
A7 RED ACC (+). Connect to
the 12Vdc controlled by the
ignition key / switch.
A8 GND. ( - / Ground) Connect
to clean, exposed and
unpainted metal parts of the
car chassis to make a good
ground connection.
ISO-B
FRONT SPEAKER
B3 Right + (Gray)
B4 Right – (Gray/Black)
B5 Left + (White)
B6 Left – (White/Black)
REAR SPEAKER
B1 Right + (Violet)
B2 Right – (Violet/Black)
B7 Left + (Green)
B8 Left – (Green/Black)

Page 7 of 35 pages
GM-7300Navi ENGLISH
Note:
- Only use groundless loudspeakers.
- Use only loudspeakers of minimal 40Watt, using fewer watts may result in damaging your
loudspeakers at higher volumes.
- Use 4~8 (Ohm impedance) loudspeakers only; using higher or lesser impedance may
damage the unit.
- Do not use 3-cable loudspeakers and do not connect the loudspeakers minus to the car body
(GND). The GM-7300Navi is using a BTL circuit and each loudspeaker must be connected
with insulated cables according the diagram.
- Loudspeaker cables and/or optional external power amplifiers must always be about 30cm
away from the antenna and/or antenna extension parts.
Connect the speakers according the following diagram, incorrect connections will damage
the unit or your loudspeakers
Correct connection
Left front - Right front | Left rear - Right rear
Incorrect connections

Page 8 of 35 pages
GM-7300Navi ENGLISH
INSTALLATION IN DASHBOARD
If your car is fitted with a one (1x) DIN size opening for a car audio system, you can install
the GM-7300Navi according these steps.
Note: Unit should be installed horizontally in an angle less than 30°.
1) Insert the mounting bracket into the 1X DIN opening of your dashboard
2) Bend the mounting tabs outwards with a screwdriver, to tighten and fix the mounting
bracket in its place
3) Connect the M5 Bolt to the rear of the unit
4) Check electrical connections as described earlier
(either an ISO connection or separate wiring)
5) Insert the ISO connector into the unit
6) Push the unit into the mounting bracket until you
hear a click
7) Move the assemble bar (metal strip with holes) over the M5 bolt
and use the M5 nut to tighten the assemble bar.
8) Use the screw Bt5x16 to fix the other side of the assemble bar to the car body
9) Place the front rim over the unit to finish the installation.
Note: Step 7 and 8 are only possible when you can reach the back of the unit inside the dashboard.
1X DIN SLOT
To remove the unit, remove the front rim and
place the two extraction keys into the left and
right side of the unit until they click in place and
pull the unit gently out of the dashboard.

Page 9 of 35 pages
GM-7300Navi ENGLISH
BASIC OPERATIONS
Power button (STANDBY Button on Remote Control)
Press the power button to switch the unit ON or OFF.
When the TILT function is set to AUTO and the monitor is opened, power-off will
automatically close the monitor. When the TILT function is set to MANUAL, power–off will not
close the monitor automatically and the monitor will remain opened.
* RESET: In case the unit malfunctions or needs to be set to factory default setting, press
and hold the POWER button for about 10 seconds, then the unit will reset to the
factory defaults.
Button [4-5-6] ~ [8-9-10] Radio Station Preset Button, Disc Play-mode Control
MODE Button
No:
[4]
Button
No:
[5]
Button
No:
[6]
Button
No:
[8]
Button
No:
[9]
Button
No:
[10]
Radio
Press the button for tuning to the pre-memorized channel (preset channel)
Press and hold pressed the button to store the current frequency channel into
memory
CD
Play,
Pause
Move to
previous
chapter or
track
Move to
next
chapter or
track
Fast backward for
Audio disc.
(Speed min 2x to
32x)
Press long to select
repeat mode
ÖRepeat One
ÖRepeat all
ÖRepeart off
Fast forward for
Audio disc (Speed
min 2x to 32x)
Press long for
intro track mode
Stop playing.
Press long to
select Random
play mode
(Shuffle)
MP3
and
SD/MMC
Play,
Pause
Move to
previous
chapter or
track
Move to
next
chapter or
track
Fast backward
(Speed min 2x to
32x)
Press long to
Select repeat mode:
folder =>
repeat one =>
repeat folder
Fast forward
(Speed min 2x to
32x)
Press long for
intro track mode
Stop playing.
Press long to
change from
folder to
Random play
mode (Shuffle)
DVD
Play,
Pause
Move to
previous
chapter or
track
Move to
next
chapter or
track
Fast backward for
DVD Audio disc.
Slow backward
for video title.
(Speed min 2x to
32x)
Press long for
intro track mode
Fast forward for
DVD Audio
disc. Slow
forward for
video title.
(Speed min 2x
to 32x)
Press long for
random play
mode
Mute Button
Press the Mute button to mute the volume. Please note that the volume will be muted on all
audio output connectors. The MUTE icon will be seen on the information display. To resume
playing, press mute again.

Page 10 of 35 pages
GM-7300Navi ENGLISH
Mode Button
Press the Mode button to toggle between the available sources in the following sequence:
TUNER →DVD →SD →REAR CAM →AUX →TUNER
Eject button
Press this button and the unit will eject the disc. If the disc is not removed for about 10
seconds after eject is pressed, the disc is reinserted automatically and starts to play again.
Gently load a disc inside the unit and do not apply any force to the disc, it will automatically
be loaded.
Volume knob / Bass / Treble / Balance / Fader
Increase or decrease the volume by turning the knob clockwise or counterclockwise.
When in Tuner mode (radio), push the knob to select one of the Audio functions in the
following sequence:
VOLUME →BASS →TREBLE →BALANCE →FADER →EXIT
When in DVD or AUX mode, push the knob to select one of the Audio functions in the
following sequence:
VOLUME →BASS →TREBLE →BALANCE →FADER →BRIGHT →CONTRAST →
COLOR →SHARP →EXIT
When BASS or TREBLE is selected, rotate the volume knob clockwise to boost Bass or
Treble, rotate the volume knob counterclockwise to decrease Bass or Treble.
When BALANCE is selected, rotate the volume knob clockwise to boost the volume to the
right (R), rotate the volume knob counterclockwise to boost the volume to the left (L).
When FADER is selected, rotate the volume knob clockwise to boost the volume to the front
(F), rotate the volume knob counterclockwise to boost the volume to the rear (R).
While in TUNER mode, press the Volume knob for over 2 seconds to enter the second
setup menu (LOC →LOUD →STEREO/MONO →TIME →TAVOL →EON →DUAL ZONE
→EXIT)
While in DVD or AUX mode press, the Volume knob for over 2 seconds to enter the
second setup menu (LOUD →STEREO/MONO →TIME →TAVOL →EON →DUAL
ZONE →EXIT)
When LOC is selected, rotate the volume knob to select ON or OFF. ON to select the short
distance or local radio station mode (LOC) or select OFF for long distance radio stations.
When LOUD is selected, rotate the volume knob to select Loudness ON or OFF.
When STEREO/MONO is selected, rotate the volume knob to select Stereo or Mono.
When TIME (clock) is selected, rotate the volume knob clockwise to increase the time, rotate
the volume knob counterclockwise to decrease the time.
When TAVOL is selected, rotate the volume knob clockwise to boost the TA volume, rotate
the volume knob counterclockwise to decrease the TA volume. (from 0 – 45) Default is 16.
When EON is selected (ON is default), rotate the volume knob clockwise to select EON
OFF, rotate the volume knob counterclockwise to select EON ON.
When Dual Zone is selected, rotate the volume knob to select DVD/SD Card/AUX or OFF.
Note: After 5 seconds of non operation the display will return to the default of the selected mode.

Page 11 of 35 pages
GM-7300Navi ENGLISH
Remote Sensor
IR Remote control signal receiving window. Please do not block this window, else you cannot
control the unit with the remote control. IR remote control operation may be hindered by the
monitor when the monitor is open. In this case, use the remote control at the similar level of
the remote control receiver window.
OPEN & CLOSE Button
OPENING THE MONITOR
When the power is off, press the OPEN button and the unit will turn on and open the monitor
automatically. If the movement of the monitor is hindered by any obstacle, it returns to its
original position automatically.
CLOSING THE MONITOR
If there is any obstacle hindering the closing movement of the monitor, the monitor stops the
closing movement sequence. Press the button again to continue the closing sequence after
removing any obstacle. The monitor should be in the center position for the closing,
sequence otherwise it will not close and a warning message will be displayed on the screen.
An option can be selected for monitor automatic-closing or manual-closing by pressing:
OSD →SETUP →SYSTEM →TILT and to select with the joystick button or by touching the
icon, either AUTO or MANUAL.
If AUTO is selected and the monitor is opened, the monitor will automatically close when the
power is switched off. If MANUAL is selected and the monitor is opened, the monitor will not
close when the power is switched off.
PRESET SCAN
In TUNER mode long press this button to search stations automatically. The frequency
search will stop when a station is found or when the button is pressed again. Press the
button shortly, then a few seconds of each stored Preset channels (1 – 6) will be heard. The
unit will scan the preset channels until the button is pressed again.
PTY
Press the PTY button in the TUNER mode to enable or disable Program Type. Default status
is off. When PTY is enabled (on) and the selected program type matches, the PTY
information is displayed. If the PTY information is different or not available the PTY icon
blinks. Press any button to stop the PTY search. (see more under RDS operation)
Band
In TUNER mode press the Band button to select your frequency band of choice in the
following sequence:
FM 1 →FM 2 →FM 3 →MW1 →MW2 →FM 1
When a new frequency band is selected, the last chosen frequency / station of that frequency
band will be heard.
5 WAY JOYSTICK Controller (Up / Down / Left / Right / Enter)
While playing a DVD Movie, use the JOYSTICK key to choose the DVD Title Menu and
press the JOYSTICK to ENTER the selected menu.
While playing a CD or SD/MMC, use the JOYSTICK UP / DOWN key to select a track, use
the JOYSTICK LEFT / RIGHT to show the next frame (each frame shows 6 tracks). Press
the JOYSTICK to ENTER and play the selected track.

Page 12 of 35 pages
GM-7300Navi ENGLISH
While in TUNER/RADIO mode, long press the JOYSTICK to activate MANUAL or AUTO
seek of radio frequencies. Use the JOYSTICK LEFT / RIGHT to seek radio frequencies
increasing or decreasing in frequency. Long press the JOYSTICK to select STEREO or
MONO.
While in the SETUP MENU mode, use the JOYSTICK UP / DOWN / LEFT / RIGHT to
choose a menu item and press the JOYSTICK to ENTER a selection.
AF / REG Button (Alternate Frequency / Regional)
Press the Alternative Frequency / Regional AF/REG button in the TUNER mode to enable or
disable AF. Default status is On. When AF is enabled (on) and available with the current
radio station, the AF icon will be visible on the screen, if it is not available the AF icon will
blink. Press the Alternative Frequency / Regional AF/REG button in the TUNER mode for
longer than 2 seconds to enable or disable REGIONAL. Default status is off. When REG is
enabled (on) the REG icon will be on and the unit will accept regional variants of the tuned
station / frequency. When REG is disabled the unit will ignore regional variants. (see more
under RDS operation)
TP / LOUD Button
Press the TP / LOUD button in the TUNER mode to enable or disable Travel Announcement
/ Travel Program. The default status is off. When there is a TA or TP signal available from
the radio station that is tuned-in, the TP icon will be shown on the screen. When TA/TP is
enabled (on), but no travel announcement is transmitted, the TA icon is off. When a travel
announcement is transmitted the TA icon is on. In case TA/TP is enabled (on) but no RDS
signal is present, the TP icon will blink. (see more under RDS operation). Press this button
for longer than 3 seconds to switch Loudness ON or OFF.
Mini LCD Display
When the monitor of the GM-7300NAvi is closed, you will see basic Radio, CD or DVD information
on this display as well if AF, EON, TA, TP, MUTE, PTY, RPT (repeat), RDM (Random), INT
(intro scan), ST (Stereo), LOC (local) or LOUD (Loudness) is ON or OFF. CH and a
number will be ON to show which Preset station is in use. When the feature is in use, it will
be shown in the display, else it will be dim.
Disc Loading Slot
•Load one disc with the label side facing upwards and make sure you do not touch the
data side with your fingers.
•Press the EJECT button in case there is already a disc inside the unit.
•Gently slide the disc into the Slot, the unit will automatically load the disc.
•Once the disc is loaded, the unit will automatically start reading the disk and it will
take a few seconds to download the disc initial data, thereafter the unit will start
playing the disc.
3

Page 13 of 35 pages
GM-7300Navi ENGLISH
Note:
● Finger prints and dust on the disc surface can affect the sound quality. Clean the discs
regularly with a soft cotton cloth from the disc center to the outside of the disc but do not
clean in circular motions.
● Do not use any kind of solvent, such as diluting agent, gasoline, liquid detergent, gasoline
liquid detergent antistatic aerosol used for vinyl, this may cause serious disc damage.
● Keep discs away from direct sunlight or any heat source.
● Do not stick any paper or stickers on a disc.
● Only use 12cm and round discs, do not insert any other type or size of discs.
● Do not apply force to the disc to load it into the unit.
TILT Button
With this button the monitor tilt angle can be adjusted. The tilt adjustment angle can be
adjusted from level 3 to level 5. To setup the tilt level, press MENU and select SYSTEM →
TILT RANGE and use the JOYSTICK UP / DOWN / LEFT / RIGHT to choose a level (1, 2, 3,
4 or AUTO [level 5]) and press the JOYSTICK to ENTER the selection.
IN / OUT Button
With this button the monitor can be adjusted more towards the dashboard (IN) or away from
the dashboard (OUT). The adjustment is a 3 step-levels sequential cycle: NORMAL →
IN/OUT 1 →IN/OUT 2 →IN/OUT 3 →NORMAL
To setup a fixed IN/OUT level, press MENU and select SYSTEM →IN/OUT FIX and use the
JOYSTICK UP / DOWN / LEFT / RIGHT to choose a level (1,2 or 3) and press the
JOYSTICK to ENTER the selection.
REL Button
Press this button to release the front button panel to access the SD/MMC card slot or to
store it away for safety, when the GM-7300Navi is not in use. The unit will power off automatically
when the front button panel is removed for more than 20 seconds.
DIS Button
When playing a disc or a SD/MMC card, press this button to show the duration and the name
of a song.

Page 14 of 35 pages
GM-7300Navi ENGLISH
OSD Button
With this button the general settings of the unit can be configured. Press the OSD button and
browse through the On Screen Icons to configure the unit or to select an item.
SOURCE MENU
MENU DESCRIPTION
RADIO Change mode to Radio
DVD Change mode to DVD or CD
SD CARD When a SD/MMC card is inserted and
present, change mode to SD card
TV Mode Not available (grayed out)
CAMERA Change mode to Rear Camera (When a
car is put in reverse transmission, the TFT
display will change to Camera MODE
automatically).
GPS Not available (grayed out)
AUX IN Change mode to AUX Input
DUAL Choose DUAL to enter DUAL ZONE
MENU.
SETUP Choose SETUP to enter SETUP MENU.
DUAL ZONE MENU
MENU DESCRIPTION
DVD Set Dual Zone mode to DVD (or CD)
SD/MMC When a SD/MMC card is inserted and
present, Set Dual Zone mode to SD card
TV Not available (grayed out)
AUX IN Select Dual Zone mode to AUX Input
OFF Set Dual Zone mode OFF.
SETUP MENU
MENU DESCRIPTION
AUDIO Choose AUDIO to enter the AUDIO
MENU.
VIDEO Choose VIDEO to enter the VIDEO MENU.
RDS Choose RDS to enter the RDS MENU.
TV Not available (grayed out)
SYSTEM Choose SYSTEM to enter the SYSTEM
MENU.
SCREEN Choose SCREEN to enter the touch
screen calibration menu

Page 15 of 35 pages
GM-7300Navi ENGLISH
AUDIO MENU
MENU DESCRIPTION
BASS Adjustable in 15 levels. Default level is 0.
TREBLE Adjustable in 15 levels. Default level is 0.
BALANCE Adjustable in 8 levels for each left and
right channel. Default is left equal to right.
FADER Adjustable in 8 levels for each front and
rear channel. Default is front equal to rear.
S.WOOFER Sub-woofer ON / OFF
S.VOLUME Maximum Start Volume. Use this menu to
setup the starting-volume level. The
volume level ranges from 0 to 45 and the
Default level is 17. When the volume level
is below 17 and the unit is switched off, it
will memorize the last volume setting when
it is switched on again. When the volume
level is higher than 17, the unit will default
set the volume at 17 the next time it is
switched on.
VIDEO MENU
MENU DESCRIPTION
BRIGHT Adjust level of screen brightness.
Adjustable in 40 levels. Default level is 20.
CONTRAST Adjust level of screen contrast. Adjustable
in 40 levels. Default level is 20
COLOR Adjust level of screen color. Adjustable in
40 levels. Default level is 20.
SHARP Adjust level of screen sharpness.
Adjustable in 6 levels. Default level is 3.
SCREEN (Only in DVD MODE). Choose the
preferred TFT display mode: 16:9 or 4:3
RDS MENU
MENU DESCRIPTION
AF AF ON or OFF
REGION REGION ON or OFF
TP TP ON or OFF
EON EON ON or OFF
PTY PTY ON or OFF
TA VOL Choose TA Volume level from 0 to 45.
Default level is 16.

Page 16 of 35 pages
GM-7300Navi ENGLISH
SYSTEM MENU
MENU DESCRIPTION
BEEP Beep Sound ON / OFF (When set to ON, a
beep is heard after every Button pressed)
TILT Select AUTO or MANUAL monitor close.
When the TILT function is set to AUTO and
the monitor is opened, power-off will
automatically close the monitor. When the
TILT function is set to MANUAL, power–off
will not close the monitor automatically and
the monitor will remain opened.
TILT
RANGE
Monitor Angle adjustment
AUTO: 1-5 levels can be adjusted by
pressing the TILT button sequentially
Level 1: Tilt level 1 = 3 steps
Level 2: Tilt level 2 = 4 steps
Level 3: Tilt level 3 = 5 steps
Level 4: Tilt level 4 = 6 steps
Level 5: Tilt level 5 = 7 steps
IN/OUT FIX
Adjust the monitor inwards or outwards.
Level None: Monitor Can be moved from
position 1 to position 3 by pressing the
IN/OUT button sequentially.
Level 1: Fixed position 1;
Level 2: Fixed position 2;
Level 3: Fixed position 3.
TIME SET Adjust and Set the clock time
GPS DUAL
SOUND
Not available (grayed out)
MENU Button
With this button the information of the unit will be displayed, depending in which mode the
unit is used.
RADIO DISPLAY
(1) Displays current Frequency Band and current memorized station and RDS information on
the bottom. (touch with your finger or with a stylus pen on the icons to select them)
(2) Contents of current Frequency Band
- Current Tuned-in memory Position is highlighted.

Page 17 of 35 pages
GM-7300Navi ENGLISH
(3) STATUS display
- MEM: Displays the current memory. If there is no stored memory, MEM 0 is displayed
- Play status display
a. AUTO: auto seek mode
b. MANUAL: manual seek mode
c. P.SCAN: preset scanning mode
d. A.SAVE: auto save mode.
- VOL: Volume level display
- STEREO / MONO display (KMO)
- LOC: only displays if the local radio station mode is ON
(4) RDS display (see description on RDS later in this manual)
- AF ON or OFF - TA ON or OFF
- TP ON or OFF - EON ON or OFF
- PTY ON or OFF
SYSTEM DISPLAY
In DVD and AUX modes, no picture is shown on screen and a warning message is
displayed, when the parking break is not ON. WARNING ENJOY SOUND ONLY WHILE
DRIVING
(2) Monitor Error Display
The Monitor can be swiveled manually 30° degrees to the left or the right for passenger
viewing.
If the monitor is turned into the left or right position, the monitor cannot close automatically
when the CLOSE button is pressed and a warning message is displayed: ERROR MONITOR
NOT CENTERED
Center the monitor manually and press CLOSE again to continue the closing sequence.
Reverse Camera Display
If the on the ISO cable pin A2 the connection is made to the Reverse lamp and the car is put
into its reverse gear, the unit will automatically switch to the Rear Camera (if installed in your
car, the reverse camera is an optional item). In case the display is closed and the car is put
in its reverse gear, then the display will open automatically and the image of the Rear
Camera will be shown. When the car is put into another gear, the unit will resume in its
previous playing mode.
RESET Button
If a error was caused by a faulty setting or when the unit does not respond to any key
press of IR commands, press the RESET button with a small pin to return to the
factory default settings.
Table of contents
