2
SUMMARY
1. INTRODUCTION ....................................... 02
1.1 Safety ..................................................................... 02
2. COMPONENTS AND TECHNICAL FEATURES...
.................................................................... 02
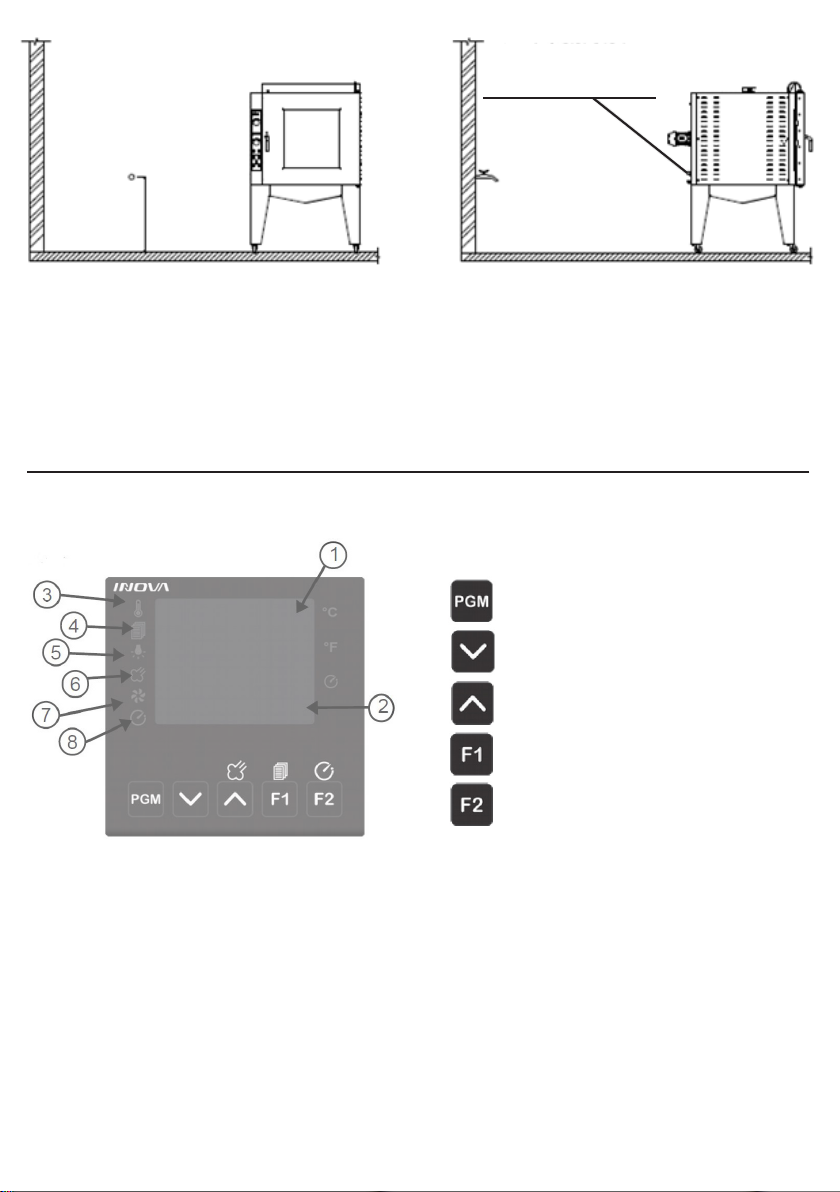
3. INSTALLATION AND PRE-OPERATION........ 03
3.1 Placing.................................................................... 03
3.2 Electrical Installaon............................................... 03
3.3 Water Points Connecon ........................................ 03
4. OPERATION PROCEDURES........................ 02
4.1 Oven Control Panel................................................. 02
4.2 Oven operaon procedures for products with steam...
..................................................................................... 02
4.3 Oven operaon procedures for products without
steam ........................................................................... 02
5. CLEANING................................................ 02
6. MAINTENANCE ........................................ 02
7. PROBLEM RESOLUTION............................ 02
8. ELECTRICAL DIAGRAMS............................ 02
1. INTRODUCTION
This product was developed to be used in commercial
kitchens. It is used, for example, in restaurants, cafeterias,
hospitals, bakeries, etc.
This appliance usage is not recommended when:
- The producon process should be done in a connuous
way in industrial scale;
- The workplace is in an atmosphere of corrosive, explosive,
with dust or gas.
1.1 Safety
The instrucons below must be followed to avoid accidents,
non-compliance can cause serious injuries:
1.1.1 Never use this Equipment with wet clothes or wet
feet or on a wet or humid surface, do not immerse it under
water, do not place under any kind of water ow, hose, tap or
similar, do not use water jets of any kind on the equipment.
1.1.2 If the Equipment physically falls down, in any way,
suers any kind of damage or has stopped working for any
reason, it is necessary to call specialized technical assistance.
1.1.3 The use of unauthorized accessories that are not
recommended by the manufacturer can lead to injuries.
1.1.4 Keep hands or any kind of devices, tools, accessories
away from the moving parts of the Equipment while it
is turning on and processing recipes to avoid potenal
damages to the Equipment and injuries to the end user.
1.1.5 Never operate the Equipment while wearing clothes
with long sleeves, especially on the wrists.
1.1.6 Make sure that the voltage of Equipment and of
the local electrical supply match. Also make sure that the
equipment is properly grounded.
This Equipment cannot be operated by persons
(children included) with reduced mental, sensorial or
physical capacies. Unexperienced persons or persons
without proper training of knowledge cannot operate this
equipment. Only apt and trained persons or persons under
the supervision of an apt and trained supervisor must
operate the equipment.
We recommend children to be watched to not allow
them to play with the machine.
Always disconnect the Equipment from the power
supply when: It is not being used, before realizing any
cleaning or maintenance, before you place or take out any
accessories, before you realize any kind of procedure or
service with the unit.
Do not use the Equipment if there is any damage to
the cord or plug. Make sure that the cord does not stay on
the edge of a working table, staon or furniture and make
sure it is not in contact with hot surfaces. If the Cord is
not in good condions of use, to avoid accidents it must
be replaced by the supplier, an authorized technician or
someone qualied for the service.
If any emergency arises disconnect the Equipment from
the power supply, unplug it from the electrical socket.
Never spray water directly on to the equipment.
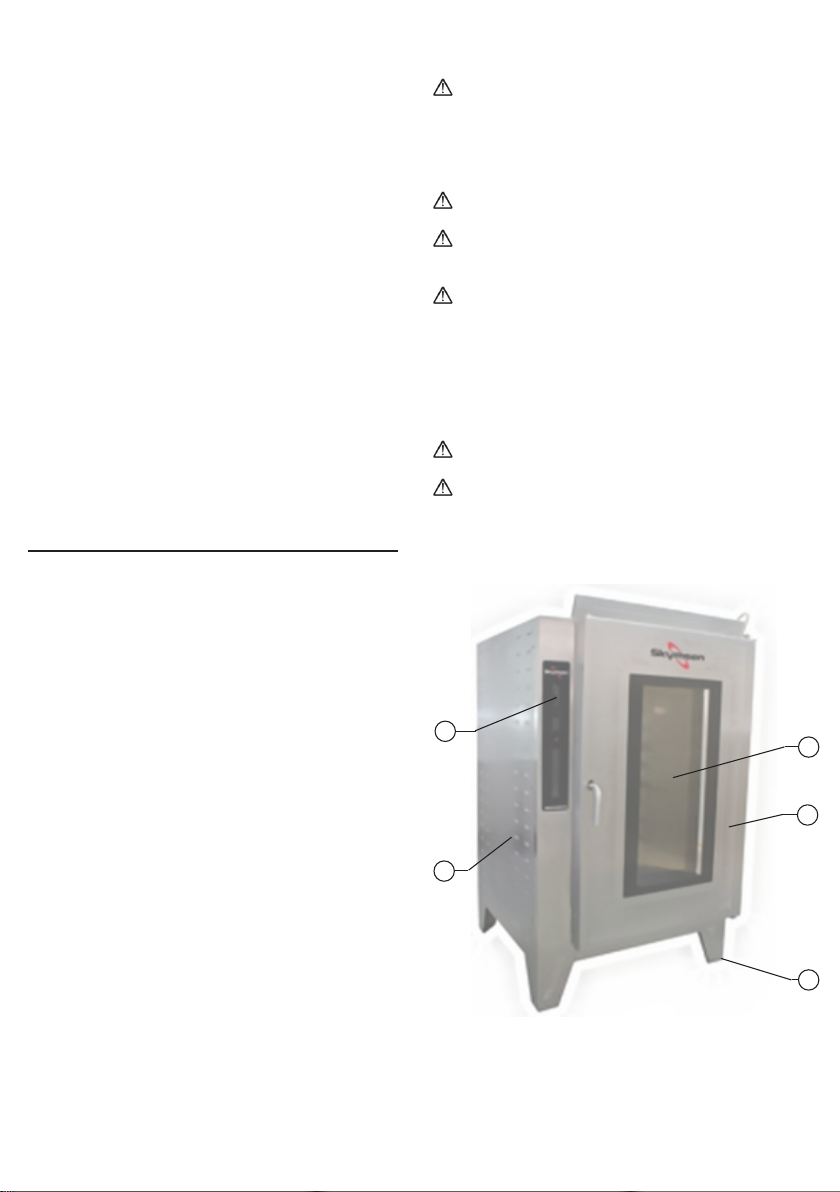
2. COMPONENTS AND TECHNICAL FEATURES
01
02
04
03
Picture 01
01 – Glass
02 – Door
03 – Rollers
04 – Motor Housing
05 – Control Panel
05