Keep this document handy for easy reference.
For detailed information on the features of your oven, see your ‘User guide’.
Before using your oven, make sure you read the full ‘User guide’, with special attention to the ‘Safety and warnings’ section.
For contact information or if you require service, assistance or replacement parts, see the end of this document or your ‘Service &
warranty’ booklet.
AeroTechTM oven
US CA
QUICK START GUIDE
continued >
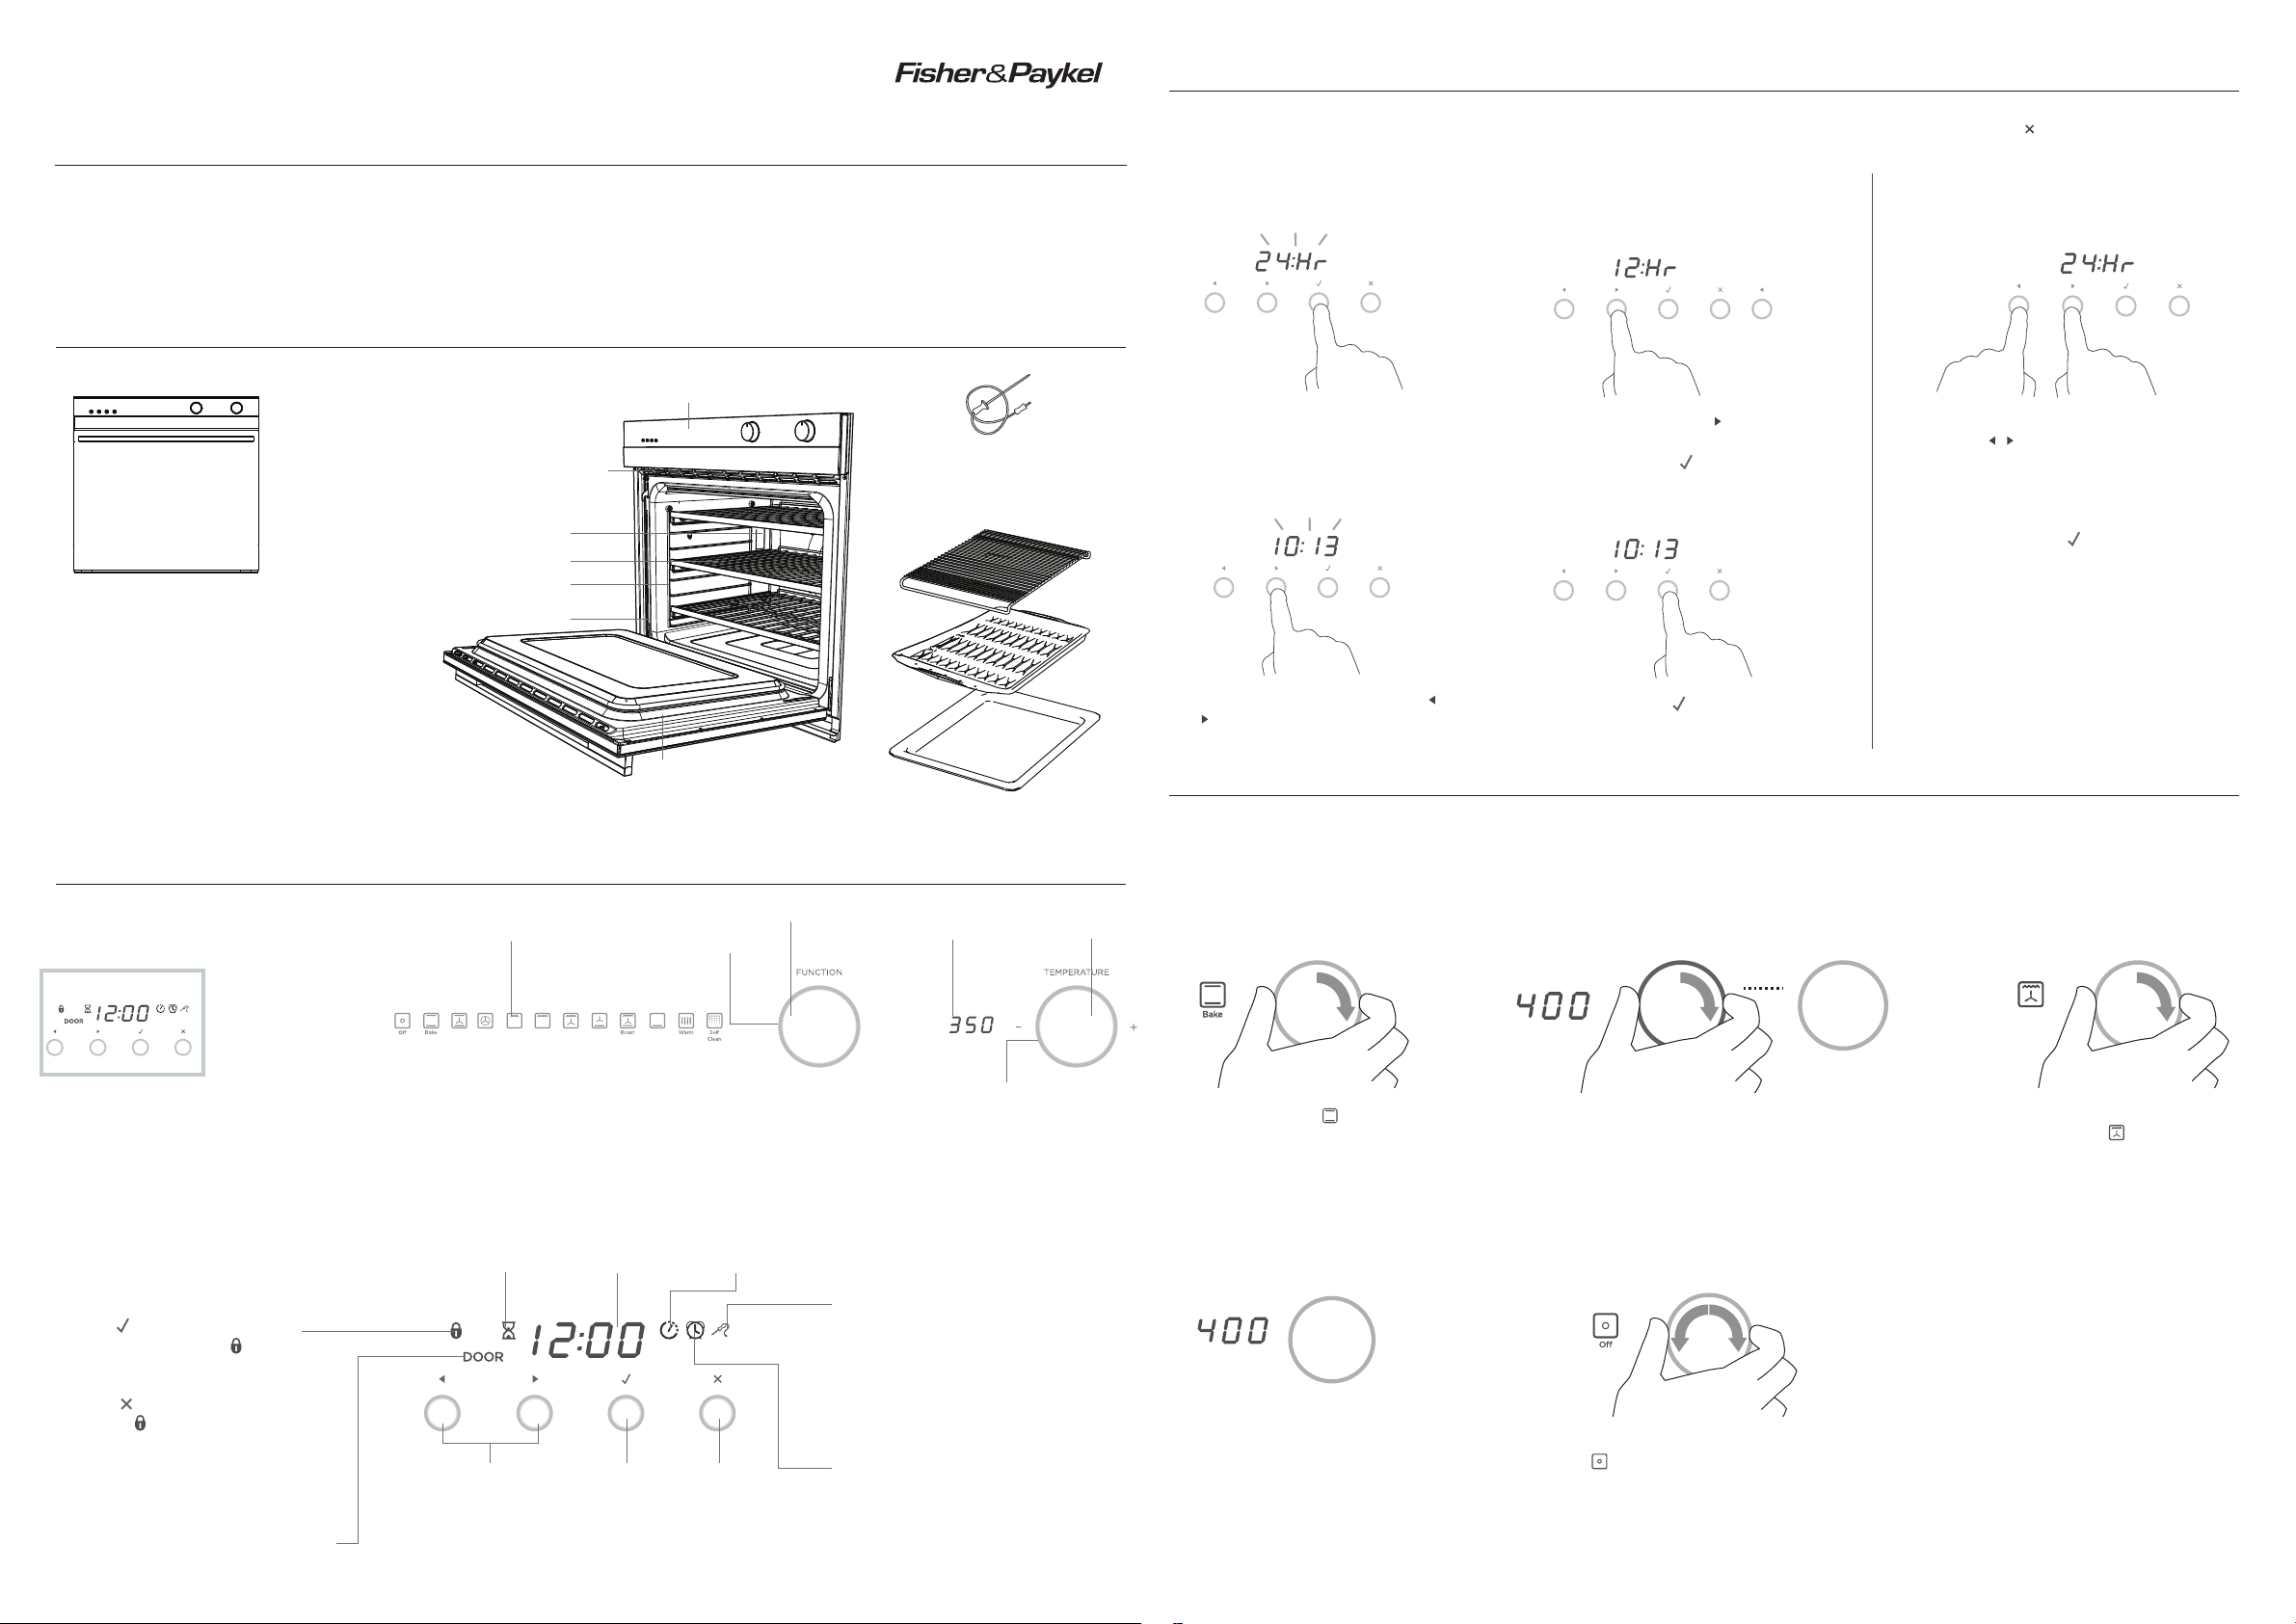
YOUR MODEL
THE CONTROL PANEL
SETTING THE CLOCK
CONDITION THE OVEN
OB30SDEPX
OB30STEPX
1Control panel
2Oven vent louvres
3Oven light
4Telescopic sliding shelf (x3)
5Side rack
6Oven door and handle
7Oven seal
Accessories:
8Meat probe
9Rack
!0 Grid
!1 Pan
8
9
!0
!1
2
3
4
5
7
6
1
Aero
Bake
True
Aero
Broil Classic
Bake
Aero
Broil
Aero
Pastry
Maxi
Broil
Locking the control panel
To lock, press and hold the
select
button until the
control lock indicator
comes
on.
To unlock, press and hold the
cancel
button until the
indicator
flashes and then
goes out.
Function indicators
(see ‘Oven functions’)
OB30SDEPX3 illustrated
Function dial Temperature
indicator
Temperature
dial
Function halo
Temperature
halo
Control lock indicator (see
‘Locking the control panel’)
if lit:
Control panel is locked
Timer indicator
(see ‘Using the
timer’)
if lit:
Timer is
counting down
Close door indicator
if lit:
Door is open when oven is on
(some functions only). See
‘Troubleshooting’ in your User guide.
Cooking time indicator
(see ‘Automatic cooking’ in User guide)
if lit:
Automatic cooking time is set
Meat probe indicator
(see ‘Using the meat probe’ in User
guide)
if lit:
Meat probe is in use (display
will alternate between probe set
temperature and internal temperature
of the meat)
Stop time indicator
(see ‘Automatic cooking’ in User
guide)
if lit:
Automatic stop time is set
Display
Scroll Select Cancel
You set the clock within the user preference menu. To learn more about the user preference menu, refer to your User guide.
Note: If you do not wish to set the time initially when the oven is first switched on at the wall, press the cancel
button to exit the clock
setting. If you want to set the clock later, follow the steps under ‘To change the time’.
To change the time
(within the user preference menu)
When the oven is first switched on at the wall
1Press and hold the left and right
scroll
buttons together
for 3 seconds to enter the user
preference menu.
The display will either show 12 Hr
or 24 Hr
2Press the select
button to
confirm. The display will flash.
3Follow steps 2-5 left to set the time.
At step 2a, you also now have the
ability to scroll between 24 Hr,
12 Hr and OFF (turns the display off).
Refer to the User guide to learn
more about this feature.
3Press the left and right scroll
buttons to set the time.
1The display will flash 24 Hr.
4Press the select
button to
confirm.
2aPress the right scroll
button to
scroll between 24 Hrand 12 Hr
2bPress the select
button to
confirm.
There will be a distinctive smell and a small amount of smoke during the conditioning of the oven.
This is normal, but make sure the kitchen is well ventilated during the conditioning.
Once cooled, wipe out the oven with a damp cloth and mild detergent, and dry thoroughly.
It is important to condition your oven before using it for cooking and baking. Conditioning will burn off any manufacturing residues
and ensure that you get the best results right from the start.
1Make sure you have removed any packaging and any cable ties used to secure the shelving during transit.
2Make sure you have set the clock.
3Make sure all the shelves are fitted.
NOITCNUF NOITCNUF NOITCNUF
ERUTAREPMET ERUTAREPMET
Aero
Grill
NOITCNUF NOITCNUF NOITCNUF
ERUTAREPMET ERUTAREPMET
Aero
Grill
NOITCNUF NOITCNUF NOITCNUF
ERUTAREPMET ERUTAREPMET
Aero
Broil
7Set the temperature to 400oF
for 5 minutes.
The halo will remain white.
8When you have finished, turn the function dial
to OFF
NOITCNUF NOITCNUF NOITCNUF
ERUTAREPMET ERUTAREPMET
Aero
Grill
. The halos will go out.
NOITCNUF NOITCNUF NOITCNUF
ERUTAREPMET ERUTAREPMET
Aero
Grill
NOITCNUF NOITCNUF NOITCNUF
ERUTAREPMET ERUTAREPMET
Aero
Broil
NOITCNUF NOITCNUF NOITCNUF
ERUTAREPMET ERUTAREPMET
Aero
Broil
4Select the Bake
NOITCNUF NOITCNUF NOITCNUF
ERUTAREPMET ERUTAREPMET
Aero
Grill
function.
The halo will glow white.
Each function has a preset
temperature and so the
oven will start heating at the
Bake preset temperature of
360oF.
5Set the temperature to 400oF for 30 minutes.
While the oven is heating up, the
temperature halo will glow red and the
temperature indicator will alternately show
the actual and set temperatures.
When the oven has reached set temperature,
a tone will sound and the halo will turn white.
6After 30 minutes is up, select
the Aero Broil
NOITCNUF NOITCNUF NOITCNUF
ERUTAREPMET ERUTAREPMET
Aero
Grill
function.


