Smart Technologies Smart Board User manual

QuickReference
GettingStartedwith SMARTAudio
Thisquickreferenceguide providesan overviewofSMARTAudio.Ifyou will be using SMARTAudiowithaSMART
Board™interactivewhiteboardorotherSMARThardwareproducts,makesurethatyou haveNotebook™collaborative
learning software10 and the SMARTBoarddriversloaded ontothecomputer.Formoreinformation aboutthe software,
visit http://www2.smarttech.com/st/en-US/Support.
Usingtheteachermicrophone
1Turnon the receiverbyswitching thepowerswitchto ON
2Turnon the teachermicrophone byturning the powerswitchto ON
3Set the teachermicrophone’schannelswitchto CH A
4Placethe microphone’slanyardaroundyourneck
5Slide themicrophoneupordownthelanyarduntilthe microphone issixinchesfromyourmouth,orremovethe
lanyardandattachthe microphone toyourclothing using thebeltclip
6Beginspeaking,withoutblockingthe infrared transmitteron the microphone,and adjustthe CHANNELA volume
dialonthe receiveruntilyou reachthedesired volumelevel
Usingthestudenthandheldmicrophone
1Ifyou haven’t already,turnon the receiverbyswitching the powerswitchto ON
2Twistthe lowersectionof the microphonecounter-clockwisetoopenthe batterycover
3Set the microphone’schannelswitchto CH B
4Twistthe lowersectionof the microphoneclockwisetoclosethe batterycover
5Turnon the microphonebyturning the powerswitchto ON
6Beginspeaking withthe microphone underyourchinand withinthreeinchesfromyourmouth
7Adjustthe CHANNELB volumedialonthe receiveruntilyou reachthedesiredvolumelevel
TIP:Foroptimalfunctionality,don’tblocktheinfraredtransmittersonthe studentand teachermicrophones.
ChannelAvolumecontrol Channel Bvolumecontrol
Frontviewofthereceiver
Receiverpowerswitch
Lanyard
Channel
switch
Power
switch
Backviewof theteachermicrophone
Channelswitch
Powerswitch
©2008 SMARTTechnologiesULC. Allrightsreserved.Notebook,smarttechand the SMARTlogo aretrademarksorregistered trademarksofSMARTTechnologies
ULCintheU.Sand/orothercountries.Allotherthird-partyproductsand companynamesmaybe trademarksoftheirrespectiveowners. Printed inCanada 06/2008.
Using SMARTRecorderwithSMARTAudio
You can useSMARTAudiowithSMARTRecordertorecordlessondirections, classroomdiscussionsand student
assessments.Beforeyou begin,ensurethatthe receiverand computeraresetup properly. A simplewired setup is
requiredforrecording.Formoreinformation aboutthesetup,visit
http://www2.smarttech.com/st/en-US/Support.
1Press the SMARTBoardiconintheWindowsNotificationArea and select Recorder... fromthe list
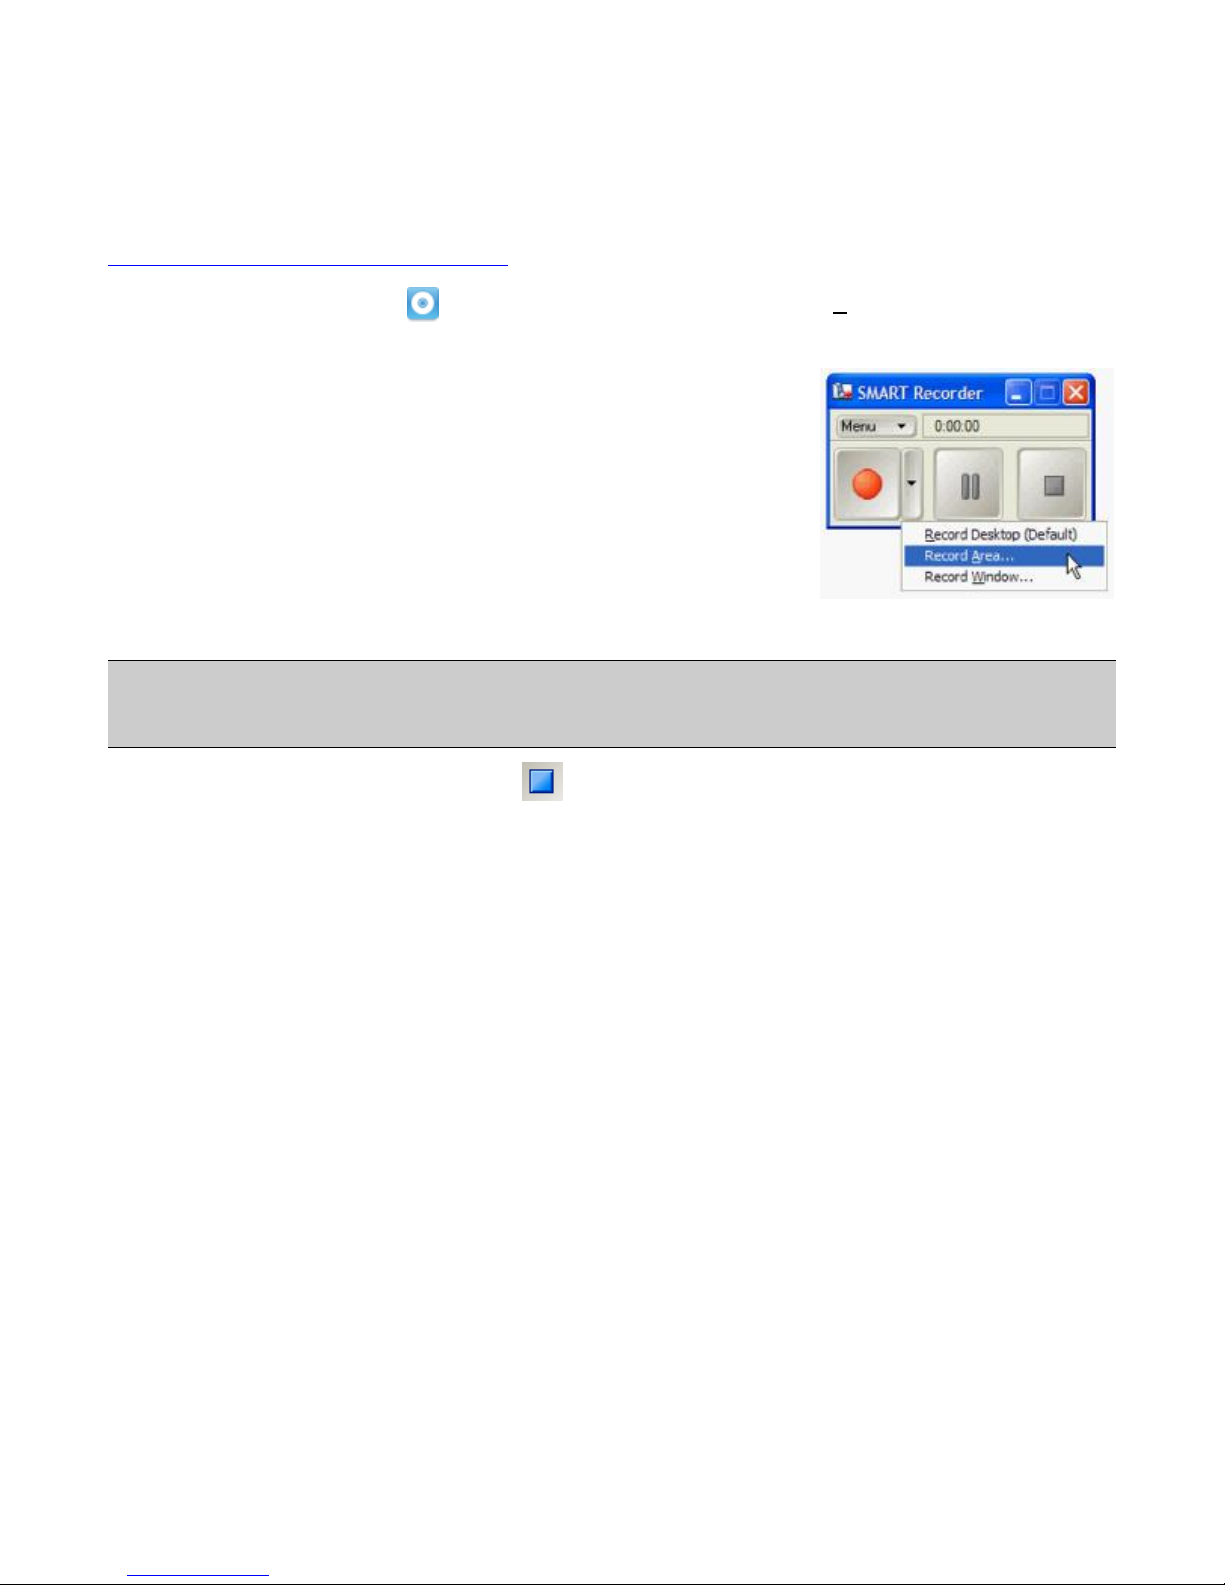
2Select the appropriaterecordingoption fromthe Recordbutton drop-down
list:
Record Desktop(Default)-Recordaudiofromthemicrophonesalong
witheveryaction youperformonyourdesktop.
Record Area -Recordaudiofromthe microphonesalongwithanyactions
takenwithinanarea ofthe screenthatyouselectpriortobeginning the
recording.
Record Window- Recordaudiofromthe microphonesalong withany
actionstaken withinaspecificwindowthatyou selectpriortobeginning
therecording.
3When youfinishyourrecording,click Stop .The SaveAs dialog boxappears.
4Browsetothe location whereyouwanttosaveyourrecording
5Typeanameforthe fileinthe Filename box
6Click Save.The RecordingComplete dialog boxwill appear.
7Click OK
NOTE:If the batteryindicatorlighton eitherthe teacherorstudenthandheldmicrophone isred,thebatteriesinthe
microphone shouldbe chargedorreplaced.
TIP: Ifyou onlywant torecordaudio, select RecordArea.Whenyou selectanarea of the screentorecord,click
and drag thecursortoselectasmall rectangleonyourscreen and release.Thisminimizesthe sizeof the file
becauseyou arenotrecording unnecessaryvisualcomponents.
SMARTRecorderrecordingoptions
Other manuals for Smart Board
13
Table of contents
Other Smart Technologies Amplifier manuals


Popular Amplifier manuals by other brands


Constellation audio
Constellation audio Virgo II owner's manual

Cary Audio Design
Cary Audio Design SLI-80 owner's manual

Precision MicroDynamics
Precision MicroDynamics Polaris installation manual

Yamaha
Yamaha DSP-A2 Service manual

Extron electronics
Extron electronics VersaTools MTP DA4 Specification sheet

NAD
NAD CI 8-150 DSP Quick setup guide


