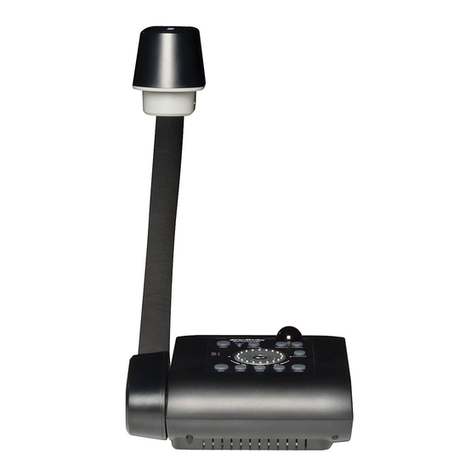
SMART 550 User manual

smarttech.com/kb/171225
FCC warning
This equipment has been tested and found to comply with the limits for a Class A digital device, pursuant to Part 15 of the FCC Rules. These limits are designed to
provide reasonable protection against harmful interference when the equipment is operated in a commercial environment. This equipment generates, uses, and
can radiate radio frequency energy and, if not installed and used in accordance with the manufacturer’s instructions, may cause harmful interference to radio
communications. Operation of this equipment in a residential area is likely to cause harmful interference in which case the user will be required to correct the
interference at his own expense.
Trademark notice
SMARTBoard, smarttech, the SMART logo and all SMART taglines are trademarks or registered trademarks of SMARTTechnologiesULC in the U.S. and/or other
countries. All third-party product and company names may be trademarks of their respective owners.
Copyright notice
© 2017SMARTTechnologiesULC. All rights reserved. No part of this publication may be reproduced, transmitted, transcribed, stored in a retrieval system or
translated into any language in any form by any means without the prior written consent of SMARTTechnologiesULC. Information in this manual is subject to change
without notice and does not represent a commitment on the part of SMART.
This product and/or use thereof is covered by one or more of the following U.S. patents:
www.smarttech.com/patents
11/2017

i smarttech.com/kb/171225
Important information
WARNING
lFailure to follow the instructions shipped with your SMART product could result in personal
injury and damage to the product.
lEnsure that any cables extending across the floor to your SMART product are properly
bundled and marked to avoid a trip hazard.
lTo reduce the risk of fire or electric shock, do not expose the SMART product to rain,
moisture, or fire.
lDo not push foreign objects into the openings on your SMART product.
lDo not open or disassemble the SMART product. You risk electrical shock from the high
voltage inside the casing. Opening the casing also voids your warranty.
lThe camera arm on your SMART product has joint that present a pinch hazard when your
move the camera arm. Keep clear of the pinch points.
lDo not stare into the light or shine the light directly into someone’s eyes. Turn off the light
when displaying or capturing images of people.
lDo not overload power outlets or extension cords as this can result in a fire or electric shock.
lTurn off and disconnect your SMART product before a thunderstorm. During a thunderstorm,
do not touch your SMART product or the plug, because there is a risk of electrical shock.
lOnly use your SMART product with the type or power source that is written on the power
supply and do not modify the plug.
lDo not short circuit or allow contract with conductive objects to the battery terminals.
lDo not disassemble batteries.
CAUTION
lPlace your SMART product on a solid surface to prevent it from falling.
lIf you have a security cable attached to your SMART product, do not carry or swing your
SMART product by the security cable.

IMPORTANT INFORMATION
ii smarttech.com/kb/171225
lDo not connect non-shielded interface cables to your SMART product and do no leave
cables connected to unused connectors, because this can cause interference level that
exceed FCC regulations.
lAvoid setting up and using the SMART product in an area with excessive levels of dust,
humidity and smoke.
lDo not block or cover the opening or slots on your SMART product. These slots provide
ventilation, ensure reliable operation and protect your SMART product from overheating.
lDo not carry your SMART product by the camera arm. Carry it by the base of the unit.
lDo not aim the camera lens at the sun.
lIf your SMART product requires replacement parts, make sure the service technician uses
replacement parts specified by SMART Technologies or parts with the same characteristics
as the original.
lEnsure that batteries are stored in a cool and dry place.
lDo not discard batteries in water, fire, or domestic waste. Dispose batteries at collection
points.
lRemove the batteries in the remote control if you are not in for an extended period of time.
Battery corrosion or leakages can damage the remote control.
lDo not mix new and used batteries.
lDo not mix different types of batteries: alkaline, nickel-cadmium (rechargeable), or carbon-
zine.
Federal Communication Commission
Interference Statement
This device complies with Part 15 of the FCC Rules. Operation is subject to the following two
conditions:
1. This device may not cause harmful interference, and
2. this device must accept any interference received, including interference that may cause
undesired operation.

IMPORTANT INFORMATION
iii smarttech.com/kb/171225
This equipment has been tested and found to comply with the limits for a Class B digital device,
pursuant to Part 15 of the FCC Rules. These limits are designed to provide reasonable protection
against harmful interference in a residential installation. This equipment generates, uses and can
radiate radio frequency energy and, if not installed and used in accordance with the instructions,
may cause harmful interference to radio communications.
However, there is no guarantee that interference will not occur in a particular installation. If this
equipment does cause harmful interference to radio or television reception, which can be
determined by turning the equipment off and on, the user is encouraged to try to correct the
interference by one of the following measures:
lReorient or relocate the receiving antenna.
lIncrease the separation between the equipment and receiver.
lConnect the equipment into an outlet on a circuit different from that to which the receiver is
connected.
lConsult the dealer or an experience radio/TV technician for help.
CAUTION
Any changes or modifications not expressly approved by the party responsible for compliance
could void the user’s authority to operate this equipment.
This transmitter must not be co-located or operating in conjunction with any other antenna or
transmitter.
For operation within 5.15 ~ 5.25GHz / 5.47 ~5.725GHz frequency range, it is restricted to indoor
environment. The band from 5600-5650MHz will be disabled by the software during the
manufacturing and cannot be changed by the end user. This device meets all the other
requirement specified in Part 15E, Section 15.407 of the FCC Rules.
FCC Radiation Exposure Statement:
This product complies with the FCC portable RF exposure limit set forth for an uncontrolled
environment and are safe for intended operation as described in this manual. Reduce RF exposure
further by keeping the product as far as possible from your body and by setting the device to a
lower output power (if available).
Innovation, Science, and Economic Development
Canada Statement
This device complies with RSS-210 of the Industry Canada Rules. Operating is subject to the
following two conditions:

IMPORTANT INFORMATION
iv smarttech.com/kb/171225
1. This device may not cause harmful interference, and
2. this device must accept any interference received, including interference that may cause
undesired operation.
Ce dispositif est conforme à la norme CNR-210 d’Industrie Canada applicable aux appareils radio
exempts de licence. Son fonctionnement est sujet aux deux conditions suivantes:
1. le dispositif ne doit pas produire de brouillage préjudiciable, et
2. ce dispositif doit accepter tout brouillage reçu, y compris un brouillage susceptible de
provoquer un fonctionnement indésirable.
CAUTION
i. the device for operation in the band 5150-5250 MHz is only for indoor use to reduce the
potential for harmful interference to co-channel mobile satellite systems;
ii. the maximum antenna gain permitted for devices in the bands 5250-5350 MHz and 5470-
5725 MHz shall comply with the e.i.r.p. limit; and
iii. the maximum antenna gain permitted for devices in the band 5725-5825 MHz shall comply
with the e.i.r.p. limits speci"ed for point-to-point and non point-to-point operation as
appropriate.
iv. Users should also be advised that high-power radars are allocated as primary users (i.e.
priority users) of the bands 5250-5350 MHz and 5650-5850 MHz and that these radars
could cause interference and/or damage to LE-LAN devices.
Avertissement:
Le guide d’utilisation des dispositifs pour réseaux locaux doit inclure des instructions précises sur
les restrictions susmentionnées, notamment :
i. les dispositifs fonctionnant dans la bande 5 150-5 250 MHz sont réservés uniquement pour
une utilisation à l’intérieur a"n de réduire les risques de brouillage préjudiciable aux systèmes
de satellites mobiles utilisant les mêmes canaux;
ii. le gain maximal d’antenne permis pour les dispositifs utilisant les bandes 5 250-5 350 MHz et
5 470-5 725 MHz doit se conformer à la limite de p.i.r.e.;
iii. le gain maximal d’antenne permis (pour les dispositifs utilisant la bande 5 725-5 825 MHz) doit
se conformer à la limite de p.i.r.e. spéci"ée pour l’exploitation point à point et non point à
point, selon le cas.

IMPORTANT INFORMATION
v smarttech.com/kb/171225
iv. De plus, les utilisateurs devraient aussi être avisés que les utilisateurs de radars de haute
puissance sont désignés utilisateurs principaux (c.-à-d., qu’ils ont la priorité) pour les bandes 5
250-5 350 MHz et 5 650-5 850 MHz et que ces radars pourraient causer du brouillage et/ou
des dommages aux dispositifs LAN-EL.
Radiation Exposure Statement:
This product complies with the Canada portable RF exposure limit set forth for an uncontrolled
environment and is safe for intended operation as described in this manual. Reducer RF exposure
further by keeping the product as far as possible from your body and by setting the device to a
lower output power (if available).
Déclaration d'exposition aux radiations:
Le produit est conforme aux limites d'exposition pour les appareils portables RF pour les Etats-Unis
et le Canada établies pour un environnement non contrôlé.
Le produit est sûr pour un fonctionnement tel que décrit dans ce manuel. La réduction aux
expositions RF peut être augmentée si l'appareil peut être conservé aussi loin que possible du
corps de l'utilisateur ou que le dispositif est réglé sur la puissance de sortie la plus faible si une
telle fonction est disponible.
EU Declaration of Conformity
Hereby, SMART Technologies ULC declares that the ratio equipment type Wireless AC Dual Band
Adapter, DWA-171 is an compliance with Directive 2014/53/EU. The full text of the EU declaration of
conformity is available at the following internet address: www.smarttech.com/compliance.
WARNING
This equipment is compliant with Class A of CISPR 32. In a residential environment, this
equipment may cause radio interference.
The frequency band and the maximum transmitted power in EU are listed below:
Transmitting Band (MHz) Maximum Transmit Power EIRP (dBm)
2400-2483.5 19.85
5150-5350 19.45
5470-5725 17.44
Restrictions in (5GHz)

IMPORTANT INFORMATION
vi smarttech.com/kb/171225
AT/BE/BG/CZ/DK/EE/FR/DE/IS/IE/IT/EL/ES/CY/LV/LI/LT/LU/HU/MT/NL/NO/PL/PT/RO/SI/SK/TR/FI/S
E/CH/UK/HR. 5150MHz-5350MHz is for indoor use only.
CAUTION: EXPOSURE TO RADIO FREQUENCY RADIATION
This equipment complies with EU radiation exposure limits set forth for an uncontrolled
environment. This equipment should be installed and operated with minimum distance 20 cm
between the radiator and your body.

vii smarttech.com/kb/171225
Contents
Important information i
Federal Communication Commission Interference Statement ii
Innovation, Science, and Economic Development Canada Statement iii
EU Declaration of Conformity v
Chapter 1: Welcome 1
About this guide 1
Features 1
Components 3
Modes 10
Software 10
Chapter 2: Getting started 13
Setting up your document camera 13
Connecting to different displays 15
Turning your document camera on and off 17
Connecting to a wireless network 17
Connecting to external devices 19
Shooting area, overhead light, and anti-glare sheet 22
Using the external memory storage 23
Chapter 3: Using your document camera 25
Understanding Camera, Computer Pass-Through, and Playback modes 25
Features of each mode 26
Setting document camera modes 27
Displaying printed documents 28
Using an SD/SDHC card 29
Chapter 4: Using your document camera in Camera mode 31
Using Camera mode 31
Using the on-screen display menu in Camera mode 33
Capturing and transferring images and videos 42
Using a microscope 44
Chapter 5: Using your document camera in Playback mode 47
Setting your document camera to Playback mode 47
Using the OSDmenu in Playback mode 48
Chapter 6: Using your document camera with SMART software 53
Connecting your document camera to SMART Notebook software 53

CONTENTS
viii smarttech.com/kb/171225
Using a microscope with SMART Notebook software 55
Connecting your document camera to SMART Document Camera software 55
Navigating SMART Document Camera software’s Viewer menu options 56
Chapter 7: Troubleshooting 59
Resolving general issues 59
Resolving image issues 60
Resolving software issues 61
Resolving recording issues 61
Resolving connection issues 62
Appendix A: Hardware environmental compliance 63

Chapter 1
1 smarttech.com/kb/171225
Chapter 1: Welcome
About this guide 1
Features 1
Components 3
Control panel 4
Right panel 6
Left panel 6
Rear panel 7
Remote control 8
Power adapter 9
USB cable 9
WiFi dongle 10
Microscope adapter 10
Anti-glare sheet 10
Modes 10
Software 10
SMART Notebook software and SMART Product Drivers 11
SMART Document Camera software 11
This chapter introduces the SMART Document Camera™ 550.
About this guide
This guide is for users who set up and use the SMART Document Camera 550 in their
organizations.
It includes information on the document camera’s on-screen display menu, remote control, and
basic troubleshooting.
Features
The SMART Document Camera 550 can transform any classroom or lecture hall into a collaborative
and interactive learning environment. The document camera enables you to capture and display
printed documents, microscope slides, videos, and 3D objects on your computer, projector or

CHAPTER 1
WELCOME
2 smarttech.com/kb/171225
display panel.
The document camera includes the following features:
Feature Feature
Camera lHigh resolution CMOS sensor
l12X digital zoom
lUp to 30 frames per second
lAutomatic or manual focus
lMaximum shooting area 17 4/8" x 9 6/8"
Output/input lHDMI 1080p @ 50 Hz / 60 Hz, 720p @ 50 Hz / 60 Hz, 1024 × 768p
@ 60 Hz
lUSB mini-B (connect to computer)
lWiFi
lSD memory card
lInternal memory
Physical construction lBuilt-in battery
lBuilt-in LED illumination lamp
lSecurity lock slot
lFlexible arm
lMicrophone integrated into base
Software lSMARTNotebook® collaborative learning software
lSMART Document Camera software
lSMART Product Drivers
Image and video
storage
lSupports SD/SDHC cards (maximum 32 GB)
lSupports USB mass storage mode for internal memory and SD
card
For more information, see the SMART Document Camera 550 specifications
(smarttech.com/kb/171224).

CHAPTER 1
WELCOME
3 smarttech.com/kb/171225
Components
The SMART Document Camera has a flexible arm to position the lens at any angle. The camera
head has LED overhead lighting to enhance lighting conditions.
The SMART Document Camera 550 consists of the following components:
No. Name
1 Camera head
2 Camera lens
3 LED light
4 Camera arm
5 Control panel

CHAPTER 1
WELCOME
4 smarttech.com/kb/171225
Control panel
The control panel to enables you to switch between Camera, Computer Pass-Through, and
Playback modes. Additionally, using the control panel allows you to adjust the settings and
features in the Camera mode’s on-screen display (OSD) menu.
The control panel of the document camera consists of the following:
No. Name More information
1 Power Power ON/OFF the document camera
2 WiFi/USB mode Switch between WiFi and USB mode
3 Camera/PC mode Switch the video signal between a computer and camera with
the use of the HDMI IN port
4 Brightness
decrease
Decrease the level of brightness when capturing a live images
5 Lamp Power ON/OFF the overhead light
6 Freeze/Stop lPause or resume an image frame in Camera mode
lStop video playback in Playback mode

CHAPTER 1
WELCOME
5 smarttech.com/kb/171225
No. Name More information
7 Navigation arrows lAccess options from the OSD menu
lAdjust the volume of a video play back by using and
lFast-forward to rewind a video by using and
8 Menu Access the OSD menu
9 Recording Start or stop recording video and audio
10 Auto-Focus lAutomatically adjust focus
lSelection option for Playback mode and OSD menu
lStart or pause video playback
11 Capture/Delete lCapture an image in Camera mode
lDelete image or video in Playback mode
12 Brightness
increase
Increase the level of brightness when capturing a live images
13 Playback View captured images and videos
14 Zoom out Decrease the image magnification in Camera and picture
Playback mode
15 Power indicator lSolid red: Standby
lFlashing red: Power on
lSolid green: HDMI output
lSolid orange: TV output
16 WiFi connection
indicator
lFlashing orange: Searching for Access Point
lSolid blue: Connected to Access Point
lFlashing blue: Camera can be accessed wirelessly
17 Zoom in Increase the image magnification on Camera and picture
Playback mode
18 Battery life
indicator
lSolid green: Battery is over 40%
lSolid orange: Battery is between 20%-40%
lSolid red: Battery is between 5%-20%
lFlashing red: Battery is lower than 5%
19 Battery charge
indicator
lSolid red: Power plug is connected and battery is charging
lSolid green: Battery is fully charged
lOff: Power plug is not connected

CHAPTER 1
WELCOME
6 smarttech.com/kb/171225
Right panel
The right panel of the document camera consists of the following:
No. Name More information
1 Camera holder Holds the camera head for storage
2 SD card slot SD/SDHC memory card slot
3 TV-RGB switch Switch between TV and output display video
4 Security lock slot Attachment for a Kensington compatible lock
Left panel
The left panel of the document camera consists of the following:
No. Name More information
1 RS-232 Connect to a computer serial port

CHAPTER 1
WELCOME
7 smarttech.com/kb/171225
No. Name More information
2 Speaker Connect to an amplified speaker
3 MIC Connect to microphone
NOTE
The built-in microphone will be disabled once the external
microphone is connected to the document camera.
4 Reset Resetting the document camera will set it back to standby
mode
Rear panel
The rear panel of the document camera consists of the following connectors:
No. Name More information
1 DC 12V Connect the power adapter
2 WiFi dongle port Connect the WiFi dongle
3 HDMI IN Connect to an external HDMI source
4 HDMI OUT lConnect as an output video signal to a monitor or projector
lHDMI OUT is used to transmit high definition images
5 TV OUT lConnect to a device with a TV output
lTV OUT is used to transmit standard definition images
6 USB mini-B Connect to a computer

CHAPTER 1
WELCOME
8 smarttech.com/kb/171225
Remote control
All features of the SMART Document Camera 550 can be accessed with the remote control. The
remote control requires two AAA batteries.
No. Name More information
1 Power Power ON/OFF the document camera
2 Camera Camera mode displays the video signal from the document
camera
3 Record Start or stop recording video and audio
4 Capture Capture still image in Camera mode. When in continuous
capture mode, press this button again to stop
5 Visor Hide parts of the presentation screen
6 Rotate Rotate an image in Camera or Playback mode
7 Menu Access the OSD menu
8 Navigate arrows lAdjust the volume of a video play back by using and
lFast-forward to rewind a video by using and
lAdjust the spotlight frame and visor screen coverage
9 Auto-focus Automatically adjust focus

CHAPTER 1
WELCOME
9 smarttech.com/kb/171225
No. Name More information
10 Zoom In/Out Increase or decrease the image magnification on camera and
picture Playback mode
11 Zoom reset Reset zoom default magnification to 100%
12 Playback View captured images and videos
13 PC 1/2 Displays the video signal from HDMI input of the document
camera
14 Freeze/Stop lPause or resume an image frame in Camera mode
lStop video playback in Playback mode
15 Spotlight Adjust the size, shade, and color of the spotlight
16 Split screen Displays a split screen. One side displays live image from the
camera and the other side displays thumbnails of
images/video
17 Mode Switch between text, graphics and microscope mode
18 Timer Select timer duration
19 Video playback lMake a selection in Playback mode and OSD menu
lPlay/Pause video playback
20 Lamp Power ON/OFF the overhead light
21 Brightness Increase or decrease the level of brightness when capturing a
live images
22 Default Reset back to factory default settings
23 Delete Delete image or video in Playback mode
Power adapter
Your document camera comes with a power adapter, including a country specific connector that
connects to the external power supply. Plug adapters are available for Australia, Europe, and North
America.
USB cable
Use the USB cable to connect your document camera to your computer. You can display objects,
capture images to SMART Notebook files, and control your document camera from SMART
Notebook software.

CHAPTER 1
WELCOME
10 smarttech.com/kb/171225
See the Troubleshooting and extending USB 2.0 and USB 3.0 connection knowledge base article
for more information.
WiFi dongle
Use the WiFi dongle to connect your document camera to the network.
Microscope adapter
Your document camera comes with a microscope adapter along with two different sized rubber
couplers for the microscope eyepiece.
Anti-glare sheet
Place the anti-glare sheet over printed documents to reduce glare.
Modes
Your document camera has three modes you can use to control how data is sent to a computer,
projector, monitor, or display.
lCamera mode controls your document camera from the control panel and displays images on
a projector, monitor, or display.
lComputer Pass-Through mode displays the video signal from the HDMI input on a projector,
monitor, or display.
lPlayback mode lets you control your document camera from the Control Panel and displays
image from an SD/SDHC card or USB drive on a connected projector, monitor, or display.
Software
Before using your document camera, download the required software to get the most out of your
document camera.
IMPORTANT
lBefore connecting your document camera to a computer, ensure the latest versions of
SMART Notebook and SMART Product Drivers are installed.
lThe document camera is only compatible with SMART Notebook software through a wired
connection.
Table of contents
Other SMART Document Camera manuals

