Smarti SHC300 User manual

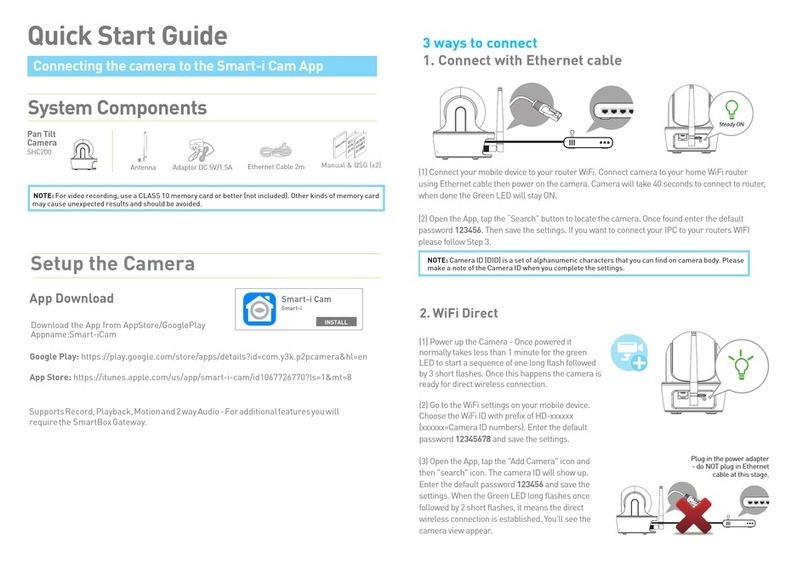
(1) Connect your mobile device to your router WiFi. Connect camera to your home WiFi router
using Ethernet cable then power on the camera. Camera will take 40 seconds to connect to router,
when done the Green LED will stay ON.
(2) Open the App, tap the “Search” button to locate the camera. Once found enter the default
password 123456. Then save the settings. f you want to connect your PC to your routers W F
please follow Step 3.
NOTE: Camera D (D D) is a set of alphanumeric characters that you can find on camera body. Please make a
note of the Camera D when you complete the settings.
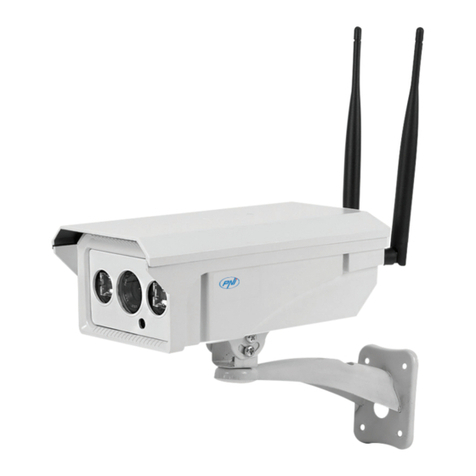
Bullet
Camera
SHC300
System Components
NOTE: For video recording, use a CLASS 10 memory card or better (not included). Other kinds of memory card
may cause unexpected results and should be avoided.
Plug in the power adapter - do NOT plug in
Ethernet cable at this stage.
Adapto r DC 5V/1.5ABracket Antenna USB to RJ45 Lead Manual & QSG (x2)
Quick Start Guide
Connecting the camera to the Smart-i Cam App
2. WiFi Direct
(1) Power up the Camera - Once powered it
normally takes less than 1 minute for the green
LED to start a sequence of one long flash followed
by 3 short flashes. Once this happens the camera is
ready for direct wireless connection.
(2) Go to the WiFi settings on your mobile device.
Choose the WiFi D with prefix of HD-xxxxxx
(xxxxxx=Camera D numbers). Enter the default
password 12345678 and save the settings.
(3) Open the App, tap the "Add Camera" icon and
then "search" icon. The camera D will show up.
Enter the default password 123456 and save the
settings. When the Green LED long flashes once
followed by 2 short flashes, it means the direct
wireless connection is established. You'll see the
camera view appear.
3 ways to connect
1. Connect with Ethernet cable
Google Play: https://play.google.com/store/apps/details?id=com.y3k.p2pcamera&hl=en
App Store: https://itunes.apple.com/us/app/smart-i-cam/id1067726770?ls=1&mt=8
Supports Record, Playback, Motion and 2 way Audio - For additional features you will
require the SmartBox Gateway.
Smart-i Cam
Smart-i
INSTALL
App Download
Download the App from AppStore/GooglePlay
App Name: Smart-i Cam
Setup the Camera

(1) Secure the camera
bracket on a stable surface
(2) Loosen up the thumb
screw
(3) Adjust viewing angle, then
secure by tightening the T-bolt.
3. WiFi to your router
Follow the steps below to add the camera to your WiFi - Open App and click:
(1) Tap on Edit Settings - Settings - Advanced (Enter your camera password default: 123456) -
WiFi setting. Then choose your SSID(This is your routers name) and enter your routers WiFi
password.
(2) Remove the Ethernet cable connecting your camera to your router.
(3) The camera will be offline for around 40 seconds whilst it reboots to establish WiFi
connection. When the camera connects to WiFi router correctly, the green LED will stay ON.
NOTE: 1. WiFi setting may fail if you leave the Ethernet cable connected. Please remove the cable after settings
have been completed.
2. The camera will only accept an SS D composed with English alphabet characters and numbers (case
sensitive), non-English and special characters (!@#$%, etc) will not be accepted. Make sure to insert dashes (-).
f the camera fails to connect to the assigned WiFi router, you need to redo the settings again.
On the power cable you'll find a small indented button. Hold it down for 5 seconds and
you should see the cameras lights flash in sync. Please repeat the steps above.
Camera Installation
Snapshot
Tap to capture screen images.
Tap to record video to device
memory card.
Tap to mute audio.
Tap to return to the main page.
Camera Settin s/Email Alerts
Live View
Playback
(1) Tap Edit Setting and
then the Event icon.
(2) Select the time interval
for the event list.
(3) Tap the file that you want to
playback from the list.
NOTE: Micro SD card required for Snapshot, Playback and Download features.
Note: The image shown is static until you click on it and then you will be prompted to change the default password.
Please keep the new password safe.

Information :
Please change the below settings if you experience any problems with your image quality in your
environment.
Indoor 50hz for UK
Indoor 60hz for US
Outdoor
Factory Default Settin
Hold the black button located on the power lead for 5 seconds. Release and the camera
lights should start flashing in sync.
Download
(1) Tap Edit Setting and
then the Event icon.
(2) Select the time interval for
the event list.
(3) Press and hold the video
clip to download to your device
- Camera will begin recording.
- With Push Notification enabled, the system will send a notification message to the user’s
mobile device.
- With Email Alerts enabled, the system will send out Emails to alert the user to the event.
Enter your email details: Advanced -> Email -> Email Setting
Enter Admin
Password
(default 123456)
For better playback performance -
Android users: Use [MX player] app (software decoder) to playback. t is a free app on Google Play.
You can also use VLC player. This video will be stored on the external SD card (folder SCH).
Note: You cannot change the storage location.
iOS users: Use [Oplayer Lite] app to playback. t is a free app on App store.
To extract the videos from your Apple device you must use iTunes (See below).
Email Alerts
The camera has a motion detection function, which can notifying the user when
triggered. When motion detection is enabled and camera detects movement:
For more information and Products available in the Smart-i Range please visit our website at
http://www.smart-i.com
RoHS
Compliant
Table of contents
Other Smarti Security Camera manuals
