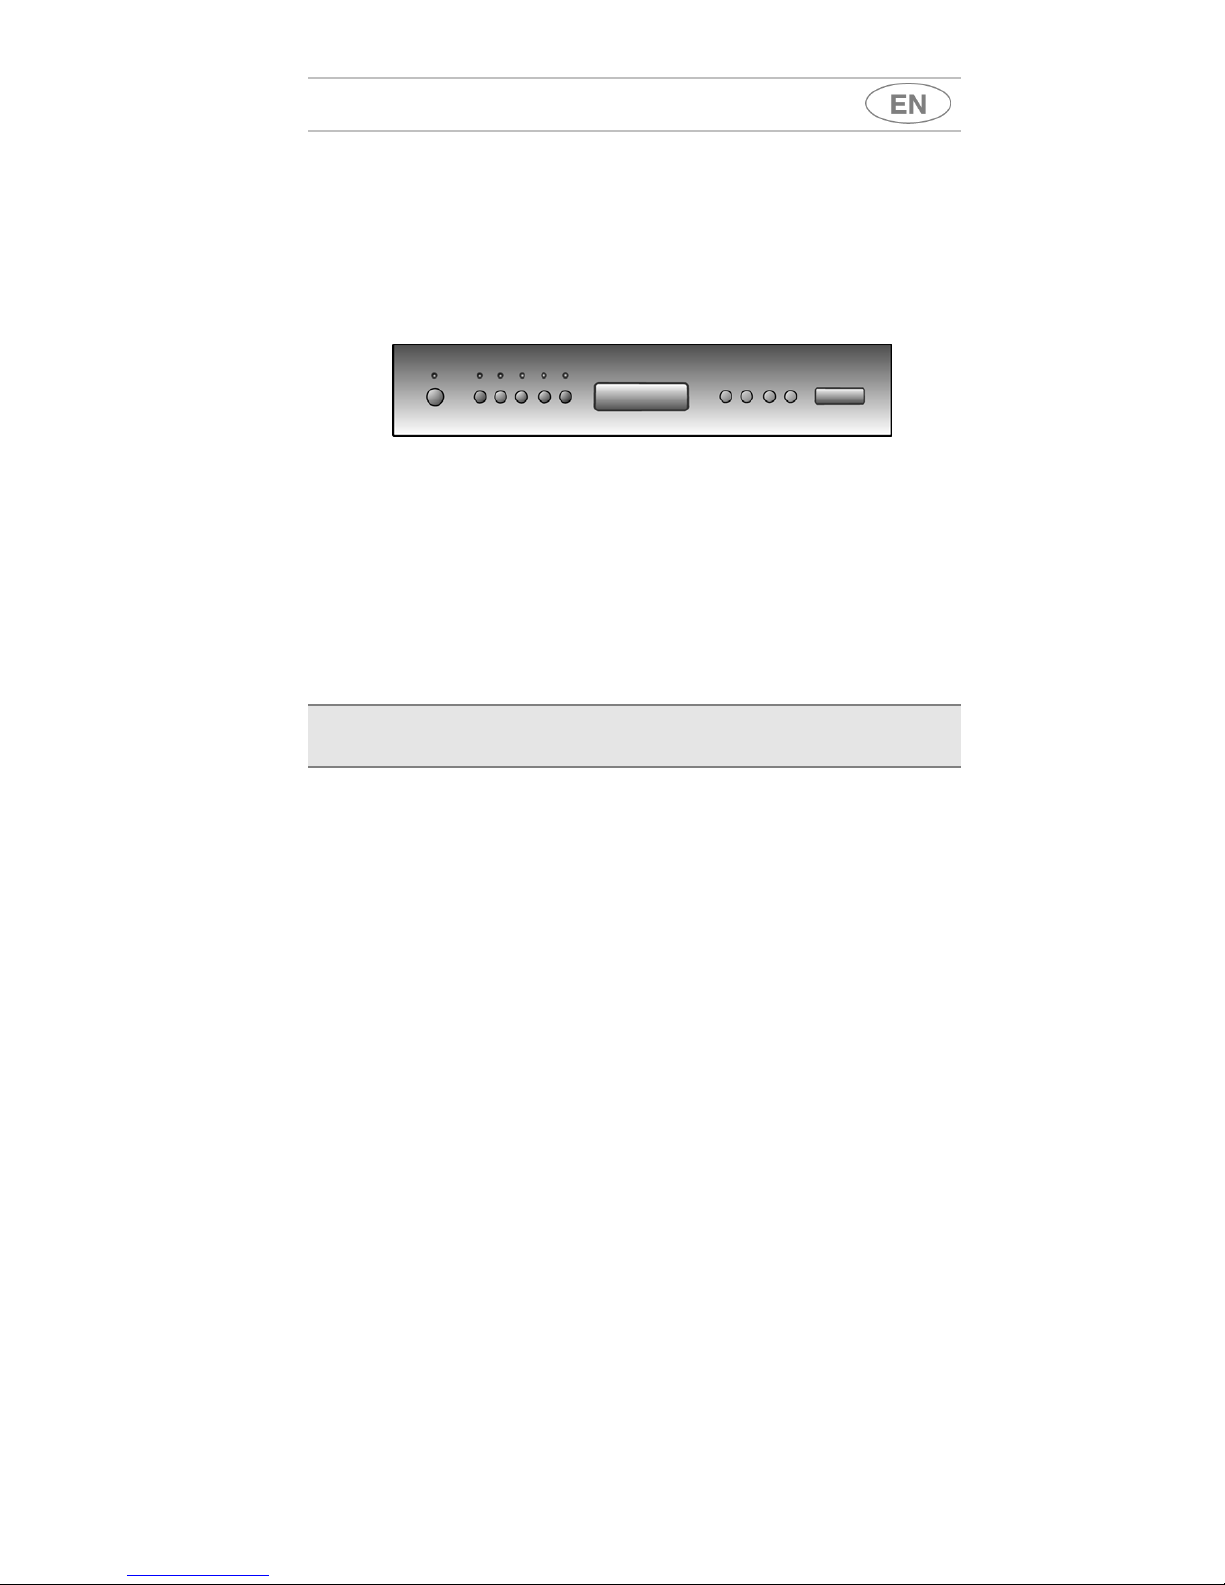
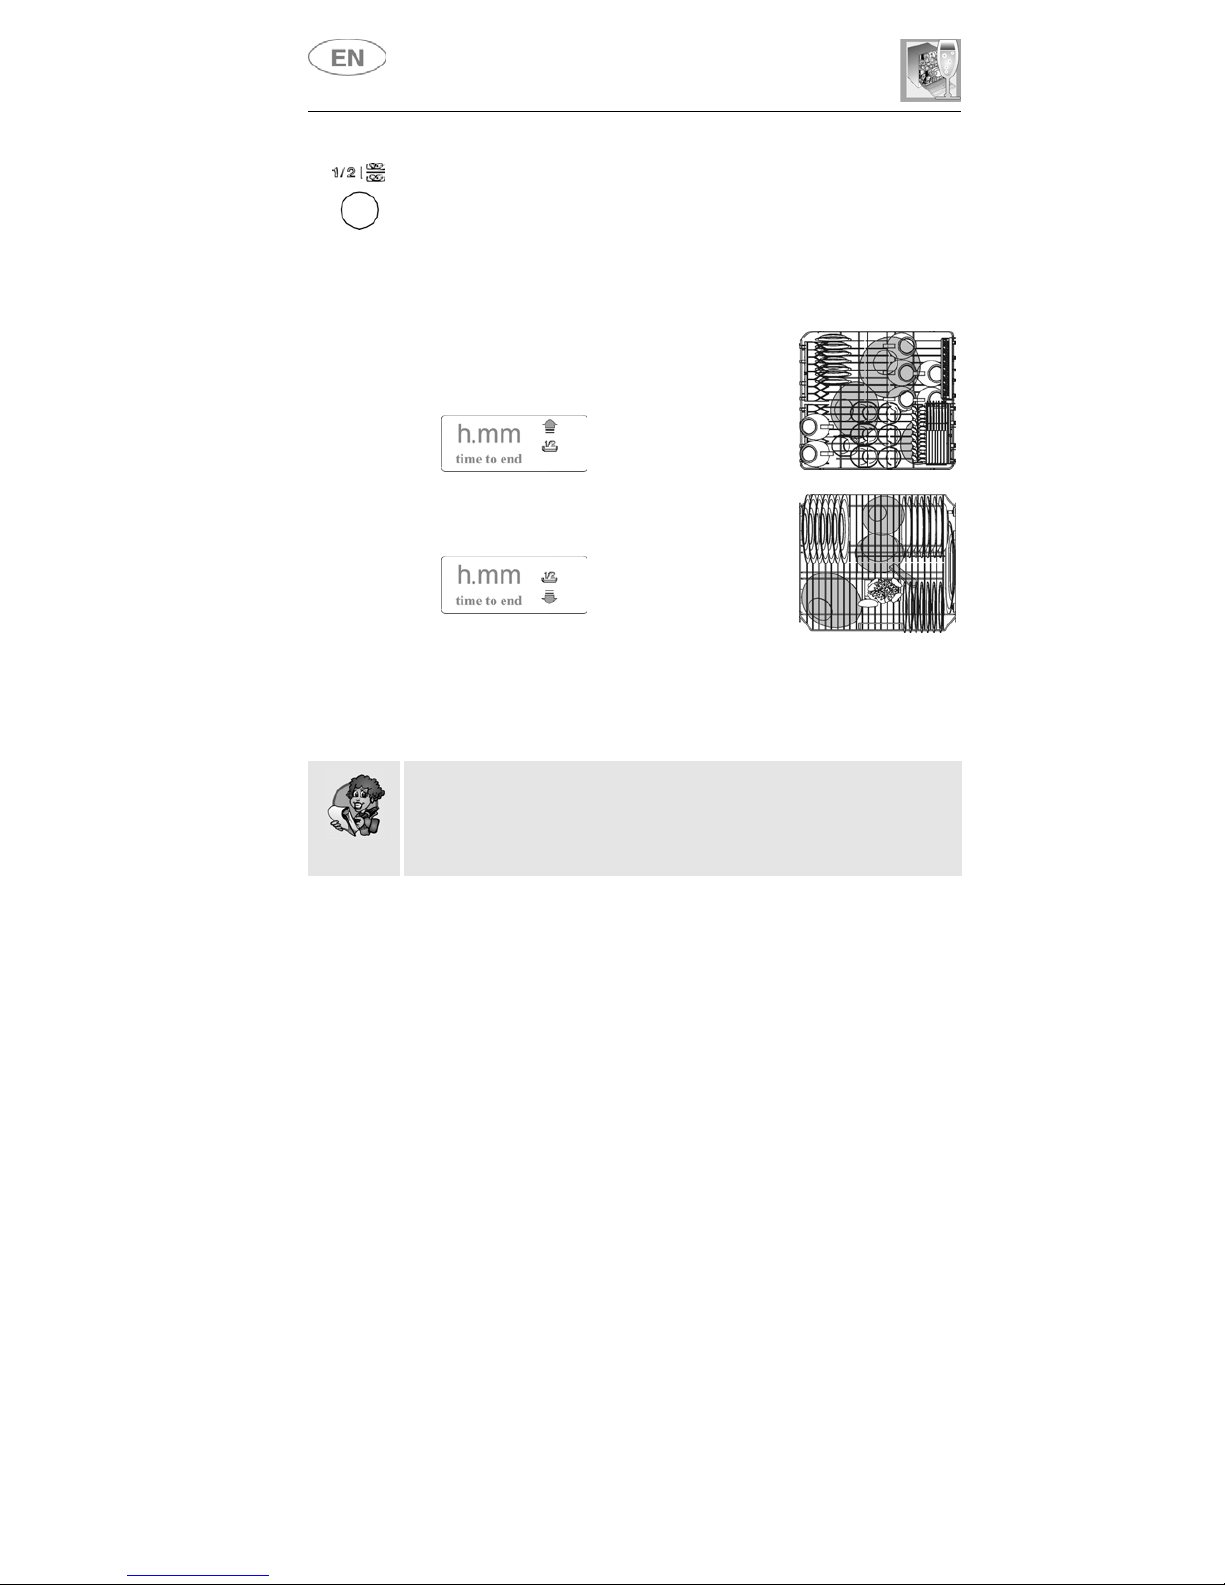
Smeg DF614S User manual

INSTRUCTION MANUAL
G
GU
UI
ID
DE
EF
FO
OR
RU
US
SI
IN
NG
GT
TH
HE
ED
DI
IS
SH
HW
WA
AS
SH
HE
ER
RA
AN
ND
DT
TH
HE
EW
WA
AS
SH
HI
IN
NG
GP
PR
RO
OG
GR
RA
AM
MS
S

Contents
1. Description of the controls________________________________16
2. Troubleshooting _______________________________________25
Thank you for choosing one of our products.
You are advised to read this manual carefully; it contains all the
information you need about the right conditions for the proper, safe use
of your dishwasher.
The individual sections are laid out to provide you with a step-by-step
guide to all your appliance's functions; the texts are easy to understand
and are complete with detailed illustrations.
This user-friendly manual will provide answers to all your questions
about use of the dishwasher.
For any other information about use and maintenance of the dishwasher,
read the enclosed manual carefully.
USER INSTRUCTIONS: useful information is provided for the use of the
washing programs and all the dishwasher's functions.

User instructions
1. Description of the controls
1.1 Front panel
All the dishwasher controls are grouped on the front panel.
1ON/OFF BUTTON
2SELECTION PROGRAM BUTTONS (P1…P5)
3½ LOAD WASH BUTTON (on some models only)
4"3/1" OPTION BUTTON (on some models only)
5DELAY PROGRAM BUTTON (on some models only)
6START/STOP BUTTON
7POWER ON LIGHT
8PROGRAMS INDICATOR LIGHTS
9INFORMATION DISPLAY
10 RECESSED DOOR HANDLE
1.2 Information display
The dishwasher is equipped with a practical
DISPLAY which provides information on the
programmed dishwasher functions.

User instructions
DURATION CONSUMPTION
PROGRAMME,
NUMBER & SYMBOL
LOAD CROCKERY
AND CUTLERY
PROGRAM
PROGRESS MINUTES WATER
LITRES (1)
POWER
KWh (2)
1SOAK
Pans and dishes
awaiting a
further wash
Cold prewash (**) 60,03
2QUICK Dishes
with light dirt
Wash at 38°C
Cold rinse
Rinse at 58°C
(**) 13 0,85
3ECO
Wash immediately
after use for dishes
with normal dirt
Wash at 55°C
Cold rinse
Rinse at 68°C
Dry
(**) 14 1,30
4AUTO40-50
Wash immediately
after use for dishes
with normal dirt
Cold prewash
Wash at 40°C
Wash at 55°C
Cold rinse
Rinse at 68°C
Dry
(***) (***) (***)
5INTENSIVE
Very dirty
pans and dishes,
even with
dried-on dirt
Wash at 70°C
2 cold rinses
Rinse at 70°C
Dry
(**) 17 1,50
6DELICATE Dishes
with normal dirt
Cold prewash
Wash at 45°C
Cold rinse
Rinse at 68°C
Dry
(**) 17 1,15
7BIO
(*) EN 50242
Dishes
with normal dirt
Cold prewash
Wash at 50°C
Cold rinse
Rinse at 62°C
Dry
(**) 15 1,08
8AUTO 60-70
Normally soiled
dishes, including
dried-on residue
Cold prewash
Wash at 50°C
Wash at 65°C
Cold rinse
Rinse at 70°C
Dry
(***) (***) (***)
9SUPER
Very dirty
pans and dishes,
even with
dried-on dirt
Prewash at 45°C
Wash at 70°C
2 cold rinses
Rinse at 70°C
Dry
(**) 20 1,70
Only run the soak program with half loads.
The HALF LOAD option (3) is available for all programs except the soak program.
(*) Reference program as per EN 50242 standard. (**) See display.
(***) When the "AUTO 40-60" or "AUTO 60-70" program is selected, the dishwasher recognises
the type of dirt and automatically adjusts the washing parameters as appropriate.
(1) Average power consumption with the softener set on level 2.
(2) The cycle duration and power consumption may vary according to the water and room
temperatures, and the type and amount of dishes.

User instructions
1.3 Washing programs
The dishwasher is equipped with a control panel and an INFORMATION
DISPLAY (9) from which it is possible to carry out all the power switch-
on, switch-off and programming operations.
Before starting a washing program make sure that:
•The water supply tap is open.
•The correct amount of detergent has been added to the
dispenser.
•The baskets have been correctly loaded.
•The spray arms are able to rotate freely and without
obstruction.
•The dishwasher door is securely closed.
LIGHTING
Pressing the ON/OFF button (1) will start the dishwasher and will lit up
the dishwasher pilot light (7). After approximately 3 second from this
operation the DISPLAY (9) will be turned on with a visualization that will
depend upon the state of the dishwasher.

User instructions
PROGRAMMING
In this dishwasher model all the programming operations are possible
only with closed door. With open door, on the DISPLAY (9) will appear
the symbols -- and the PILOT LIGHT PROGRAMS (8) remains out.
SELECTION PROGRAM
The program selection is possible
through the relative buttons (2).
By pressing the relative button of desired program (see table) it will lid up
the relative pilot light to confirm that the operation did occurred on the
DISPLAY (9) will appear a program duration forecasting (“h.mm”).
START PROGRAM
At this point, in order to start the machine, it is only enough to press the
START/STOP (6) for some seconds until the writtin “Time to end” start
to flash and confirmation “beep” is heard. From this moment the cycle
dration on the DISPLAY (9) starts to decrease.
This phase, that updates itself during the cycle, is “indicative” since it is
influenced by the washing conditions such as dishwasher type and
quantity, entry temperature etc. For this reason it is normal to see the
updating during a program (increment and decrease of minutes)
specially in the passage from one phase to the other (for example, from
washing to rinse).
END PROGRAM
The end of the program is indicated by a short signal acoustic and from
the “End” visual notification on DISPLAY (9). By pressing one of the
buttons, the “End” visual signal will vanish from the display and the
dishwasher is ready to continue a new cycle, the same thing happens
when closing or opening the door or by switching on-off the machine.
INTERRUPTING A PROGRAM
In order to interrupt a running program it is necessary:
•to press the
START/STOP (6) for some seconds until when the
writting “Time to end” remains lit on the display (confirmation beep).
At this point,it is possible to start the cycle again, otherwise:

User instructions
TO CHANGE A PROGRAM
To change the running program it is necessary:
•to interrupt the running program (see “INTERRUPTING A PROGRAM”);
•select the new program;
•to press again the START/STOP button (6) to make start the new
program.
STOPPING A PROGRAM
To stop a program in progress, it must first be interrupted (see
"INTERRUPTING A PROGRAM").
Now press buttons P1+P2 simultaneously and
the first three program lights will come on.
The display will show "P0" and the dishwasher will immediately switch to
the end of the cycle and drain the tank (during this process, the "Time to
end" message will flash). When the drain procedure ends, the end of
cycle message "End" appears on the display.
In case that the door is opened during the operation, to the next door
closing it is going to be necessary to start the program as shown in
paragraph “START PROGRAM”. The program will resume from the point in
which it was interrupted.
In case that the tub temperature is higher than 50°C the program
will start about 30 seconds later.
The washing cycle will not take place if the dishwasher door is left open or
not properly closed.

User instructions
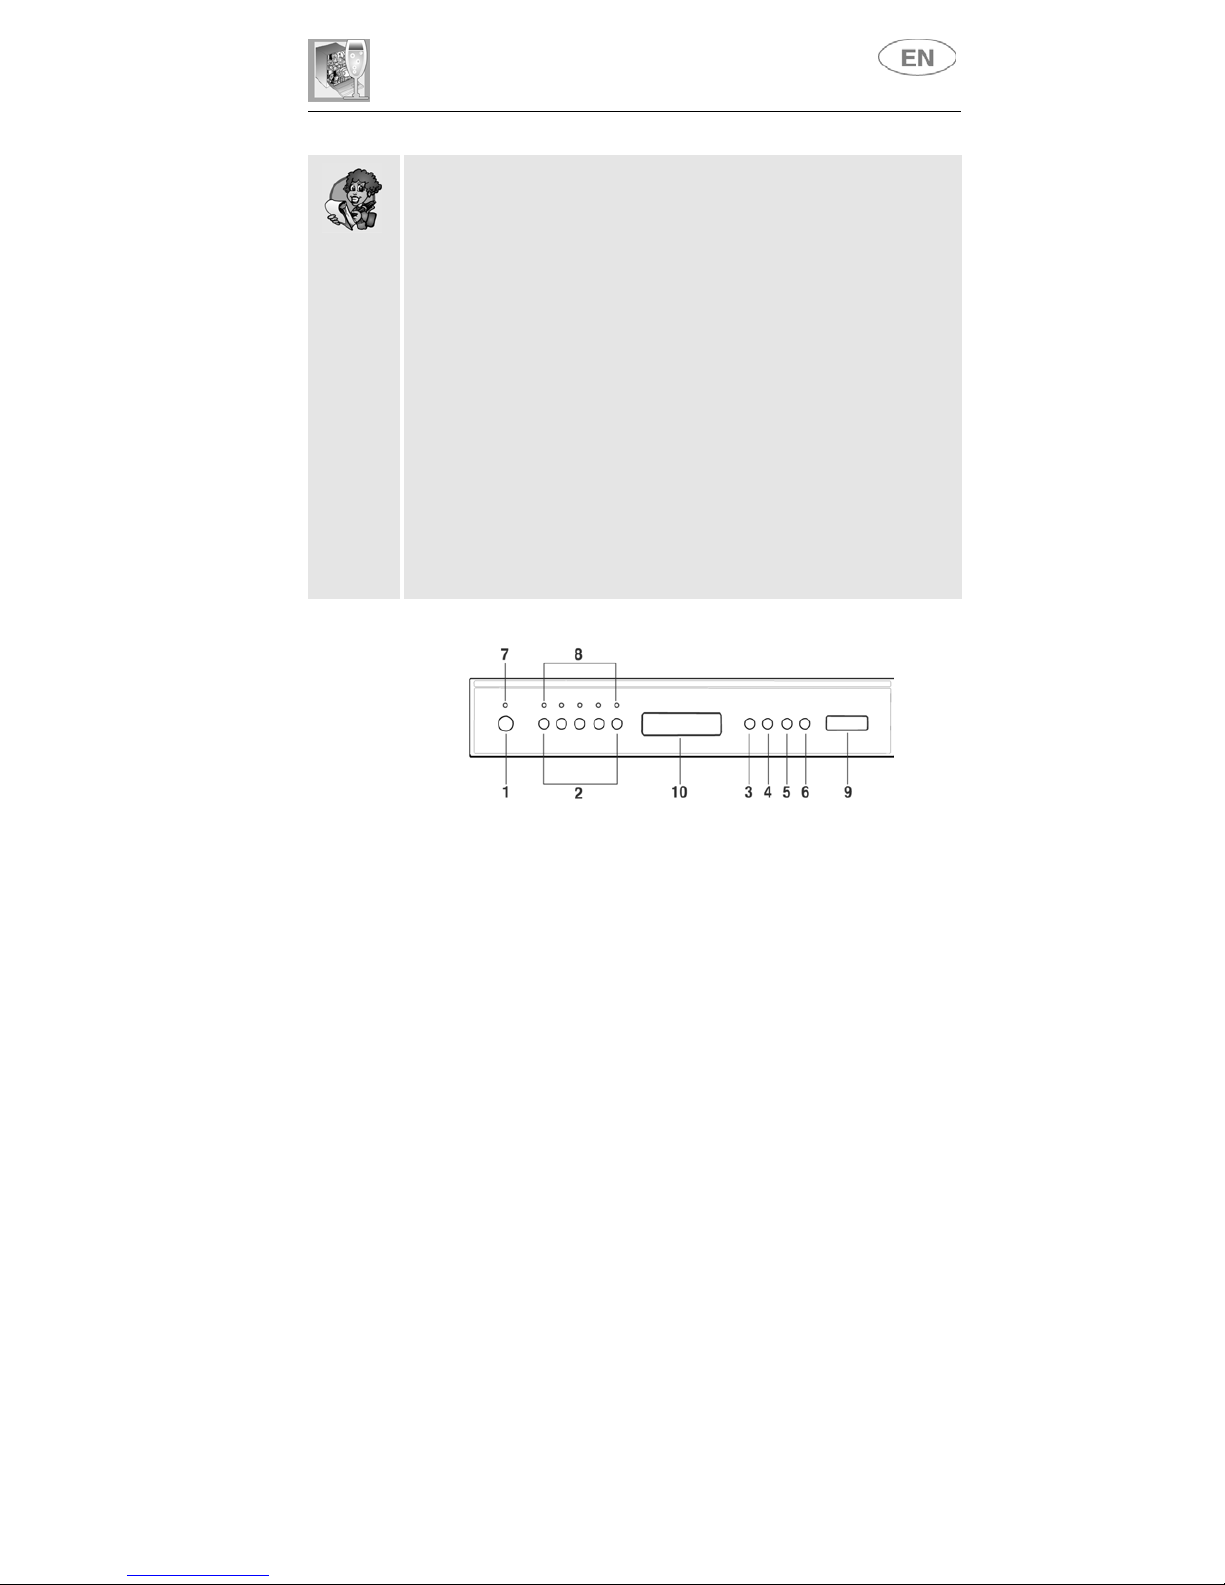
DELAYING THE PROGRAM (on some models only)
(available in all programs except the soak program)
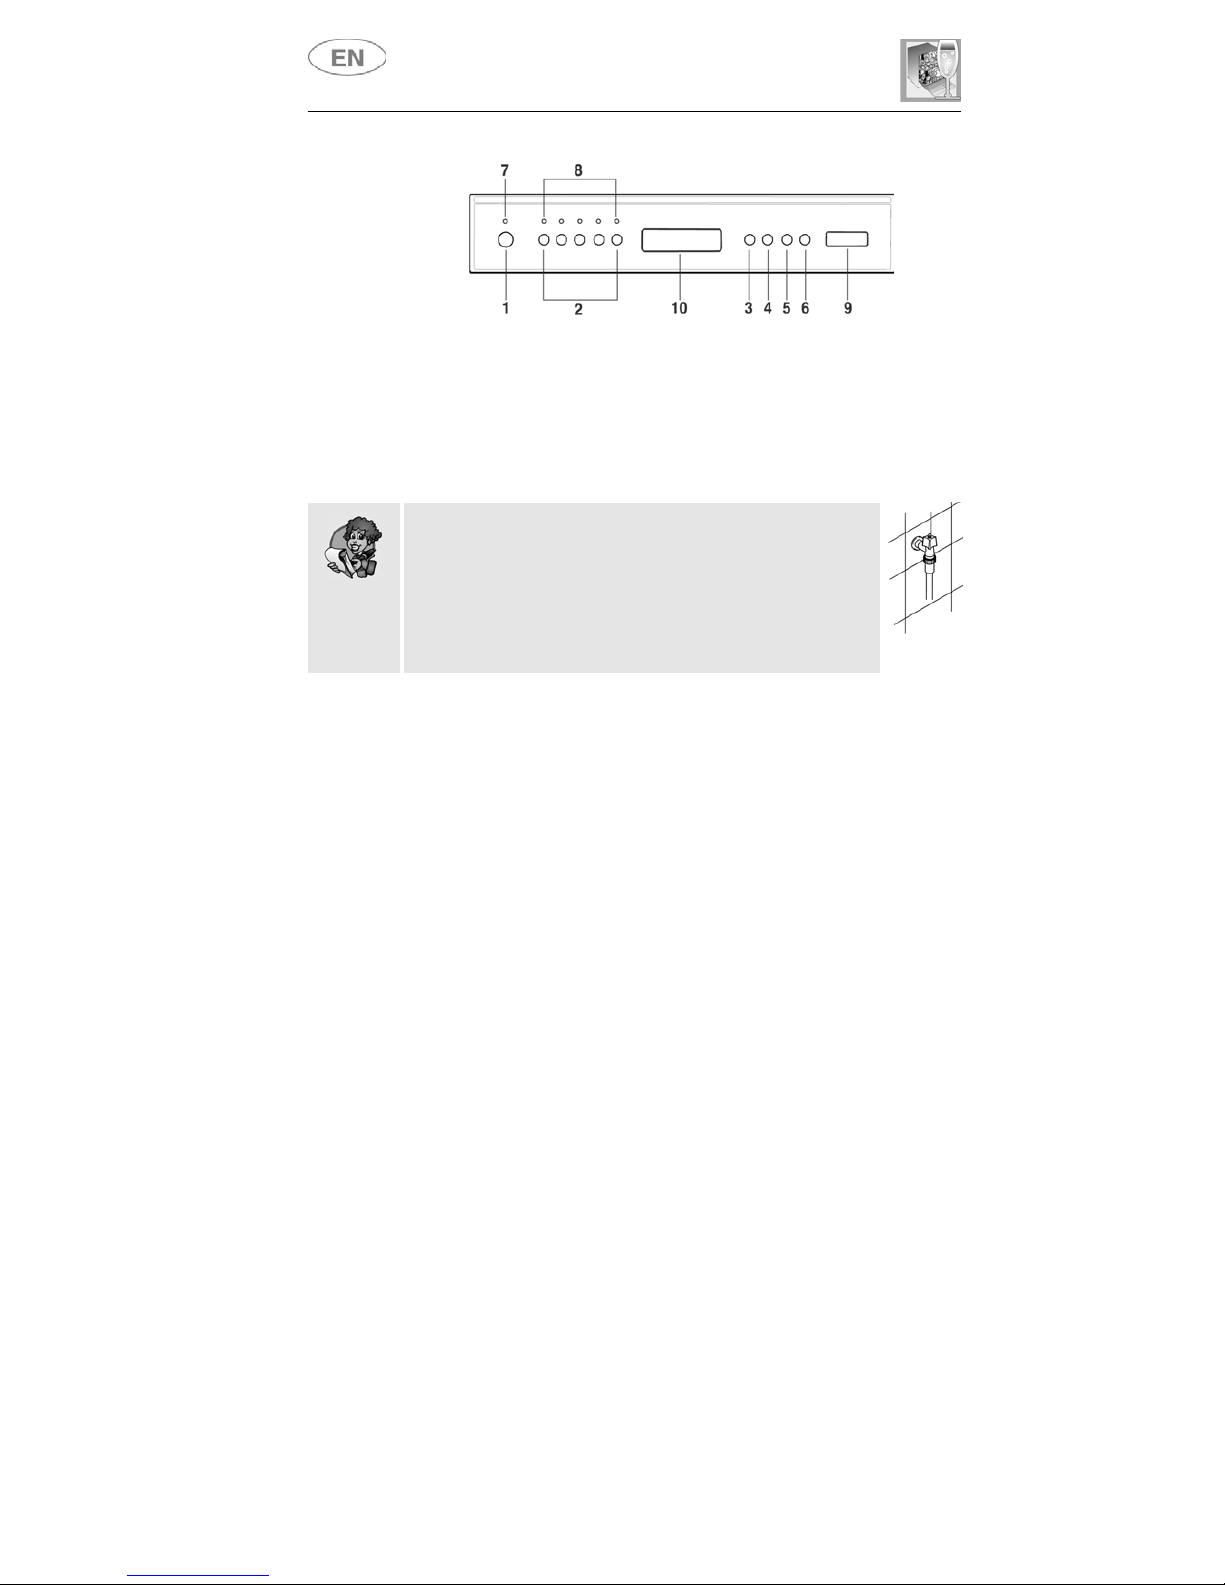
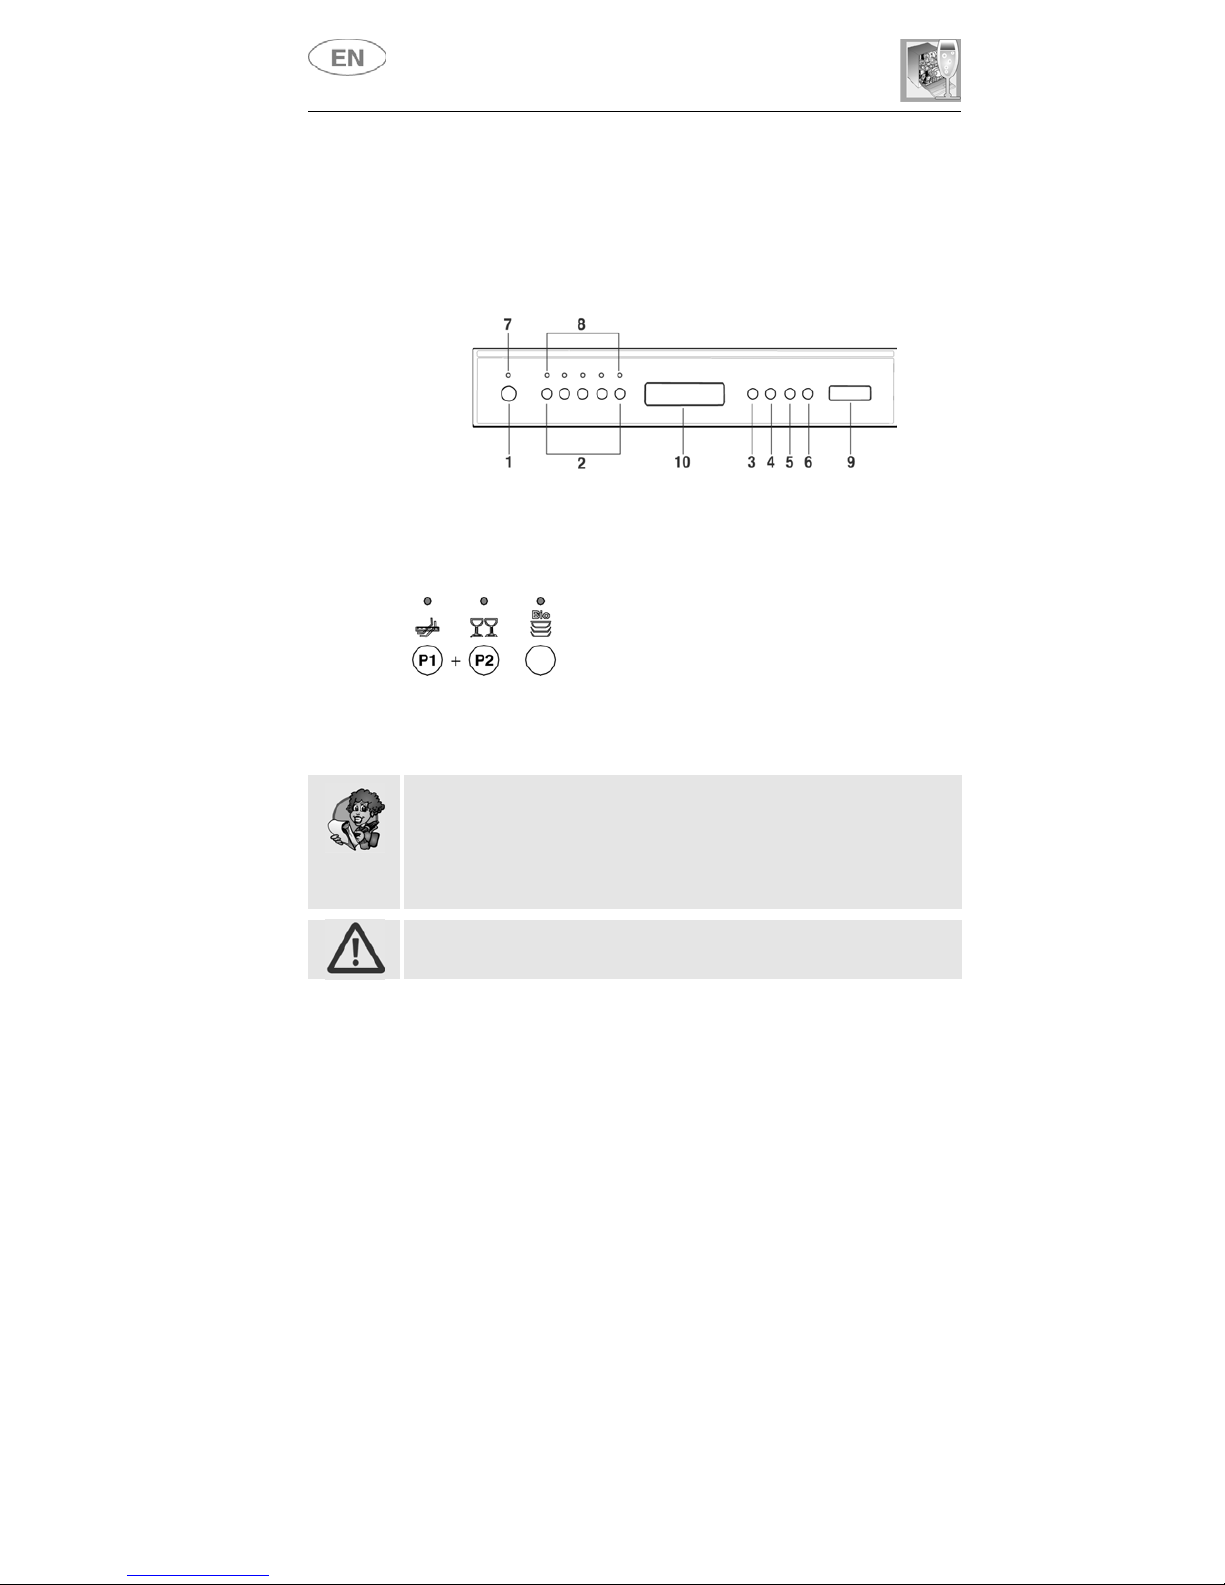
The PROGRAM DELAY button (5) can be pressed to delay the start of
the program by up to 12 hours. This means that the dishwasher can be
operated at the time of day of your choice.
The first time the PROGRAM DELAY button (5) is pressed the display
will show 12 hours, the maximum delay time before the program will
start. Each subsequent time the button is pressed the delay time will be
reduced, until the desired delay time is reached.
Particularly, on the display it will have the following
indications.
Chosen the delay, proceed with the program start, press the button
START/STOP (6) for same seconds until the clock symbol start to
flaash.
The machine will perform a dish pre-washing, and when finish, the “delay
program” will enter in function as it was first set.
In case you want to put to zero the “delay program” within the running
program it is necessary:
•to press the
START/STOP (6) button for some seconds until the
clock symbol remain lid up on the display;
•to press the
DELAY PROGRAM (5) more times until the reset of the
delay program (clock symbol shut off);
•to press the
START/STOP (6) button to make start the program.
N.B.: It is not possible to select the “delay program” when the program
have already began.
"3/1" OPTION BUTTON (on some models only)
(available in all programs except the soak program)
Pressing this button (4) activates the "3/1" option; the relative light
comes on to confirm the selection.
This option is specifically for the use of tablet or powder detergents
which already contain salt and rinse aid. If you decide to use a product of
this kind, press the button to allow the dishwasher to vary the necessary
parameters to ensure the best washing results by making full use of the
quantities of detergent, salt and rinse aid these special products contain.
At the end of the cycle, the appliance automatically presets for the use of
conventional products.

User instructions
HALF LOAD WASH FUNCTION (on some models only)
This function is recommended for loads of up to 7 place-settings, and
cuts down on the use of water and electricity.
By pressing the ½ LOAD WASH (3) button it is possible to select only
one basket washing (upper or lower).
After having the program selected, continue as follows:
•by pressing for one time the ½ LOAD
WASH (3) button, it will select the upper
basket and on the display will compare the
following visualization;
•by pressing the
½ LOAD WASH (3) button
again the lower basket is selected;
•by pressing a third time the ½ LOAD WASH (3) button it will bring
back to the full load washing mode.
One half of the cutlery basket can be placed in the ½ LOAD program
basket.
WARNING: do not load dishes and cutlery into the non-selected
basket, because the water spray will only reach the selected basket.

User instructions
TO SAVE ON ENERGY! … AND PROTECT THE ENVIRONMENT
•Always try to run the dishwasher fully loaded.
•Do not wash the dishes in running water.
•Use the washing program that is most appropriate for each type of
load.
•Do not carry out any preliminary rinsing.
•If available, connect the dishwasher to a hot water supply up to
60°C.
•When possible, skip the drying cycle by leaving the door open
when the washing cycle is complete; the air and the residual heat
will dry the dishes perfectly.
TO CUT DOWN ON DETERGENT CONSUMPTION! … AND PROTECT
THE ENVIRONMENT
The phosphates contained in dishwasher detergents are harmful to the
environment. To avoid using excessive amounts of detergent and to
save on electricity, observe the following:
•separate the more delicate items from dishes that are more
resistant to aggressive detergents and high temperatures;
•do not pour the detergent directly on the dishes.
REMOVING THE DISHES
At the end of the washing program, wait at least 20 minutes before
removing the dishes, to allow them to cool down. To prevent any water
droplets on the upper basket from falling on the dishes in the lower
basket, it is advisable to unload the lower basket first, and then the
upper basket.

User instructions
ADDITIONAL FUNCTIONS (Customizing the consumer parameters)
(available in all programs except the soak program)
The electronic control system allows personalizing the machine use
directly through a programming procedure not directly accessible that
allows: regulate water hardness level.
To access the programming environment, the appliance must be turned
on with the door closed. Then proceed as follows:
•press the
PROGRAM DELAY (5) button until the Hsymbol appears
on the display, followed by the number 3, > H3;
•press the
PROGRAM DELAY (5) button the number of times
needed to select the right setting level for the hardness of the water
(H0, H1, H2, H3, H4, H5);
•press the
START/STOP (6) button to confirm the setting and return
to the program setting menu.
N.B.: after 2 minutes, the appliance exits the parameter setting menu
automatically.
WATER HARDNESS TABLE
WATER HARDNESS
German Degrees (°dH) French Degrees (°dF) SETTING
0 - 4 0 - 7 .h 0
5 - 15 8 - 25 .h 1
16 - 23 26 - 40 .h 2
24 - 31 41 - 60 .h 3
32 - 47 61 - 80 .h 4
48 - 58 81 - 100 .h 5
Contact your local water board for information on the hardness of your
water supply.

User instructions
2. Troubleshooting
The dishwasher is equipped with a self-diagnostics system that is
capable of detecting and signalling a number of possible faults.
TABLE OF FAULTS DETECTED BY THE SELF-DIAGNOSTICS SYSTEM
FAULT DESCRIPTION
E1
Acquastop failure
The anti-flooding system has been activated (for the relevant models
only). The system is tripped in case of water leaks. Contact the after-
sales service.
E2
Safety level
The system which limits the water level inside the dishwasher has been
tripped. Interrupt the program and switch off the dishwasher. Switch the
dishwasher back on, program it again and start the washing cycle. If the
problem persists, contact the after-sales service.
E3
Water heating malfunction
The water is not heated or the heating parameters are not correct.
Repeat the washing program; if the problem persists, contact the after-
sales service.
E4
Water temperature monitoring malfunction
Interrupt the program and switch off the dishwasher. Switch the
dishwasher back on, program it again and start the washing cycle. If the
problem persists, contact the after-sales service.
E5
Water intake malfunction
The appliance does not take in water or does not do so correctly. Check
that the water connections are correct, the water intake tap is turned on
and the filter is not fouled. If the problem persists, contact the after-
sales service.
E6
Water pump-out malfunction
The appliance does not pump out the water or does not do so correctly.
Check that the drain hose is not kinked or crushed and that the siphon
and filter are not fouled. If the problem persists, contact the after-sales
service.

User instructions
FAULT DESCRIPTION
E7
Turbine flow-regulator malfunction (for the relevant models only)
The appliance is not able to "measure" the amount of water loaded
accurately. Interrupt the program and switch off the dishwasher. Switch
the dishwasher back on, program it again and start the washing cycle. If
the problem persists, contact the after-sales service.
E8
Alternate washing system malfunction
Interrupt the program and switch off the dishwasher. Switch the
dishwasher back on, program it again and start the washing cycle. If the
problem persists, contact the after-sales service.
E9 Water intake system malfunction
Contact the after-sales service.
•The
E1,E2,E3,E4,E8,E9 alarms provoke the “forcing” to end
cycle of the running program.
•The
E5,E6 alarms interrupts the running program once the cause is
resolved, it will bring bach the execution of the program.
•The alarm
E7 is visualized at the end of the cycle that comes,
however, brought to the end since the operation of the dishwasher is
not harmed.
To “reset” an alarm is necessary:
•Open and close the door, or turn off and on the machine. At this
point is possible to program the dishwasher again.
If the fault persists, call the authorised Technical Service Centre.

INSTRUCTION MANUAL
W
WA
AR
RN
NI
IN
NG
GS
SA
AN
ND
DR
RE
EC
CO
OM
MM
ME
EN
ND
DA
AT
TI
IO
ON
NS
S,
,G
GU
UI
ID
DE
EF
FO
OR
RT
TH
HE
EU
US
SE
EO
OF
FB
BA
AS
SK
KE
ET
TS
S
A
AN
ND
DF
FO
OR
RC
CL
LE
EA
AN
NI
IN
NG
GD
DI
IS
SH
HW
WA
AS
SH
HE
ER
RS
S

Contents
1. Safety and operating instructions __________________________28
2. Installation and hook-up _________________________________31
3. Operating instructions ___________________________________33
4. Cleaning and maintenance _______________________________46
Thank you for choosing one of our products.
You are advised to read this manual carefully; it contains all the
information you need about the right conditions for the proper, safe use
of your dishwasher.
The individual sections are laid out to provide you with a step-by-step
guide to all your appliance's functions; the texts are easy to understand
and are complete with detailed illustrations.
Following the cleaning instructions provided here will keep your
dishwasher's performance at peak levels in the long term.
This user-friendly manual will provide answers to all your questions
about use of the dishwasher.
INSTALLATION INSTRUCTIONS: these are intended for the qualified
technician who must carry out the installation, hook-up and testing of
the appliance.
USER INSTRUCTIONS: useful advice is provided for the use of baskets,
spray arms, containers and filters.

Safety instructions
1. Safety and operating instructions
THIS MANUAL FORMS AN INTEGRAL PART OF THE APPLIANCE: IT MUST
ALWAYS BE KEPT INTACT TOGETHER WITH THE DISHWASHER. BEFORE
USING THE APPLIANCE, CAREFULLY READ ALL THE INSTRUCTIONS
CONTAINED IN THIS MANUAL.
INSTALLATION MUST BE PERFORMED BY A QUALIFIED TECHNICIAN, IN
COMPLIANCE WITH THE REGULATIONS IN FORCE. THIS APPLIANCE IS
INTENDED FOR DOMESTIC USE, AND COMPLIES WITH THE EEC
DIRECTIVES 72/23, 89/336 (INCLUDING 92/31) CURRENTLY IN FORCE,
INCLUDING THE PREVENTION AND ELIMINATION OF RADIO FREQUENCY
INTERFERENCE.
THE APPLIANCE IS DESIGNED FOR THE FOLLOWING PURPOSE: WASHING
AND DRYING OF DISHES; ANY OTHER USE SHALL BE CONSIDERED
IMPROPER. THE MANUFACTURER DECLINES ALL RESPONSIBILITY FOR
USES OTHER THAN THOSE DESCRIBED ABOVE.
THE NAME PLATE FEATURING THE TECHNICAL DATA, SERIAL NUMBER
AND MARKINGS IS VISIBLY POSITIONED ON THE INNER EDGE OF THE
DOOR. THE NAME PLATE ON THE INNER EDGE OF THE DOOR MUST
NEVER BE REMOVED.
DO NOT LEAVE THE DISCARDED PACKAGING MATERIALS UNSUPERVISED
WITHIN THE HOME. SEPARATE THE VARIOUS MATERIALS WHICH MAKE
UP THE PACKAGING AND TAKE THEM TO THE NEAREST SORTED WASTE
COLLECTION CENTRE.
THE APPLIANCE MUST BE PROVIDED WITH AN EARTH CONNECTION IN
ACCORDANCE WITH THE ELECTRICAL SAFETY REGULATIONS IN FORCE.
THE MANUFACTURER DECLINES ALL RESPONSIBILITY FOR DAMAGE TO
PERSONS OR PROPERTY RESULTING FROM THE FAILURE TO EARTH THE
APPLIANCE OR FROM A DEFECTIVE EARTH CONNECTION.
THE POWER SUPPLY LEAD PLUG AND THE RELATIVE SOCKET MUST BE
OF THE SAME TYPE AND COMPLY WITH THE RELEVANT REGULATIONS.
CHECK THAT THE MAINS VOLTAGE AND FREQUENCY ARE THE SAME AS
THE VALUES MARKED ON THE NAMEPLATE. DO NOT USE ADAPTERS OR
SHUNTS. NEVER DISCONNECT THE PLUG BY PULLING ON THE POWER
SUPPLY LEAD.
•AFTER INSTALLATION, THE PLUG MUST REMAIN ACCESSIBLE.
•IN THE EVENT OF DAMAGE TO THE POWER CORD, HAVE IT
REPLACED BY A QUALIFIED TECHNICIAN.

Safety instructions
IF THE APPLIANCE IS INSTALLED ON A CARPETED OR COVERED FLOOR,
ENSURE THAT THE OPENINGS ON ITS UNDERSIDE ARE NOT
OBSTRUCTED.
ALWAYS SWITCH OFF THE DISHWASHER AFTER EACH USE TO AVOID
WASTING ELECTRICITY.
OBSOLETE APPLIANCES MUST BE RENDERED UNUSABLE. CUT OFF THE
MAINS POWER CORD AFTER UNPLUGGING IT FROM THE WALL OUTLET,
AND MAKE SAFE ANY COMPONENTS WHICH MIGHT BE DANGEROUS FOR
CHILDREN (LOCKS, DOORS, ETC.). THE APPLIANCE MUST THEN BE TAKEN
TO A SORTED WASTE COLLECTION CENTRE.
IN THE EVENT OF A FAULT, DISCONNECT THE DISHWASHER FROM THE
ELECTRICAL POWER SUPPLY AND SHUT OFF THE WATER TAP. THEN
CALL IN A QUALIFIED TECHNICIAN.
DO NOT USE APPLIANCES WHICH HAVE BEEN DAMAGED DURING
TRANSIT! IF IN DOUBT, CONSULT YOUR DEALER.
THE APPLIANCE MUST BE INSTALLED AND CONNECTED IN ACCORDANCE
WITH THE INSTRUCTIONS PROVIDED BY THE MANUFACTURER OR BY A
QUALIFIED TECHNICIAN.
THE APPLIANCE IS INTENDED FOR USE BY ADULTS. DO NOT ALLOW
CHILDREN TO COME NEAR OR PLAY WITH THE DISHWASHER. KEEP
CHILDREN AWAY FROM DETERGENTS AND FROM THE OPEN
DISHWASHER DOOR. THE PACKAGING MATERIALS (PLASTIC BAGS,
POLYSTYRENE, METAL BARS, ETC.) MUST NOT BE LEFT WITHIN THE
REACH OF CHILDREN.
KEEP CHILDREN AWAY FROM THE OPEN DISHWASHER. THE APPLIANCE
MAY CONTAIN RESIDUES OF DETERGENT WHICH CAN CAUSE
IRREVERSIBLE DAMAGE TO THE EYES, MOUTH, AND THROAT, AS WELL
AS POSSIBLE DEATH BY SUFFOCATION.
DO NOT INTRODUCE SOLVENTS SUCH AS ALCOHOL OR TURPENTINE
WHICH MAY CAUSE AN EXPLOSION.
DO NOT LOAD DISHES THAT ARE SOILED WITH ASH, WAX OR PAINTS.
LEANING OR SITTING ON THE DISHWASHER DOOR WHEN OPEN MAY
CAUSE THE APPLIANCE TO OVERTURN, PUTING PEOPLE AT RISK.

Safety instructions
DO NOT UNDER ANY CIRCUMSTANCES TOUCH THE HEATING ELEMENT
IMMEDIATELY AFTER THE END OF A WASHING PROGRAM.
OVER TIME, THE DISHWASHER HEATING ELEMENTS MAY CHANGE
COLOUR, IN PART OR OVERALL. THIS IS PERFECTLY NORMAL AND DOES
NOT IN ANY WAY AFFECT THE OPERATION OF THE APPLIANCE.
DO NOT DRINK THE WATER RESIDUES WHICH MAY BE PRESENT INSIDE
THE DISHES OR DISHWASHER AT THE END OF THE WASHING PROGRAM
AND BEFORE THE DRYING CYCLE.
KNIVES OR OTHER SHARP-ENDED COOKING UTENSILS MUST BE PLACED
IN THE CUTLERY BASKET BLADE-DOWN, OR LAID HORIZONTAL IN THE
TOP BASKET. TAKE CARE NOT TO CUT YOURSELF AND ENSURE THAT
THEY DO NOT PROJECT FROM THE BASKET.
AQUASTOP MODELS
THE AQUASTOP DEVICE PREVENTS FLOODING IN THE EVENT OF A
WATER LEAK. WHEN THE AQUASTOP DEVICE IS TRIPPED, CALL IN A
QUALIFIED TECHNICIAN TO IDENTIFY AND REPAIR THE FAULT.
IN MODELS EQUIPPED WITH THE AQUSTOP DEVICE, THERE IS A
SOLENOID VALVE INSIDE THE WATER INTAKE HOSE. DO NOT CUT THE
HOSE AND DO NOT ALLOW THE SOLENOID VALVE TO DROP INTO
WATER. IN THE EVENT OF DAMAGE TO THE WATER INTAKE HOSE,
DISCONNECT THE APPLIANCE FROM THE ELECTRICAL POWER SUPPLY
AND FROM THE WATER SUPPLY.
IMMEDIATELY AFTER INSTALLING THE DISHWASHER, PERFORM A QUICK
TEST OF THE APPLIANCE FOLLOWING THE INSTRUCTIONS BELOW. IF
THE DISHWASHER FAILS TO OPERATE CORRECTLY, DISCONNECT IT
FROM THE ELECTRICAL POWER SUPPLY AND CALL THE NEAREST
TECHNICAL SERVICE CENTRE. DO NOT ATTEMPT TO REPAIR THE
APPLIANCE.
THE DISHWASHER MEETS ALL THE REQUIREMENTS SET OUT BY THE
REGULATIONS IN FORCE CONCERNING SAFETY AND ELECTRICAL
EQUIPMENT. ANY TECHNICAL CHECKS SHOULD BE CONDUCTED
EXCLUSIVELY BY A TRAINED AND AUTHORISED TECHNICIAN: REPAIRS
CARRIED OUT BY UNAUTHORISED PERSONS WILL INVALIDATE THE
WARRANTY, AS WELL AS POSING A POTENTIAL HAZARD TO THE USER.
The manufacturer declines all responsibility for damage to persons or property
resulting from failure to observe the above precautions, from tampering with
even a single component of the appliance, or from the use of non original
spare parts.

Installation instructions
2. Installation and hook-up
Remove the polystyrene basket retainers. Position the appliance in the
desired place of installation. The back or sides of the dishwasher may be
placed up against walls or other furniture units. If the dishwasher is
installed near a heat source, fit the special insulating panel to prevent
overheating and malfunction of the appliance. To ensure stability, install
integrated or built-under dishwashers only under continuous worktops,
and screw them to the adjacent units. To facilitate the installation
procedure, the intake and drain hoses can be positioned in any direction;
make sure that the hoses are not kinked, crushed or pulled too tightly.
Make sure to tighten the locking ring-nut once the pipes have been
placed in the direction required. A hole at least 8 cm in diameter is
required to allow the power supply cable and pipes to pass.
Level the appliance on the floor using its adjustable feet. This operation
is essential for ensuring correct operation of the dishwasher.
Installing a hob on top of a free-standing dishwasher is absolutely
forbidden. Building-in a dishwasher underneath a ceramic hob is
absolutely forbidden.
A dishwasher can be built-in underneath a conventional hob provided
there is no break in the kitchen worktop, and the dishwasher and hob
are installed and secured correctly, so that no hazards are
generated.
For free-standing models only: if the appliance is not built-in and is
therefore accessible on one side, the door hinge area must be covered
for safety reasons (injury hazard).
The covering fixtures are available as an accessory from specialist
dealers or the After-Sales Service.
Some models are equipped with only one adjustable foot at the rear,
which can be adjusted by turning the screw on the lower front part of the
appliance.
2.1 Water supply connection
Preventing the risk of clogging or damage: if the water pipe is new or
has not been used for a long time, before connecting to the water supply
check that the water is clear and free of impurities, to prevent damage to
the appliance.
The dishwasher must always be connected to the water system
with new hoses; old or used hoses must never be reused.

Installation instructions
CONNECTING TO THE WATER SUPPLY
Connect the intake hose to a cold water supply with ¾”
gas thread, inserting the filter Asupplied with the
dishwasher. Take care to screw the hose firmly into
place with your hands and then complete by
tightening about ¼ of a turn with pliers.
In dishwashers equipped with the ACQUASTOP
device, the filters is already fitted inside the threaded
ring.
The dishwasher can also be connected to a hot water supply not
exceeding 60°C. Supplying the appliance with hot water cuts down the
washing time by approximately 20 minutes, but slightly reduces its
effectiveness. Make the connection to the domestic hot water supply using
the same procedure described for connecting to the cold water supply.
DRAIN CONNECTION
Insert the dishwasher’s drain hose
into a drain pipe having a diameter
of at least 4 cm, or alternatively,
place it inside the kitchen sink
using the plastic support provided,
taking care not to crush or
excessively bend the hose. It is
important to prevent the hose from
coming loose and falling. For this
purpose, the plastic support is
equipped with a hole for tying it to
the wall or water tap.
The free end should be positioned at a height of between 30 and 100
cm, and should never be submerged in water. If a horizontal drain
extension hose is used (for a maximum of 3 m) the drain hose can be
placed at a maximum height of 85 cm from the ground.
2.2 Electrical connection
Plug the power cord into a suitable electrical outlet, according to the
instructions given in chapter "1. Safety and operating instructions".
This manual suits for next models
24
Table of contents
Other Smeg Dishwasher manuals

Smeg
Smeg KOA725 Operation instructions

Smeg
Smeg BLV2NE-1 User manual

Smeg
Smeg GM287-120 User manual

Smeg
Smeg ST8246U User manual

Smeg
Smeg Dishwasher PL115NE User manual

Smeg
Smeg DWAFI152T User manual

Smeg
Smeg DWD1 User manual

Smeg
Smeg Universale PL65233XIN User manual

Smeg
Smeg CL6S-4 User manual

Smeg
Smeg Dishwasher DWI710 User manual
Popular Dishwasher manuals by other brands

Siemens
Siemens SE64A560/17 Instructions for use

Hotpoint
Hotpoint Ultima DWF70 Instructions for installation and use

Kenmore
Kenmore ULTRA WASH 665.1310 Use & care guide

Indesit
Indesit DFP 27B1 operating instructions

Viking
Viking Custom Front DFUD042 installation guide

Tappan
Tappan TDB652RB operating instructions