Smeg STU8642 User manual

CONTENTS
Contents
1 INTRODUCTION............................................................................................. 3
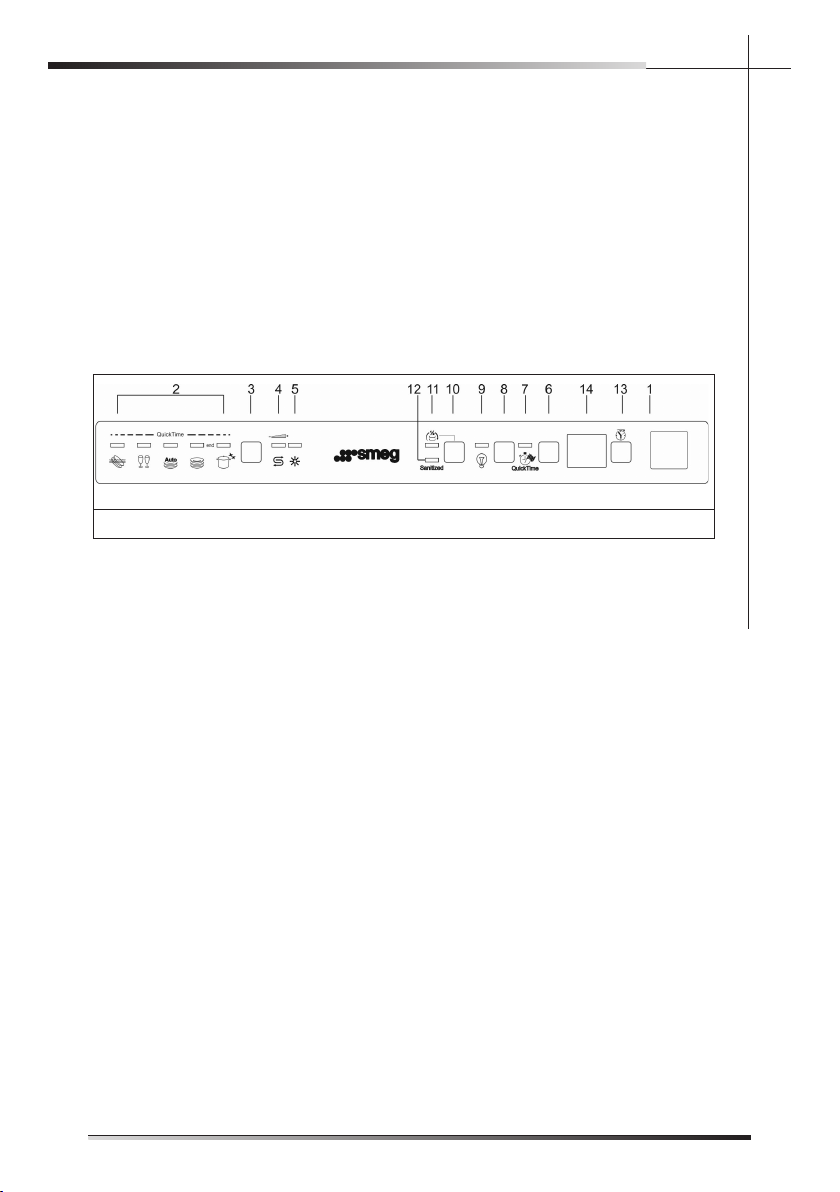
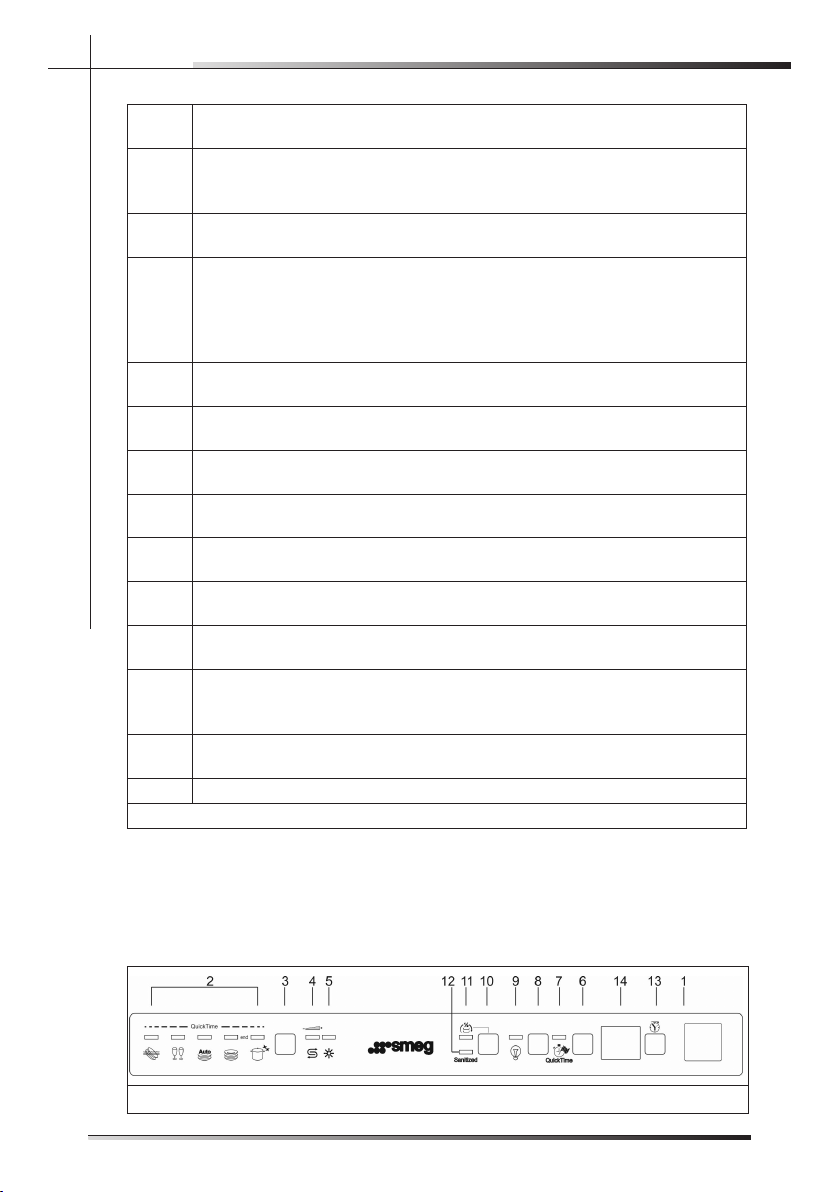
2 DESCRIPTION OF THE CONTROLS............................................... 5
2.1 Upper panel ............................................................................................5
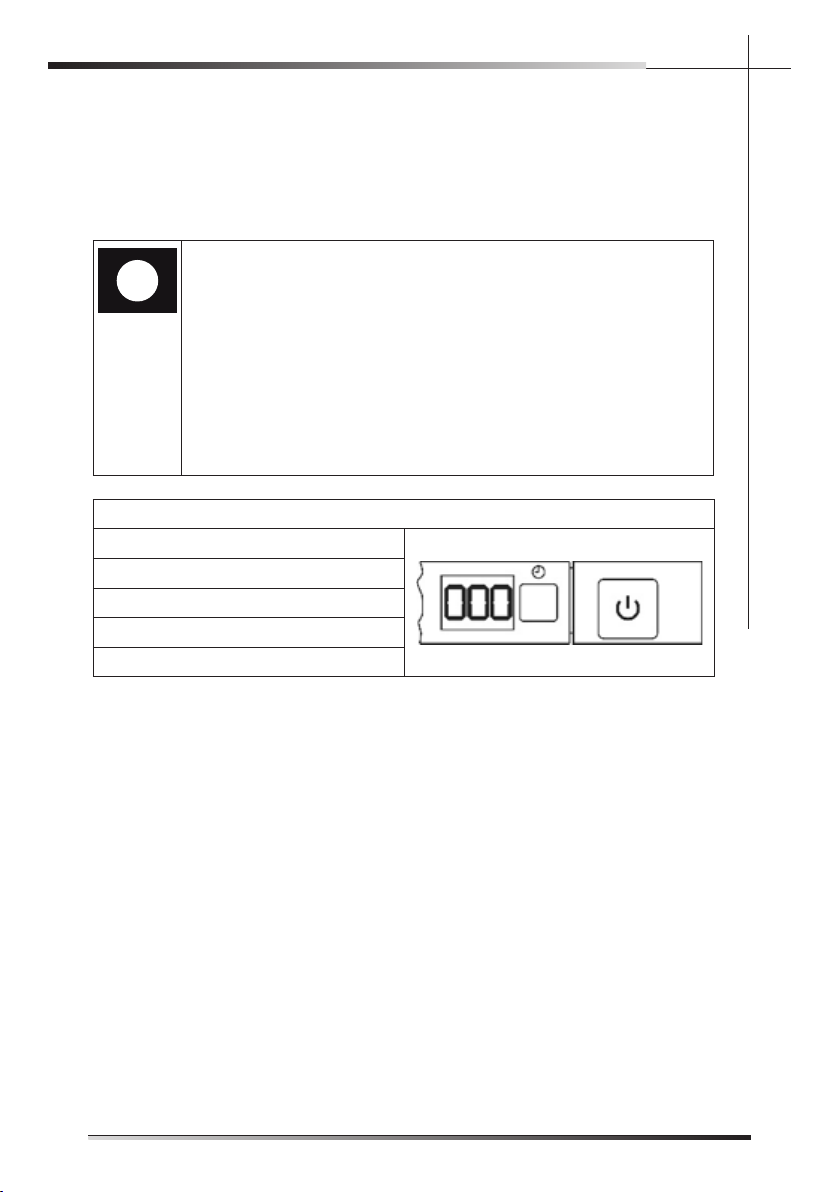
2.2 Setting the washing program and switching on and off...........................6
2.2.1 Switching on ...........................................................................................9
2.2.2 Selecting and starting the program.......................................................10
2.2.3 End of program .................................................................................... 11
2.2.4 Interrupting a program ......................................................................... 11
2.2.5 Changing the current program ............................................................. 11
2.2.6 Canceling the current program ............................................................. 11
2.2.7 Options ................................................................................................12
2.2.8 Switching off .........................................................................................13
2.2.9 Removing the dishes ...........................................................................13
2.3 Additional function ...............................................................................14
2.3.1 Adjusting the water softener .................................................................14
3 ENERGY SAVING AND ENVIRONMENTAL RESPECT ..................... 15
3.1 Reducing the consumption of detergent and respecting the environment . 15
4 TROUBLESHOOTING ................................................................................ 16
5 OPERATING INSTRUCTIONS .................................................................. 18
5.1 Using the water softening system (on some models only) .................. 18
5.2.1 Adding the rinse-aid ............................................................................ 21
5.2.2 Adjusting the rinse-aid dispenser setting ............................................ 21
5.2.3 Adding the detergent ........................................................................... 22
5.3 General warnings and recommendations ........................................... 24
5.4 Using the racks ................................................................................... 26
5.4.1 Lower rack ...........................................................................................27
5.4.2 Cutlery basket ......................................................................................29
5.4.3 Flexi Duo Top Rack ............................................................................. 30
5.4.4 Upper Rack...........................................................................................31
6 CLEANING AND USER MAINTENANCE .............................................. 34
6.1 General warnings and recommendations ........................................... 34
6.2 Cleaning the water intake filter ............................................................ 35
6.3 Cleaning the spray arms ..................................................................... 35
6.4 Cleaning the filter unit ......................................................................... 37
6.5 General warnings and recommendations for correct maintenance .... 38
6.6 Troubleshooting minor problems ........................................................ 39
7 IMPORTANT SAFETY AND INSTRUCTIONS ....................................... 41
8 INSTALLATION AND HOOK-UP .............................................................. 47
9 TECHNICAL DATA ...................................................................................... 48
1
EN

2
EN

1 INTRODUCTION
Thank you for choosing one of our products. To use this
dishwasher correctly and safely, please read this manual
carefully. The manual is divided into sections giving you
a step-by-step guide to all your appliance’s functions.
The texts are easy to understand and are complete with
detailed illustrations. Following the cleaning instructions
provided here will keep dishwasher performance at peak
levels in the long term. This user- friendly manual will pro-
vide answers to all your questions about use of the dish-
washer.
This manual comprises the following sections:
INTRODUCTION: general information about the manual.
USER INSTRUCTIONS: advice on using the washing
programs and information about all the dishwasher func-
tions.
Useful advice is provided for the use of racks, spray
arms, containers and filters.
WARNINGS: a list of warnings concerning safety and
use of the dish- washer.
INSTALLATION INSTRUCTIONS: for the qualified tech-
nician who must carry out the installation, hook-up and
testing of the appliance.
Nomenclature of figures and tables:
The progressive number of each figure is shown in the
bottom right- hand corner of the relative box. An example
of a progressive number is “Fig. 4-01”, where the first
number (4) indicates the section to which the figure be-
longs, while the second number (01) indicates the pro-
gressive number of the figure in section 4 (Fig. 4-01 is
the first figure in section 4). The tables are numbered in
the same way, bearing in mind that “Tab.” is used instead
of “Fig.” (e.g.: Tab. 4-01 is the first table in section 4). If
a table occupies more than one page, a letter is added
after the progressive number (e.g.: “Tab. 4-01a”, Tab.
4-01b”).
3
EN
INTRODUCTION

Symbols used in this manual (see tab. 1-01)
DANGER. This symbol highlights information and warnings
which, if not observed, may compromise personal safety or
dam- age the appliance.
DANGER OF ELECTROCUTION. This symbol highlights in-
formation and warnings of an electrical nature which, if not
observed, may compromise personal safety or damage the
appliance.
This symbol highlights general information and warnings.
Tab. 1-01
4
EN
INTRODUCTION

2 DESCRIPTION OF THE CONTROLS
2.1 Upper panel
All the dish washer controls are grouped on the upper panel (se fig. 2-01).
The dishwasher can only be switched on, programmed, switched off, etc.
with the door open.
A brief description (see tab. 2-01) of the various controls on the upper
panel is given below.
FIG. 2-01
The panel shown is indicative, programs and options may vary depending
on model.
USER INSTRUCTIONS
5
EN

1On/off button
Press to power the appliance.
2
Program indicator lights
These show which program is selected and whether there are any faults
(Troubleshooting).
3Program selection button
Press in sequence to select the required program.
4
Add salt indicator light (only fitted on some models)
Shows the appliance has run out salt.
WATER HARDNESS ADJUSTMENT ON INDICATOR LIGHT
The light flashes to indicate that the appliance is in “water hardness
adjustment” mode.
5Add rinse aid indicator light (only fitted on some models)
Shows the appliance has run out of rinse aid.
6Quick time option button
Press this button to start one of the quick time programmes (see table).
7Quick time programmes indicator light
Shows that one of the quick time programmes will be run
8Enersave option button
Option to reduce energy consumption.
9Enersave option light
Shows the function is active.
10 Half load option button
Press to select the half load option.
11 Half load option light
Shows the function is active.
12
Sanitation indicator light
Shows that sanitation has been completed (see notes in the programmes
table)
13 Programme delay button
Press to delay the start of the programme up to 9 hours.
14 Information display
Tab. 2-01
2.2 Setting the washing program and switching on
and o
The dishwasher is equipped with a control panel (see g. 2-02) which is used to pro-
gram the appliance and switch it on and o.
FIG. 2-02
6
USER INSTRUCTIONS
EN

To select the most suitable program for the dishes to wash, consult the
following table which specifies the most appropriate type of washing
sequence depending on the kind of dishes and how dirty they are (see
tabs. 2-02a and 2-02b)
PROGRAMME, NUMBER
& SYMBOL
LOAD CROCK-
ERY AND
CUTLERY
PROGRAM
PROGRESS
DURATION CONSUMPTION
MINUTES
(1) WATER ENERGY
KWH (1)
1
QuickTime
end
QuickTime
Sanitized
1131410 6789432 5
½
1112
Auto
end
Auto
end
Auto
end
Auto
end
Auto
end
Auto
end
Auto
end
Auto
end
Auto
end
Auto
end
Auto
end
Auto
end
Auto
E1
E2
E3
E4
E5
E6
E7
E8
E9
E11
SOAK Cold prewash 15 4.0 l
1.06 gal. 0.02
2CRYSTAL
Wash at 45°C
(113°F)
Cold rinse
Rinse at 70°C
(158°F)
Dry
65 12 l
3.17 gal. 0.5
3
QuickTime
end
QuickTime
Sanitized
1131410 6789432 5
½
1112
Auto
end
Auto
end
Auto
end
Auto
end
Auto
end
Auto
end
Auto
end
Auto
end
Auto
end
Auto
end
Auto
end
Auto
end
Auto
E1
E2
E3
E4
E5
E6
E7
E8
E9
E11
AUTO DELI-
CATE (2)
Wash at 45°C
(113°F)
Cold rinse
Rinse at 53°C
(127°F)
Dry
180-195 10.6 l
2.8 gal. 0.5-0.6
4WASH
PLUS
Mixed dishes
very dirty, inclu-
ding dried-on
residues.
Cold prewash
Wash at 65°C
(149°F)
Cold rinse
Rinse at 70°C
(158°F)
Dry
110 15 l
3.96 gal. 1.00
5
EXTREME
WASH
ETL
SANITATION
LISTED
Cold prewash
Wash at 65°C
(149°F)
Cold rinse
Rinse at 70°C
Dry
105-130
12-16 l
3.17 gal
4.23 gal.
1.0-1.2
Tab. 2-02a
(1) The cycle times and electrical energy listed use and care manual are
based on normal soil loads and 120°F (49°C) incoming water and will
vary based on your actual conditions.
(2) Program for energy star; the ENERSAVE option must be enabled.
- Only “EXTREME WASH” program conforms to NSF std 184 and is certi-
fied by INTERTEK with the ETL SANITATION LISTED.
- When the “Sanitized” light shine it means that the dishwasher and its
contens have been sanitized according to the requirements of the Na-
tional Foundation (NSF).
USER INSTRUCTIONS
7
EN
Mixed dishes
very dirty, and
pans dirty,
including dried-
on residues.
Normally soiled
dishes, inclu-
ding dried-on
residues, for
daily use.
Glass china
and mixed
dishes with light
dirt.
Pans and
dishes awaiting
completion of
the load.

PROGRAMME, NUMBER
& SYMBOL
LOAD
CROCKERY
AND CUT-
LERY
PROGRAM
PROGRESS
DURA-
TION CONSUMPTION
MINUTES
(1) WATER ENERGY
KWH (1)
6
QuickTime
end
QuickTime
Sanitized
1131410 6789432 5
½
1112
Auto
end
Auto
end
Auto
end
Auto
end
Auto
end
Auto
end
Auto
end
Auto
end
Auto
end
Auto
end
Auto
end
Auto
end
Auto
E1
E2
E3
E4
E5
E6
E7
E8
E9
E11
+RAPID 27’
Wash at 38°C
(100°F)
Rinse at 50°C
(122°F)
27 7.5 l
1.98 gal. 0.4
7+DELICATE
QUICK
Cold prewash
Wash at 50°C
(122°F)
Cold rinse
Rinse at 70°C
(158°F)
60 15 l
3.96 gal. 1.0
8+
QuickTime
end
QuickTime
Sanitized
1131410 6789432 5
½
1112
Auto
end
Auto
end
Auto
end
Auto
end
Auto
end
Auto
end
Auto
end
Auto
end
Auto
end
Auto
end
Auto
end
Auto
end
Auto
E1
E2
E3
E4
E5
E6
E7
E8
E9
E11
ECO QUICK
Cold prewash
Wash at 60°C
(140°F)
Cold rinse
Rinse at 70°C
(158°F)
85 15 l
3.96 gal. 1.2
9+NORMAL
QUICK
Cold prewash
Wash at 70°C
(158°F)
Cold rinse
Rinse at 70°C
(158°F)
90 15 l
3.96 gal. 1.3
10 +STRONG
and FAST
Wash at 65°C
(149°F)
Cold rinse
Rinse at 70°C
55 12 l
3.17 gal. 1.12
Tab. 2-02a
(1) The cycle times and electrical energy listed use and care manual are
based on normal soil loads and 120°F (49°C) incoming water and will
vary based on your actual conditions.
8
USER INSTRUCTIONS
EN
Dishes with light
dirt, washed
immediately
after use.
Dishes with light
dirt.
Dishes with
normal dirt,
washed
immediately
after use.
Dishes with
normal dirt,
washed
immediately
after use.
Mixed dishes
with normal dirt,
without dried-on
residues.

Only run the soak program with half loads.
To run programmes 6, 7, 8, 9, 10, select the required standard programme
and then press the quick time option button (ref. 6 fig. 2-02).
After using the above tables to choose the most suitable washing cycle,
program the appliance.
Before starting a washing program, make sure that:
• The water supply tap is open.
• The correct amount of detergent has been added to the
dispenser (to add detergent, see the instructions in the
general manual).
• The spray arms are able to rotate freely and without ob-
struction
• The racks have been correctly loaded (see the instruc-
tions in the general manual).
• The dishwasher door is securely closed.
INFORMATION DISPLAY
Information displayed
Scheduled program duration
Remaining program time
Delayed start : 1 – 24 hours
Error message : Err
2.2.1 Switching on
Press the on/off button (ref. 1 fig. 2-02) to start the dishwasher. Then wait
for one of the program indicator lights to turn on (ref. 2 fig. 2-02).
USER INSTRUCTIONS
9
EN

2.2.2 Selecting and starting the program
•Press the program selection button (ref. 3 fig. 2-02) several times until
the indicator light corresponding to the required program turns on (ref.
2 fig. 2-02);
• if required, press the relative buttons to select any complementary func-
tions (e.g.: “extra drying”, “program delay”; see para 2.2.7 “options”);
• close the door; the program will start after about 2 seconds and the
relative indicator light will flash throughout the cycle (program¬ running
signal).
IMPORTANT
The door of the dishwasher must be closed within 4 seconds
after use of the program selection button for all functions
(e.g. program selection, change, deletion, etc.).
If the door is not closed within 4 seconds, one or more pro-
gram lights (depending on the current operation) will flash at
high speed to indicate that the operation must be confirmed
before the door is closed.
To confirm, simply press the program selection button
once and the flashes will slow down; close the door at once to
start/ restart the dishwasher.
The same applies if the dishwasher is opened with the pro-
gram delay option set and the cycle not started (e.g. to
add more dishes): the program selection button must be
pressed before the door is closed, restarting the program
delay countdown.
If the door of the dishwasher has not been closed or has been
incorrectly closed, the washing cycle will not begin.
FAST CYCLES OPTION
• Select this option together with any washing program (except the soak
program) to SHORTEN the cycle by a minimum of 10% to a maximum
of 55%, depending on the cycle selected. To activate this option, press
the FAST CYCLES button (light comes on) after selecting the
program required. The option is automatically deactivated at the end of
the program.
10
USER INSTRUCTIONS
EN

2.2.3 End of program
The end of the program is signaled by a short beep. Additionally the indi-
cator light of the normal and strong programs (marked “end”) flash.
PROGRAM IN PROGRESS INDICATOR LIGHT
(on some models only)
When a program is running, a flashing light is projected onto the floor un-
der the right-hand corner of the door. At the end of the program, the light
goes out to reduce sleep mode electricity consumption.
2.2.4 Interrupting a program
To interrupt the current program simply open the door of the dishwasher;
to restart the program, simply close the door again. The program restarts
from where it was interrupted.
2.2.5 Changing the current program
To change the current program, simply open the door of the dishwasher
and select the new program. Close the door to run the new program au-
tomatically.
2.2.6 Canceling the current program
• To cancel the current program, open the door and press and hold down the
program selection button (ref. 3 fig. 2-02) for a few seconds until the indica-
tor lights of the fourth and fifth programs turn on (ref. pr. 4, pr. 5 fig. 2-03).
• Close the door again.
• After about 1 minute, the dishwasher terminates the cycle and the in-
dicator lights of the fourth and fifth programs (ref. pr. 4, pr. 5 fig. 2-03)
start flashing.
QuickTime
end
QuickTime
Sanitized
1131410 6789432 5
½
1112
Auto
end
Auto
end
Auto
end
Auto
end
Auto
end
Auto
end
Auto
end
Auto
end
Auto
end
Auto
end
Auto
end
Auto
end
Auto
E1
E2
E3
E4
E5
E6
E7
E8
E9
E11
symbols programs according to the models FIG. 2-03
USER INSTRUCTIONS
11
EN

2.2.7 Options
Function designed for loads with hard to dry item s such as saucepans,
non-stick pans and plastic containers. Increases the hot rinse tempera-
ture and can be used in programmes featuring a final drying phase (see
programmes table).
PROGRAM DELAY
(available for all programs except soak)
The “Program delay” function delays the beginning of the washing pro-
gram up to 24 hours from the moment in which programming takes place.
This makes it possible to use the dishwasher at a certain time of day.
Before programming a delay, open the door of the dishwasher, select the
required washing program (see para 2.2 “Setting the washing program
and switching on and off”). Select the day by pressing the Program delay
button (ref. 11 fig. 2-02); each time you press the button, the display in-
creases the delay before the appliance starts by 1 hour.
SPREAD HALF LOAD
Suitable when there are not many dishes to be washed, it saves energy
and reduces the program duration. Place dishes in both baskets then load
the detergent dispenser than less than the normal amount for a full load.
ENERSAVE OPTION
This option further reduces energy consumption by opening the
door at the end of the cycle for more effective drying. At the end
of the wash an automatic device releases the door, which slowly
opens by a few centimetres. This allows optimal drying even with
low rinsing temperatures, for significant energy saving.
The dishwasher remains in an idle state between the rinse stage
and the end of the cycle to allow proper drying (the display
shows the time left until the end of the cycle). Opening the door
at this stage causes the cycle to stop and ends the program.
The program end is signalled by a short beep and the flashing
of the indicator lights for programs 4 and 5.
Enersave is activated automatically if the selected program is
compatible with the option. It can be deactivated before the pro-
gram is started.
EN
12
USER INSTRUCTIONS
f fognihct iwS8.2.2
eh tdnapeebt r ohsas t imer ehsawhs i deh t ,ma r go r peh t f odneeh tt A indi-
cator lights of the fourth and fifth program (ref. pr. 4, pr. 5 fig. 2-04) flash.
Turn off the appliance by opening the door and pressing the on/off button (ref.
1 fig. 2-02).
FIG. 2-04
If it is necessary to open the door during the washing cycle, the
program will be interrupted, the relative indicator light will continue to
flash and a beep will indicate that the cycle has not terminated. Wait
for about 1 minute before closing the door and continuing with the
program. When the door closes, the program will start from where it
was interrupted. This operation should be performed only if neces-
sary as it could cause irregular program performance.
SEHS I DEHTG N I V OM E R4
˜˜˜
t sae l t at i aw,ma r go r pgn i hsaweh t f odneeh t tA 20 minute before
removing the dishes in order to allow them to cool. To prevent any
water droplets on the upper rack from falling onto the dishes in the
lower rack, empty the lower rack first and then the upper one.
2.2.9
symbols programs according to the models
When the function is activated, opening of the door must not
be impeded in any way; do not leave anything in the necessary
space in front of the door to allow it to open. Do not force the
door lock before the end of the cycle is signalled, as this would
damage the mechanism.
12
USER INSTRUCTIONS
EN

2.2.8 Switching off
At the end of the program, the dishwasher emits a short beep and the in-
dicator lights of the fourth and fifth program (ref. pr. 4, pr. 5 fig. 2-04) flash.
Turn off the appliance by opening the door and pressing the on/off button
(ref. 1 fig. 2-02).
QuickTime
end
QuickTime
Sanitized
1131410 6789432 5
½
1112
Auto
end
Auto
end
Auto
end
Auto
end
Auto
end
Auto
end
Auto
end
Auto
end
Auto
end
Auto
end
Auto
end
Auto
end
Auto
E1
E2
E3
E4
E5
E6
E7
E8
E9
E11
symbols programs according to the models FIG. 2-04
If it is necessary to open the door during the washing cycle,
the program will be interrupted, the relative indicator light will
continue to flash and a beep will indicate that the cycle has not
terminated. Wait for about 1 minute before closing the door
and continuing with the program. When the door closes, the
program will start from where it was interrupted. This opera-
tion should be performed only if necessary as it could cause
irregular program performance.
2.2.9 Removing the dishes
At the end of the washing program, wait at least 20 minute
before removing the dishes in order to allow them to cool. To
prevent any water droplets on the upper rack from falling onto
the dishes in the lower rack, empty the lower rack first and then
the upper one.
USER INSTRUCTIONS
13
EN

2.3 Additional functions
2.3.1 Adjusting the water softening system
The dishwasher is equipped with a device which allows the softener set-
ting to be varied to suit the hardness of the mains water. The hardness is
set using the PROGRAM SELECTION BUTTON (3).
To access the setting function, hold the button down for more than 15
seconds. The WATER HARDNESS ADJUSTMENT INDICATOR LIGHT
(4) flashes, while the SELECTED PROGRAM INDICATOR LIGHTS (2)
show the current setting. Each pressure on the button changes the setting
following the sequence in the table below:
>
WATER HARDNESS TABLE
WATER HARDNESS
SETTING
German
degrees
(°dH)
French
Degrees
(°dF)
0 - 6 0 - 11 All lights off
(no salt)
7 - 10 12 - 18 One light on
11 - 15 19 - 27 Two lights on
16 - 21 28 - 37 Three lights
on
22 - 28 38 - 50 Four lights on
29 - 35 51 - 62 Five lights on
36 - 50 63 - 90 Two lights on
Contact your local water board for information on the hardness of your water
supply.
After adjustment or display of the current setting, simply do not touch the
button for a few seconds; the dishwasher will automatically return to stan-
dard mode, quitting the adjustment mode.
14
USER INSTRUCTIONS
EN

3 ENERGY SAVING AND ENVIRONMENTAL CONSID-
ERATIONS
• Always try to run the dishwasher fully loaded.
• Do not wash the dishes under a running tap.
• Use the most suitable washing program for each type of load.
• Do not pre-rinse.
• If available, connect the dishwasher to a hot water system with a tem-
perature of up to 60°C (140°F).
• When possible, skip the drying cycle by opening the door after wash-
ing: the air and the residue heat will dry the dishes to perfection.
3.1 Reducing the consumption of detergent and re-
specting the environment
The phosphates contained in dishwasher detergents are harmful to the
environment. To avoid using excessive amounts of detergent and to save
on electricity:
• Separate the more delicate items from those that are more resistant to
aggressive detergents and high temperatures;
• Do not pour the detergent directly onto the dishes.
USER INSTRUCTIONS
15
EN

4 TROUBLESHOOTING
The dishwasher can to signal a number of malfunctions by turning on vari-
ous indicator lights, as described below (see following table):
FAULT DESCRIPTION
E1
Acquastop failure
The anti-flooding system has tripped (only
for models fitted with this feature). Acti-
vates in case of water leaks. Contact the
technical assistance service.
E2
Safety level
The system limiting the water level in the
dishwasher has tripped. Interrupt the cur-
rent program. Switch off the dishwasher,
switch it back on again, program a new cy-
cle and press start. If the problem persists,
contact the technical assistance service.
E3
Water heating malfunction
The water is not heated or is incorrectly
heated. Repeat the washing program; if
the problem persists, contact the technical
assistance service.
E4
Water temperature monitoring malfunction
Interrupt the current program. Switch off
the dishwasher, switch it back on again,
program a new cycle and press start. If the
problem persists, contact the technical as-
sistance service.
E5
Water intake malfunction
The appliance does not take in water or
does so incorrectly. Make sure the water
connections are correct, that the water
supply tap is open and that the filter is not
clogged. If the problem persists, contact
the technical assistance service.
Tab. 4-01a
16
USER INSTRUCTIONS
EN

FAULT DESCRIPTION
E6
Water pump-out malfunction
The appliance does not pump out the water or
does so incorrectly. Make sure the drain hose
is not kinked or crushed and that the siphon
and filters are not clogged.
If the problem persists, contact the technical
assistance service.
E7
Turbine flow-regulator malfunction
(only for models fitted with this feature)
The appliance is unable to precisely measure
the quantity of incoming water. Interrupt the
current program and switch off the dishwash-
er. Switch it back on again, program a new
cycle and press start. If the problem persists,
contact the technical assistance service.
E8
Alternate washing system malfunction
Interrupt the current program and switch
off the dishwasher. Switch it back on again,
program a new cycle and press start. If the
problem persists, contact the technical assis-
tance service.
E9 Water intake system malfunction
Contact the technical assistance service.
E11
QuickTime
end
QuickTime
Sanitized
1131410 6789432 5
½
1112
Auto
end
Auto
end
Auto
end
Auto
end
Auto
end
Auto
end
Auto
end
Auto
end
Auto
end
Auto
end
Auto
end
Auto
end
Auto
E1
E2
E3
E4
E5
E6
E7
E8
E9
E11
Wash motor pump does not work
Tab. 4-01a
QuickTime
end
QuickTime
Sanitized
1131410 6789432 5
½
1112
Auto
end
Auto
end
Auto
end
Auto
end
Auto
end
Auto
end
Auto
end
Auto
end
Auto
end
Auto
end
Auto
end
Auto
end
Auto
E1
E2
E3
E4
E5
E6
E7
E8
E9
E11
Light off
QuickTime
end
QuickTime
Sanitized
1131410 6789432 5
½
1112
Auto
end
Auto
end
Auto
end
Auto
end
Auto
end
Auto
end
Auto
end
Auto
end
Auto
end
Auto
end
Auto
end
Auto
end
Auto
E1
E2
E3
E4
E5
E6
E7
E8
E9
E11
Light on
QuickTime
end
QuickTime
Sanitized
1131410 6789432 5
½
1112
Auto
end
Auto
end
Auto
end
Auto
end
Auto
end
Auto
end
Auto
end
Auto
end
Auto
end
Auto
end
Auto
end
Auto
end
Auto
E1
E2
E3
E4
E5
E6
E7
E8
E9
E11
Light flashing
If an alarm situation occurs, the dishwasher interrupts the current program and
signals the fault.
• Alarms E1, E2, E3, E4, E8, E9 immediately terminate the current program.
• Alarms E5, E6 interrupt the current program and, after the problem has
been eliminated, resume the cycle.
• Alarm E7 is displayed at the end of the cycle which, however, is completed
given that it does not jeopardize the operation of the dishwasher.
• E11: Contact the after-sales service.
To “reset” an alarm:
• open or close the door, or switch the appliance on and back off again. At
this point, the dishwasher can be programmed again.
If the fault persists, contact the Authorized Technical Assistance
Service.
USER INSTRUCTIONS
17
EN

5 OPERATING INSTRUCTIONS
BEFORE STARTING TO USE THE APPLIANCE, MAKE SURE
YOU HAVE READ AND UNDERSTOOD ALL THE WARNINGS
CONTAINED IN CHAPTER 2 “IMPORTANT SAFETY INSTRUC-
TION”.
Once the dishwasher has been correctly installed, prepare for use as follows:
• adjust the water softening system;
• add the regenerating salt;
• add the rinse-aid and detergent.
5.1 Using the water softening system
The amount of scale contained in the water (water hardness index) can
cause whit-ish staining on the dry dishes, which tend to become dull over
time. The dishwasher is equipped with an automatic softening system which
uses a special regenerating salt to reduce the hardness of the water. The
dishwasher is factory set for water hardness level 3 (average hardness 41-
60°dF – 24-31°dH / 23.6-35 gpg). When using water of medium hardness,
the regenerating salt container should be refilled after approximately 20
washing cycles. The salt container can hold approximately 1.7 Kg (3.75 lb)
of salt in grains. Some models are equipped with an optical no-salt indica-
tor. In these models, the cap of the salt container contains a green float
which descends as the salt concentration in the water drops. When the
green float can no longer be seen, the container must be topped up with
regenerating salt. The container is situated at the bottom of the dishwasher.
After removing the lower rack, unscrew the salt container cap (ref. A fig.
5-01) by turning it anticlockwise and pour in the salt using the funnel (ref. A
fig. 5-02) supplied with the dishwasher. Before replacing the cap (ref. A fig.
5-01), remove any salt residues from around the opening.
A
Fig. 5-01
18
USER INSTRUCTIONS
EN

A
S A LT
Fig. 5-02
• When using the dishwasher for the first time, in addition to the salt it is
also necessary to add one liter of water to the container.
• Each time the salt container is refilled, make sure that the cap (ref.
A fig. 5-01) is securely closed. The mixture of water and detergent
must never penetrate the salt container, as this would compromise the
operation of the regeneration system. In the event of this occurring, the
warranty will be invalidated.
• Only use regenerating salt specially formulated for domestic dishwash-
ers. If using salt tablets, do not fill the container completely.
• Do not use table salt as it contains insoluble substances which, over
time, may damage the water softening system.
• When necessary, refill the regenerating salt container before starting
the washing program. In this way, the excess saline solution will be im-
mediately removed by the water; the prolonged presence of salt water
inside the tank may lead to corrosion.
BE CAREFUL NOTTO CONFUSETHE SALT AND DETERGENT
PACKAGES;ADDING DETERGENT TO THE SALT CONTAINER
WILL DAMAGE THE WATER SOFTENING SYSTEM.
USER INSTRUCTIONS
19
EN

5.2 Using the rinse-aid and detergent dispensers
The detergent and rinse aid dispensers are situated on the inner part of
the door: the detergent dispenser (ref. A fig. 5-03) is on the left, and the
rinse-aid dispenser (ref. B fig. 5-03) is on the right.
A
B
Fig. 5-03
WITH THE EXCEPTION OF THE SOAK PROGRAM, BEFORE
EVERY WASHING CYCLE IT IS NECESSARY TO ADD THE
REQUIRED AMOUNT OF DETERGENT TO THE DETER-
GENT DISPENSER. THE RINSE AID, ON THE OTHER HAND,
SHOULD ONLY BE ADDED AS REQUIRED.
20
USER INSTRUCTIONS
EN
Table of contents
Other Smeg Dishwasher manuals

Smeg
Smeg Dishwasher DWD1E User manual

Smeg
Smeg STA445 User manual

Smeg
Smeg LSA12XPQ User manual

Smeg
Smeg DW1410 User manual

Smeg
Smeg STA8643 User manual

Smeg
Smeg LVS375SX User manual

Smeg
Smeg KOA725 Operation instructions

Smeg
Smeg LVS342CQSX User manual

Smeg
Smeg LSCI999 User manual

Smeg
Smeg Dishwasher D12S User manual

Smeg
Smeg DF614S User manual

Smeg
Smeg Dishwasher GM336-160 User manual

Smeg
Smeg DWAFI6214-2 User manual

Smeg
Smeg ST 316 User manual

Smeg
Smeg Dishwasher 85028 User manual

Smeg
Smeg Dishwasher DWI710 User manual

Smeg
Smeg PL45XME User manual

Smeg
Smeg DWD64.1SS User manual

Smeg
Smeg DF613SDX User manual

Smeg
Smeg PL5222X User manual