Smeg AS62C User manual

Dryer
Asciugatrice
AS 62 C

2 - EN
1Warnings
Please read the following information. Otherwise,
there may be the risk of personal injury or
material damage. Moreover, any warranty and
reliability commitment will become void.
General Safety
• Neverplaceyourmachineonacarpet
covered floor. Otherwise, lack of airflow from
below of your machine may cause electrical
parts to overheat. This may cause problems
with your machine.
•Yourmachineisdesignedtostopoperating
in the event of power resuming after a power
failure.Youmustpress“Start/Pause/Cancel”
button to resume the program. Press the
“Start/Pause/Cancel”buttonfor3seconds
tocanceltheprogram(See,Cancelinga
Program)
•Yourmachinecanbeoperatedat
temperaturesbetween+5°Cand+35°C.
First Use
• Donotneglecttohavethegrounding
installation made by a qualified electrician. Our
company shall not be liable for any damages
that may arise when the machine is used on a
line without grounding.
• PleasecalltheAuthorizedServiceto
commission your machine.
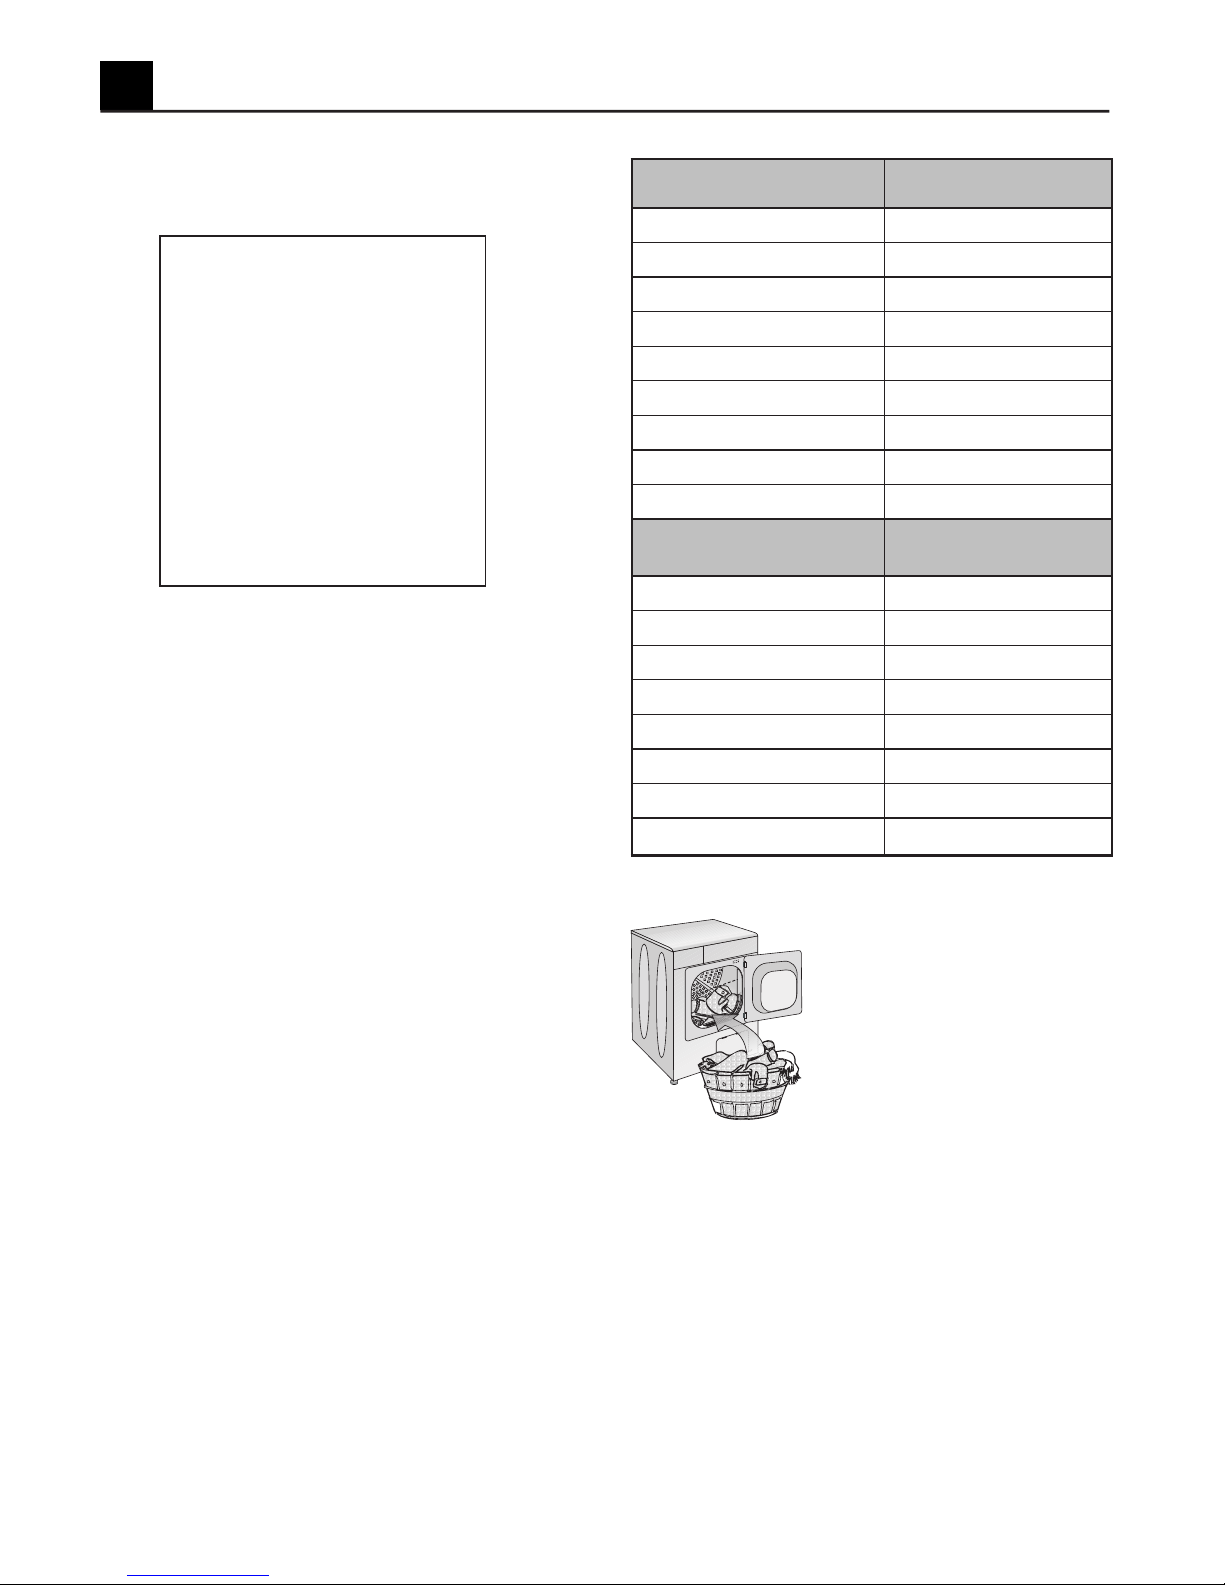
• Whenoperatingyourmachineforthefirst
time, partly load it with wet pieces of clothes
and let it run approximately for 15 minutes.
• Youmaysmellanunpleasantodorand
excessivefibre/lintmayaccumulateduringfirst
drying cycle.
• Forsafetyandperformancepurposes,clean
the filters after each drying cycle.
Intended use
• Thisproducthasbeendesignedforhome
use.
•Theappliancemayonlybeusedfordryingof
textiles that are marked accordingly.
Safety instructions
•Unplugthemachinewhenitisnotinuse.
• Neverwashdowntheappliancewithwater!
Thereistheriskofelectricshock!
•Nevertouchtheplugwithwethands.Never
pullfromthecabletounplugthemachine.Do
not operate the machine if the power cord or
plug is damaged.
• Neverattempttorepairthemachineyourself.
•Formalfunctionsthatcannotbesolvedby
information in the operating manual: Turn
off and unplug the appliance and call an
authorizedserviceagent.
To minimize the risk of fire in
a tumble dryer, the following
should be observed:
• Itemsthathavebeenspotted
or soaked with vegetable or cooking oil
constituteafirehazardandshouldnotbe
placed in a tumble dryer.
Oil-affected items can ignite spontaneously,
especially when exposed to heat sources
such as in a tumble dryer. The items become
warm, causing an oxidation reaction in the
oil.Oxidationcreatesheat.Iftheheatcannot
escape, the items can become hot enough to
catch fire. Piling, stacking or storing oil-affected
items can prevent heat from escaping and so
createafirehazard.
Ifitisunavoidablethatfabricsthatcontain
vegetable or cooking oil or have been
contaminated by hair care products be placed in
a tumble dryer they should first be washed in hot
water with extra detergent - this will reduce, but
noteliminate,thehazard.
The ‘cool down’ cycle of tumble dryers should
be used to reduce the temperature of
the items. They should not be removed from the
tumble dryer or piled or stacked while hot.
Warning:Neverstoptumbledryerbeforethe
end of the drying cycle unless all items are
quickly removed and spread out so that the heat
dissipated.
•Itemsthathavebeenpreviouslycleanedin,
washedin,soakedinorspottedwithpetrol/
gasoline, dry-cleaning solvents or other
flammable or explosive substances should not
be placed in a tumble dryer.
Highly flammable substances commonly used
in domestic environments include acetone,
denaturedalcohol,petrol/gasoline,kerosene,
spot removers (some brands), turpentine, waxes
and wax removers.
•Itemscontainingfoamrubber(alsoknown
as latex foam) or similarly textured rubber
like materials should not be dried in a tumble
dryer on a heat setting.
Foamrubbermaterialscan,whenheated,
produce fire by spontaneous combustion.
•Fabricsoftenersorsimilarproductsshould
not be used in a tumble dryer to eliminate
the effects of static electricity unless this
practice is specifically recommended by
the manufacturer of the fabric softener or
product.
Undergarmentsthatcontainmetal
reinforcements should not be placed in a tumble
dryer.
Damagetothetumbledryercanresultifmetal
reinforcements come loose during drying.

3- EN
Whenavailableadryingrackcouldbeusedfor
such items.
•Plasticarticlessuchasshowercapsor
babies’ waterproof napkin covers should not
be placed in a tumble dryer.
•Rubber-backedarticles,clothesfittedwith
foam rubber pads, pillows, galoshes and
rubber-coated tennis shoes should not be
placed in a tumble dryer.
If there are children in your house...
•Electricalappliancesmaybedangerousfor
the children. Keep children away from the
machinewhenitisoperating.Donotlet
them tamper with the machine.
•Closetheloadingdoorwhenyouleavethe
area where the machine is located.
•Thisapplianceisnotintendedforuseby
young children or infirm persons unless
they have been adequately supervised by a
responsible person to ensure that they can
use the appliance safely.
•Youngchildrenshouldbesupervised
to ensure that they do not play with the
appliance.
2Installation
The proper location
• Installyourmachineinenvironmentswhich
havenoriskoffreezingandinastableand
level position.
• Donotplaceyourmachineonalongpilerug
or on similar surfaces.
• Operateyourmachineinawellventilated,
dust-free environment.
BMake sure that your machine is not placed
on the power cable.
BPlaceitatleast3cmawayfromtheedgesof
other furniture and the walls.
• Aspecialpart(Partno:2959700100)
replacing the top trim must be provided and
installedbytheAuthorizedServiceinorder
to use the machine under a counter or in
acupboard.Itshouldneverbeoperated
without the top trim.
• Placethemachineonasoundfloor.Ifitisto
be placed on top of a washing machine, the
approximateweighttogethermayreach180
kg when they are full.
• Afittingdeviceshouldbeusedbetweenthe
two machines for use on a washing machine.
Thefittingdevice(Partno2962800100
white/2962800200grey)mustbeinstalled
bytheAuthorizedService.
Levelling Inordertoensurethatyour
machine operates more silently
and vibration-free, it must stand
level and balanced on its feet.
Frontfeetofyourmachine
can be adjusted. Balance the
machine by adjusting the feet.
Loosenthefeetbyhand.Adjustthemuntilthe
machine stands level and firmly.
CNever unscrew the adjustable feet from their
housings.
2 plastic pieces supplied together with the
OperatingInstructionspreventyourmachine
from slipping on wet and slippery surfaces.
Tilt your machine to backwards t install these
plasticparts.Fittheplasticpartstothefront
adjustable feet. Press on the plastic parts to fix
themintheirplaces.Checkthebalanceofyour
machine again and readjust the adjustable feet
if necessary.
Ventilation hose and connection (for
products equipped with an outlet vent)
Ventilation hose assures exhausting of the air
from inside the machine. Vented dryer has 1 air
outlet.Stainlesssheetmetaloraluminumpipes
can be used instead of the hose. The diameter
ofthepipetobeusedshouldbeminimum10
cm.
Maximum hose and pipe lengths are given in
the table below.
Hose Pipe
Maximum length 4 m 5 m
1 elbow 45° -1.0m -0.3m
1elbow90° -1.8 m -0.6m
1elbow90°short -2.7m
1 wall passage -2.0m -2.0m
Each elbow and other passages should be
subtracted from the above maximum length.
Connecttheairoutlethosetothehosespacer
piece by turning it anti-clockwise in order to
connect the ventilation hose. Make the hose
passages as shown below.
CExhaust of humid air from the dryer into the
roomisinconvenient.Airoutlethosemustbe

4 - EN
extended directly to the outdoors. There must
be a small number of elbows as not to hinder
air ventilation.
CThe ventilation hose can be routed outdoors
via a window or it can be connected to the air
outlet in the bathroom.
CTo prevent water accumulation in the hose,
make sure that it is not folded on the floor.
BThe air ventilation hose should not be
connected to the chimney of a stove or a
fireplace.
BPay attention that the air inlet openings are
unobstructed.
BDonotoperateyourmachineatthesame
time with heaters such as a coal or gas stove.
Airflowmaycausethechimneytoflareup.
Airflowmaycausethechimneytoflameup.
Connection to a water drain (for
products equipped with a condenser)
Inproductsequippedwithacondenserunitthe
water accumulated during the drying cycle is
collectedinthewatertank.Youshoulddrainthe
accumulated water after each washing cycle.
Youcandirectlysendtheaccumulatedwater
out through the water drain hose supplied with
the machine instead of periodically draining the
water collected in the water tank.
Removethehoseonthemachinebypullingit
out from its end in order to make the water drain
hoseconnection.Donotuseanytoolstotake
outthehose.Attachthedrainhoseadaptorto
theendofthishose.Connectthespecialdrain
hose supplied with the machine to the hose
adaptor fitting. The other end of the drain hose
can be directly connected to the wastewater
drain or to the washbasin. The fitting must
always be secured in all types of connections.
CWhenyoudirectthewaterdrainout,“Water
Tank”warningLEDwilllightupattheendof
each program.
•Thehoseshouldbeattachedtoaheightof
maximum80cm.
•Youmustbecarefulnotthepinchorbendthe
hose.
Electrical connection
Connectthemachinetoanearthedoutlet
protected by a fuse of suitable capacity.
Important:
•Connectionshouldcomplywithnational
regulations.
•Powercordplugmustbewithineasyreach
after installation.
•Thevoltageandtheallowedfuseprotection
arespecifiedinthesection“Technical
Specifications”.
•Thestatedvoltagemustmatchwithyour
mains voltage.
•Connectionviaextensioncordsormulti-plugs
should not be made.
•Themainfuseandswitchesmusthavea
contactdistanceofminimum3mm.
BAdamagedpowercablemustbereplacedby
a qualified electrician.
BThe appliance must not be operated unless it
isrepaired!Thereistheriskofelectricshock!
Disposal
Packaging material can be dangerous to
children. Keep the packaging materials out
of the reach of children or dispose of them
accordingly.Donotdisposethemtogetherwith
normal domestic wastes.
Disposing of the old machine
Disposeofyouroldapplianceinan
environmental friendly manner.
• Youmayrefertoyourlocalagentorsolid
waste collection center in your municipality to
learn how to dispose of your machine.
Before disposing of your old machine, cut off the
mains plug and make the door lock unusable, so
children will not be endangered.

5 - EN
Alwaysfollowtheadviceonthegarmentlabels.
Withthisdryer,dryonlythelaundryhavinga
label stating that they are suitable for drying in a
dryer by selecting the appropriate program.
• Laundryitemswithmetalattachmentssuch
as, belt buckles and metal buttons can
damage your machine.
• Donotdryitemssuchaswoolen,silk
garments and nylon stockings, delicate
embroidered fabrics, garments with metal
accessories and items such as sleeping bags
in the machine.
• Garmentsmadeofdelicateandvaluable
fabrics as well as lace curtains can be
creased.Donotdrytheseinyourmachine!
• Donotdryitemsmadeofhermeticfibers
such as pillows and quilts in the drying
machine.
• Garmentsmadeoffoamorrubbermaybe
deformed.
• Donotdryclothescontainingrubberinthe
machine.
• Donotdryclothesexposedtopetroleum,
oil, combustible or explosive agents in the
machine even if they are washed beforehand.
• Overlywetlaundryorlaundrywithdripping
water must not be put into the machine.
Preparing clothes to be dried
• Alllaundrymustbespunatthehighest
possible spin speed your washing machine
allows for the textile type.
• Laundrymaybetangledafterwashing.
Separateyourlaundrybeforeplacingthem
into your dryer.
• Sortyourlaundryaccordingtotheirtypesand
thicknesses.Drythesametypeoflaundry
together.
Followingweightsaregivenasexamples.
Home articles Approximateweights(gr)
Cottonquitcovers(double) 1500
Cottonquitcovers(single) 1000
Bed sheets (double) 500
Bed sheets (single) 350
Large tablecloths 700
Smalltablecloths 250
Tea napkins 100
Bath towels 700
Hand towels 350
Garments Approximateweights(gr)
Blouses 150
Cottonshirts 300
Shirt 200
Cottondresses 500
Dresses 350
Jeans 700
Handkerchiefs(10pieces) 100
T-Shirts 125
Right load capacity
APlease consider the
informationinthe“Program
SelectionTable”.Alwaysstart
the program in accordance
with the maximum load
capacity.
C Addinglaundryto
the machine more than the
level shown in the figure is
notrecommended..Drying
performance will degrade when the machine
isoverloaded.Furthermore,yourmachineand
your clothes might be damaged.
CPlace your garments into the drum
loosely so that they will not get tangled..
CLarge pieces may bunch-up during
drying.Stopthemachine1-2timesduring
drying process to separate bunched-up laundry.
Loading door
Open the loading door. Place laundry items
loosely into the machine. Push the loading door
to close. Ensure that no items are caught in the
door.
3Before drying
Donotdry
with drier
A
High-
temperature
Drying
B
Normal-
temperature
Drying
Suitablefor
drier
C
Dry
horizontally
l
Dryona
hanger
m
Hang without
spinning
n
Canbeironed
with hot iron
o
Canbe
ironed with
warm iron
p
Donotiron
q
D

6- EN
4Selecting a Program and Operating Your Machine
Control panel
1.On/Offbutton
2. Program selection knob
3.Start/Pause/Cancelbutton
4. Low temperature
5. Program follow-up indicator
6.FiltercleaningwarningLED
7.WatertankfullwarningLED*
8.Timedelaybutton*
*Accordingtoyourmachine’smodel
Pulire filtri 150
Svuotare
Contenitore
On/Off
Refresh
10
30
60 80
100
130
150
Bassa
Temperatura
Avvio
Pausa
61
3
245
7

7- EN
Turning the machine on
Prepare machine for program selection by
pressingthe“On/Off”button.
C Pressingthe“On/Off”buttondoes
not necessarily mean that the program has
started.Press"Start/Pause/Cancel"buttonof
the machine to start the program.
Timer program selection
Decidetheappropriatetimefromthetable
below which includes drying temperature in
degrees.Selectthedesiredtimewiththetimer
program selection button.
Extra dry Dryathightemperature
only for cotton laundry.
Thick and multi layered
laundry (E.g.: towels,
linens, jeans) are dried in
a way that they do not
require ironing before
placing in the wardrobe.
ReadytoWear Normal laundry (E.g.:
tablecloths, underwear) are
dried in a way that they do
not require ironing before
placing in the drawers.
ReadytoIron Normal laundry (E.g.,
Shirts,dresses)aredried
ready to be ironed.
C Alwaysselectthehighesttemperature
required for drying. High temperature will
ensure energy and time saving.
C Forfurtherprogramdetails,see,
“Program/TimeSelectionTable”
Main programs
•Anti-creasing
A2-houranticreasingprogramtoprevent
laundry from creasing will be activated if you
do not take the laundry out after the program
has come to an end. This program rotates
thelaundryin60-secondintervalstoprevent
creasing.
•Ventilation
Onlyventilationisperformedfor10minutes
withoutblowinghotair.Youcanairyourclothes
that have been kept at closed environments for
alongtimethankstothisprogramtodeodorize
unpleasant odors.
•Timer programs
Youcanselectoneofthe10min...60min...80
min... timer programs to achieve the final
dryinglevel.Drythecottonlaundryathigh
temperatures and synthetic and easy-care
laundry at low temperatures depending on the
type of the laundry.
C Youmustpressthe“Lowtemperature”
button for synthetics.

8 - EN
*:EnergyLabelstandardprogram(EN61121:2005)
AllvaluesgiveninthetablehavebeenfixedaccordingtoEN61121:2005Standard.These
values may deviate from the table according to the laundry type, laundry spin speed,
environmental conditions and voltage fluctuations.
Program selection and consumption table
Program table
Programs Capacity
(kg)
Spin speed in washing
machine (rpm)
Approximate amount of
remaining humidity
Drying time
(minutes)
Cottons / Coloreds
AReady to Wear
61200-1000 % 60 130
900-800 % 60 150
31200-1000 % 60 80-60
900-800 % 60 100-80
AReady to Iron
61200-1000 % 60 130-100
900-800 % 60 130
31200-1000 % 60 80-60
900-800 % 60 80-60
Synthetics
BReady to Wear
3800 % 50 80-60
600 % 50 130-100
1.5 800 % 50 60-30
600 % 50 60-30
Delicates
BReady to Wear 1.5 600 % 50 40
Energy consumption values
Programs Capacity
(kg)
Spin speed in washing
machine (rpm)
Approximate amount of
remaining humidity
Energy
consumption
value kWh
Cottons linen Ready to wear* 6 1000 % 60 3.84
Cottons Ready to iron 6 1000 % 60 3.40
Synthetics&Mixed fabrics
Ready to wear 3 600 % 50 2.00

9- EN
Auxiliary function
Low temperature
This function allows for drying at lower
temperatures and therefore saves energy.
WarningLEDwilllightupwhenyouselect
the function.
C Youmustusethisfunctionwhenyou
dry your synthetic or delicate laundry.
Warning indicators
C Warningindicatorsmaydiffer
according to the model of your machine.
Filter cleaning
AwarningLEDwilllightuptoremindfilter
cleaning after the program finishes.
C IfthefiltercleaningwarningLEDlights
upcontinuously,pleasereferto,“Solution
suggestionsforproblems”.
Water tank
AwarningLEDwilllightupattheendofthe
program or when the tank is full with water. The
machinestopsoperatingwhenthiswarningLED
lights up during a program running. To restart
the machine, please drain the water in the water
tank.Press“Start/Pause/Cancel”buttonto
start the program after you have emptied the
watertank.ThewarningLEDgoesoffandthe
program resumes operating.
Starting the Program
1.Press“Start/Pause/Cancel”buttontostartthe
program.
2.“Start/Pause/Cancel”buttonwilllightupto
indicate that the program has started.
Timer follow-up indicator
One of the lamps is on as far as program runs
and shows the approximate remaining time.
C LEDsonthetimerfollow-upindicator
will also flash when the child-proof lock is
activated.
C IfmorethanoneLEDlightuporflash
concurrently, it means there is malfunctioning
orafailure(pleasesee,Solutionsuggestionsfor
problems).
Changing the program after the
program has started
Youcanusethisfeaturetodryyourlaundryina
different program after your machine has started
to run.
Forexample;
Pressandholdthe“Start/Pause/Cancel”button
forabout3secondstoselect“80”minutes
programinsteadof“60”minutesprogram.
Selectthe“80”minutesprogrambyrotatingthe
program knob.
Press“Start/Pause/Cancel”buttontostartthe
program.
CThe program which is selected first will
go on even if the program selection button
is moved and another program mode is
selectedwhilethemachineisoperating.You
must cancel the ongoing program in order to
changethedryingprogram.(See,Endingthe
program through canceling)
Adding/removing laundry in standby mode
Inordertoaddortakeoutlaundryafterthe
start-upoftheprogram;
1.Pressthe“Start/Pause/Cancel”buttonto
switchthemachineto“Pause”mode.Drying
process will stop.
2. Open the door at Pause position and close it
again after adding or taking out laundry.
3.Press“Start/Pause/Cancel”buttontostartthe
program.
C Anylaundryaddedafterthedrying
process was started may cause the already
dried clothes in the machine intermingle with
wet clothes and the result will be wet laundry
after the drying process is over.
CLaundry may be added or taken out
as much as desired during a drying process,
but as this process will interrupt drying
continuously, it will extend the program
duration and increase energy consumption.
Therefore, it is recommended to add laundry
before the drying program is started.
Child-proof lock
There is a childproof lock to prevent any
program interruption due to the pressing of
keys while the program is on. The loading
doorandallkeysexceptthe“On/Off”key
on the panel are deactivated when the child-
proof lock is active.
Inordertoactivatethechildprooflock,press
onthe“Start/Pause/Cancel”and“Low
temperature”buttonssimultaneouslyfor3
seconds.
To start a new program
after the program is
over or to interrupt
the program, the
childproof lock should be
deactivated. To deactivate
the childproof lock, press the same buttons for
3sec.
C OneoftheLEDsontheprogram
follow-up indicator starts flashing when the
child-proof lock is activated.
Ending the program through canceling
The program which is selected first will keep
on going even if the position of the program
selectionbuttonischanged.Anewprogramcan
beselectedandstartedafter“Programcancel”
is activated in order to change the drying

10 - EN
program.
Tocancelanyselectedprogram;
• Press“Start/Pause/Cancel”buttonforabout
adurationof3seconds.The“Filtercleaning”
and“Watertank”warningLEDsaswellasthe
“0”warningLEDontheprogramfollow-up
indicator will light up at the end of this period
for reminding purposes.
A Astheinsideofthemachinewillbe
excessively hot when you cancel the program
while the machine is running, activate the
ventilation program to cool it down.
End of program
The“Filtercleaning”and“Watertank”warning
LEDsaswellasthe“0”warningLEDonthe
program follow-up indicator will light up at the
end of the program. The door can be opened
and the machine becomes ready for a second
cycle.
Pressthe“On/Off”buttontoshutdownthe
machine.
C A2-houranticreasingprogram
to prevent laundry from creasing will be
activated if you do not take the laundry out
after the program has come to an end.
C Cleanthefilteraftereachdrying(please
see,Filtercleaning).
C Drainthewatertankaftereachdrying
(pleasesee,Watertank)
This appliance’s packaging material is recyclable. Help recycle it and protect the environment
bydroppingitoffinthemunicipalreceptaclesprovidedforthispurpose.Yourappliancealso
containsagreatamountofrecyclablematerial.Itismarkedwiththislabeltoindicatethe
used appliances that should not be mixed with other waste. This way, the appliance recycling
organised by your manufacturer will be done under the best possible conditions, in compliance
withEuropeanDirective2002/96/EConWasteElectricalandElectronicEquipment.Contact
yourtownhalloryourretailerfortheusedappliancecollectionpointsclosesttoyourhome.We
thank you doing your part to protect the environment.
Models Condenser Dryer with time control
Height / Height for built-under installation (cm) 85.0 / 82.0
Width (cm) 59.5
Depth / Depth for built-under installation (cm) 54
Height adjustment of feet (cm) 0.5
Weight, unpacked (kg) 35
Voltage 230V ~ 50 Hz
Connected load 2200 W
Fuse protection 16A
Technical Specifications

11 - EN
5Maintenance and cleaning
Fluff filter
Lint and fibres released from the laundry to the
air during the drying cycle are collected in the
“FluffFilter”.
C Suchfibreandlintaregenerallyformed
duringwearingandwashing.Alwayscleanthe
filteraftereachDryingprocess.Youcanclean
the filter and filter area by vacuum cleaner.
Forfiltercleaning;Openthecover.Remove
the fluff filter by pulling it up and open the filter.
Cleanlint,fibre,andthefluffbyhandorwitha
softpieceofcloth.Closethefilterandplaceit
back into its seat.
Sensor (models equipped with a
sensor)
There are humidity sensors
in your machine that detect
whether the laundry is dry or not.
Forsensorcleaning;Openthe
doorofthemachine.Allowthe
machine to cool off if drying has
beencarriedout.Wipethemetalsensorswitha
soft cloth, dampened with vinegar and dry them.
C Cleanmetalsensors4timesayear.
ANever use solvents, cleaning agents or
substances alike when cleaning as these might
causefireandexplosion!
Water tank
The moisture in the damp laundry is taken from
thelaundryandcondensed.Drainthewater
tank after each drying cycle or during drying
when“Watertank”warningLEDcomeson.
A Condensedwaterisnotdrinkable!
ANever take out the water tank when
theprogramisrunning!
Watertankmaybelocatedintwodifferent
places, namely, inside the drawer on the panel
or inside the kick plate cover.
Ifyouforgettodrainthewatertank,your
machine will stop during the following drying
cycleswhenthewatertankisfullandthe“Water
tank”warningLEDwilllighton.Ifthisisthe
case,pressthe“Start/Pause/Cancel”buttonto
resume the drying cycle after draining the water
tank.
Todrainthewatertank;Carefullyremovethe
watertankbyopeningthekickplatecover/
pulling the drawer.
1 Drainthewaterbyopeningthewatertank
cover.
2 Ifthereislintaccumulationinthewatertank
cover, clean it and press to close.
3 Placethewatertankintoitsseat.
Condenser
Hot and humid air in the condenser is cooled with
the cold air from the room. Thus, the humid air
circulating in your machine is condensed and then
pumped into the tank.
C Cleanthecondenserafterevery20
drying cycles or once a month.
Tocleanthecondenser;Ifadryingprocess
has been carried out, open the door of the
machineandwaituntilitcoolsdown.Unlock
the 4 condenser locks after opening the kick
plate.Pulloutthecondenser.Cleanthe
condenserwithpressurizedwaterandwaituntil
thewaterdrains.Replacethecondenserwiththe
sidelabeled“Top”facingupwards.Lockthe4
condenser locks. Make sure that the red lock
on the upper right corner is engaged securely.
Closethekickplatecover.
Close properly and
check the locking
latchs?

12 - EN
6Solution suggestions for problems
Problem Cause Explanation/Suggestion
Dryingprocesstakes
too much time.
Coverfilterandfilterdrawermighthave
not been cleaned. *CleanthecoverfilterandFilterdrawer.
Laundry come out wet
at the end of drying.
*Coverfilterandfilterdrawermight
have not been cleaned.
*Excessivelaundrymighthavebeen
loaded in.
*CleanthecoverfilterandFilterdrawer.
*Donotoverloadthemachine.
Machine does not
switch on or the
program does not
start. Machine is not
activated when set.
*Itmighthavenotbeenpluggedin.
*Theloadingdoormaybeajar.
*Programmighthavenotbeensetor
the“Start/Pause/Cancel”buttonmight
have not been pressed.
*“Childprooflock”mighthavebeen
activated.
*Thecondensercoveronthemodels
with a condenser might not be closed
securely.
*Makesurethatthemachineisplugged
in.
*Makesurethattheloadingdooris
properly closed.
*Makesurethattheprogramhasbeen
setanditisnotin“Pause”mode.
*Deactivatethechildprooflock.
*Makesurethatthecondensercover
and the red lock is closed securely.
Program has been
interrupted without
any cause.
*Theloadingdoormaybeajar.
*Electricitymaybecutoff.
*Makesurethattheloadingdooris
properly closed.
*Press“Start/Pause/Cancel”buttonto
start the program.
Laundry has shrunk,
become felted or
deteriorated.
*Aprogramsuitableforthelaundry
type might have not been used.
*Dryonlythelaundrywhichissuitable
for drying in your machine after checking
the labels on your clothes.
*Selectaprogramwithsuitablelow
temperature for the laundry type to dry
your clothes.
Drumlightningdoes
not come on.
(for models equipped
with a lamp)
*Themachinemighthavenotbeen
startedbyusingtheOn/Offbutton.
*Bulbmayhaveblown.
*MakesurethatthemachineisOn.
*Calltheauthorizedservicetoreplace
the bulb.
“Final/Anti-creasing”
LEDflashes.
*The2-houranticreasingprogramto
prevent laundry from creasing might
have been activated.
*Turnoffthemachineandtakeoutthe
laundry.
“Final/Anti-creasing”
LEDison. *Programhascometoanend. *Turnoffthemachineandtakeoutthe
laundry.
The“Drying”LED
flashes.
*Aheatsensorfailurehasoccurred.
Machine ends the program without
heating.
*Turnoffthemachineandtakeoutthe
laundry.Callyourauthorizedservice.
Alsoforproductsequippedwithacondenser
“Watertank”warning
LEDison.
*Watermaybefull.
*Anti-creasingprogrammightbe
running.
*Drainthewaterinthewatertank.
“Filtercleaning”LED
is on. *Filtermighthavenotbeencleaned. *Cleanthecoverfilter.
“Condensercleaning”
LEDison. *Filterdrawer/Condensermighthave
not been cleaned.
*Cleanthefiltersinthecondenser/filter
drawer under the kick plate.
ACallanauthorizedserviceiftheproblempersists.

Table of contents
Other Smeg Dryer manuals