Smeg DR72IN User manual

Dryer
DR72IN

2EN
Read this manual prior to initial operation of the product!
Dear Customer,
We hope that your product, which has been manufactured in modern facilities and passed through a strict quality
control procedure, will give you very good results.
We advise you to read through this manual carefully before using your product and keep it for future reference.
This User Manual will
• Help you use your machine in a fast and safe way.• Read the User Manual before installing and starting your product.• In particular, follow the instructions related to safety.• Keep this User Manual within easy reach for future reference. • Please read all additional documents supplied with your product.Remember that this User Manual is also applicable for several other models. Explanation of symbols
Throughout this User Manual the following symbols are used:A Important safety information. Warning for hazardous situations with regard to life and property.BCaution; Warning for supply voltage.
Caution; Warning for fire hazard.Caution; Warning for hot surfaces.
Read the instructions.C Useful information. Important information or useful hints about usage.This appliance’s packaging material is recyclable. Help recycle it and protect the environment by dropping it off in the municipal receptacles provided for this purpose. Your appliance also contains a great amount
of recyclable material. It is marked with this label to indicate the used appliances that should not be mixed with other waste. This way, the appliance recycling organised by your manufacturer will be done under
the best possible conditions, in compliance with European Directive 2002/96/EC on Waste Electrical
and Electronic Equipment. Contact your town hall or your retailer for the used appliance collection points
closest to your home. We thank you doing your part to protect the environment.
2960310805_EN/060513.1707

3EN
1Important safety information
This section includes safety information that will help
protection from risks of personal injuries or materialistic
damages. Failure to follow these instructions shall cause
any warranty and reliability commitment to become void.
General safety
• Never place the machine on a carpet-covered floor, otherwise, lack of airflow beneath the machine may
cause electrical parts to overheat. This will cause
problems with your machine.
• If the power cable or mains plug is damaged, you must call Authorised Service Agent for repair.
• The product should not be plugged in during installation, maintenance and repair works. Such
works should always be made by the technical
service. Manufacturer shall not be held responsible for damages arising from processes carried out by
unauthorised persons.
• Connect the product to a grounded outlet protected by a fuse of suitable capacity as stated in the
technical specifications table.
• Operate your product at temperatures between +5°C and +35°C.• Do not use electrical devices in the product.• Do not connect the air exit of the product to the chimney holes which are used for the exhaust fumes of the devices operating with gas or other types of
fuel.
• You must provide enough ventilation in order to prevent gases exiting from devices operating with other types of fuels including the naked flame from
accumulating in the room due to the back fire effect.
• Always clean the lint filter before or after each loading.
• Never operate your dryer without the lint filter installed.
• Do not allow fibre, dust and dirt accumulation around the exhaust exit and at adjacent areas.• Power cable plug must be within easy reach after installation.
• Do not use extension cords, multi-plugs or adaptors to connect the dryer to power supply in order to
decrease the risk of electric shock.
• Do not make any changes on the plug supplied with the product. If it is not compatible with the socket, have a qualified electrician change the socket with a
suitable one.
• Items cleaned or washed with gasoil/fuel oil, dry-laundry solvents and other combustible or explosive materials as well as the items that are contaminated
or spotted with such materials should not be dried in
the product since they emit flammable or explosive vapor. • Do not dry items cleaned with industrial chemicals in the dryer.
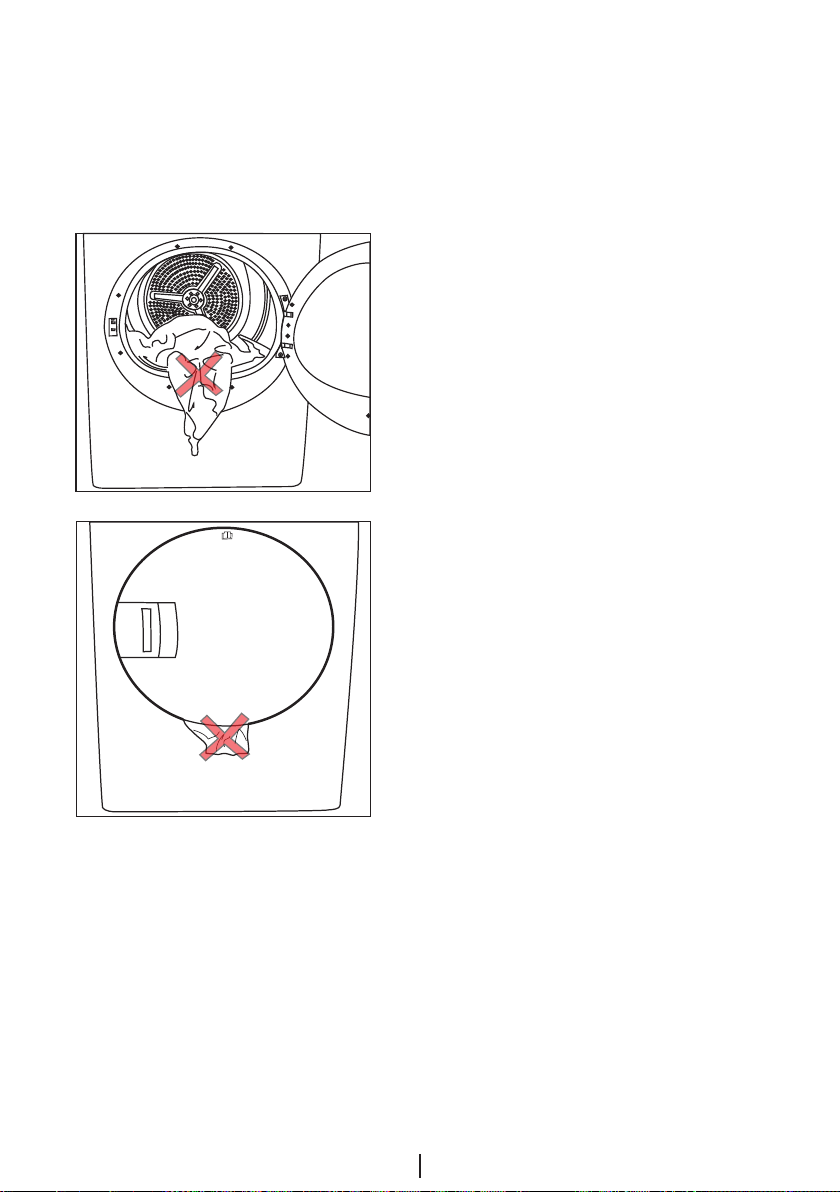
• Do not dry unwashed items in the dryer.• Items soiled with cooking oils, acetone, alcohol, fuel oil, kerosene, stain remover, turpentine, paraffin and
paraffin removers must be washed in hot water with
plenty of detergent before being dried in the dryer.
• Garments or pillows bolstered with rubber foam (latex foam), shower bonnets, water resistant textiles, materials with rubber reinforcement and rubber foam
pads should not be dried in the dryer.
• Do not use fabric softeners and anti-static products unless they are recommended by the manufacturers
of the fabric softener or the product.
• This product must be grounded. Grounding installation decreases the risk of electric shock by
opening a path with low resistance for the electricity
flow in case of a malfunction or failure. Power cable of this product is equipped with a conductor and a
grounding plug that allows for grounding the product.
This plug must be installed appropriately and inserted
into a socket which is grounded in accordance with
the local laws and regulations.
• Do not install the product behind a door with a lock, sliding door or a door that has a hinge against the
hinge of the dryer.
• Do not install or leave this product in places where it will be exposed to outdoor conditions.• Do not tamper with the controls.• Do not perform any repair or part replacing procedures on the product even if you know or have
the ability to perform unless it is clearly suggested
in the operating instructions or the published service
manual.
• Inside and exhaust duct of the product must be cleaned by the qualified service personnel
periodically.
• Wrong connection of grounding conductor of the product can cause electric shock. If you have any suspect about the grounding connection,
have it checked by a qualified electrician, service
representative or service personnel.
• Do not reach into the machine when the drum is spinning.
• Unplug the machine when it is not in use.• Never wash down the appliance with water! There is the risk of electric shock! Always disconnect by unplugging from the mains before cleaning.
• Never touch the plug with wet hands. Never unplug by pulling on the cable, always pull out by grabbing
the plug only. Do not operate the machine if the
power cable or plug is damaged!

4EN
• Never attempt to repair the machine yourself, otherwise, you will be putting your life and others’
lives in danger.
• For malfunctions that cannot be solved by following the information given in the safety instructions:Turn off the machine, turn off and contact an
authorised service agent.
• Do not stop the dryer before the drying cycle comes to an end unless you will remove all laundry from the
dryer fast in order to lay them and dissipate the heat.
• Remove the door of the drying compartment before decommissioning or disposing of the product.
• The final step of the drying cycle (cool-down cycle) occurs without applying heat to ensure that the items
are left at a temperature that will not damage them.
• Fabric softeners or similar products should be used as specified by the fabric softener instructions.
• Underwear that contains metal reinforcements should not be placed in a dryer. Damage to the dryer can
result if metal reinforcements come loose during
drying.
• Check all garments for forgotten lighters, coins, metal pieces, needles, etc. before loading.
• At times when your dryer is not in use or after the laundry is taken out following the completion of
drying process, turn off by using the On/Off button. In cases when the On/Off button is on (while the dryer is energized), keep the door of the dryer closed.Intended use
• This product has been designed for domestic use. It should not be used for other purposes.
• Use the product only for drying laundry that are marked accordingly.
• Dry only those articles in your product that are stated in this manual.
• This product is not intended to be used by persons with physical, sensory or mental disorders or
unlearned or inexperienced people (including children) unless they are attended by a person who will be responsible for their safety or who will instruct
them accordingly for use of the product.
Children’s safety
• Electrical appliances are dangerous for the children. Keep children away from the machine when it is operating. Do not let them tamper with the machine.
• Packaging materials are dangerous to children. Keep the packaging materials out of reach of children
or dispose them by classifying according to waste
directives.
• Do not allow children sit/climb on or enter in the product.
• Children should be supervised to ensure that they do not play with the product.
• Close the loading door when you leave the area where the product is located.

5EN
2Installation
Refer to the nearest Authorised Service Agent for installation of your product.
C Preparation of location and electrical installation for the product is under customer’s responsibility.
BInstallation and electrical connections must be carried out by a qualified personnel.
A Prior to installation, visually check if the product has any defects on it. If so, do not have it installed. Damaged products will cause risks for your safety.
Appropriate installation location
• Install the product in an environment which has no risk of freezing and is in a stable and level position.• Operate your product in a well ventilated, dust-free environment.
• Do not block the air ducts in front of and under the product with materials such as long pile rugs and
wooden bands.
• Do not place your product on a long pile rug or on similar surfaces.
• Do not install the product behind a door with a lock, sliding door or a hinged door which can strike the
product.
• Once the product is installed, it should stay at the same place where its connections have been made.
When installing the product, make sure that the rear
wall of it does not touch anywhere (tap, socket, etc.) and also pay attention to install the product at a place
where it will stay permanently.
BDo not place the product on top of the power cable.
• Keep at least 1.5 cm distance to walls of other furniture.
Removing the transportation safety
assembly
ARemove the transportation safety assembly before using the product for the first time.
1. Open the loading door.2. There is a nylon bag inside the drum that contains a
piece of styrofoam. Hold it from its section marked with XX.
3. Pull the nylon towards yourself and remove the transportation safety assembly.
AMake sure that you have removed the transportation safety assembly (nylon+styrofoam pieces) before using the product for the first time. Do not leave any items
inside the drum.
Under counter installation
• Leave at least 3 cm of space between the side and rear walls of the product and the walls of the counter/
cupboard when installing your product under a counter
or in a cupboard.
Mounting over a washing machine
• A fixing device should be used between the two machines when installing the dryer above a washing
machine. The fixing device (KITSPF-1) must be installed by the Authorized Service Agent.• Place the product on a firm floor. If it will be placed on top of a washing machine, the approximate weight of both machines may reach 180 kg when they are full.
Therefore, the floor must be capable of carrying the
load on it!Connection to water drain;
In products equipped with a condenser unit the water accumulated during the drying cycle is collected in the
water tank. You should drain the accumulated water after
each drying cycle.
You can directly send the accumulated water out through
the water drain hose supplied with the machine instead of
periodically draining the water collected in the water tank.
Connecting the water drain hose;

6EN
First use
• To have the product ready for operation before calling the authorised service agent, make sure
that its location and power supply installations are
appropriate. If they are not, call a qualified electrician to have any necessary arrangements carried out.
• Make sure that the power connections of the product are in accordance with the instructions given in
relevant chapters of this manual.
Disposing of packaging material
Packaging materials are dangerous to children. Keep packaging materials in a safe place out of reach of
children. Packaging materials of your product are manufactured from recyclable materials. Sort and
dispose of them in accordance with recycled waste
instructions. Do not dispose of them with normal
domestic waste.
Transportation of the machine
1. Unplug the machine from the mains.2. Remove the water drain (if any) and chimney connections.
3. Drain water remained in the machine completely
before transportation.
Disposing of the old machine
Dispose of your old machine in an environmentally
friendly manner.
Refer to your local dealer or solid waste collection centre in your area to learn how to dispose of your machine.
Before disposing of your old machine, cut off the power
cable plug and make the loading door lock unusable to
avoid dangerous conditions to children.
1. Remove the hose on the machine by pulling it out from its end. Do not use any tools to take out the hose.
2. Connect the special drain hose supplied with the
machine to the pipe fitting.
3. The other end of the drain hose can be directly
connected to the wastewater drain or to the washbasin.
The fitting must always be secured in all types of
connections. Your house may be flooded if the hose
gets out of its housing during water discharge.
Important:• The hose should be attached to a height of maximum 80 cm.
• You must be careful not the pinch or bend the hose. • The end of the hose should not be bent, it should not be stepped on and it must not be folded between the drain
and the machine.
Adjusting the feet
In order to ensure that your machine operates more silently and vibration-free, it must stand level and balanced on its feet. Balance the machine by adjusting the feet.
Rotate the feet to adjust until the machine stands level and firmly.
CNever unscrew the adjustable feet from their housings.
Electrical connection
Connect the machine to a grounded outlet protected
by a fuse of suitable capacity as stated in the technical
specifications table. Our company shall not be liable for any damages that will arise when the machine is used on a
circuit without grounding.
• Connection must comply with national regulations.• If the current value of the fuse or breaker in the house is less than 16 Amps, have a qualified electrician install
a 16 Amp fuse.
• Power cable plug must be within easy reach after installation.
• The voltage and allowed fuse or breaker protection are specified in the “Technical Specifications” section.
• The specified voltage must be equal to your mains voltage.
• Do not make connections via extension cables or multi-plugs.
• The main fuse and switches must have a contact distance of minimum 3 mm.
BDamaged power cable must only be replaced by a
qualified electrician.
BIf the product is faulty, it must not be operated unless it is repaired! There is the risk of electric shock!

7EN
EN 2
Height (adjustable)84.6 cm
Width 59.5 cm
Depth 53 cm
Capacity (max.)7 kg
Weight (net)36 kg
Voltage
See type labelRated power inputModel codeType label is located behind the loading door.
Technical specification

8EN
A B C
l mn
o p q
D
Low
Laundry unsuitable for drying in the
machine
•Laundry items with metal attachments such as belt buckles and metal buttons can damage your dryer.
• Do not dry items such as woollens, silk garments and nylon stockings, delicate embroidered fabrics, laundry
with metal accessories and items such as sleeping
bags in the dryer.
• Laundry made of delicate and valuable fabrics as well as lace curtains can be creased. Do not dry them in
the dryer!• Do not dry items made of hermetic fibres such as pillows and quilts in the dryer.
• Laundry made of foam or rubber will be deformed.• Do not dry laundry containing rubber in the dryer.• Do not dry laundry exposed to petroleum, oil, combustible or explosive agents in the dryer even if they are washed beforehand.
• Overly wet laundry or laundry with dripping water must not be put into the dryer.
• Items cleaned or washed with gasoil/fuel oil, dry-laundry solvents and other combustible or explosive materials as well as the items that are contaminated
or spotted with such materials should not be dried in
the product since they emit flammable or explosive vapor.
• Do not dry items cleaned with industrial chemicals in the dryer.
• Do not dry your unwashed laundry in the dryer.• Items soiled with cooking oils, acetone, alcohol, fuel oil, kerosene, stain remover, turpentine, paraffin and
paraffin removers must be washed in hot water with
plenty of detergent before being dried in the dryer.
hings to be done for energy saving:
• Make sure that you operate the product at its full capacity but pay attention to not exceeding it.• Spin your laundry at the highest speed possible when washing them. Thus, the drying time is shortened and
energy consumption is decreased.
• Pay attention to dry same types of laundry together.• Follow the instructions in the user manual for programme selection.
• Make sure that sufficient clearance is provided at the front and rear side of the dryer for air circulation. Do
not block the grill at the front side of the product.
• Do not open the door of the machine during drying unless necessary. If you must certainly open the door, pay attention not to keep it open for a long time.
• Do not add new (wet) laundry during drying.• Lint and fibres released from the laundry to the air during the drying cycle are collected in the “Lint Filter”. Make sure that you clean the filters before or after each drying.
• In models with condenser, make sure that you clean the condenser regularly at least once every month or
after every 30 drying cycles.
• In vented models, follow the chimney connection rules in the user manual and pay attention to the
chimney cleaning.
• Ventilate the room, where the dryer is located, well during drying.
• For power saving in models with lamps, at times when your dryer is not in use, keep the door closed
if the On/Off button is pressed (if the dryer is energized).Laundry suitable for drying in the
machine
CAlways follow the suggestions on the laundry labels.
Dry only the laundry having a label stating that they
are suitable for drying in a dryer and make sure that
you select the appropriate programme.
3Initial preparations for drying

9EN
• Garments or pillows bolstered with rubber foam (latex foam), shower bonnets, water resistant textiles, materials with rubber reinforcement and rubber foam
pads should not be dried in the dryer.
• Do not use fabric softeners and anti-static products unless they are recommended by the manufacturers
of the fabric softener or the product.
• Do not dry the underwear reinforced with metal parts in the dryer. If these metal reinforcements loosen and break during drying, they will damage your dryer.
Preparing laundry for drying
• Check all laundry items before loading them into the
product to make sure that there are no lighters, coins,
metal items, needles and etc. in their pockets or on
any part of them.
• Fabric softeners and similar products must be used in accordance with the instructions of the manufacturer
of the relevant products.
• All laundry must be spun at the highest spin speed that your washing machine allows for the laundry type.
• Laundry may be tangled after washing. Separate your laundry before placing them into your dryer.
• Sort your laundry according to their types and thicknesses. Dry the same type of laundry together.
E.g.: fine kitchen towels and table cloths dry faster than the thick bath towels.
Correct load capacity
AConsider the information in the “Programme Selection Table”. Always start the programme in accordance
with the maximum load capacity.CAdding laundry to the machine more than the level
shown in the figure is not recommended. Drying
performance will degrade when the machine is
overloaded. Furthermore, your dryer and your laundry
can be damaged.
C Place your laundry into the drum loosely so that they will not get tangled.
CLarge pieces (E.g.: bed sheets, quilt covers, large tablecloths) may bunch-up. Stop the dryer 1-2 times during drying process to separate bunched-up laundry. Following weights are given as examples.Home articlesApproximate weights (g)Cotton quit covers (double)1500
Cotton quit covers (single)1000
Bed sheets (double)500
Bed sheets (single)350
Large tablecloths700
Small tablecloths 250
Tea napkins 100
Bath towels 700
Hand towels350
GarmentsApproximate weights (g)Blouses 150
Cotton shirts 300
Shirts 200
Cotton dresses 500
Dresses 350
Jeans 700
Handkerchiefs (10 pieces)100
T-Shirts125

10 EN
Loading the laundry
1. Open the loading door.2. Place the laundry in the machine without compressing.
3. Push the loading door to close. Ensure that no items are caught in the door.

11 EN
4Selecting a Programme and Operating Your Machine
Control panel
1. Washing machine spin speed*/ Timer programme
selection
Spin speed used to spin the laundry in the washing
macthine / Indicates the time for timer programs.2. Display
Indicates the status of the machine.3. Start/Pause/Cancel button
Used to start, pause or cancel the programme.4. Programme selection knob
Used to select a programme.5. On/Off button
Used to turn on and off the machine.6. Anti-creasing
Prevents the laundry from creasing after the machine completes its programme.
7. Dryness level
Used to adjust the required dryness level.8. Cancel audio warning
Used to cancel the audio warning given at the end of the programme.
9. Time delaying buttons
Used to set the time delay.1 2 3 4 5
6789
Spin speed is used to show the remaining time more accurately.
It does not affect the performance of your machine.
Spin speed / Timer programmes
Operation icon
Pause icon
Water tank full warning icon
Filter cleaning warning icon
Condenser cleaning warning icon
Remaining time indicator
Child-proof lock warning icon
Time delaying mode
Door open warning icon
Anti-creasing mode
Audio warning level / Cancel audio warning
Drying degree
Anti-creasing is activated

12 EN
Preparing the machine
1. Plug in your machine. 2. Place the laundry in the machine. 3. Press the “On/Off” button.C Pressing the “On/Off” button does not necessarily mean that the programme has started. Press “Start/Pause/Cancel” button of the machine to start the programme.
Programme selection
Decide the appropriate programme from the table below
which includes drying temperatures in degrees. Select
the desired programme with the programme selection
knob.
Extra dry Drying at high temperature
only for cotton laundry. Thick
and multi layered laundry
(E.g.: towels, linens, jeans) are dried in a way that they do not
require ironing before placing in
the wardrobe.
Cupboard dry Normal laundry (E.g.: tablecloths, underwear) are dried in a way that they do not
require ironing before placing in
the wardrobe.
Iron dryNormal laundry (E.g., Shirts,
dresses) are dried ready to be ironed.
C For further programme details, see, “Programme Selection Table”
Main programmes
Depending on the type of laundry, the following main
programmes are available:•CottonsYou can dry your durable laundry with this programme.
Dries at high temperature. It is recommended to use for your cotton items (such as bed sheets, quilt cover,
underclothing, etc.).•SyntheticsYou can dry your less durable laundry with this
programme. It dries at a lower temperature compared to the cottons programme. It is recommended for your synthetic laundry (such as shirts, blouses, synthetic/
cotton blended laundry, etc.).C Do not dry curtains and lace in your machine.
Special programmes
For special cases, there are also extra programmes available:CAdditional programmes may differ according to the
model of your machine. •Quick 35 minYou can use this programme to dry your cotton laundry
that you have spun at high speeds in your washing
machine.This program dries 2 kg cotton laundry (2 Shirts
/ 5 T-shirts) in 35 minutes.CTo obtain better results from your dryer, your laundry
must be washed at suitable programmes and spun
at the recommended spin speeds in the washing
machine.
•Shirts This programme dries the shirts more sensitively and
creases them less and thus, helps to iron them more
easily.
CThere may be a little humidity on your shirts at the
end of the programme. We recommend you not to
leave the shirts in the dryer.
•Jeans You can use this programme to dry your jeans that you
have spun at high speeds in your washing machine.
C Review the relevant section in the programme table.•MixUsed to dry synthetic and cotton laundry that do not release colour. Used for laundry that is suitable for drying.•SportUsed to dry the laundry that are made of synthetic, cotton or mixed fabrics and have a tag indicating that they are suitable for drying.
•Wool FinishYou can use this function to ventilate and soften your
woolen laundry that can be washed in the washing
machine. Do not use this function to dry your laundry
completely. Take out your laundry and ventilate them
immediately after the program is over.
•DailyThis programme is used to dry cottons and synthetics
daily, and lasts for 1 hour.
•BabyThis programme is used for baby clothes that bear
machine dryable approval on its label.
•DelicatesYou can dry your highly delicate laundry that are suitable
for drying or laundry which is advised to be hand-washed at a lower temperature.
C It is recommended to use a cloth bag to prevent certain delicate laundry from getting creased or
damaged. Take your laundry immediately out of the
dryer and hang them after the programme ends in
order to prevent them being creased.
•VentilationOnly ventilation is performed for 10 Tminutes without blowing hot air. You can air your clothes that have
been kept at closed environments for a long time and
deodourise unpleasant odours thanks to this programme.

13 EN
•Timer programsYou can select one of the 10 min., 20 min., 30 min., 40
min., 50 min., 60 min., 80 min., 100 min., 120 min.,
140 min. and 160 min. timer programmes to achieve the
desired final drying level at low temperatures. Programme dries at the selected time regardless of the drying
temperature.
Time display
The display shows the time remaining for the programme
to complete while a programme is running. Time
is displayed in hours and minutes as “02:30”. The exemplary display image shows the dryer when it is running and child-proof lock is active.C Programme duration may differ from the values in the consumption table subject to the changes in the
water hardness and temperature, ambient
temperature, type and amount of laundry, auxiliary functions selected, and changes in the supply
voltage..

14 EN
EN
ProgramsCapacity (kg)Spin speed in
washing machine
(rpm)Approximate amount of remaining humidity
Drying time
(minutes)Cottons / Coloreds
AExtra dry7 1000 % 60 124
ACupboard dry 7 1000 % 60 116
A Iron dry7 1000 % 60 90
Quick 35 min 2 1200 % 50 35
Shirts 1.5 1200 % 50 40
Jeans 4 1200 % 50 80
Delicates 1.75 600 % 40 40
Mix4 1000 % 60 83
Sport 4 1000 % 60 90
Wool Finish 1.5 600 % 50 6
Daily 4 1200 % 50 59
Baby 3 1000 % 60 65
Synthetics
BCupboard dry 3.5 800 % 40 45
Energy consumption values
ProgramsCapacity (kg)Spin speed in
washing machine
(rpm)Approximate amount of remaining humidity
Energy
consumption value
kWh
Cottons linen cupboard dry* 7 1000 % 60 4.15
Cottons iron dry 7 1000 % 60 3.25
Synthetics cupboard dry 3.5 800 % 40 1.42
Programme selection and consumption table
Programme table
* : Energy Label standard programme (EN 61121:2012)All values given in the table have been fixed according to EN 61121:2012 Standard. These values may deviate from the table according to the laundry type, laundry spin speed, environmental conditions and voltage
fluctuations.

15 EN
Auxiliary function
Audio Warning
CancelaudiowarningAudiowarninglevel1Audiowarninglevel2Audiowarninglevel3Your dryer will give an audio warning when the
programme comes to an end. If you do not want to hear this buzzing or want to change the volume level, you need to press the “Volume level” button. No audio warning will
be given when “x” appears on the screen.CYou can select this function either before or after the
programme starts.
Drying degree
Used to adjust the required dryness level. More drying is performed compared to the default settings when “+” sign appears and less drying is performed when “-” sign appears. Programme duration can change depending on the selection.
AThis function must be selected before the programme
starts.
Anti-creasing
A 2-hour anti creasing programme to prevent laundry from creasing will be activated if you do not take the
laundry out after the programme is over. This programme
rotates the laundry in 600-second intervals to prevent creasing. Press “Anti-creasing” button to activate.Anti-creasing is activated but the programme is running in the first exemplary figure. Drying is over and the first step of anti-creasing has started in the second figure.Changing the contrast
Contrast can be adjusted in order to make the symbols
on the display appear clearer. It may particularly be necessary to change the contrast setting of the display
when the dryer is installed over a washing machine.press
and
Press and hold the Spin Speed/Time button for 3 seconds.
When the contrast is changed at the end of 3 seconds, all
symbols on the display will become visible for 3 seconds
in order to indicate that the process is complete.
Perform the same procedure to revert back to the previous contrast setting.
Warning indicators
CWarning indicators may differ according to the model
of your machine.
Filter cleaning
A warning symbol will appear to remind filter cleaning
after the programme finishes.
Cf the filter cleaning symbol flashes continuously,
please refer to “Suggested solutions for problems”.
Water tank
A warning symbol will turn on at the end of the
programme or when the tank is full with water. The
machine stops operating if the warning symbol turns on
when a programme is running. To restart the machine,
please drain the water in the water tank. Press “Start/Pause/Cancel” button to start the programme after you have emptied the water tank. The warning symbol turns
off and the programme resumes operating.
Cleaning the condenser
Warning symbol turns on with certain intervals to remind
that the condenser needs cleaning.
Door open
Dryer door open symbol lights up.

16 EN
Time delay
With the “Time delay” function you can delay the
programme start up to 24 hours.
1. Open the loading door and put the laundry in.2. Set the drying programme and spin speed, and if
required, select the auxiliary functions.3. Press “Time delaying” buttons “+” and “-” to set the desired time delay. The time delay symbol will flash.
4. Press “Start/Pause/Cancel” button. Then the time delay starts to count down. The Time delay symbol lights
up. Start symbol lights up.
The “:” in the middle of the displayed time delay will start flashing.
More laundry may be loaded or taken out during the time delay period. At the end of the time delay countdown
process, time delay symbol fades, drying process starts
and the programme duration is displayed. The time on the
display is the total of normal drying time and delay time.
Time delay is started by pressing the start/pause/cancel
button in the exemplary figure.Changing the delay time
If you want to change the time during the countdown:1. Press “Start/Pause/Cancel” button for 3 seconds to cancel the programme. Time delay function must be
set again for the required time.
2. Press Time delay buttons “+” or “-” to set the desired time delay.
3. Press “Start/Pause/Cancel” button. The Time delay symbol lights up. Pause symbol fades. Start symbol lights up.
4. The “:” in the middle of the displayed time delay will start flashing.
Canceling the time delay
If you want to cancel the time delay countdown and start the programme immediately:1. Press “Start/Pause/Cancel” button for 3 seconds to cancel the programme.
2. Then, press “Start/Pause/Cancel” button to start the desired programme.
Starting the programme
1. Press “Start/Pause/Cancel” button to start the programme.
2. “Start/Pause” symbol will light up to indicate that the programme has started and “:” symbol between the remaining time will continue flashing.
Progress of programme
DryingIron
Wardrobe(Extra)
VentilationAnti-creasingThe progress of a running programme is shown through a
number of symbols on the screen.
At the beginning of each programme step, the relevant
symbol in the series of symbols will light up and thus, all
symbols will remain lit up at the end of the programme.
The symbol that is lit up at the far right of the series of
symbols indicates the step that is being carried out.
“Drying”:
- Lights up in all programmes apart from drying and ventilation.
“Iron Dry”:
- Starts to illuminate when the drying degree reaches “iron dry” step and remains illuminated until the next step.“Cupboard Dry”:
Starts to illuminate when the drying degree reaches
“wardrobe dry” step, and remains illuminated until the
next step.“Extra Dry”:
Starts to illuminate when the drying degree reach to
“wardrobe dry extra” step. “Ventilation”:- Illuminates when the programme ends.C Anti-creasing icon will light up at the end of the programme if anti-creasing function is active.Changing the programme after the
programme has started
You can use this feature to dry your laundry in a different
program after your machine has started to run.
For example;Press and hold the “Start/Pause/Cancel” button for about 3 seconds to “Cancel” the programme in order to select
“Extra Dry” programme instead of “Iron Dry” programme. Select the “Extra Dry” program by rotating the program knob. Press “Start/Pause/Cancel” button to start the program.
C If you select a new programme by turning the programme selection knob while your machine is
running, then the current program is cancelled and
new programme information is displayed.

17 EN
Adding/removing laundry in standby
mode
In order to add or take out laundry after the start-up of the programme;
1. Press the “Start/Pause/Cancel” button to switch the machine to “Pause” mode. Drying process will stop.2. Open the door at Pause position and close it again after adding or taking out laundry.
3. Press “Start/Pause/Cancel” button to start the program.
C Any laundry added after the drying process was
started may cause the already dried clothes in the
machine intermingle with wet clothes and the result
will be wet laundry after the drying process is over.
CLaundry may be added or taken out as much as desired during a drying process, but as this process
will interrupt drying continuously, it will extend the program duration and increase energy consumption.
Therefore, it is recommended to add laundry before
the drying programme has started.
C If you select a new programme by turning the programme selection knob while your machine is in
standby, then the current program is cancelled and
new programme information is displayed.
Child-proof lock
There is a child-proof lock to prevent any programme interruption due to the pressing of button while the
programme is running. The loading door and all button
except the “On/Off” button on the panel are deactivated when the child-proof lock is active.In order to activate the child-proof lock, press on the “audio warning” and “anti-creasing” buttons simultaneously for 3 seconds.
To start a new programme after the programme is over or
to interrupt the programme, the child-proof lock should be deactivated. Press the same buttons for 3 sec. again to deactivate the child-proof lock.Lock symbol will appear on the screen when the child-proof lock is activated.
C Child-proof lock will also be deactivated when the machine is restarted by pressing the on/off button.
When the child-proof lock is activated: • Display icons will not change even if the position of programme selection knob is changed while the
machine is running or in halt.
• If the child-proof lock is deactivated after changing the position of the programme selection knob while
your machine is running, your machine stops and
new programme information is displayed
Ending the programme through canceling
A new program can be selected and started after
“Program cancel” is activated in order to change the drying program.
To cancel any selected programme:Press “Start/Pause/Cancel” button for about 3 seconds. “Lint filter cleaning” and “Water tank” warning symbols light up and “End” label appears on the screen as a
reminder at the end of this period.
A As the inside of the machine will be excessively hot when you cancel the program while the machine is
running, activate the ventilation program to cool it
down.
C If you change the position of programme selection knob while your machine is running, then the
machine stops, current programme is cancelled and
new programme information is displayed.
End of programme
“Filter cleaning” and “Water tank” warning symbols
light up and “End” label appears on the screen in the
programme follow-up indicator when the programme ends. The door can be opened and the machine becomes
ready for a second cycle.
Press “On/Off” button to turn off the dryer.C When selected, the 2-hour anti creasing programme will be activated to prevent laundry from creasing if
you do not take the laundry out after the programme
has come to an end.
CClean the filter after each drying (please see, Filter
cleaning).CDrain the water tank after each drying (please see,
Water tank)

18 EN
Sensor
There are humidity sensors in your dryer that detect
whether the laundry is dry or not.
To clean the sensor:1. Open the loading door of the dryer.2. Allow the machine to cool down if drying has been
carried out.
3. Wipe the metal sensors with a soft cloth, dampened
with vinegar and dry them.
CClean metal sensors 4 times a year.
ANever use solvents, cleaning agents or similar
substances when cleaning since these materials can
cause fire and explosion! Water tank;
The moisture in the damp laundry is taken from the
laundry and condens ed. Drain the water tank after each
drying cycle or during drying when “Water tank” warning
light turns on.
A Condensed water is not drinkable!ANever take out the water tank when the programme is
running!If you forget to drain the water tank, your dryer will stop during the following drying cycles when the water tank
is full and the “Water tank” warning light will turn on. If this is the case, press the “Start/Pause/Cancel” button to resume the drying cycle after draining the water tank.
5Maintenance and cleaning
Filter Cartridge / Door Inner Surface
Lint and fibres released from the laundry to the air during the drying cycle are collected in the “Filter Cartridge”.
CSuch fibre and lint are generally formed during
wearing and washing.
CAlways clean the filter and the inner surfaces of the
cover after each drying process.
CYou can clean the filter and filter area by vacuum
cleaner.
To clean the filter:1. Open the loading door.2. Remove the cover filter by pulling it up and open the filter.
3. Clean lint, fibre, and cotton raveling by hand or with a
soft piece of cloth.
4. Close the filter and place it back into its
seat.
C Clogging may arise on the filter surface after using
your machine for some time; if this occurs, wash the
filter with water and dry it before using again.
C Clean the entire inner surface of the cover and door
gasket.

19 EN
*To drain the water tank:1-Pull the drawer and remove the water tank carefully.2-Drain the water in the tank3-If there is lint accumulation in the funnel of the water tank, clean it under running water.
4-Place the water tank into its seat.For the condenser;
Hot and humid air in the condenser is cooled with the cold air from the room. Thus, the humid air circulating in
your dryer is condensed and then pumped into the tank.
CClean the condenser after every 30 drying cycles or
once a month.
To clean the condenser:1. If a drying process has been carried out, open the door of the machine and wait until it cools down.
2. Unlock the 2 condenser locks after opening the kick plate. 3. Pull out the condenser.4. Clean the condenser by applying pressurized water with a shower armature and wait until the water
drains.
5. Place the condenser in its housing. Fasten the 2 locks and make sure that they are seated securely.
6. Close the kick plate cover.

20 EN
6Suggested solutions for problems
Drying process takes too much time
• Meshes of the filter may be clogged. Wash with water.Laundry comes out wet at the end of drying.• Meshes of the filter may be clogged. Wash with water.• Excessive laundry might have been loaded in. Do not load the dryer in excess.Dryer does not switch on or the programme does not start. Dryer is not activated when set.
• It might have not been plugged in. Make sure that the machine is plugged in.• The loading door may be ajar. Make sure that the loading door is properly closed.• Programme might have not been set or the "Start/Pause/Cancel" button might have not been pressed. Make sure that the programme has been set and it is not in “Pause” mode.• "Childproof lock" might have been activated. Deactivate the childproof lock.Programme has been interrupted without any cause.• The loading door may be ajar. Make sure that the loading door is properly closed.• Electricity may be cut off. Press "Start/Pause/Cancel" button to start the programme. Laundry has shrunk, become felted or deteriorated.• A programme suitable for the laundry type might have not been used. Dry only the laundry which is suitable for drying in dryer after checking the labels on your clothes.
• Select a programme with suitable low temperature for the laundry type to dry your clothes.Drum lightning does not come on.
• Dryer might have not been started by using the "On/Off" button. Make sure that the dryer is on.• Bulb may have blown. Call the authorized service to replace the bulb.“Final / Anti-creasing” symbol flashes.• The 2-hour anti creasing programme to prevent laundry from creasing might have been activated. Turn off the dryer and take out the laundry.
“Final / Anti-creasing” symbol is on.• Programme has come to an end. Turn off the dryer and take out the laundry.Water comes out the cover.
• Clean the entire inner surface of the cover and door gasket.Cover opens spontaneously.
• Push it until you hear that it is closed.For products with a condenser:“Water tank” warning symbol is on.
• Water may be full.• Anti-creasing programme might be running. Drain the water in the tank.“Filter cleaning” symbol is on.
• Filter might have not been cleaned. Clean the cover filter.“Condenser cleaning” symbol is on.
• Filter drawer/Condenser might have not been cleaned. Clean the filters in the condenser/filter drawer under the kick plate.
ACall an authorised service if the problem persists.
Table of contents
Other Smeg Dryer manuals
Popular Dryer manuals by other brands

PrintDry
PrintDry FD1908-120 instruction manual

Amana
Amana W10096991A Use and care guide

SPX
SPX JEMACO HXK Series Installation, operation and maintenance manual

GE
GE GTDP180ED4WW installation instructions

LG
LG RC9041A3Z owner's manual

Alliance Laundry Systems
Alliance Laundry Systems 602004144 operation & maintenance