Smeg FME20EX3 User manual

Instructions for Use
Microwave
Bedienungsanweisung
Mikrowelle
Instructions d’Utilisation
Micro-ondes

1
ENGLISH
Dear Client,
First, we would like to thank you for choosing our product. We are sure that this odern, functional and
practical icrowave oven, anufactured fro the best aterials, will satisfy your require ents.
You are advised to read our operation anual carefully and the enclosed pa phlet to enable you to get
the best results fro your Microwave oven.
PLEASE KEEP THESE DOCUMENTS OR UTURE RE ERENCE.
Disposal of old electrical appliances
This appliance is arked according to the European directive 2002/96/EC on Waste Electrical and
Electronic Equip ent (WEEE). By ensuring this product is disposed of correctly, you will help prevent
potential negative consequences for the environ ent and hu an health, which could otherwise be
caused by inappropriate waste handling of this product.
The sy bol on the product, or on the docu ents acco panying the product, indicates that this
appliance ay not be treated as household waste. Instead it shall be handed over to the applicable
collection point for the recycling of electrical and electronic equip ent.
Disposal ust be carried out in accordance with local environ ental regulations for waste disposal. For
ore detailed infor ation about treat ent, recovery and recycling of this product, please contact your
local city office, your household waste disposal service or the shop where you purchased the product.

2
Contents
Installation Instruction ...................................................................................................................3
Important Information ....................................................................................................................4
Description of the Microwave Oven ..............................................................................................5
The Advantages of a Microwave Oven: ........................................................................................ 5
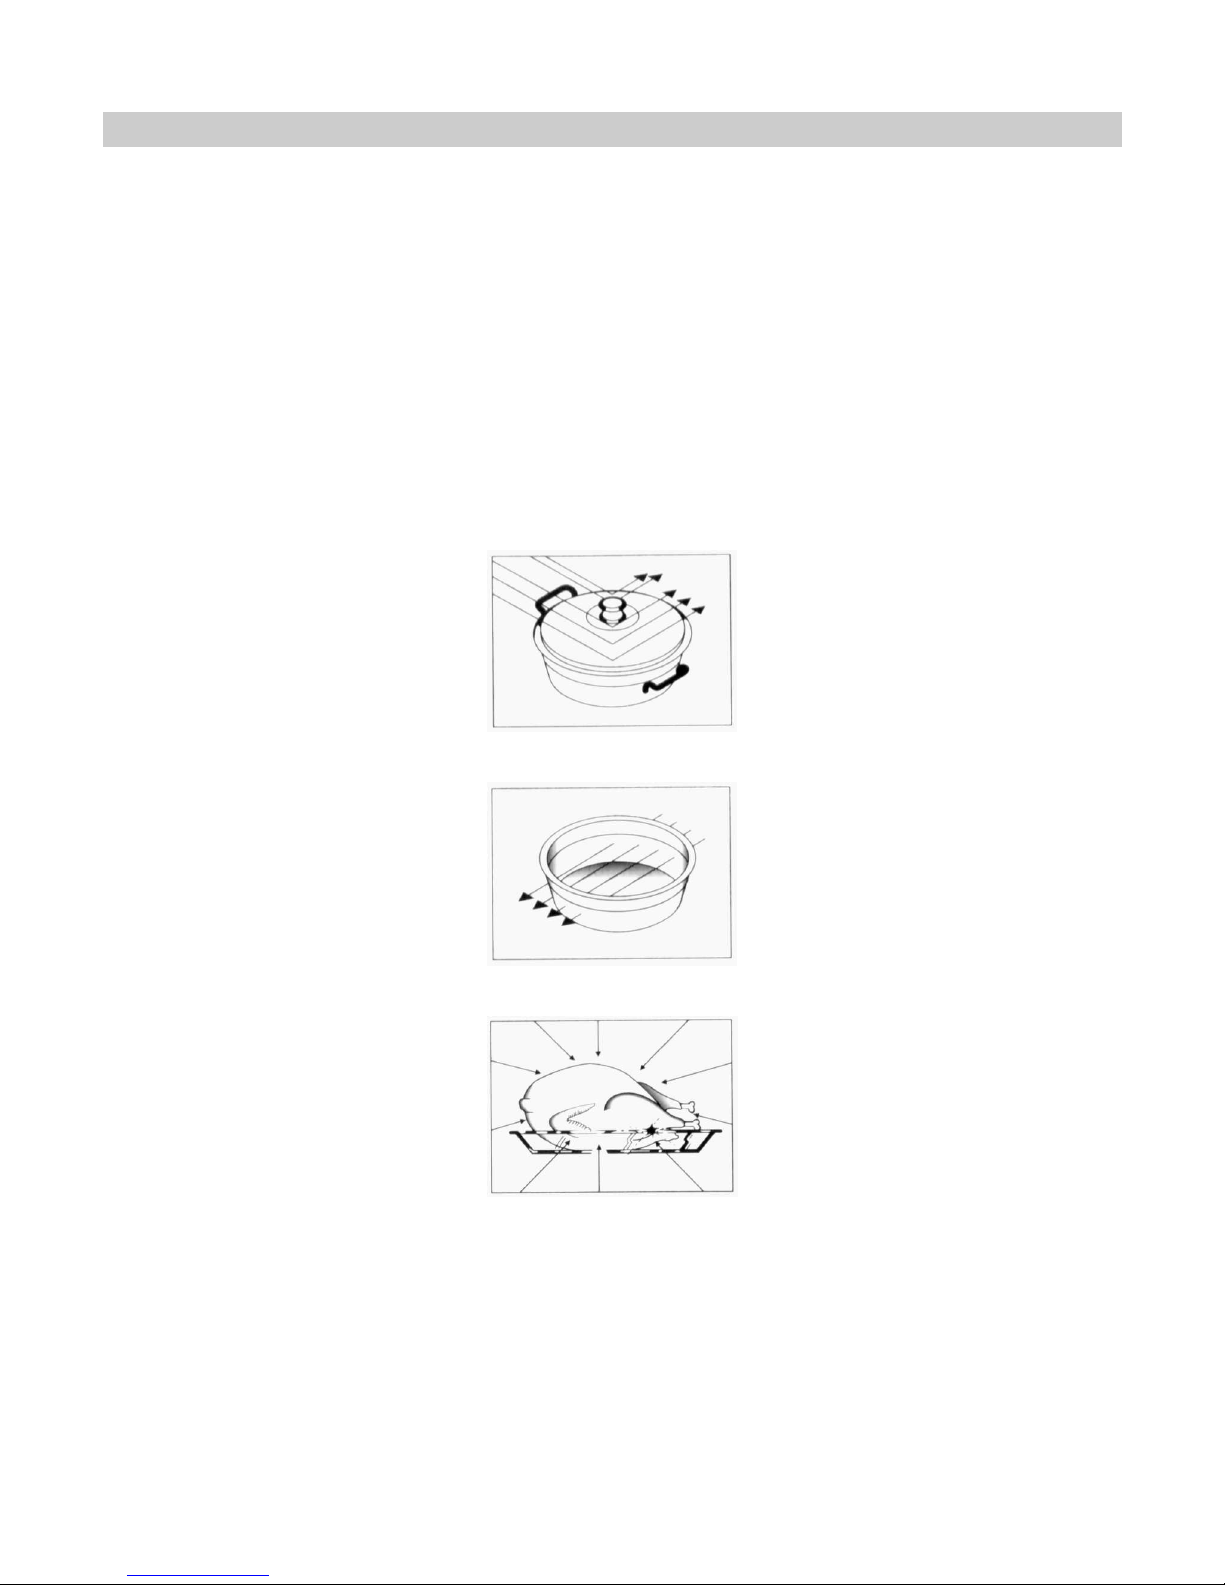
How the Microwave Oven Works? ................................................................................................ 5
Why does the Food Heat Up?........................................................................................................ 6
Operating Instruction......................................................................................................................7
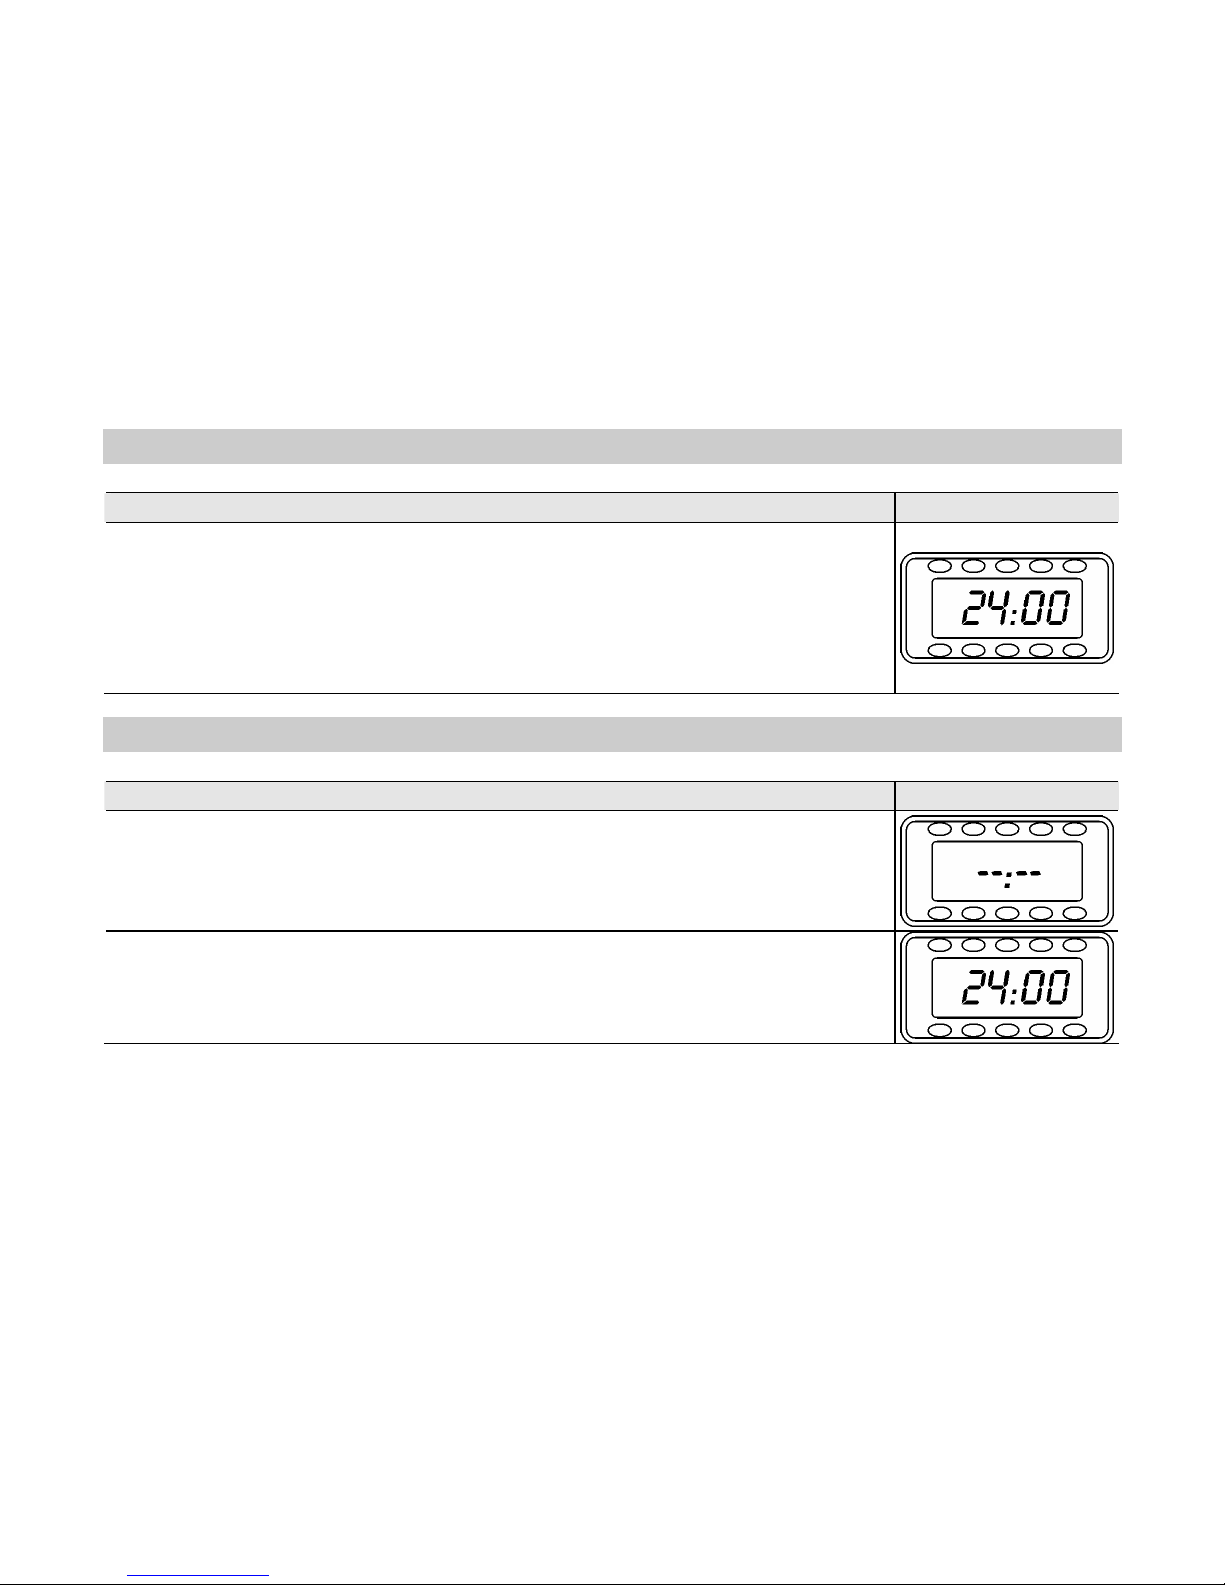
Setting the clock ............................................................................................................................ 7
Safety Block ................................................................................................................................... 7
Microwave Function....................................................................................................................... 8
Grill Function.................................................................................................................................. 8
Microwave and Grill Function........................................................................................................ 8
Defrost by Weight (Auto atic) ...................................................................................................... 9
Defrost by Ti e (Manual)............................................................................................................10
Special Function: DRINK .............................................................................................................10
Special Function: PIZZA...............................................................................................................10
Special Function: CHICKEN.........................................................................................................11
Progra ing the Microwave Oven.............................................................................................11
While in operation .......................................................................................................................12
Interrupting the Operation...........................................................................................................12
Advice for Good Usage of the Microwave Oven .........................................................................13
Working with Microwaves............................................................................................................13
Functioning of the grill.................................................................................................................13
Advice on the use of Cookware ...................................................................................................14
Metal.............................................................................................................................................14
Glass.............................................................................................................................................14
Porcelain.......................................................................................................................................14
Glazed Cera ic Dishes ...............................................................................................................14
Plastic ...........................................................................................................................................14
Wood.............................................................................................................................................15
Recipient Test ..............................................................................................................................15
Lids ...............................................................................................................................................15
Microwave Oven Maintenance ....................................................................................................16
Cleaning........................................................................................................................................16
Official Technical Assistance Service (T.A.S.) ............................................................................17
Solving Proble s .........................................................................................................................17
Cord Replace ent.......................................................................................................................17
Light Replace ent.......................................................................................................................17

3
Installation Instruction
Re ove the icrowave oven fro packing.
Re ove all packing aterials and accessories fro the icrowave oven cavity.
Check whether the following parts are in good condition:
-Door and hinges;
-Front of the icrowave oven;
-Inside and outside of icrowave oven.
Should you find any faults DO NOT USE THE MICROWAVE OVEN, and contact your dealer.
Place the icrowave oven on a flat stable surface able to support its weight.
To allow efficient cooling of the microwave oven its installation is recommended in a unit with an
opening in the upper part (refer to the installation instructions leaflet enclosed).
Warning: The microwave oven plug shall be accessible after installation.
When installing the microwave oven great care should be taken to ensure that the mains power cable
cannot come into contact with the rear since the high temperatures involved could cause damage.
When the microwave oven is installed in a column with a conventional oven, the microwave oven must
not be located underneath the conventional oven because of the possibility of condensation forming
inside the latter.
The icrowave oven has been supplied with a ono-phase power supply cord. The appliance ust be
earthed.
WARNING: THIS APPLIANCE MUST BE EARTHED.
The anufacturers and dealers are not liable for any breakdowns or personal accidents should these
installation instructions not be observed by the purchaser.

4
Important Information
WARNING: If the door or the door hinges are damaged, the oven should not be switched on until
repaired by a qualified technician.
WARNING: It is dangerous for anyone, except a qualified technician, to tamper with the apparatus or
try to repair it in any way by removing any lid or covering which assures protection against the
exposure to microwave energy.
WARNING: Liquids and other food should not be heated in airtight recipients as these can explode.
WARNING: Children should only be allowed to use the oven without adult supervision if they have been
given the appropriate instructions so that they can use the oven safely and understand the dangers of
its incorrect use.
WARNING: When the microwave oven is operated in the Combination mode (Microwaves + Grill),
children should only be allowed to use the unit under adult supervision due to the high temperatures
generated.
WARNING: The microwave oven should be cleaned regularly and any food deposits removed (please
see the chapter on Oven Maintenance for details). ailure to maintain the oven in a clean condition
could lead to deterioration of the surface that could adversely affect the life of the appliance and
possibly result in a hazardous situation.
When heating food in plastic or paper recipients, check the oven frequently in case they ignite.
If any s oke is detected, then switch off the oven or disconnect it and keep the door closed in order for
any fla e to die out.
After war ing up baby bottles or baby food jars, stir or shake its contents and check the te perature
before feeding, to avoid burns.
War ing up drinks in the icrowave oven ay result in a delayed eruptive boiling, therefore one should
be careful when handling the recipient.
Eggs with their shell and whole boiled eggs shouldn’t be war ed up in icrowave ovens as they ay
explode, even after icrowave heating has ended.
Only use utensils that are suitable for use in icrowave ovens. Do not use any etal utensils inside the
oven unless they were supplied with the oven and for that purpose.
Do not war up liquids or other food in closed recipients as they ay explode.
Do not war up pure alcohol or alcoholic drinks. FIRE DANGER.
When in doubt, choose short periods to cook, heat or defrost food with icrowaves. With long cooking
periods the food ay beco e dry and even begin to burn.
Do not use the icrowave oven for anything other than war ing, cooking or defrosting food.
Do not operate the icrowave oven without its tray nor when e pty.
Keep the icrowave oven ventilation holes open. Never cover any air vents or openings.

5
Description of the Microwave Oven
The Advantages of a Microwave Oven:
In a conventional oven the heat radiated by the resistances or gas burners, slowly penetrates the food
fro the outside to the inside. There is, therefore, a great loss of energy in the heating of the air, oven
co ponents and recipients.
On the other hand, in icrowave ovens the heat is generated in the interior of the food itself, heating it
fro the inside outwards. There is therefore no loss of energy as the air, interior walls of the oven and
recipients (when adequate) do not heat up with icrowaves.
In short, icrowave ovens have the following advantages:
1. Save on cooking ti e: in general there is a 3/4 reduction of the cooking ti e than with conventional
ethods.
2. Ultra-quick defrosting that prevents bacteria develop ent.
3. Electricity saving.
4. Maintaining the nutritive value of the food due to the cooking ti e reduction.
5. Easy cleaning.
How the Microwave Oven Works?
In the icrowave oven there is a high voltage valve called "Magnetron" that converts electric energy to
Microwave energy. These electro agnetic waves are conducted to the inside of the oven cavity by eans
of wave-guide and spread by a ode stirrer or by a turntable.
Inside the oven, the Microwaves spread out in all directions and are reflected by the etallic walls,
penetrating the food evenly.

6
Why does the ood Heat Up?
Most food contains water, whose olecules vibrate with Microwaves.
The friction between the olecules generates heat, which causes a te perature rise in the food,
defrosting it, cooking it or keeping it war .
As the heat is for ed inside the food:
-It ay be cooked with little or no liquid or fat;
-Defrosting, heating or cooking in the icrowave oven is quicker than in a conventional oven;
-Vita ins, inerals and nutritive substances are preserved;
-There is no change in the natural colour and s ell of the food.
The Microwaves pass through porcelain, glass, cardboard and plastic but not through etal. Therefore,
recipients ade of or containing etal should not be used in the icrowave oven.
The Microwaves are reflected by the etal…
…they pass through Glass and Porcelain…
…and they are absorbed by the food.

7
Operating Instruction
Consult the figure in the appendix leaflet and then proceed in the following anner:
1. Plug your icrowave into a suitable electric current (see Installation Instructions).
2. Open the door by pressing the Door Open button (15). In the odels without this button, you need
only pull the door open. The oven light should switch on.
3. Place the recipient with food on the turntable or on the grill rack.
4. Select the function and cooking ti e required, as described in the following chapters.
5. Close the door and press the START key (6).
6. The icrowave oven starts working. The Display (1) shows the functioning ti e decreasing.
Setting the clock
How to Proceed Display (1)
1.
1.1.
1. Press the CLOCK key (7) until the digits start blinking.
2.
2.2.
2. Introduce the hour by turning the ROTATING KNOB (14) in both directions.
3.
3.3.
3. Press the CLOCK key (7) again to change the inutes.
4.
4.4.
4. Introduce the inutes by turning the ROTATING KNOB (14) in both directions.
5.
5.5.
5. Press the CLOCK key (7) to stop.
Safety Block
How to Proceed Display (1)
1.
1.1.
1. The icrowave oven operation can be blocked
(for exa ple: to prevent it fro
being used by children) by pressing the STOP key (13
) for 3 seconds. At the end of
these ti e there is an alar sound, the Display (1
) show 4 lines and the oven
won’t work. Note: you can see the clock by pressing the START key (6).
2.
2.2.
2. To unblock it, press the START key (6
) for 3 seconds. At the end of these ti e
there is an alar sound and the Display (1) show the clock once again.

8
Microwave unction
How to Proceed Display (1)
1.
1.1.
1. Press the MICROWAVE (4) key: the Microwave function indicator light up.
2.
2.2.
2. Introduce the functioning ti e (exa ple: 10 inutes), by tur
ning the ROTATING
KNOB (14) in both directions.
3.
3.3.
3. To change the icrowave power, press the – (5) and +(12) keys. If these keys
are not pressed, the icrowave oven work as default at axi u power.
4.
4.4.
4. Press the START key (6). The oven starts working.
Grill unction
How to Proceed Display (1)
1.
1.1.
1. Press the GRILL key (10): the Grill function indicator light up.
2.
2.2.
2. Introduce the functioning ti e (exa ple: 10 inutes), by tur
ning the ROTATING
KNOB (14) in both directions.
3.
3.3.
3. Press the START key (6). The oven starts working.
Microwave and Grill unction
How to Proceed Display (1)
1.
1.1.
1. Press the MICROWAVE + GRILL key (11
): the MICROWAVE + GRILL function
indicator light up.
2.
2.2.
2. Introduce the functioning ti e (exa ple: 10 inutes), by tur
ning the ROTATING
KNOB (14) in both directions.
3.
3.3.
3. To change the icrowave power, press the – (5) and + (12) keys. If these keys
are not pressed, the icrowave oven work as default at axi u power.
4.
4.4.
4. Press the START key (6). The oven starts working.

9
Defrost by Weight (Automatic)
How to Proceed Display (1)
1.
1.1.
1. Press the DEFROST key (9): the Defrost by Weight function indicator light up.
2.
2.2.
2. Introduce the type of food, by pressing the – (5) and + (12
) keys. If these keys
are not pressed, it select type 1 food as default.
3.
3.3.
3. Introduce the weight of the food (exa ple: 1,2 kg), by tur
ning the ROTATING
KNOB (14) in both directions.
4.
4.4.
4. Press the START key (6). The oven starts working.
5.
5.5.
5.
When the oven stops and the alar sounds, open the door and turn the food
over. Close the door and press the START key (6).
The following table describes the different Defrost by Weight progra es; the respective weight ranges;
defrost ti e ranges; standing ti e ranges (to allow te perature evenness) and reco endations.
Code ood Weight Defrost Time Standing Time
Recommendation
1 Meat 0,1 – 1,5 kg 4 – 61 in 20 – 30 in Cover the thinner ends with tin foil.
Turn the eat when the oven
whistle sounds.
2 Poultry 0,1 – 1,5 kg 4 – 61 in 20 – 30 in Cover the thinner ends with tin foil.
Turn the eat when the oven
whistle sounds.
3 Fish 0,1 – 1,5 kg 4 – 63 in 20 – 30 in Cover the tail of the fish with tin foil.
Turn the fish when the oven whistle
sounds.
4 Fruit 0,1 – 0,5 kg 2 – 13 in 5 – 10 in Place the fruit in a glass dish and
cover it during defrosting and
standing ti e.
5 Bread 100 – 800 g 2 – 19 in 5 – 10 in Place the bread on the glass
turntable covered with kitchen
paper towel.
IMPORTANT NOTES:
-In the Defrost by Weight function, the introduced weight is that of the food alone, not including the
dish.
-Use the Defrost by Weight function only for raw food.
-This function has better results if the food is at a te perature of –18°C and if the food is taken
directly fro the freezer to the oven.
-If the food is at a higher te perature (either because it isn’t a 3 star freezer or because the food has
been out of the freezer for ore than 20 inutes) the oven calculated ti e will be ore and there
ay be a risk of fire. In these cases, select a weight, which is lower than the real food weight.
-In the cases above and when the food is already cooked and frozen, use the Defrost by Ti e function,
starting with short periods of ti e.
-When you use tin foil to protect the thinner parts of the food, ake sure that it doesn’t touch the oven
walls, otherwise there ay be da ages.

10
Defrost by Time (Manual)
How to Proceed Display (1)
1.
1.1.
1. Press the DEFROST key (9) twice: the Defrost by Ti e functi
on indicator light
up.
2.
2.2.
2. Introduce the defrosting ti e (exa ple: 12 inutes), by tur
ning the ROTATING
KNOB (14) in both directions.
3.
3.3.
3. Press the START key (6). The oven starts working.
4.
4.4.
4. When the oven stops and the alar sounds, open the door and turn th
e food
over. Close the door and press the START key (6).
Special unction: DRINK
How to Proceed Display (1)
1.
1.1.
1.
Place the drink (150 to 300 l of coffee, tea, ilk, water, etc.) in a heat
resistant recipient on the turntable.
2.
2.2.
2. Press the Special Function DRINK key (3): the Special Functi
on DRINK
indicator light up.
3.
3.3.
3. Press the START key (6). The oven starts working.
Special unction: PIZZA
How to Proceed Display (1)
1.
1.1.
1. Sprinkle the turntable with flour and place the pizza directly on the turntable.
2.
2.2.
2. Press the Special Function PIZZA key (2): the Special Functi
on PIZZA indicator
light up.
3.
3.3.
3. Press the START key (6). The oven starts working.
4.
4.4.
4.
At the end, there is a standing ti e during which the oven continues working
and the Special Function PIZZA indicator blink.

11
Special unction: CHICKEN
How to Proceed Display (1)
1.
1.1.
1.
Spread olive oil and spices (salt, pepper, etc.) over the separated chicken
pieces (400 to 500 g) and place the in a heat resistant recipient on the
turntable.
2.
2.2.
2. Press the Special Function CHICKEN key (8
): the Special Function CHICKEN
indicator light up.
3.
3.3.
3. Press the START key (6). The oven starts working.
4.
4.4.
4.
The total preparation ti e is of 30 inutes, divided into 4 periods of 7,5
inutes. At the end of the first 3 period
s the oven stop and the alar sound. Turn
the chicken pieces over and press the START key (6) again.
5. At the end, there is a standing ti e during which the oven continues working
and the Special Function CHICKEN indicator blink.
Programming the Microwave Oven
The Nor al Functions (Microwave, Grill, Microwave + Grill, Defrost by Weight and Defrost by Ti e) can be
progra ed in sequence to a axi u of 3 functions.
For exa ple, to defrost by weight 800 g of eat, cook it in Microwaves for 10 inutes at power 4 and
finally using the Microwave + Grill function for 8 inutes at power 3, you should proceed as follows:
How to Proceed Display (1)
1.
1.1.
1. Press the DEFROST key (9): the Defrost by Weight function indicator light up.
2.
2.2.
2. Introduce the type of food, ( eat = type 1) by pressing the - (5) and + (12
)
keys.
3.
3.3.
3. Introduce the weight of the food (0,8 kg), by turning the ROTATING KNOB (14).
4.
4. 4.
4. Press the CLOCK / PROGRAMMING (7) to activate the next function.
5.
5. 5.
5. Press the MICROWAVE key (4): the Microwave function indicator light up.
6.
6. 6.
6.
Introduce the functioning ti e (10 inutes), by turning the ROTATING KNOB
(14).
7.
7. 7.
7. Press the – key (5) to change the icrowave power to 4.
8.
8. 8.
8. Press the CLOCK / PROGRAMMING (7) to activate the next function.

12
How to Proceed Display (1)
9.
9.9.
9. Press the MICROWAVE + GRILL key (11
): the Microwave + Grill function
indicator light up.
10.
10. 10.
10.
Introduce the functioning ti e (8 inutes), by turning the ROTATING KNOB
(14).
11.
11. 11.
11. Press the – key (5) twice to change the icrowave power to 3.
12.
12. 12.
12. Press the START key (6). The oven starts working.
While in operation ...
You can open the oven door at any ti e while the food is being cooked; this way:
-THE PRODUCTION OF MICROWAVES IS IMMEDIATELY INTERRUPTED;
-the Grill will be switched off, however, re aining very hot;
-the Ti er will auto atically stop, indicating the ti e still left.
Then, if you wish you ay:
-Stir or turn the food, to i prove even heating;
-Change the icrowave power level by pressing the - (5) or + (12) keys;
-Select another function by pressing the Function (2, 3, 4, 8, 9, 10, 11) keys;
-Change the functioning ti e left by turning the ROTATING KNOB (14).
Close the door again and press the START key (6). The oven restarts working.
Interrupting the Operation
To stop the oven before co pleting its progra ed ti e, press the STOP (13) key or open the door.
If you don’t wish to continue cooking the food, close the door and press the STOP (13) key again. The oven
will e it a sound and the Display (1) will show the Clock.
At the end of the functioning ti e, the oven will stop, e it 3 signal sounds and the Display (1) will show
the word “End”. The sound signals are repeated every 30 seconds until the door is opened or the STOP
key (13) pressed.

13
Advice for Good Usage of the Microwave Oven
Working with Microwaves
Before using any dish, ake sure that it is appropriate for use in icrowaves (SEE ADVICE ON THE USE OF
UTENSILS AND RECIPIENTS).
Always ake a slit in the food's shell before cooking it.
Whenever heating liquids use a recipient with a large opening to allow the vapour to escape.
Remember that:
1. Larger quantities of food require ore cooking ti e.
2. The lower the food te perature the ore cooking ti e is needed.
3. Less dense foods cook faster.
4. An even distribution of the food in the oven guarantees better results. The cooking of different types
of foods si ultaneously is possible by placing the dense food in an outside circle and the less dense
in the centre of the plate.
5. Better results are achieved by allowing the food to stand before serving because it continues to cook
for so e ti e after the oven is switched off.
6. The cooking ti e ay be shortened and the liquids preserved (the food doesn't dry out) by covering
the food. The lids should be transparent to allow the icrowaves through and they should have a
s all opening for the vapour to escape.
unctioning of the grill
For best results of the grill, use the grill rack supplied with the appliance.
Do not place the grill rack in contact with the cavity’s metal surface as there may be an electric arc
and consequent damages.
IMPORTANT NOTES:
1. While the grill is being used for the first ti e, the producing of fu es and odours is nor al, due to the
oils used in the anufacturing process.
2. After the first uses 0f the grill, it is nor al for the perforated area that protects the heating ele ents
of the grill to defor and to beco e a golden colour due to the high te peratures that the grill
reaches during use.
3. The glass on the door reaches high te peratures during grilling. Therefore the oven should be
installed at least 80 c above the floor, SO AS TO BE OUT OF REACH OF CHILDREN.
4. While in operation, the inside walls of the oven and the grill beco e very hot, therefore the use of
kitchen gloves is reco ended.
5. During extended use of the grill it is nor al for the heating ele ents to switch off for short periods
due to the action of the safety te perature li iter.
6. Do not use plastic containers or others that have poor te perature resistance, as these could be
destroyed due to the high te peratures that the grill reaches.

14
Advice on the use of Cookware
Metal
Do not use etal dishes, tinned food, food wrapped in tin foil and cutlery inside the icrowave oven. The
etal reflects the icrowaves and food is not heated.
The food should be re oved fro its tin foil containers and placed in dishes adequate for use in the
icrowave oven. As icrowaves don't penetrate tin foil, the food heats only on the surface. By using
appropriate dishes, the heat is evenly distributed throughout the food.
EXCEPTIONS:
To cook or defrost pieces of eat of irregular sizes, you ay cover the thinner parts with tin foil, which
should be kept at least 2 c away fro the oven walls, otherwise these ay cause an electric arc.
Metal spits ay be used as long as they are s aller than the pieces of eat.
Glass
All heatproof glass containers ay be used.
Crystal contains a percentage of lead, which ay cause it to crack if used in the icrowave oven. The
sa e ay happen to glass dishes with jagged edges.
Porcelain
Porcelain dishes ay be used but they should not have hollow handles. Hu idity ay be for ed inside
the hollow handles, which will causes an increase in pressure that ay cause the to break.
Glazed Ceramic Dishes
This type of dish ay heat considerably.
Painted glazed cera ic dishes ay be used if the painting is done under the glaze.
Many glazes and colours contain etallic substances. If this is the case they should not be used in the
icrowave as they ay be da aged.
Recipients with silver and gold glazes ay go dark.
Plastic
Plastic dishes should be heat resistant (at least 180° C) or they ay be defor ed when used in the
icrowave. Mela ine dishes are not suitable for use in the icrowave as they heat up too uch.
To cook or heat food in plastic bags, they should be perforated to allow vapour to escape thus preventing
the bag fro bursting.

15
Wood
Wooden recipients should not be used in the icrowave. Wood contains water, which evaporates and ay
cause the recipient to crack.
Recipient Test
If in doubt about the use of glass, glazed cera ic or porcelain dishes in the icrowave oven, do the
following test:
1. Place the e pty dish and a glass of water inside the icrowave oven;
2. Close the door;
3. Set the Power Level Selector at axi u power;
4. Adjust the ti er to 1 inute;
Note: The oven starts.
If during this test you hear any noise along with sparks, turn off the oven i ediately.
Any kind of cookware that has this kind of behaviour or is very hot when re oved fro the oven should
not be used in the icrowave oven.
EXCEPTIONS:
Glazed cera ic dish recipients contain any water olecules and heat a lot, but can be used in the
icrowave oven.
If in doubt, contact the supplier of the cookware, and ake sure that they are appropriate for icrowaves.
Lids
The use of glass lids, plastic lids or plastic fil is advisable because:
1. They prevent the release of excessive vapours especially when cooking for longer periods.
2. They increase the speed of heating food.
3. They prevent the food fro drying up.
4. They prevent the loss of the food aro a.
The lids should have holes to avoid pressure. Plastic fil should be perforated.
Baby bottles, baby food jars and other si ilar recipients should be war ed up without lids as they can
burst.

16
Microwave Oven Maintenance
Cleaning
MAKE SURE THAT THE OVEN IS UNPLUGGED BEFORE CLEANING THE OVEN.
DON'T USE ABRASIVE CLEANING PRODUCTS.
OUTSIDE
1. Clean the outside surface with neutral detergent, lukewar water and dry it with a da p cloth.
2. Avoid water fro entering the oven ventilation holes.
INSIDE
1. Clean the oven walls with a da p cloth after each use.
2. Avoid water fro entering the ventilation holes in the oven's interior.
3. If so e ti e has passed by since the last cleaning and the oven's interior is dirty, place a glass of
water on the tray and switch on the oven for 4 inutes on the highest setting. Moisture will for on
the oven walls, which will be easily cleaned.
4. The tray can be washed with regular dish washing detergent or in the dishwasher.
DOOR, DOOR SEAL, AND OVEN FRONT
1. These parts should always be clean, especially the contact surface between the door and the oven
front, to prevent microwave leakage.
2. Use neutral detergent, lukewar water and dry the surface with a soft cloth.

17
Official Technical Assistance Service (T.A.S.)
Solving Problems
Repairs or interventions carried out by an unqualified service an can cause dangerous situations.
Every and any kind of repair or intervention should be done by the manufacturer, authorised agents or
qualified technicians.
If you detect any abnor alities in the oven, check the following before you contact T.A.S:
1. Check if the outlet into which the oven is plugged has power. To do so, plug another appliance into the
sa e outlet and check if it works.
2. If the oven la p switches on, but the food does not heat up, check if the door is well closed (if the
door is not properly closed, no icrowaves will be produced).
Cord Replacement
If the cord is da aged, it should be replaced by the anufacturer, authorised agents or qualified
technicians in order to avoid any dangerous situation and also because special tools are required.
Light Replacement
In the odels without the lid to replace the light bulb, this should be done by the Technical Assistance
Service because special tools are required.

Cod.: 183839 - d
SMEG S.p.A.
VIA CIRCONVALLAZIONE NORD, 36
42016 GUASTALLA RE
ITALIA
Tel.: +39 0522 837 777
Fax: +39 0522 838 384

ES
¡PRECAUCIÓN! Durante el funcionamiento del
horno microondas, el marco y la puerta pueden
alcanzar temperaturas que aconsejan tener
precaución durante su utilización.
DE
VORSICHT! Der Mikrowellenherd kann während
der Inbetribnahme an ür und ürrahmen hohe
emperaturen erreichen, Vorsicht ist empfohlen.
GB
WARNING! During the functioning of the
microwave oven, the frame and the door may
reach temperatures which require care when using
the appliance.
FR
ATTENTION! Lors du fonctionnement du four
micro-ondes, le cadre et la porte peuvent atteindre
des températures élevées qui nécessitent de
prendre desprécautions pendant son utilisation.
PT ATENÇÃO! Durante o funcionamento do forno
micro-ondas,o aro e a porta podem alcançar
temperaturas elevadas pelo que se aconselha
precaução durante a sua utilização.
NL
WAARSCHUWING! Wanneer de magnetron in
werking is kunnen de rand en de deur heel erg
warm worden, voozichtigheid is dan ook geboden.
IT PRECAUZIONE! Durante il funzionamento del
forno microonde, la cornice e la porta possono
raggiungere temperature che consigliano di agire
con precauzione durante il suo utilizzo.
GR
ΠΡΟΣΟΧ ! Κατά την διάρκεια λειτουργίας του
φούρνου µικροκυµµάτων το πλαίσιο και η πόρτα
µπορεί να θερµανθούν υπερβολικά γι’ αυτό και
συνίσταται προσοχή κατά την διάρκεια της χρήσης
του.
Microondas
Mikrowelle
Microwave
Micro-ondes
Magnetronoven
Microonde
Μικροκυµµάτων
1830
620
Other Smeg Microwave Oven manuals
Popular Microwave Oven manuals by other brands

Alto-Shaam
Alto-Shaam 7.14 Installation and Maintenance

HIGH ONE
HIGH ONE MWO 20 M W 902C instruction manual

Silvercrest
Silvercrest SMW 800 C3 operating instructions

Silvercrest
Silvercrest SMW 800 C2 operating instructions

Junker
Junker JG4119260 User manual and installation instructions

Concept2
Concept2 MTV 6925WH manual