Snooper SHOTSAVER S430 User manual

Page
Components 3
Quick Start Guide 4
Settings 6
Brightness
Volume
Language
Calibrate the screen
Power save
Information
Picture 7
Satellite Navigation & GPS Speed Trap locator
Troubleshooting 8
Snooper Accessories & Additional Software 10
Service under Warranty 11
2
S430
Contents
Important Safety Information
• Please read this carefully before using S430.
• Do not open the cabinet of S430
• Always treat your product with care and keep it in a clean and dust-free place
• Do not expose S430 to moisture or humidity.
• Do not expose S430 to extreme high or low temperature.
• Do not attempt to disassemble your product.
• Use only the chargers and batteries approved by Performance Products
Limited.The use of any other type may invalidate any approval and warranty.
No reverse charging with other chargers, they may have inverse polarity.
• Never use the charger if the plug is damaged.
• Never touch the charger if your hands/ feet are wet.
• Do not expose the charger to water, it may cause electrical fires.
• Do not repair the charger yourself for your safety.
• To reduce the risk of fire or burns, do not disassemble crush or puncture the
battery.
• Do not let the metal contacts on the battery touch other metal object, it could
lead to short-circuit and damage the battery.
Copyright
Copyright @2009 SNOOPER. All rights reserved.
Product specifications and features are for reference only and are subject to
change without prior notice.
Declaration
This User Manual is published by SNOOPER without any warranty. Improvement
and changes to this User Manual necessitated by typographical errors,
inaccuracies of current information, or improvements to programs and/or
equipment, may be made by Performance Products Limited any time and
without notice. Such changes will, however, be incorporated into new editions of
this User Manual.

UK • 3
Return to contents
Components Included
The following components come as standard with your Shotsaver S430:
1 x Snooper Shotsaver S430 system
1 x Quick Start Guide
1 x USB PC connection lead
1 x Download Software Disc, including the full user manual
PLEASE NOTE
Due to our desire to continually improve our products, the specification may change without notice.
S430

UK • 4
Return to contents
QUICK START GUIDE
Basic Operation and downloading golf courses
1. Register Shotsaver FREE at www.snooperneo.co.uk
2. Charge unit with charger provided until the LED on the front of the unit changes from red to
green.
3. Power the unit on by pressing and holding the button below the LCD until the Shotsaver
launch screen is displayed. Next slide the on-screen power button from left to right.
4. Launch Shotsaver software by pressing the golf icon.
5. Start game.
Your S430 is already pre-loaded with over 4500 golf courses. Press the Search button to find
a course to play and/or to add a course to your Favourites folder. Select Country and County
or just press Search. Using the keyboard enter the name of the golf course and then click on
it to select it. Press OK to play the course or Route if you have sat nav software installed and
would like your S430 to navigate you to the course. Finally select the appropriate Tee colour
and/or Add, if you would like to add the selected course to your Favourites folder so that it is
easier to access next time you play there.
6. The hole selected will be displayed something like this. To refresh the distances displayed tap on the screen at any time.
Note: ensure that Shotsaver has GPS connectivity before you start or the distance information displayed will not be accurate.
S430
Distance to back
of the green
Distance to centre
of the green
Scroll through
hazards
Distance to front
of the green
Distance to
hazards
Main menu Return
End hole
Details of current hole
Battery & GPS
strength

UK • 5
Return to contents
7. Edit players.
Click here to add players names and handicap. This information must be added prior to starting play if you want Shotsaver to
save your score and calculate your Stableford points.
8. View club distances.
Click here to view any club distances previously recorded.
9. History.
View previous scores saved here.
10. Scoring.
To enter your score press Menu and then Scorecard. Then press here to enter all players scores(Show scorecard graphic and
indicate where to press to enter the score and where to press to change the players score displayed. Also indicate net score and
Stableford score) Press here to change players score.
11. Record club distance.
Press Menu and then Record club distance. Select the club you want to record. Stand as near to your ball as possible and press
Start. Hit the ball and once you have walked up to it again, stand as close as possible to it and press End. The distance that the
ball was hit will automatically be displayed.
Press here to enter all
players scores
Press here to view other
players scores
Net score
Stableford score

UK • 6
Return to contents
Settings
To change the settings of your device press the Settings’ button in the main menu.
BRIGHTNESS
To adjust the brightness of the display press the brightness button in the Menu. Use the + and - buttons to increase or decrease the
brightness of the screen. Press the X button to confirm and exit the setting.
VOLUME
To adjust the volume press the volume button in the menu. Use the + and - buttons to increase or decrease the volume. Press the X
button to confirm and exit the setting.
LANGUAGE
To change the language press the language button in the menu and then the language you require. Press the X button to confirm
and exit the setting.
CALIBRATE THE SCREEN.
To re-calibrate the screen press the Calibrate button in the menu and then follow the on-screen instructions.
POWER SAVE
The battery life of your S430 will vary depending on what settings you use.
Backlight permanently on - up to 6 hours
With the backlight permanently on the battery will last up to approximately 6 hours.
Backlight auto off setting - up to 11 hours
Extend the battery life up to 11 hours by setting the backlight to automatically switch off after a short period of activity (similar to
most mobile phones) Go to the SETTING section in the Main Menu of the device displayed when you first power the unit on. Click on
POWER SAVE and choose your preferred BACKLIGHT OFF TIME - 1min, 30 sec, 20 sec, 10 sec.
Sleep mode - up to 16 hours
Extend the battery life up to 16 hours using the Sleep Mode. Go to SETTING, then POWER SAVE and change POWER DOWN TIME
to 2 mins. After 2 mins of inactivity the screen will go blank. Wake up the unit by briefly pressing the button beneath the LCD.
INFORMATION
Press the information button for information on the software and hardware version of your device.
S430

UK • 7
Return to contents
PICTURE
View pictures on SD card
To view pictures on this device first put the images you want to view on suitable micro SD card. Put the SD card in to the SD card slot
on the underside of the unit. Press the Picture icon and to view the pictures on the SD card tap SDMMC Card. The images you have
placed on the SD card will be shown in the Preview section. Scroll up or down using the arrows and tap the ‘thumbnail’ of the image
you want to view. Use the back and forwards arrows to scroll through your images. Tap the ‘X’ button to exit the Picture at any time.
Slide show
First select the speed of the slides to be viewed. You can select the images to be displayed for 1, 2, 3, 4, 5 or 10 seconds. Once you
have selected the time you require, press the play button and all your images will be displayed in rotation. To exit the slide show at
any time tap anywhere on the screen.
DOWNLOADING NEW COURSES
Your Shotsaver S430 is preloaded with over 4500 golf courses and has the capacity to store up to 20,000 courses in total. As and
when new courses are plotted you can download them on to your unit - FREE OF CHARGE. To download new courses put the CD
ROM included with your S430 in to the CD drive of your PC and follow the on-screen instructions.
SATELLITE NAVIGATION & GPS SPEED TRAP LOCATOR
It is also possible to use your device as a satellite navigation and GPS speed trap locator. There are two sat nav packages available,
the Sapphire Plus S280 sat with either UK & Ireland mapping or Western Europe. Please visit www.snooper.eu for further details.
Sapphire Plus S280 sat nav comes preloaded on a micro SD card. To install the sat nav software simply take the micro SD card and
insert it in to the SD card slot on the bottom of the unit. To operate the sat nav function simply power the unit in the normal way and
press the Navi button in the main menu. The Sapphire Plus S280 sat nav software will automatically launch. For further information
on how to use this software refer to the operating instructions provided with it.

UK • 8
Return to contents
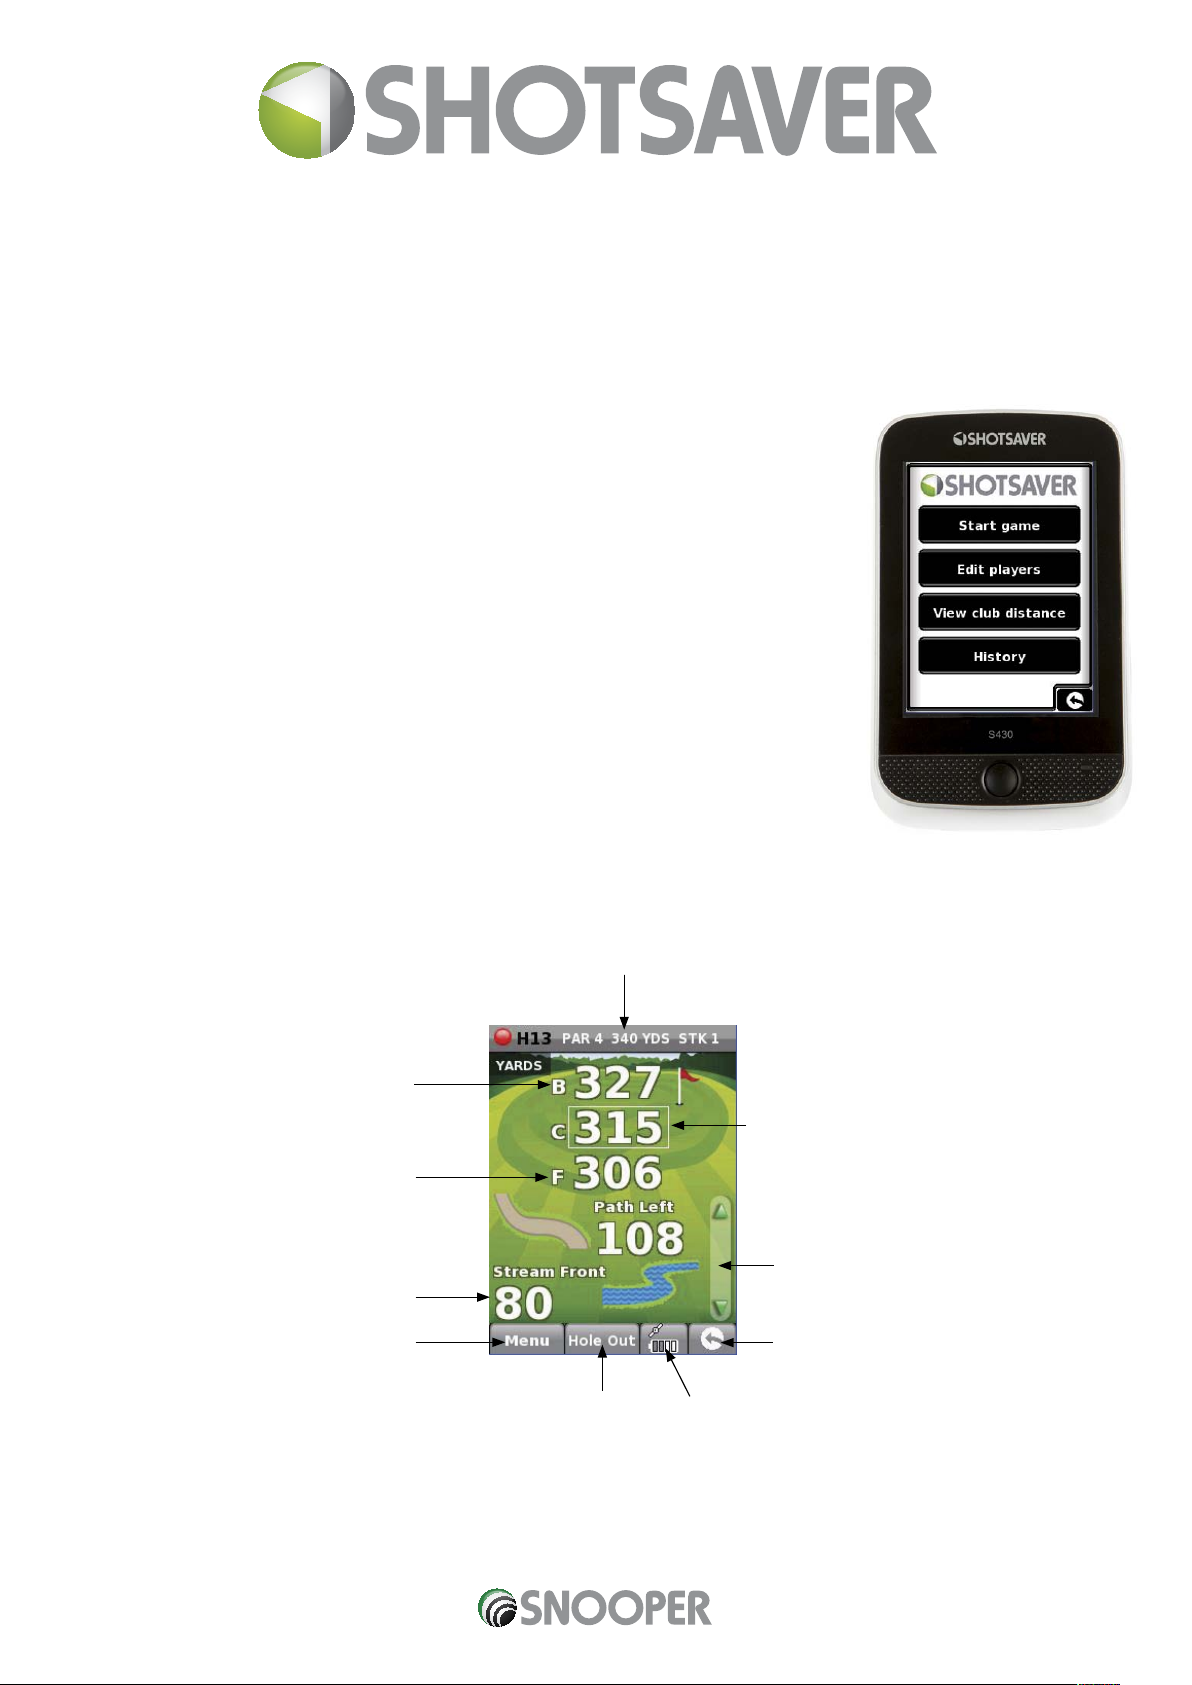
Troubleshooting Shotsaver
DOWNLOADS
If you are having difficulty performing a download to your Shotsaver you should consult the following checklist first before
contacting technical support. If you are still unable to perform a download after following this checklist then please
contact our Technical Helpline on 0870 787 0700 and select Option 3. There is also additional help available on the
www.snooperneo.co.uk website.
This guide is in two sections; the first section is a list of things to check before performing a download and the second
section consists of possible reasons and solutions to error messages encountered while trying to perform a download.
SECTION ONE
1. Have you registered your Shotsaver?
You will not be able to download the database unless the Shotsaver is registered. Please register online at
www.snooperneo.co.uk.
2. Is the USB computer cable supplied with the Shotsaver connected correctly?
Please check that the USB lead is plugged into the USB socket on the Shotsaver and is fully plugged in as far as possible. Check
the computer USB connection is secure.
3. Have you installed the USB drivers correctly for the USB cable?
After installing the USB driver from the Software Disc the computer requires rebooting. Once rebooted the Shotsaver needs to be
connected to the USB lead. The ‘Found New Hardware’ wizard will eventually launch and you need to select ‘Install the software
automatically (Recommended)’ and the wizard will complete the USB driver installation.
4. What operating system are you using on your computer?
The Snooper download software will only work on the following Windows 32 bit operating systems: Windows 2000, Windows XP
and Windows Vista THE SOFTWARE WILL NOT WORK ON WINDOWS 95/98, 98SE and Millennium. Apple Macintosh is not
supported. Windows XP and Vista 64bit systems are not supported.
To determine which operating system you have on your computer:
a) Right click on the ‘My Computer’ icon on your desktop and select ‘Properties’ from the drop down menu.
b) When the ‘System Properties’ dialogue box opens the ‘General’ tab is selected by default. Under the heading ‘System’ the
operating system is displayed.
c) If you do not have a ‘My Computer’ icon on your desktop (common in Windows XP) click on ‘Start’ and two columns will appear.
In the right hand column you will see the option of ‘My Computer’. Right click on this option as instructed in (a) above.
5. Have you installed the Snooper download software onto your computer?
If you have not installed the software you will not be able to perform a download to your Shotsaver. Once the software is installed
there will be a new icon on your desktop: ‘Shotsaver Updater’. Please check to see if you have the latest version of this software by
visiting www.snooperneo.co.uk and clicking on the link ‘Download software’.
6. Have you connected the computer to the internet?
The computer needs to be connected to the internet before you can begin to download the database to your Shotsaver. Please
make sure that your internet connection is established and that you have signed in to your broadband account (if required).

UK • 9
Return to contents
7. What version of Internet Explorer / Netscape Navigator are you using?
The software will only operate if you have Internet Explorer or Netscape Navigator 6 or above.
To check what version of Internet Explorer you have; open your browser, click on the ‘Help’ menu and select ‘About Internet
Explorer’. This should now display what version you currently have installed. If you have a version older than 6 (e.g. 5), open your
browser, click on ‘Tools’ and select ‘Windows Update’. This will take you to the Microsoft website where you can download the
latest version of internet explorer.
To check what version of Netscape Navigator you have: open the browser, click on the ‘Help’ menu and select ‘About Netscape
Navigator’.
SECTION TWO
This section is for supplying possible reasons and solutions to problems you may be experiencing whilst trying to download the
database to your Shotsaver. If after going through section one you are still experiencing difficulty or have received an error message
please read through the following:
ERROR MESSAGE – ‘Error 521 - There was a problem connecting to the Performance Products server’
If you get an error message similar to the one above this normally means there is something blocking communication between the
software, most typically a firewall, and our server. Windows XP and Vista are supplied with a firewall as standard.
If you have a Firewall on your computer the software may appear to hang and your Firewall software will inform you that the Updater
software is trying to access the internet. Please make sure that you grant/allow/permit /unblock access through the Firewall. Please
read the messages supplied by your Firewall software carefully before choosing your option. If you do not allow the program to
access the internet through the Firewall, the download process will fail.
If no message was prompted by the firewall software uninstall and then re-install the software and perform a download again.
Warning: We do not recommend disabling your firewall software in order to perform a download to your Shotsaver nor
can we advise how to alter the settings on third party software nor can we be held responsible for any action taken by
the computer user that makes the computer more vulnerable to viruses and computer hackers. Any changes made to
the computer firewall settings are at the user’s discretion. We would recommend contacting the third party software
manufacturer for information of how to configure the firewall software.
OTHER PROBLEMS
The unit cannot be switched on
Check that the unit has been charged.
The unit cannot acquire satellite connection
Check that the Shotsaver’s built in GPS antenna has a clear view of the sky above.
If this is the first time you have powered up your Shotsaver please remember that the first ‘cold’ start can take up to 30 minutes to
acquire sufficient satellite connection. The unit requires time to calibrate and you will find that with subsequent use that the time for
acquiring satellites will reduce. Eventually the unit should take approximately 90 seconds to acquire satellite connection.

UK • 10
Return to contents
Snooper Accessories & Additional Software
GOLF TROLLEY BRACKET
ONLY £24.99 INC VAT
Mount your Shotsaver on this specially made golf trolley
bracket. Fit’s most golf trolleys.
SAT NAV SOFTWARE
FROM ONLY £64.99!
Shotsaver will navigate you perfectly round a golf course but with the addition of Snooper’s
satellite navigation and speed camera location software, your Shotsaver can also navigate
you in your car as well! Mapping covering the UK & Ireland is available for only £64.99 inc
vat with the whole of Western Europe available for only £99.99 inc vat.
Visit www.snooper.eu for further details.
PROTECTIVE HARD CARRY CASE PROTECTIVE SILICON CASE BATTERY BACKUP SILICON CASE

UK • 11
Return to contents
Service under Warranty
Your Shotsaver comes with a standard one year manufacturer’s warranty.
If, for some reason, your unit requires service under warranty return your Shotsaver, via special delivery (insured) and in suitable
packaging to:
The Returns Department
Performance Products Limited
Cleaver House
Sarus Court
Manor Park
Cheshire WA7 1UL
Enclose the following information:
(a) Your name, address and a full description of the problem.
(b) A telephone number where you can be reached during business hours.
(c) Your units’ serial number.
DISPOSAL OF OLD ELECTRICAL & ELECTRONIC EQUIPMENT APPLICABLE IN THE
EUROPEAN UNION.
This symbol on a product or its packaging indicates that this product shall not be treated as household waste. It
should be handed over to an applicable collection point for the recycling of electrical equipment.
By ensuring that this product is disposed of correctly you will help/prevent potential negative impact on the
environment. The recycling of materials will help to conserve natural resources.
For further details about recycling please contact your local civic office or the shop where it was originally
purchased.

FR • BE • 12
Retour au sommaire
Page
Contenu du coffret 13
Guide de démarrage rapide 14
Réglages 16
Luminosité
Volume
Langue
Etalonnage de l’écran
Mode Economie
Informations
Image 17
Navigation par satellite et système de détection de radars GPS
Dépannage 18
Accessoires Snooper et logiciel supplémentaire 20
Garantie et service après vente 21
S430
Sommaire
Consignes de sécurité importantes
• Lisez attentivement les consignes ci-dessous avant d’utiliser votre S430.
• N’ouvrez pas le châssis du S430.
• Prenez toujours soin de votre produit, conservez-le dans un environnement
propre et sans poussière.
• N’exposez pas le S430 à des liquides ou à l’humidité.
• N’exposez pas le S430 à des températures très élevées ou très faibles.
• N’essayez pas de démonter votre appareil.
• Utilisez uniquement les chargeurs et batteries approuvés par Performance
Products Limited. L’utilisation d’un autre type peut invalider tout accord et
garantie.
• N’effectuez pas de chargement en inverse avec d’autres chargeurs car ils
possèdent peut-être une polarité inverse.
• N’utilisez pas le chargeur si la fiche est endommagée.
• Ne touchez pas le chargeur si vos mains/pieds sont mouillés.
• N’exposez pas le chargeur à l’eau sous peine de déclencher un incendie
électrique.
• Pour votre propre sécurité, ne réparez pas vous-même le chargeur.
• Pour réduire les risques d’incendie ou de brûlures, ne désassemblez pas,
n’écrasez pas et ne percez pas la batterie.
• Ne mettez pas en contact les contacts métalliques de la batterie avec d’autres
objets métalliques, sous peine d’entraîner un court-circuit et d’endommager
la batterie.
Copyright
Copyright @2009 SNOOPER. Tous droits réservés.
Les spécifications et fonctions du produit sont indiquées à titre de référence
uniquement et sont sujettes à changement sans préavis.
Déclaration
Ce Guide de l’utilisateur est publié par SNOOPER sans aucune garantie.
Performance Products Limited peut y effectuer, à tout moment et sans préavis,
des améliorations et des modifications en raison d’erreurs typographiques,
de l’inexactitude du contenu en cours ou d’améliorations apportées aux
programmes et/ou au matériel. De tels changements seront, cependant,
incorporés dans les nouvelles versions de ce Guide de l’utilisateur.

FR • BE • 13
Retour au sommaire
Contenu du coffret
Le coffret du Shotsaver S430 comprend en standard les composants suivants :
1 x système Snooper Shotsaver S430
1 x Guide de démarrage rapide
1 x câble USB de connexion au PC
1 x CD-ROM de téléchargement de logiciel, comportant le Guide de l’utilisateur complet
REMARQUE
Notre volonté d’amélioration continue de nos produits peut nous conduire à modifier les caractéristiques
techniques sans préavis.
S430

FR • BE • 14
Retour au sommaire
Guide de démarrage rapide
Utilisation de base
1. Enregistrez votre Shotsaver GRATUITEMENT à l’adresse www.snooperneo.co.uk.
2. Chargez l’appareil à l’aide du chargeur fourni jusqu’à ce que le voyant frontal passe de rouge
à vert.
3. Pour mettre l’appareil sous tension, exercez une pression prolongée sur le bouton situé sous
l’écran LCD jusqu’à ce que l’écran de démarrage ShotSaver s’affiche. Faites ensuite glisser de
la gauche vers la droite le bouton « Marche / Arrêt » de l’écran.
4. Lancez le logiciel Shotsaver en appuyant sur l’icône golf.
5. Démarrer jeu.
Plus de 4500 terrains de golf sont déjà préchargés sur votre S430. Appuyez sur le bouton
Rechercher pour rechercher un terrain et faire une partie et/ou en ajouter un à votre dossier
Favoris. Sélectionnez Pays et Région ou appuyez simplement sur Rechercher. Saisissez le nom
du terrain de golf à l’aide du clavier, puis cliquez sur ce nom pour le sélectionner. Appuyez
sur OK pour faire une partie ou sur Itinéraire si vous disposez d’un logiciel de navigation par
satellite et souhaitez que votre S430 vous guide jusqu’à ce terrain. Pour finir, choisissez la
couleur du Tee appropriée et/ou sélectionnez Ajouter pour ajouter le terrain sélectionné à votre dossier Favoris afin d’y accéder
plus facilement par la suite.
6. Le trou sélectionné est affiché comme suit, par exemple. Pour actualiser les distances affichées, appuyez sur l’écran à tout
moment.
Remarque : assurez-vous que le Shotsaver dispose d’une connexion GPS avant de commencer sans quoi les distances affichées ne seront
pas exactes.
S430
Distance par rapport à
l’arrière du green
Distance par rapport
au centre du green
Faire défiler les
obstacles
Distance par rapport à
l’avant du green
Distance par rapport
aux obstacles
Menu principal Retour
Finir le trou
Détails du trou actuel
Batterie et
puissance GPS

FR • BE • 15
Retour au sommaire
7. Modifier joueurs
Cliquez sur cette option pour ajouter le nom et le handicap des joueurs. Vous devez spécifier ces informations avant de
commencer une partie pour que le Shotsaver enregistre votre score et calcule vos points Stableford.
8. Afficher distances du club
Cliquez sur cette option pour afficher les distances du club enregistrées au préalable, le cas échéant.
9. Historique
Sélectionnez cette option pour afficher les scores préalablement enregistrés.
10. Score
Pour entrer votre score, appuyez sur Menu puis sur Carte de score. Appuyez ensuite ici pour entrer le score de tous les joueurs.
(Affiche la carte de score et indique où appuyer pour entrer le score et pour modifier les scores affichés. Indique également le
score net et le score Stableford.) Appuyez ici pour modifier le score des joueurs.
11. Enregistrer distance du club
Appuyez sur Menu , puis sur Enregistrer distance du club. Sélectionnez le club à enregistrer. Tenez-vous aussi près que
possible de votre balle et appuyez sur Début. Frappez la balle, rendez-vous à l’endroit où elle a atterri, tenez aussi près que
possible d’elle et appuyez sur Fin. La distance de frappe de la balle s’affiche automatiquement.
Appuyez ici pour entrer le
score de tous les joueurs.
Appuyez ici pour afficher
le score des autres
joueurs.
Score net
Score Stableford

FR • BE • 16
Retour au sommaire
Réglages
Pour modifier les réglages de votre appareil, appuyez sur le bouton Réglage du menu principal.
LUMINOSITÉ
Pour régler la luminosité de l’affichage, appuyez sur le bouton Luminosité du menu. Utilisez les boutons + ou - pour augmenter ou
réduire la luminosité de l’écran. Appuyez sur le bouton X pour confirmer et quitter le réglage.
VOLUME
Pour régler le volume, appuyez sur le bouton Volume du menu. Utilisez les boutons + ou - pour monter ou baisser le volume.
Appuyez sur le bouton X pour confirmer et quitter le réglage.
LANGUE
Pour changer de langue, appuyez sur le bouton Langue du menu et choisissez la langue voulue. Appuyez sur le bouton X pour
confirmer et quitter le réglage.
ETALONNAGE DE L’ÉCRAN
Pour ré-étalonner l’écran, appuyez sur le bouton Etalonnage du menu, puis suivez les instructions qui s’affichent.
MODE ECONOMIE
L’autonomie de la batterie de votre S430 varie selon le réglage que vous utilisez.
Rétro-éclairage allumé en permanence : 6 heures maximum
Lorsque le rétro-éclairage est allumé en permanence, la batterie a une autonomie d’environ 6 heures au maximum.
Désactivation automatique du rétro-éclairage : 11 heures maximum
Pour prolonger jusqu’à 11 heures maximum l’autonomie de la batterie, réglez le rétro-éclairage de sorte qu’il s’éteigne
automatiquement après une courte période d’inactivité (comme sur la plupart des téléphones portables). Accédez à la section
REGLAGE du menu principal de l’appareil qui s’affiche lorsque vous mettez celui-ci sous tension. Cliquez sur MODE ECONOMIE et
choisissez le délai de désactivation rétro-éclairage qui vous convient : 1 mn, 30 s, 20 s, 10 s.
Mode veille : 16 heures maximum
Prolongez jusqu’à 16 heures maximum l’autonomie de la batterie à l’aide du mode veille. Accédez à REGLAGE, puis à MODE
ECONOMIE et réglez DELAI MISE HORS TENSION sur 1 au 2 mn. L’écran s’éteindra après 1 au 2 minutes d’inactivité. Pour quitter le
mode veille, appuyez brièvement sur le bouton situé sous l’écran LCD.
INFORMATIONS
Appuyez sur le bouton Informations pour afficher des informations sur la version du logiciel et du matériel de votre appareil.

FR • BE • 17
Retour au sommaire
IMAGE
Affichage des images figurant sur la carte SD
Pour afficher des images sur l’appareil, placez-les d’abord sur une carte Micro SD appropriée. Insérez la carte SD dans la fente
correspondante, située sur le dessous l’appareil. Appuyez sur l’icône Image, puis sur Carte SDMMC pour afficher les images que
contient la carte. Les images sont affichées dans la section d’aperçu. Faites défiler la liste vers le haut et le bas à l’aide des flèches et
appuyez sur la miniature de l’image que vous souhaitez consulter. Utilisez les flèches droite et gauche pour faire défiler les images.
Appuyez sur le bouton « X » à tout moment pour quitter l’affichage Image.
Diaporama
Sélectionnez d’abord la durée d’affichage des diapositives : soit 1, 2, 3, 4, 5 ou 10 secondes. Appuyez ensuite sur le bouton Lire pour
afficher toutes les images les unes après les autres. Pour quitter le diaporama, appuyez n’importe où sur l’écran.
TÉLÉCHARGEMENT DE NOUVEAUX TERRAINS
Plus de 4500 terrains de golf sont préchargés sur le Shotsaver S430, qui est capable de mémoriser en tout jusqu’à 20 000 terrains.
Lorsque de nouveaux terrains sont créés, vous pouvez les télécharger GRATUITEMENT sur votre appareil. Pour ce faire, insérez le CD-
ROM livré avec votre S430 dans le lecteur de CD de votre PC et suivez les instructions qui s’affichent.
NAVIGATION PAR SATELLITE ET SYSTÈME DE DÉTECTION DE RADARS GPS
Vous pouvez également vous servir de votre appareil en tant que système de navigation par satellite et de détection de radars
GPS. Deux offres de navigation par satellite sont disponibles, le Sapphire Plus S280 avec une cartographie du Royaume-Uni
et de l’Irlande ou une cartographie de l’Europe de l’Ouest. Pour plus d’informations, consultez www.snooper.eu. Le logiciel de
navigation par satellite Sapphire Plus S280 est préchargé sur une carte Micro SD. Pour l’installer, il vous suffit d’insérer la carte Micro
SD dans la fente prévue à cet effet, située sous l’appareil. Pour utiliser la fonction de navigation par satellite, allumez l’appareil
selon la procédure usuelle et appuyez sur le bouton Navi du menu principal. Le logiciel de navigation par satellite Sapphire Plus
S280 est automatiquement chargé. Pour plus d’informations sur l’utilisation de ce logiciel, reportez-vous à la documentation qui
l’accompagne.

FR • BE • 18
Retour au sommaire
Résolution des incidents Shotsaver
TÉLÉCHARGEMENTS
Si vous rencontrez des problèmes de téléchargement sur le Shotsaver, passez en revue la liste de contrôle ci-dessous. Vous trouverez
également une assistance complémentaire à l’adresse : www.snooperneo.co.uk
Ce guide est divisé en deux sections. La première répertorie les éléments à vérifier avant d’effectuer un
téléchargement, tandis que la seconde passe en revue les diverses causes des messages d’erreur susceptibles de
s’afficher lors d’une tentative de téléchargement et les solutions correspondantes.
SECTION UN
1. Avez-vous enregistré votre Shotsaver ?
Vous ne pourrez pas télécharger la base de données si vous n’avez pas préalablement enregistré le Shotsaver. Enregistrez-le en
ligne à l’adresse www.snooper.fr/enregistrer.snooper.php.
2. Le câble USB livré avec le Shotsaver est-il correctement connecté ?
Vérifiez que le câble USB est fermement connecté à la prise USB du Shotsaver (en d’autres termes, que la fiche est engagée autant
que possible dans la prise). Vérifiez que la connexion USB de l’ordinateur fonctionne.
3. Avez-vous correctement installé les pilotes USB du câble USB ?
Une fois le pilote USB installé à partir du CD du logiciel, il est nécessaire de redémarrer l’ordinateur. Après ce redémarrage, vous
devez connecter le Shotsaver au câble USB. L’assistant « Nouveau matériel détecté » démarre. Vous devez sélectionner l’option «
Installer le logiciel automatiquement (recommandé) » pour que l’assistant achève l’installation des pilotes USB.
4. Quel est le système d’exploitation installé sur votre ordinateur ?
Le logiciel de téléchargement Snooper prend uniquement en charge les systèmes d’exploitation Windows 32 bits suivants
: Windows 2000, Windows XP et Windows Vista LE LOGICIEL NE FONCTIONNE PAS SOUS WINDOWS 95/98, 98SE et
Millennium. Ni les systèmes Apple Macintosh, ni les systèmes Windows XP et Vista 64 bits ne sont pris en charge.
Pour déterminer le système d’exploitation installé sur votre ordinateur :
a) Cliquez avec le bouton droit de la souris sur l’icône « Poste de travail » sur votre Bureau et sélectionnez « Propriétés » dans le
menu contextuel.
b) Par défaut, la boîte de dialogue « Propriétés système » s’ouvre à la page « Général ». Le système d’exploitation est indiqué sous
l’en-tête « Système ».
c) Si l’icône « Poste de travail » ne figure pas sur votre Bureau (fréquent sous Windows XP), cliquez sur « Démarrer ». Deux colonnes
s’affichent alors. La colonne de droite contient l’option « Poste de travail ». Cliquez sur cette option avec le bouton droit de la
souris comme indiqué ci-dessus à l’étape (a).
5. Avez-vous installé le logiciel de téléchargement Snooper sur votre ordinateur ?
Si vous n’avez pas installé le logiciel, vous ne pourrez pas effectuer de téléchargement sur votre Shotsaver. Une fois le logiciel
installé, votre Bureau contient une nouvelle icône : « Shotsaver Updater ». Assurez-vous que vous disposez de la version la plus
récente du logiciel en consultant le site www.snooperneo.co.uk et en cliquant sur le lien de téléchargement de logiciel.
6. Avez-vous connecté l’ordinateur à Internet ?
L’ordinateur doit être connecté à Internet pour que vous puissiez télécharger la base de données sur votre Shotsaver. Assurez-
vous que la connexion à Internet est établie et que vous avez ouvert une session sur votre compte à haut débit (le cas échéant).

FR • BE • 19
Retour au sommaire
7. Quelle version d’Internet Explorer / Netscape Navigator utilisez-vous ?
Le logiciel prend uniquement en charge la version 6 ou supérieure d’Internet Explorer ou de Netscape Navigator.
Pour vérifier quelle version d’Internet Explorer vous utilisez, ouvrez votre navigateur, cliquez sur le menu « Aide » et sélectionnez
« A propos de Internet Explorer ». Le numéro de la version installée devrait s’afficher. Si elle est antérieure à 6 (5, par exemple),
ouvrez votre navigateur, cliquez sur « Outils » et sélectionnez « Windows Update ». Cette option vous connecte au site Web de
Microsoft, à partir duquel vous pouvez télécharger la version la plus récente d’Internet Explorer.
Pour vérifier quelle version de Netscape Navigator vous utilisez, procédez comme suit : ouvrez le navigateur, cliquez sur « Aide »
et sélectionnez « A propos de Netscape Navigator ».
SECTION DEUX
Cette section indique les causes et solutions possibles des problèmes que vous êtes susceptible de rencontrer au cours du
téléchargement de la base de données sur le Shotsaver. Si, après avoir passé en revue la section un, le problème persiste ou un
message d’erreur s’affiche, lisez les informations suivantes :
MESSAGE D’ERREUR - « Erreur 521 : Un problème est apparu pendant la connexion au serveur Performance Products »
En règle générale, un message d’erreur similaire au message ci-dessus indique que la communication entre le logiciel et notre
serveur est bloquée, dans la plupart des cas par un pare-feu. Notez que Windows XP et Vista intègrent un pare-feu en standard.
Si un pare-feu est installé sur votre ordinateur, le logiciel semble parfois s’interrompre et/ou le logiciel de pare-feu vous informe que
le logiciel de mise à jour tente d’accéder à Internet. Veillez à accorder/permettre au logiciel l’accès à Internet via le pare-feu. Lisez
attentivement les messages générés par votre pare-feu avant de choisir l’option appropriée. Si vous n’autorisez pas l’accès à Internet
via le pare-feu, le processus de téléchargement échoue.
Si votre pare-feu n’affiche pas de message, désinstallez le logiciel, réinstallez-le et effectuez une nouvelle mise à jour.
Avertissement : nous ne vous conseillons pas de désactiver votre pare-feu pour mettre à jour votre Shotsaver. Nous
ne pouvons pas vous renseigner sur les paramètres d’un logiciel tiers. Nous ne pouvons pas non plus être tenus
responsables de toute action exécutée par l’utilisateur qui accroît la vulnérabilité de l’ordinateur vis-à-vis des virus
et des hackers. Toute modification des paramètres du pare-feu de l’ordinateur est effectuée à la seule initiative
de l’utilisateur. Nous vous recommandons de contacter l’éditeur du pare-feu pour obtenir des informations sur sa
configuration.
AUTRES PROBLÈMES
Il est impossible de mettre l’appareil sous tension.
Assurez-vous que l’appareil est chargé.
L’appareil est incapable d’acquérir une connexion satellite.
Vérifiez que l’antenne GPS intégrée au Shotsaver dispose d’une vue dégagée du ciel.
Si vous mettez le Shotsaver sous tension pour la première fois, n’oubliez pas que le premier démarrage « à froid » peut prendre
jusqu’à 30 minutes pour acquérir une connexion satellite appropriée. L’appareil nécessite un certain temps pour effectuer
l’étalonnage et, lors de l’utilisation suivante, le délai d’acquisition d’une connexion satellite sera plus court. L’acquisition d’une
connexion satellite par l’appareil finira par ne nécessiter qu’environ 90 secondes.

FR • BE • 20
Retour au sommaire
Accessoires Snooper et logiciel supplémentaire
SUPPORT POUR CHARIOT DE GOLF
Fixez votre Shotsaver sur ce support pour chariot de golf
spécialement conçu. Adapté à la plupart des chariots.
LOGICIEL DE NAVIGATION PAR SATELLITE
Le Shotsaver vous guide à la perfection tout au long d’un parcours de golf mais, lorsqu’il est
en outre équipé du logiciel de navigation par satellite de Snooper, il vous aide également à
naviguer en voiture ! Cartographie disponible pour toute l’Europe de l’Ouest.
Consultez www.snooper.eu pour plus d’informations.
ETUI DE TRANSPORT RIGIDE ETUI EN SILICONE ETUI EN SILICONE POUR BATTERIE
DE SECOURS
Table of contents
Languages:
Other Snooper GPS manuals

Snooper
Snooper S1000 User manual

Snooper
Snooper Shotsaver S320 User manual

Snooper
Snooper SPT200 User manual

Snooper
Snooper My-Trak SPT220 User manual

Snooper
Snooper Shotsaver Tour Pro S430 User manual

Snooper
Snooper S2600 User manual

Snooper
Snooper Shotsaver S210 User manual

Snooper
Snooper S2 neo User manual

Snooper
Snooper SC5800 User manual

Snooper
Snooper Sapphire Plus User manual
Popular GPS manuals by other brands

Seacraft
Seacraft ENC3Pro user manual

Fujitsu Siemens Computers
Fujitsu Siemens Computers POCKET LOOX N100 series Easy guide

Lowrance
Lowrance 12 Installation and operation instructions

Furuno
Furuno GP-170 installation manual

Bushnell GOLF
Bushnell GOLF EXCEL user manual

Garmin
Garmin eTrex eTrex owner's manual