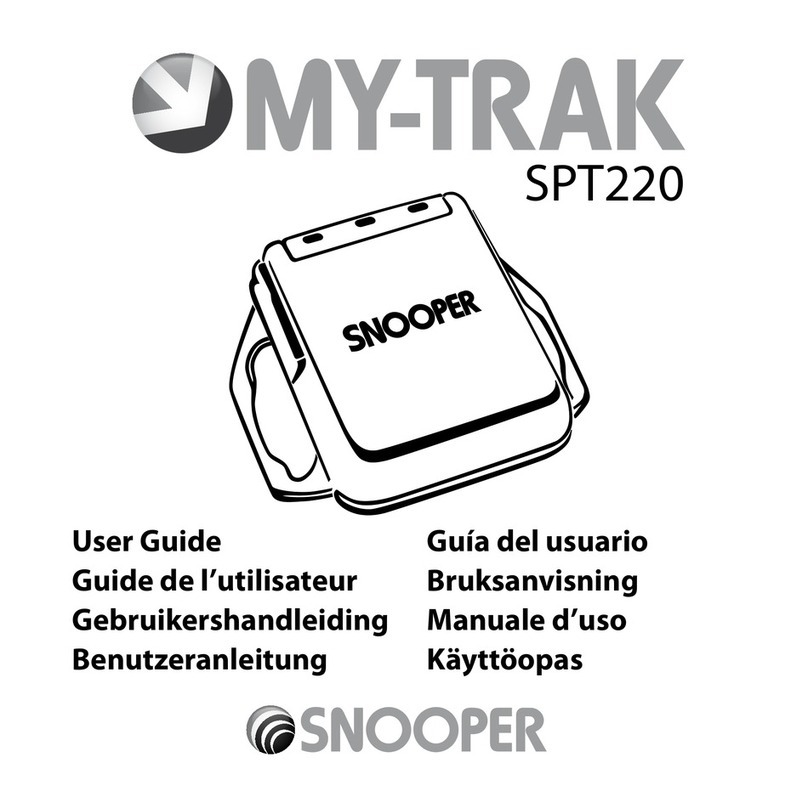
Snooper SPT200 User manual

User Guide
Guide de l’utilisateur
Gebruikershandleiding
Benutzeranleitung
Guía de usuario
Guia do Utilizador
Manuale d’uso
Käyttöopas
Användarguide
SPT200
S AT E L L I T E N AV I G AT I O N
Snooper Tracker User Guide (9 lang).indd 1 12/11/08 17:44:11

2
Tracker SPT200 – User Guide (EN)
Content
1. Introduction 3
2. Features 3
3. Getting started 4
(3.1) Accessories 4
(3.2) Charging the battery 5
(3.4) Installing the SIM card 5
4. Operation 6
(4.1) Fast startup operation 6
(4.2) Authorized user setting 7
(4.3) Usage 8
5. Specification 12
6. Frequently asked questions 13
Snooper Tracker User Guide (9 lang).indd 2 12/11/08 17:44:11

3
1. Introduction
SPT200 Snooper Tracker is a compact personal remote positioning device using
built-in GPS and GSM/GPRS modules. Using the latest GPS technology, it can
provide an accurate position of just about anything you care to track. Simply phone
your SPT200 and it will automatically return the geographical co-ordinates of it’s
position in a SMS text message.
2. Features
Built-in GPS•
GSM /SMS communication or GPRS TCP/UDP connection.•
Supports 900/1800/1900 MHZ.(Optional)•
20 channels high sensitivity GPS Module•
Ultra compact•
Low power consumption, Standby time 72 hours•
Fast Signal Acquisition•
Find location pre-authorized mobile phone•
Location via SMS text message•
SOS button send out exact location for immediate rescue/action.•
Geo-fencing to restrict movement to a defined radius.•
Snooper Tracker User Guide (9 lang).indd 3 12/11/08 17:44:11

4
3. Getting Started
(3.1) What’s in the box
SPT2001.
Car charger with USB cable2.
Home charger
Tool for inserting SIM card3.
SPT 200 Carry Case4.
SOS button
GSM indicator light Power indicator lightGPS indicator light
SIM card slot
Switch
ON/OFF
USB charging socket
Snooper Tracker User Guide (9 lang).indd 4 12/11/08 17:44:11

5
(3.2) Charging the Battery
The SPT 200 Snooper Tracker incorporates a built-in rechargeable lithium polymer
battery.
The FULLY charged battery can supply power for the tracker for about 72 hours (In
stand by mode)
Do not remove, puncture or damage the battery or throw the battery into fire or•
water. Before you can use the SPT200 Snooper Tracker you must FULLY charge
the battery using the home or cigarette car charger for at least 3 hours. The unit
should be powered off to ensure that the battery is fully charged.
Battery Charge status indicator:•
Red light on – battery charging
Red light off – battery charging is complete
(3.3) Installing SIM card
Insert a valid GSM SIM card into the“SIM Card”slot on the right of your Snooper
Tracker
(Note: Use the tool supllied to push the SIM card into the slot and the SIM card•
will be locked in automatically.)
Please note you will need to ensure that the following SIM card settings are
correct before use. You may need to insert the sim card in to a mobile phone to
apply these settings.
Ensure that the Sim card is activated on the relevant network.1.
Switch off voice mail (you may need to contact the network provider to disable2.
this feature)
Check that the user ID of the mobile phone being used by an authorised user3.
has not been hidden.
Snooper Tracker User Guide (9 lang).indd 5 12/11/08 17:44:11

6
Make sure that the Sim card is not locked using a PIN code4.
4. Operation
(4.1) Fast Startup Operation
Place your Snooper Tracker in an open area and push the power switch to the on
position.
The tracker should start to work within 10 to 20 seconds. The GSM LED indicator
will flash once a second when the tracker is successfully receiving GSM signals. If
there is no GSM network, the GSM indicator light will remain off.
While the STP200 is searching for satellite signals, the GPS indicator light will•
flash every 2 seconds. Once GPS connectivity has been establish the GPS
indicator light will illuminate permanently.
Once both GSM and GPS signals have been established your SPT 200 is ready for•
use.
Snooper Tracker User Guide (9 lang).indd 6 12/11/08 17:44:11

7
(4.2) Setting up authorised users.
Method to set authorised user/s
Up to four authorized users can be set up to operate with one SPT 200 Tracker.a.
The codes of the authorized users are SM1, SM2, SM3 and SM4. This first
authorized user will be SM1, the second SM2, the third SM3 and the fourth SM4.
Using your mobile phone the first user should send the following SMS commandb.
to the tracker. The telephone number you need to send the SMS message to is
the telephone number supplied with the Sim card being used in the Tracker.
The content of the SMS should be SM1:xxxxxxxxx, (please remember to include
the comma at the end of the number). For example, if your mobile phone number
is 123 456 789, the SMS sent to the Tracker should be: SM1:123456789, When the
setup is complete, the tracker will send the following reply to your mobile phone
via an SMS text message “Set OK!”If the connection has been unsuccessful the SMS
message“Set Fail!”will be sent instead.
Please notice that the command must be written in capitals and end with a
comma
Only the first authorised userc. can add the second authorizsed user by sending
an SMS command to the tracker. For example, if the mobile phone number of
the 2nd authorized user is 444 555 666, then the first authorized user must send
the following SMS message to the Tracker SM2:444555666, (remembering
to include the comma after the telephone number) The first and the second
authorized users are now allowed to add the other authorized users. Repeat the
same SMS command to set up the other authorised users.
If a non-authorised user tries to add an authorised user, the tracker will send and.
SMS message saying“You are not master!”.
Snooper Tracker User Guide (9 lang).indd 7 12/11/08 17:44:11

8
Deleting Authorised Users
All four authorised users are allowed to delete other users of the tracker. Toa.
delete a user send an SMS message as follows including the user code you wish
to XXX(USER CODE):, For example, if you want to delete authorized user
SM2, then send the following SMS message SM2:, to the tracker. When the
user has been deleted, the tracker will return the followiing SMS message“Set
OK!”If the it has not been able to delete the user for any reason it will send the
following SMS message“Set Fail!”.
If a non-authorised user tries to delete an authorised user, the tracker will sendb.
the SMS message“You are not master!”.
(4.3) General use
When the tracker is switched on, it will automatically send an SMS message•
“Power ON!”to all authorised users.
When the battery is low, the tracker will automatically send an SMS message•
“Low battery! Please charge!” to all authorised users.
(4.3.1) Locating the SPT200 Snooper Tracker
Any authorized user can locate the tracker by simply calling the
telephone number of the SIM card installed in the device using
their mobile phone. As soon as the tracker has been contacted
the call is automatically and an SMS message returned with
the geographical co-ordinates of the trackers position and the
current time
Snooper Tracker User Guide (9 lang).indd 8 12/11/08 17:44:11

9
The SMS message received will appear like this:
Last located:
Lat:22.654878
Long:114.049638
GPS:00 22
Batt:50%
http://www.tracker2map.com/m.php?a=0577627&b=1877800
If the SPT 200 cannot receive a GPS signal for any reason, the tracker will send an•
SMS message with the last location information available. For example:-
Last located:
Lat:22.654878
Long:114.049638
GPS:03 22
Batt:50%
http://www.tracker2map.com/m.php?a=0577627&b=1877800
To view the location of the tracker you can enter the geographical information
(Lat:22.65487 Long:114.049638) provided in the SMS message in to our website at
http://www.snooperneo.co.uk/Tracker.cfm
(4.3.2) Viewing the position of your SPT200 on your mobile phone.
To view the position of the SPT200 on your mobile phone you will need a
compatible phone with internet connectivity. When you receive the SMS message
returned by the SPT200 simply click on the URL at the end of the message. If
you phone has suitable internet connectivity the position of the SPT200 will be
displayed on a map on the screen of your mobile phone.
Snooper Tracker User Guide (9 lang).indd 9 12/11/08 17:44:11

10
(4.3.3) Continuous Monitoring
It is possible to programme your SPT 200 to send SMS messages of it’s position
every 60 seconds. Simply send the tracker the SMS message LL60, (remembering
to include the comma) using your mobile phone. Once the setup is complete, the
tracker will automatically send an SMS message once every 60s.
For example:-
SMS content: SMS NO: *** (***means the no. of SMS e.g. 001)
Lat:22.654878
Long:114.049638
GPS:03 20
Batt:50%
http://www.tracker2map.com/m.php?a=0577627&b=1877800
To cancel this function, send the SMS message• LC, to the SPT200.
(4.3.4) SOS Button
When the red SOS button is pressed, the tracker will send out an SMS“Help!”
message including the geographical position to all authorised users.
Last located:
Lat:22.654878
Long:114.049638
GPS:00 22
Batt:50%
http://www.tracker2map.com/m.php?a=0577627&b=1877800
Snooper Tracker User Guide (9 lang).indd 10 12/11/08 17:44:11

11
Help!
Lat:22.654878
Long:114.049638
GPS:03 22
Batt:50%
http://www.tracker2map.com/m.php?a=0577627&b=1877800
(4.3.5) Setting up Safety Zones
An authorised user can set a “safety zone” to monitor whether the SPT 200•
moves outside of a predetermined area. The minimum distance this zone can be
set up for is 20 meters and the maximum distance is 5 kilometers. If the object
moves outside this designated safety zone, the tracker will send a warning to
the user.
Send the SMS command• SA**, to the SPT 200 (remember to include the
comma) using an authorized mobile to set the distance and start the auto
warning function. For example, if the user wants to set a distance of 500 meters,
the SMS command should be SA500,
If the setting is completed successfully, the tracker will return the following SMS•
message Set OK! If the setting is not successful it will return the SMS message
Set Fail!
Move Warn Set OK!
Lat:22.654878
Long:114.049638
GPS:03 20
Batt:50%
http://www.tracker2map.com/m.php?a=0577627&b=1877800
Snooper Tracker User Guide (9 lang).indd 11 12/11/08 17:44:11

12
5. Specification
GPS Module 20 Channels all in view tracking GPS module
Sensitivity -158 db
Acquisition time Reacquisition < 0.1 sec
Hot Typically < 6sec Time To First Fix (TTFF)
Warm Typically < 35sec TTFF
Cold Typically < 45sec TTFF
Positioning Accuracy Less than 10 meters
Frequency Tri-band 900/1800/1900 MHz
GSM Antenna Internal GSM/GPRS antenna
GPS Antenna Internal active GPS antenna
Operation time With Battery alone: 72 hrs after fully charged; in
standby mode
Device Size 44 x 63 x 24.5 mm
Weight 85g
Operating Temperature -30°C to + 70°C
Storage Temperature -40°C to + 85°C
Relative Humidity 5% to 95%, non-condensing
Snooper Tracker User Guide (9 lang).indd 12 12/11/08 17:44:11

13
6. Frequently Asked Questions
(6.1) Q: When I ring the SPT 200 it does not automatically terminate the call
and does not return the position via SMS.
A: Please check that the network ID of the mobile phone being used has not been
hidden. Please ensure that any pin or security code has been disabled. Please note
you may have to put the Sim card in to a mobile phone to change the settings.
(6.2) Q: When I ring the SPT 200 it transfers my call to an answer service and
does not return the position via SMS.
A: Please check that the answer service on the Sim card has been switched off (you
may need to contact the network provider to disable this feature)
(6.3) Q: Can I reset my SPT 200 and return it to the‘Factory’ setting?
A: Yes, you can reset your SPT 200 by following these instructions:-
Ensure that the SPT is in a position where it can receive a good GPS connection.1.
For example outside in an open area. Not inside a building.
Press and hold the red “SOS” button whilst switching on the unit.2.
Continue to hold the red “SOS” button until the GSM and GPS LED illuminate.3.
Finally release the “SOS” button. The unit should now have been returned to the4.
factory settings.
7. Optional Accessories
Hardwire lead & extension GPS antenna Kit - £49.99 inc vat
Snooper Tracker User Guide (9 lang).indd 13 12/11/08 17:44:12

14
Tracker SPC200 – Guide de l’utilisateur
(FR•B)
Sommaire
1. Introduction 15
2. Caractéristiques 15
3. Mise En Route 16
(3.1) Accessoires 16
(3.2) Chargement de la batterie 17
(3.4) Installation de la carte sim 17
4. Fonctionnement 18
(4.1) Démarrage rapide 18
(4.2) Configuration des utilisateurs habilités 19
(4.3) Utilisation 20
5. Fiche Technique 24
6. Foire Aux Questions 25
Snooper Tracker User Guide (9 lang).indd 14 12/11/08 17:44:12

15
1. Introduction
SPT200 Snooper Tracker est un périphérique de géopositionnement à distance
personnel compact basé sur des modules GPS et GSM/GPRS intégrés. Par le biais
d’une technologie GPS de pointe, il indique la position précise de tout élément
dont vous souhaitez assurer le suivi. Il vous suffit d’appeler votre SPT200, qui vous
renverra automatiquement les coordonnées géographiques de sa position dans un
message texte SMS.
2. Caractéristiques
GPS intégré,•
communication GSM /SMS ou connexion GPRS TCP/UDP,•
prise en charge de 900/1800/1900 MHZ (facultatif),•
module GPS 20 canaux à sensibilité élevée,•
extrêmement compact,•
faible consommation électrique, autonomie de 72 heures en mode veille,•
acquisition de signaux rapide,•
recherche de positionnement par le biais d’un portable pré-autorisé,•
positionnement indiqué par un message texte SMS,•
bouton SOS, destiné à envoyer votre positionnement exact aux services de•
secours ou à assurer une réaction immédiate,
délimitation de secteur pour restreindre les mouvements à un rayon défini.•
Snooper Tracker User Guide (9 lang).indd 15 12/11/08 17:44:12

16
3. Avant de Commencer
(3.1) Contenu du coffret
SPT2001.
Chargeur allume-cigare avec câble USB2.
Chargeur secteur3.
Outil d’insertion de carte SIM4.
Housse de protection SPT2005.
Bouton SOS
Voyant GSM Voyant d’alimentationVoyant GPS
Emplacement de carte SIM
Commutateur
Marche/Arrêt
Prise de chargement USB
Snooper Tracker User Guide (9 lang).indd 16 12/11/08 17:44:12

17
(3.2) Chargement de la batterie
Le système SPT200 Snooper Tracker comprend une batterie intégrée rechargeable
en lithium polymère.
Une fois TOTALEMENT chargée, la batterie peut alimenter le système Tracker
pendant environ 72 heures (mode veille).
Ne sortez pas la batterie, ne la percez pas et ne l’endommagez pas. Ne jetez pas•
la batterie dans l’eau ou dans un feu. Avant d’utiliser le système SPT200 Snooper
Tracker, vous devez charger TOTALEMENT la batterie par le biais d’un chargeur
secteur ou allume-cigare pendant au moins 3 heures. Mettez le système hors
tension pour assurer le chargement complet de la batterie.
Voyant d’état de chargement de la batterie :•
Voyant rouge allumé : batterie en cours de chargement
Voyant rouge éteint : chargement de batterie terminé
(3.3) Installation de la carte SIM
Insérez une carte SIM GSM valide dans l’emplacement « Carte SIM » sur la droite du
système Snooper Tracker.
(Remarque : utilisez l’outil fourni pour pousser la carte SIM dans l’emplacement.•
La carte SIM sera automatiquement insérée dans l’emplacement approprié.)
Notez que vous devez vous assurer que les paramètres suivants de la carte SIM
sont corrects avant de l’utiliser. Il vous faudra peut-être insérer la carte SIM dans
un portable pour appliquer ces paramètres.
Assurez-vous que la carte SIM est activée sur le réseau approprié.1.
Désactivez la messagerie vocale (il vous faudra peut-être contacter le2.
fournisseur de réseau pour désactiver cette fonction).
Vérifiez que l’ID utilisateur du portable en cours d’utilisation par un utilisateur3.
Snooper Tracker User Guide (9 lang).indd 17 12/11/08 17:44:12

18
habilité n’est pas masqué.
Assurez-vous que la carte SIM n’est pas verrouillée par le biais d’un code PIN.4.
4. Fonctionnement
(4.1) Démarrage rapide
Placez le système Snooper Tracker dans un environnement dégagé et placez le
commutateur de marche/arrêt sur la position Marche.
Le système Tracker devrait commencer à fonctionner en 10 ou 20 secondes. Le
voyant GSM clignote une fois par seconde lorsque le système Tracker reçoit des
signaux GSM. Si le réseau GSM n’est pas disponible, le voyant GSM ne s’allume pas
Pendant que le système STP200 recherche les signaux satellites, le voyant GPS•
clignote toutes les 2 secondes. Une fois la connectivité GPS établie, le voyant
GPS reste allumé.
Une fois les signaux GSM et GPS établis, le système SPT200 est prêt à l’emploi.•
Snooper Tracker User Guide (9 lang).indd 18 12/11/08 17:44:12

19
(4.2) Configuration des utilisateurs habilités
Méthode de configuration des utilisateurs habilités
Vous pouvez configurer jusqu’à quatre utilisateurs habilités par système SPT200a.
Tracker. Les codes des utilisateurs habilités sont SM1, SM2, SM3 et SM4. Le
premier utilisateur habilité correspond à SM1, le deuxième à SM2, le troisième à
SM3 et le quatrième à SM4.
Par le biais de votre portable, le premier utilisateur doit envoyer la commandeb.
SMS suivante au système Tracker. Le numéro de téléphone requis pour envoyer
le message SMS correspond au numéro de téléphone fourni avec la carte SIM
utilisée par le système Tracker.
Le contenu du SMS doit être SM1:xxxxxxxxx, (Sans espaces , n’oubliez pas la virgule
en fn de numéro). Ainsi, si votre numéro de portable est 123 456 789, le SMS envoyé
au système Tracker doit correspondre à : SM1:123456789, Une fois la configuration
terminée, le système Tracker envoie la réponse suivante à votre portable par le biais
d’un message texte SMS : « Set OK! (Configuration correcte !) ». Si la connexion a
échoué, le message SMS « Set Fail! (La configuration a échoué !) » est envoyé.
Notez que la commande doit être entrée en majuscules et se terminer par une
virgule
Seul le premier utilisateur habilitéc. est autorisé à ajouter le deuxième utilisateur
habilité en envoyant une commande SMS au système Tracker. Ainsi, si le
numéro du portable du deuxième utilisateur habilité correspond à 444 555
666, le premier utilisateur habilité doit envoyer le message SMS suivant au
système Tracker SM2:444555666, (n’oubliez pas la virgule après le numéro
de téléphone). Le premier et le deuxième utilisateurs habilités sont à présent
autorisés à ajouter les autres utilisateurs habilités. Répétez la procédure pour
configurer les autres utilisateurs habilités.
Snooper Tracker User Guide (9 lang).indd 19 12/11/08 17:44:12

20
Si un utilisateur non habilité tente d’ajouter un utilisateur habilité, le systèmed.
Tracker envoie le message SMS suivant : « You are not master! (Vous n’êtes pas
l’utilisateur habilité !) ».
Suppression d’un utilisateur habilité
(4.3) Utilisation
Lorsque le système Tracker est sous tension, il envoie automatiquement le message
SMS « Power ON! (Sous tension ) » à tous les utilisateurs habilités.
Lorsque la batterie est presque déchargée, le système Tracker envoie
automatiquement le message SMS « Low battery! Please charge! (Batterie
presque déchargée, veuillez la recharger !) » à tous les utilisateurs habilités.
(4.3.1) Positionnement du système SPT200 Snooper Tracker
Tout utilisateur habilité peut identifier la position du système Tracker en composant
simplement sur son portable le numéro de téléphone de la carte SIM installée
dans le périphérique. Dès que le système Tracker a été contacté, l’appel est
automatiquement traité et le message SMS renvoyé contient les coordonnées
géographiques de la position du système Tracker, ainsi que l’heure en cours.
Le message SMS reçu est similaire au message suivant :
Last located (Dernière position):
Lat:22.654878
Long:114.049638
GPS:00 22
Batt:50%
http://www.tracker2map.com/m.php?a=0577627&b=1877800
Snooper Tracker User Guide (9 lang).indd 20 12/11/08 17:44:12
Table of contents
Languages:
Other Snooper GPS manuals

Snooper
Snooper S2600 User manual

Snooper
Snooper Shotsaver S210 User manual

Snooper
Snooper Shotsaver S320 User manual

Snooper
Snooper Sapphire Plus User manual

Snooper
Snooper my-trak wpt250 User manual

Snooper
Snooper S1000 User manual

Snooper
Snooper SHOTSAVER S430 User manual

Snooper
Snooper My-Trak SPT220 User manual

Snooper
Snooper S7000 User manual

Snooper
Snooper S2 neo User manual