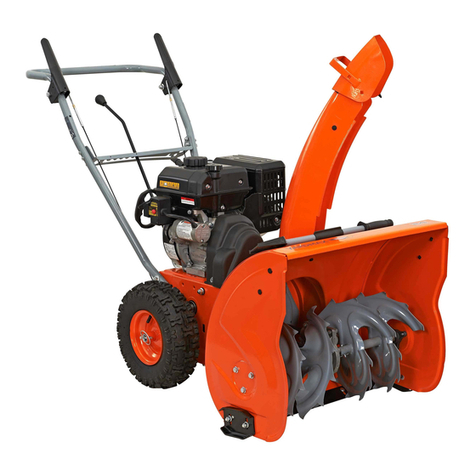
Snow Devil 57030 User manual

OPERATOR’S
MANUAL
2-Stage 24" Snow Thrower
Item #57030
IMPORTANT:
YournewmachinehasbeenengineeredandmanufacturedtoSnowDevil’s™highstandards
fordependability,easeofoperation,andoperatorsafety.Properlycaredfor,itwillgiveyou
yearsofrugged,trouble-freeperformance.
PaycloseattentiontotheRulesforSafeOperation,Warnings,andCautions.Ifyouuseyour
machineproperlyandonlyforwhatitisintended,youwillenjoyyearsofsafe,reliableservice.
Product Questions or
Technical Support, Please Contact Us.
1-800-232-1195, M–F, 8–5 (CST)

Forinformationandquestionspleasecontactcustomerserviceat1-800-232-1195.Pleasell
outtheinformationbelowandhaveitaccessiblepriortocalling.Refertothenameplateonyour
SnowThrowerfortheSerialNumber.
DATE OF PURCHASE: _____________________________________________________________
PURCHASED FROM: _____________________________________________________________
ITEM #: _____________________________________________________________
SERIAL NUMBER: _____________________________________________________________
SNOW THROWER IDENTIFICATION
SerialNumber

#57030OPERATOR’SMANUAL3
TABLE OF CONTENTS
Specications . . . . . . . . . . . . . . . . . . . . . . . . . . . . . . . . . . . . . . . . . . . . .3
ImportantSafetyInstructions. . . . . . . . . . . . . . . . . . . . . . . . . . . . . . . . . . . . 4-5
Symbols . . . . . . . . . . . . . . . . . . . . . . . . . . . . . . . . . . . . . . . . . . . .5
SnowThrowerComponents . . . . . . . . . . . . . . . . . . . . . . . . . . . . . . . . . . . . .6
AssemblyInstructions.......................................7–8
Operation . . . . . . . . . . . . . . . . . . . . . . . . . . . . . . . . . . . . . . . . . . . .9–13
SnowThrowerPreparation. . . . . . . . . . . . . . . . . . . . . . . . . . . . . . . . . . .9
CheckTireInation. . . . . . . . . . . . . . . . . . . . . . . . . . . . . . . . . . . . . . 10
SkidShoeAdjustment....................................10
UsingYourSnowThrower . . . . . . . . . . . . . . . . . . . . . . . . . . . . . . . . . . 11
DriveandAugerControls. . . . . . . . . . . . . . . . . . . . . . . . . . . . . . . . . . . 11
ChuteOutletDirectionAdjustment. . . . . . . . . . . . . . . . . . . . . . . . . . . . . . 12
SnowDischargeDirection . . . . . . . . . . . . . . . . . . . . . . . . . . . . . . . . . . 12
StoppingYourSnowThrower . . . . . . . . . . . . . . . . . . . . . . . . . . . . . . . . 13
Maintenance. . . . . . . . . . . . . . . . . . . . . . . . . . . . . . . . . . . . . . . . . . 13–16
SnowThrowerUseandCare . . . . . . . . . . . . . . . . . . . . . . . . . . . . . . . . 14
SnowThrowerCleaning . . . . . . . . . . . . . . . . . . . . . . . . . . . . . . . . . . . 15
AugerorImpellerJams. . . . . . . . . . . . . . . . . . . . . . . . . . . . . . . . . . . . 15
Drive&AugerCablesAdjustment..............................16
ShearPinsReplacement. . . . . . . . . . . . . . . . . . . . . . . . . . . . . . . . . . . 16
ExplodedView. . . . . . . . . . . . . . . . . . . . . . . . . . . . . . . . . . . . . . . . . . . 17
PartsList . . . . . . . . . . . . . . . . . . . . . . . . . . . . . . . . . . . . . . . . . . . 18–21
Warranty . . . . . . . . . . . . . . . . . . . . . . . . . . . . . . . . . . . . . . . . . . . . . 22
208CC 120 VAC Electric Start 2-Stage 24" Snow Thrower
Item#: 57030
Engine: 208CC,4-Stroke,SingleCylinder
FuelTankCapacity: 0.7-Gallons
StartType: 120VACElectricStartwithRecoilStarterBackup
Speed: 4Forwardand2ReverseSpeeds
ClearingWidth: 24"
ClearingHeight: 21"
Chute: 180°Adjustable
TireSize: 12.5"
Weight: 225lbs.
SPECIFICATIONS

#57030OPERATOR’SMANUAL 4
WARNING:Engineexhaust,someofitsconstituents,andcertainvehiclecomponents
containoremitchemicalsknowtocausecancer,birthdefectsorotherreproductiveharm.
1. Read,understandandfollowallinstructionsonyourSnowThrowerandinthisOperator's
Manualbeforeattemptingtoassembleandoperateyourmachine.Keepthismanualinasafe
placeforfutureandregularreference.Ifreplacementpartsareneeded,refertothemanual.
2. Befamiliarwithallcontrolsandtheirproperoperation.Knowhowtostopthemachineanddis-
engagethecontrolsquickly.
3. Neverallowchildrenunder14yearsoldtooperateyourSnowThrower.Children14yearsand
oldershouldreadandunderstandtheOperator'sManualinstructionsandsafetyrules.Children
over14yearsshouldbetrainedandsupervisedbyaparent.
4. Neverallowadultstooperatethismachinewithoutproperinstruction.
5. Thrownobjectscancauseseverebodilyinjury.Planyoursnow-throwingpatterntoavoiddis-
chargeofmaterialtowardroads,bystandersandthelike.
6. Keepbystanders,helpers,petsandchildrenfromyourSnowThrowerwhileitisinoperation.
Stopthemachineifanyoneentersthisarea.
7. Exercisecautiontoavoidslippingorfalling,especiallywhenoperatinginreverse.
IMPORTANT SAFETY INSTRUCTIONS

#57030OPERATOR’SMANUAL5
Personal Safety
1. Stayalert,watchwhatyouaredoingandusecommonsensewhenoperatingyourSnowThrower.
DonotuseyourSnowThrowerwhileyouaretiredorundertheinuenceofdrugs,alcohol,or
medication.AmomentofinattentionwhileoperatingtheSnowThrowermayresultinsevere
bodilyinjury.
2. NEVERLEAVEYOURRUNNINGSNOWTHROWERUNATTENDED.Stoptheengine.Donot
leaveyourSnowThroweruntilithascometoacompletestop.
3. Whensteppingbackwards,becautiousaboutanyobstaclesbeneathyourfeetorbehindyouto
avoidfalling.
Service
1. Stoptheenginebeforemakinganyadjustments.Checkformisalignment,breakageoforbinding
ofmovingparts,andanyotherconditionsthatmayaffectoperation.
2. Ifdamaged,havetheSnowThrowerservicedbyaqualiedrepairpersonusingonlyidentical
replacementparts.ThiswillensurethatthesafetyoftheSnowThrowerismaintained.
Symbols
Thesesymbolsrepresentimportantinformationabouttheproductorinstructionsonitsuse.
WARNING:Thefollowingwarningsymbolistoremindyouofthesafetyprecautions
youshouldtakewhenoperatingtheSnowThrower.
KeephandsawayfromthemovingpartsoftheSnowThrower.Therotatingpartscould
causeseverebodilyinjury.

#57030 OPERATOR’S MANUAL 6
Snow Thrower Components
Please check that the following items are included with your Snow Thrower.
– Shear Pins (2) – Operator's Manual
– Chute Assembly – Engine's Manual
– Registration Card
Note: If there are missing components, please call 1-800-232-1195, M–F 8–5 (CST)
for customer service.
Fig. 1
1 – Drive Control Handle 7 – Auger Shave Plate
2 – Speed Control Lever 8 – Auger
3 – Auger Control Handle 9 – Impeller Blade
4 – Chute Rotation Handle 10 – Snow/Ice Shovel
5 – Engine 11 – Chute Assembly
6 – Skid Shoe 12 – Drift Cutter
123
4
6
10
11
5
9
7
8
12

#57030OPERATOR’SMANUAL7
ASSEMBLY INSTRUCTIONS
YourSnowThrowerwillrequiresomeassembling.
Pleasecompletethefollowingstepsbeforeusing
yourSnowThrower.Foreasyassembly,
werecommendattachingthecomponentsinthe
orderlistedinthismanual.
Ifyouareunsureabouthowtoperformanyofthe
stepspleasecall1-800-232-1195,M–8–5(CST)
forcustomerservice.
Chute Assembly (Fig. 2 & 3)
1. InsertthechutetothesnowoutputportonyourSnow
Thrower(Fig.2).
2. Attachthechutetothesnowoutputportusingthe
boltandwasher(Fig.3).
Handle Assembly (Fig. 4 & 5)
1. AttachthelowerhandletoyourSnowThrowerusing
four(4)bolts(Fig.4).Eachsidewillrequiretwo(2)bolts.
2. Attachedtheupperhandletothelowerhandleusing
four(4)knobsandbolts(Fig.5).
Fig.3
Fig.2
Fig.4
Fig.5
Chute
Snow
Output
Port
Bolt&
Washer
Bolts
Knob
Bolt

#57030OPERATOR’SMANUAL 8
Control Cable Attachment (Fig. 6)
Securethecontrolcabletotheframewithprovidedclips(Fig.6).
Chute Rotation Handle Attachment (Fig. 7–9)
1. Assembletherotationchutebyttingthehandleintothe
rotationpiece.Securewithboltandwasher(Fig.7).
2. Slidetheendofthechuterotationhandlethroughthe
holeonthechutebracketnearthesnowoutputport
(Fig.8).Linethespiralofthehandleupwiththe
groovesinthesnowoutputport.
3. Placethewasheronthechuterotationhandlethen
insertthecotterpinthroughtheendofthechute
rotationhandlenearthechute.Bendtheendsofthe
pintoholdthepininplace.
4. Placetheeyeboltonthechuterotationhandleinto
theholelocatedhalfwayupthelefthandle.Secure
withcuppedwasherandnut(Fig9).
Handle
Fig.7
Piece
Groves
Handle
Piece
Enlarged
View
Fig.9
Fig.8
Fig.6
Clip
Hole
Chute
Rotation
Handle
Left
Handle
Chute
Rotation
Handle

#57030OPERATOR’SMANUAL9
OPERATION
Snow Thrower Preparation
PLEASE REFER TO ENGINE'S MANUAL (SEPARATE DOCUMENT) TO LEARN HOW TO START
THE ENGINE.
ThefollowingsectiondescribesstepstoprepareyourSnowThrowerforuse.Ifafterreadingthis
section,ifyouareunsureabouthowtoperformanyofthestepspleasecall1-800-232-1195M–F
8–5(CST)forcustomerservice.Forenginequestionspleasecall1-877-274-2214.Failureto
performthesestepsproperlycandamageyourSnowThrowerorshortenitslife.
WARNING: Keeptheareaofoperationfreefromforeignobjectsthatcanbethrown
bytheaugerand/orimpellerblades.Performathoroughinspectionoftheareasince
someobjectsmaybehiddenfromviewbysurroundingsnow.IftheSnowThrower
hitsanobstructionorpicksupaforeignobjectduringuse,stoptheSnowThrower,
removetheobstruction,andinspectitfordamage.Repairorreplaceanydamaged
partsbeforerestartingandoperatingyouSnowThrower.
1. Keepchildren,pets,andbystandersawayfromtheareaofoperation.Beawarethatthe
normalnoiseoftheSnowThrowerwhenturnedonmaymakeitdifcultforyoutohear
approachingpeople.
2. Startyourclearingpathbythrowingsnowinabackandforthmotion.Toclearintheopposite
direction,stopyourSnowThrowerandpivotitonitswheelstofacetheoppositedirection.Make
suretooverlapclearingpaths.
3. Determinethedirectionofthewind.Ifpossible,moveinthesamedirectionasthewindsothatthe
snowisnotthrownagainstthewind,backintoyourfaceandonthejustclearedpath.
DONOTUSEYOURHANDSTOUNCLOGCHUTE.Stopthemotorbeforeremoving
debris.DonotwalkinfrontofyourrunningSnowThrower.Donotdirectdischarged
snowtowardsbystanders.
4. Donotapplyadditionalman-madeloadtotheenginesincethismaydamagetheengine.
5. SomepartsofyourSnowThrowermayfreezeunderextremetemperatureconditions.Donot
attempttooperateyourSnowThrowerwithfrozenparts.IfthepartsfreezewhileyourSnow
Throwerisinuse,stopyourSnowThrowerandinspectitforfrozenparts.Thawallpartsbefore
restartingandoperatingyourSnowThrower.Neverforcepartsorcontrolsthathavefrozen.
Neveruseanopenameofanysorttothawfrozenparts.
6. WORKINGONPEBBLES,GRAVEL,ORUNPAVEDSURFACES.Toavoidthrowingloosesurface
materialalongwiththesnow,pushdownonthehandletoraisethescraperatthebaseoftheunit
abovethepebblesorgravel.

#57030OPERATOR’SMANUAL 10
Snow Thrower Inspection
BeforeusingyourSnowThrowerforthersttime,besurethatitisproperlyassembled.Checkthatall
partsareproperlyattachedandundamaged.Ifyouareunsureabouttheassemblyorconditionofany
ofyourSnowThrowerparts,pleasecallcustomerservice.Checkthatallpartsareattachedandun-
damaged.Checkthatallfastenersaretight.
Check Tire Ination
BeforeeachuseofyourSnowThrower,checkthetirepressure.Thepressureineachtireshouldbein
therangeof20–24psiforthebestperformance.
WARNING: Over-inatingcouldcauseatiretoburstandcauseseverebodilyinjury.
Thepressurecanbecheckedusinganordinarytirepressuregauge.Fillthetiresusinga
portableaircompressororothercompressedairsource.
Note: DO NOT OVER-INFLATE THE TIRES.
Skid Shoes Adjustment (Fig. 10)
Adjustmentoftheskidshoesgovernstheheightabovethegroundatwhichtheaugershaveplate
operates.
Forclearingsnowfromconcrete,asphalt,andothersmoothsurfaces,settheaugershaveplatesothat
thebottomoftheshieldscrapestheground.Forclearingsnowfromgravel,dirt,andotherrough
surfacestosettheaugershaveplateslightlyabovethegroundtoavoiddirtandgravelfromentering
theauger.Theoptimalheightoftheshieldwillvarydependingonthetypeofsurfacebeingcleared.
Surfaceswithlargergravelorstoneswouldrequireamoreraisedaugershieldplate.
1. MakesureyourSnowThrowerisonasolid,smooth,andlevelsurface.
2. Placeaspacerboardonthegroundunderneaththeau-
gershaveplatebetweentheskidshoes.Thethickness
oftheboardshouldbethesameastheheightabovethe
groundyouwishtoraisetheaugershaveplateto.The
skidshoesshouldnottouchtheboard(seeFig.10).
3. Usingawrench,loosenthetwo(2)nutslocatedon
eachskidshoeandallowtheskidshoestoslidetothe
ground.
4. Re-tightenthenutsontheskidshoesandwheelyourSnowThroweroffofthespacerboard.
Starting Your Snow Thrower
PLEASE REFER TO ENGINE'S MANUAL (SEPARATE DOCUMENT) TO LEARN HOW TO START
THE ENGINE.
Fig.10
Skid
Shoe
Nut

#57030OPERATOR’SMANUAL11
Using Your Snow Thrower (Fig. 11)
1. OnceyourSnowThrowerhasbeenrunningoutside
forseveralminutes,itisnowreadyforuse.Make
surethepathinfrontofyourSnowThrowerisfree
frompeople,animals,objects,andallotherob-
structionsexceptforsnow.
2. Adjustthechuteoutlettothedesireddirection.Turn
thechuterotationhandleclockwiseorcounter-
clockwiseuntilthedesiredpositionisreached(see
page12).
WARNING: Neverdirectthechuteoutlet
towardpeopleoranimals.Whilesnowmayseem
harmless,itcancontainrocksorotherdebristhat
cancauseseriousinjurywhenprojectedthroughthechute.
3. Movethedrivespeedcontrollevertothedesiredspeed.Therearesix(6)settings:four(4)
forwardspeedsandtwo(2)reversespeeds.1istheslowestforwardspeedand4isthefastest
forwardspeed.R1istheslowestreversespeedandR2isthefastestreversespeed(Fig.11).
Note:Thereisnoneutraldrivesettingsincethedrivecontrolhandlemustbeengagedformovement.
Driving and Auger Controls (Fig. 12-13)
1. Pressdownontheaugercontrolhandleonthe
left-handside(Fig.12).Theaugershould
startspinning.
2. Pressdownonthedrivecontrolhandleontheright-
handside(Fig.13).Themachineshouldstartmoving
inthedirectionwiththespeedsetbythedrivespeed
controllever.
3. Whennishedclearingasnowpath,releasethe
augercontrolhandleandthedrivecontrolhandle.
4. Thedrivespeedcanbeadjustedbyusingthedrive
speedcontrolhandle.Besuretoreleaseboththeauger
controlhandleandthedrivecontrolhandlebeforead-
justingthedrivespeedcontrollever.
Note: NEVER CHANGE THE SPEED WHILE YOUR
SNOW THROWER IS MOVING. IT COULD DAM-
AGE THE DRIVE MECHANISM AND VOID THE
WARRANTY.
Toadjustthechuteoutletdirection,besuretoreleaseboththe
augercontrolhandleandthedrivecontrolhandlebeforedoingso.
Fig.12
Fig.13
Fig.11

#57030OPERATOR’SMANUAL 12
Chute Outlet Direction Adjustment (Fig. 14–16)
Theangleofthechutedeectorcontrolsthethrowingdistanceofthesnowleavingthechute.Raising
theanglewillincreasethethrowingdistance(Fig.14).Loweringtheanglewilldecreasethethrowing
distance(seeFig.15).
1. Makesurethedriveandaugercontrolhandlesarereleased.Theaugerhastocometoafull
stop.
2. Loosentheknobsonthechutedeector(Fig.16)andadjustthechutedeectortothedesired
angle.
3. Retightentheknobsonthechutedeector.Donotover-tighten.
Snow Discharge Direction
1. Neverdirectthesnowdischargechuteattheoperator,bystanders,vehiclesornearbywindows.
ThedischargedsnowandforeignobjectsaccidentallypickedupbytheSnowThrowercancause
seriousdamageandseverebodilyinjury.Alwayspointthedischargechuteintheoppositedirection
frompotentialhazards.
2. Thedischargechutecanbeadjusted180ºbyrotatingthechuterotationhandle.Rotatethechute
rotationhandleclockwisetomovethedischargechutetotheleft(Fig.17);counterclockwiseto
movethechutetotheright(Fig18).
Fig.14 Fig.15 Fig.16
Fig.17 Fig.18

#57030OPERATOR’SMANUAL13
WARNING: Anopeningbetweenthedischargechuteandthechutedeectormay
allowforeignobjectstobepickedupbyyourSnowThrowerandbethrowninthedirec-
tionoftheoperatorcausingseverebodilyinjury.Donotadvancethechutedeectortoofar
forwardcausinganopeningtoappearbetweenthedeectoranddischargechute.Donot
overtightentheknobsonthechutedeector.
Stopping Your Snow Thrower
WhennishedusingyourSnowThrower,performthefollowingstepstoshutitdown.
1. Runtheaugerandimpellerfor30secondstoclearanyremainingsnowinsideyourSnow
Thrower.Stoptheaugerbyreleasingtheleftcontrolhandle.
2. SettheengineswitchtotheOFFposition.Thiswillstoptheengine.
3. MovethefuelvalvelevertotheOFFposition.
4. RemovesnowfromallSnowThrowersurfaces.
WARNING:NeverstoreyourSnowThrowerforextendedperiodsoftimewithfuelin
thetank.Fuelstabilizercanbeaddedtothefueltoextenditsshelflifeforstorage.
WARNING: MakesuretoturnOFFtheenginebeforeperforminganymaintenancetasks
onyourSnowThrower.
1. PropermaintenanceofyourSnowThrowerwillhelpprolongitslife.Pleaseperformthe
maintenanceproceduresaccordingthescheduleonpage14.
2. Ifyouhavequestionsaboutanyofthemaintenanceprocedureslistedinthismanual,pleasecall
1-800-232-1195,M–F8–5(CST).
3. PleasereadtheEngine'sManualforenginemaintenance.Anyquestions,call1-877-274-2214.
MAINTENANCE

#57030OPERATOR’SMANUAL 14
Maintenance Schedule
Mechanism Function Frequency
Auger&Impeller ClearJams Asnecessary
Tires CheckPressure Beforeeachuse
EngineOil
SeeEngine'sManualSparkPlug
FuelTank
Drive&AugerCables Adjusttension Asnecessary
ShearPins Replace Whenbroken
WARNING: NeverperformmaintenancewhileyourSnowThrowerisrunning.
Snow Thrower Use and Care
1.DonotattempttorepairyourSnowThrowerunlessyouhavethepropertoolsandin-
structionsfordisassemblyandrepair.
2.Checktheboltsatfrequentintervalsforpropertightnesstoensurethattheequipmentis
insafeworkingcondition.
3. Aftereachsnowremovalsession,runtheSnowThrowerforafewminutestopreventthe
collector/impellerfromfreezing.Stoptheengine,waitforallrevolvingpartstostop completely,
andwiperesidualiceandsnowofftheunit.Rotatethechuterotationhandleseveraltimesto
removeanyexcesssnow.

#57030OPERATOR’SMANUAL15
Snow Thrower Cleaning
1. Frequency:Whendirty.
2. TocleanyourSnowThrower,useadampclothandmilddetergentonthesurfacesonly.Neverget
soaporwaterinsidetheworkingmechanismsofyourSnowThrower.
Note: Donotcleanwithwater.Waterwillfreezeduetolowtemperatureanddamagethemachine.
3. CleantheSnowThrowerofsnowandicebuildupbeforestoringortransporting.Besuretosecure
theunitwhiletransporting.
4. InspecttheSnowThrowercarefullyforworn,loose,ordamagedparts.Checkconnectionsand
screwsandtightenifnecessary.
5. Storetheunit,inalocked,dryplaceoutofthereachofchildrentopreventunauthorizeduseor
damage.Coverlooselywithatarpforaddedprotection.
Auger or Impeller Jams
WARNING:Theaugerandimpellerrotateatfastspeedswhichcancauseharmoreven
amputationtoaperson'sbodyparts.Evenifyoudonotseetheaugerorimpellerrotating,it
maystartatanytimeiftheengineisrunning.
1. AlwaysturnOFFtheenginebeforeattemptingtoclearanyclogsorjams.
2. Keephandsandfeetawayfromrotatingpartswhiletheengineisrunning.
3. Donotwearloosettingclothingthatcanbecomeentangledinrotatingparts.
4. Waituntiltheaugerandcompellerhavecometoafullstop.
5. Clearanyvisiblejamsusingtheshovelattachedtoyour
machine(Fig.19).
Note: DONOTtrytoclearjamswithyourhandsorfeet.
Fig.19
Shovel

#57030OPERATOR’SMANUAL 16
Drive and Auger Cables Adjustment
Frequency:Asneeded.
Overtime,thetensioninthecablesthatleadtothedrivecontrolandaugercontrolhandlesmayloosen.
Ideally,thecablesshouldbejustbarelytightwhenthehandlesareinthereleasedposition.Totighten
thehandlecables,useawrenchorpliersandgentlyrotatethemetalturnbuckleatthetopofthecable
untilthedesiredtensionisachieved.
Shear Pins Replacement (Fig. 20)
1. Frequency:WhenBroken.
2. YourSnowThrowercontainstwoshearpins,oneon
eachendoftheaugershaftasshownin.Aclog
orjamintheaugermaycauseoneorbothofthe
shearpinstobreak.Thisisasafetymechanismto
protecttherestofyourSnowThrowerfromoverload
anddamage.YourSnowThrowercomeswithtwo
replacementshearpins.Toordermoreshearpins,
pleasecallourcustomerserviceline.
3. Turnofftheengineandwaitforallmovingpartstocometoacompletestop.
4. Removeanyremnantsofthebrokenshearpin.Youmayneedtounscrewthe
nutfromthebrokenshearpin.
5. Placeanewshearpinthroughtheholeintheaugershaftandtightenusingtheshearpinnut.
Fig.20
Shear
Pin

EXPLODED VIEW
17

PARTS LIST
18

PARTS LIST
19

PARTS LIST
20
Table of contents
Other Snow Devil Snow Blower manuals
Popular Snow Blower manuals by other brands
Troy-Bilt
Troy-Bilt Storm 3090XP Operator's manaul
SNOWJOE
SNOWJOE iON13SS-CT Operator's manual
Gude
Gude GRSF 11 PS Translation of the original instructions
Champion Power Equipment
Champion Power Equipment 100680 Operator's manual

SNOWJOE
SNOWJOE iON24SB-CT-RM Operator's manual
MTD
MTD 312-980I000 owner's guide
