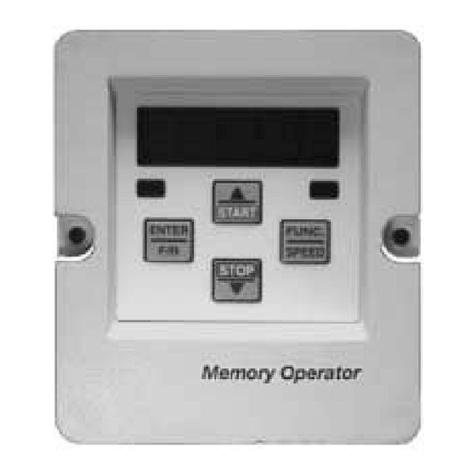
Solacom R9.0 User manual

Position and Audio Control Module R9.0
User Guide

The information furnished in this document by Solacom Technologies Inc. ("Solacom") is
believed to be accurate. Solacom makes no warranties, expressed or implied, regarding the
information contained herein, and assumes no liability for errors or omissions.
Solacom assumes no liability otherwise arising from the application or use of any such
information or product for any infringement of patents or other intellectual property rights
owned by others that may result from such application or use.
Neither the supply of this information or the purchase of product conveys any license, either
expressed or implied, under patents or other intellectual property rights owned by Solacom
or licensed from third parties by Solacom, whatsoever.
Purchasers of product are also hereby notified that the use of this information or product in
certain ways or in combination with Solacom or non-Solacom furnished goods or services
may infringe patents or other intellectual property rights.
This document and related products contain valuable trade secrets and proprietary
information belonging to Solacom. No part of this document may be reproduced, stored in
a retrieval system, or transmitted in any form or by any means without prior written
permission from Solacom. Reverse engineering, decompiling and disassembling are explicitly
prohibited.
The product specifications and information contained in this document are subject to
change by Solacom without notice.

Support and Service
The Solacom Customer System Support & Services Centre is staffed by qualified service
professionals to provide the support, service, and know-how you need to seamlessly operate and
manage your mission-critical communications infrastructure.
The Center offers a complete range of support and services, including:
answering queries and providing information
helping to diagnose and troubleshoot incidents
dispatching qualified field support personnel for training, installation,
configuration, QoS audits, personalized requirements, and more.
You may request support and service online or by phone:
Web: services.solacom.com
Email: [email protected]
North America toll free: 1-888-Solacom (1-888-765-2266)
Phone anywhere: +1 613 693 0641
Normal business hours are Monday to Friday from 09:00 to 17:00 ET.
For emergency or urgent requests, 7 days per week, 24 hours per day, use the phone
numbers above and follow the voice prompts.
i


Safety Summary
The following general safety precautions must be observed during all phases of operation, service,
and repair of this product. Failure to comply with these precautions or with specific warnings
elsewhere in this manual violates safety standards of design, manufacture, and intended use of the
product. Solacom assumes no liability for the customer’s failure to comply with these requirements.
Ground the equipment
To minimize shock hazard, the equipment switch must be connected to an electrical
ground. The equipment has a three-conductor AC power cable. This power cable
must be plugged into an approved three-contact electrical outlet with the grounding
wire (green) firmly connected to an electrical ground at the power outlet. The power
cables meet International Electrotechnical Commission (IEC) safety standards.
Keep away from live circuits
Operating personnel must not remove modules or otherwise tamper with the
equipment switch or related components. Component replacement and internal
adjustments must be made by qualified maintenance personnel. Do not replace
components with the power cable connected unless the component is hot-swapable.
To avoid injuries, always disconnect power and discharge circuits before removing
equipment shelves or making major modifications.
iii

iv
Do not service or adjust alone
Do not attempt major component replacement, internal service, or adjustment unless
another person, capable of rendering first aid and resuscitation, is present.
Replacement of modules
Replacement of modules should be performed by qualified maintenance personnel
(those who have been trained and certified by Solacom).
Electrostatic discharge (ESD)
This product contains components that can be damaged by electrostatic discharge.
You must take precautions when handling modules. As a minimum precaution, use
grounded wrist straps at all times when handling modules.
Do not modify the product
Do not install substitute parts or modify the product. To ensure that product integrity
is maintained, contact the Solacom Customer System Support & Services Centre for
any service or repair.
Power surge advisory
Electrical surges (typically lightning transients) are very destructive to customer
terminal equipment connected to AC power sources. We recommend that you install
AC surge arrestors in outlets to which any equipment is connected.

Contents
1About This Document..................................................................................................................1
1.1 References................................................................................................................................1
2Operation......................................................................................................................................3
2.1 Radio Bypass Mode.................................................................................................................3
2.2 Call Taking Mode....................................................................................................................5
2.3 Voice Recording ......................................................................................................................5
3Module Interface..........................................................................................................................7
3.1 Front Panel Connectors............................................................................................................8
3.2 DIP Switches............................................................................................................................8
3.3 Status LEDs .............................................................................................................................9
3.4 Rear Panel Connectors.............................................................................................................9
4Installation..................................................................................................................................11
4.1 Equipment..............................................................................................................................11
4.2 Connection.............................................................................................................................12
4.3 Cable Pin Assignments ..........................................................................................................13
4.3.1 PAC Module COM Operator Position Workstation COM (Cable C).........................13
4.3.2 PAC Module AUDIO I/O Various (Cable X).............................................................13
4.3.3 P4 of Cable X Workstation Line In/Out (Cable Y).....................................................15
4.3.4 P2 of Cable X Radio Dispatch ....................................................................................16
4.3.5 P5 of Cable X Voice Recorder....................................................................................17
Jack Box Pin Assignments...........................................................................................................18
4.3.6 Dual-prong Connector .....................................................................................................19
4.4 Connecting with a Call Director ............................................................................................19
v

Figures
Figure 1: Audio Paths.............................................................................................................................4
Figure 2: Front Panel..............................................................................................................................7
Figure 3: Rear Panel...............................................................................................................................7
Figure 4: Equipment.............................................................................................................................11
Figure 5: Connections ..........................................................................................................................12
Figure 6: Radio Bypass Cable (X)........................................................................................................13
Figure 7: Headset/Handset Connector.................................................................................................. 19
Figure 8: Call Director Connection ......................................................................................................19
vii


ix
Tables
Table 1: Radio Bypass Mode ................................................................................................................. 3
Table 2: Voice Recording.......................................................................................................................5
Table 3: Front Panel Connectors ............................................................................................................8
Table 4: DIP Switches............................................................................................................................8
Table 5: Status LEDs..............................................................................................................................9
Table 6: Rear Panel Connectors .............................................................................................................9
Table 7: Cable List ...............................................................................................................................12
Table 8: Cable C Pin Assignments.......................................................................................................13
Table 9: Cable X Pin Assignments......................................................................................................14
Table 10: Cable Y Pin Assignments....................................................................................................15
Table 11: Radio Connections Pin Assignments ...................................................................................16
Table 12: Voice Recorder Pin Assignments.........................................................................................17
Table 13: J1 Pin Assignments .............................................................................................................. 18
Table 14: P1 Connections.....................................................................................................................18
Table 15: P2 Connections.....................................................................................................................18
Table 16: List of Acronyms..................................................................................................................23


Position and Audio Control Module User Guide
1
1 About This Document
This document provides information on the Solacom Position and Audio Control (PAC) module. This
document is of interest to you if you are adding or configuring PAC modules in your system.
1.1 References
When application specific information is required, refer to any of the following
documents:
Guardian User Guide
LibertyCOMMAND User Guide
LibertySHIELD User Guide
LibertyIntelligence Administrator Guide
IQadmin User Guide


Position and Audio Control Module User Guide
2 Operation
The Solacom PAC (Position and Audio Control) module is a device that enhances the audio
functionality of LibertyIntelligence applications at operator position workstations. It also connects
headsets or handsets via dual-prong jack boxes, offering superior durability compared with USB
devices. The PAC provides two modes of operation: Radio Bypass mode, and Call Taking mode.
2.1 Radio Bypass Mode
In Radio Bypass mode, the PAC module allows an operator (plus an optional
supervisor) to take phone calls from a LibertyIntelligence application and radio calls
from a radio dispatch console with a single headset or handset. The audio and PTT
signals are sensed and the shared headset/handset is managed as follows:
Radio is usually continuously connected to the headset/handset.
Phone is also usually connected to the headset/handset, although ring and audio
can be switched to speakers by the operator or the LibertyIntelligence application.
When there is an active phone call, audio from the radio bypasses the headset and
instead connects to an auxiliary PAC speaker for continuous monitoring. The
headset/handset remains connected to the active phone call, but when the operator
presses the PTT switch, the microphone on the headset/handset temporarily
switches to the radio, and the telephone call is monitored via USB speakers.
Headset/Handset USB Speakers PAC Speaker
Radio only Radio - -
Phone only Phone - -
Radio & phone Phone - Radio
Radio PTT & phone Mic radio; ear off Phone -
Table 1: Radio Bypass Mode
3

Operation
The following diagram show the radio, phone, and sense connections in four
operating scenarios:
Figure 1: Audio Paths
4

Position and Audio Control Module User Guide
2.2 Call Taking Mode
In Call Taking Mode, there is no radio connection. The audio sensing of the PAC
module is used to trigger a relay closure whenever a phone call is answered,
providing “recorder active” signals and a 600 ohm analog link for local voice
recording (see Section 2.3).
2.3 Voice Recording
Voice recording is achieved by capturing the audio of phone calls (and, if available,
radio communication) and sending it to a local recorder. Operators can then usually
access portions of the recording (Instant Retrieval) on demand.
Phone audio is sent along with a signal that triggers on the presence of a phone call
so that recording takes place only when a call is answered. Radio audio is sent
continuously and must rely on VOX detection within the recorder.
Table 2: Voice Recording
5


Position and Audio Control Module User Guide
3 Module Interface
The PAC is a single module card installed in a PAC housing suitable for locating at operator
positions. This section explains the front and rear panel connectors, switches, and indicators.
Figure 2: Front Panel
Figure 3: Rear Panel
7

Module Interface
3.1 Front Panel Connectors
The front panel consists of four RJ-45 connectors, two DB9 connectors, three DIP
switches, and four LED indicators.
Item Description
MIC Currently not used.
AUX Currently not used.
SUPV An RJ-45 connector that connects to a Supervisor jack
box and provides audio, sense, and PTT signals. Sense
and PTT are monitored and displayed for the user in
the LibertyIntelligence application status bar.
OPER An RJ-45 connector that connects to an Operator jack
box and provides audio, sense, and PTT signals. Sense
and PTT are monitored and displayed for the user in
the LibertyIntelligence application status bar.
SPKR1 A DB9 connector that connects to a PAC speaker for
radio monitoring by the operator.
SPKR2 A DB9 connector that connects to a PAC speaker for
radio monitoring by the operator.
Table 3: Front Panel Connectors
3.2 DIP Switches
Three front panel DIP switches are used to select some options for operation.
Item Description
Switch 1 Controls whether radio bypass is used.
Off – enabled radio bypass (can receive radio
calls). Use for Radio Bypass mode.
On – disables radio bypass (cannot receive
radio calls). Use for Call Taking mode.
Switch 2 Sets the type of headset/handset microphone used.
Off – carbon; On – dynamic.
Switch 3 Currently not used.
Table 4: DIP Switches
8
Table of contents
Other Solacom Control Unit manuals
Popular Control Unit manuals by other brands

Ublox
Ublox NINA-B50 Series Hardware Integration Manual
Tecnoautomazione
Tecnoautomazione T182A user manual
Keyautomation
Keyautomation CT102 Instructions and warnings for installation and use
Qcells
Qcells Q.PEAK DUO M-G11 Series Installation and operation manual

ProLite
ProLite E32-A user manual

Aqua Medic
Aqua Medic Ocean Light LED Control Operation manual

