WARNING: Do not cut through any roof substrates, raers or framed
portions of the roof. Also prior to cutting, make sure that you do not have
any electrical, plumbing or possible gas lines in the area. If you do, then either
make sure you stay clear of these hazards or possibly consider installing the
unit in another location.
1.) Remember the golden rule, measure four times and cut once. On either 24”/16” center construction, we
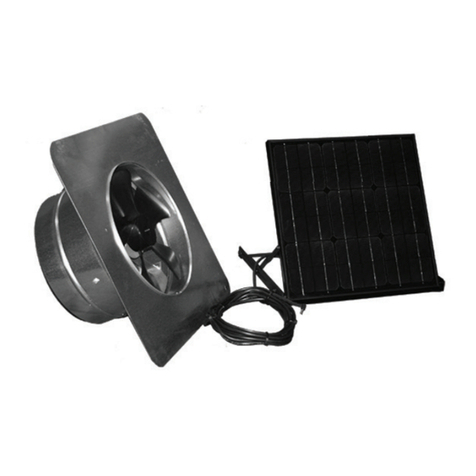
recommend cutting a 15” (een inches) round hole between the raers. We recommend installing the SR1800
between the raers but if not possible it is OK to install the SR1800 over a raer.
2.) Once the hole as been made, trim away shingles as needed to accommodate the metal base ashing so that you
have a clean and tight t. Normally if you cut a clean 15” hole, we recommend trimming away from the top rows
of shingles an additional 1” (one inch) to allow the base ashing to slip under the top row(s) of shingles and over
the bottom row(s).
3.) Slip the at metal base under the top rows of shingles and center the unit over the opening. If the unit is not
properly centered this will jeopardize the integrity of the installation. e SR1800 has been designed to
accommodate all angles so it does not mater which side is installed rst. Do not force the ashing into place, if
the ashing does not slide in smoothly then most likely you have a nail, washer or something obstructing it’s path.
Carefully nd out what is causing the issue and adjust as needed. It is also important to avoid deep scratches in
the ashings powder-coating.
4.) Once metal ashing is in place, gently li the lower exposed metal base ashing and apply sealant (caulk)
generously under the side and lower edges but not so much that it oozes out. If sealant starts to ooze, just wipe o
excess before it hardens. e bottom part of the ashing will be exposed and sit on top of the shingles.
5.) Drill 4 to 6 (four to six) mounting holes (along bottom and exposed sides). Use the provided screws to mount
the unit but making sure before screwing in the second screw, the unit is properly squared with the roof edge or
side.
6.) Aer properly mounting the SR1800 to the roof, utilize the exterior grade, high-heat, waterproof sealant (caulk)
- apply generously over the screws and verifying again the status of the oozing or lack of sealant on the exposed
metal ashing underside. Now is the time to do it right and make sure the installation is water tight.
7.) e SR1800 comes with a 36” (inch) thermoball /thermostat/ attachment. is is designed to hang down into
your attic. You can adjust the length of the thermostat with a cable tie or tape. e ermoball is designed for
two purposes:
a. To give the cable and thermostat weight so it will hang straight down.
b. To allow the fan to run once the temperature is above 80° F ( +/- 5° )
If you do not want to utilize the thermostat, the unit is delivered with a bridge adapter in the same pouch as the
screws, that allows you to remove the thermostat from the circuitry which allows the fan to run regardless of the
temperature when there is available sun. NOTE: if the white lm is removed prior to installing the solar attic fan
on the roof, the thermoball and cable can get caught up quickly within the fan. Be sure to verify that they fan/
motor is clear and the cable is clear of the blade and handing down properly.
8.) en, carefully set the SR1800 down (centered) on the metal base (ashing) making sure the thermoball /
cable is not being pinched and is handing down within the attic space. Also if you are wanting to have your solar
panel at an angle - remember to take into consideration where and how the panel is set to angle to make sure
you click into place correctly. e SR1800 when placed on the base is slightly o and not exactly squared with
the metal base unit, once the unit is (turned to the le) clicked into place, you will hear a very distinct secure
metal clip that locks the solar attic fan into place. If you have found that you have placed it incorrectly, you will
then need to remove the four screws from the sides, liing the top portion of the solar attic fan o. Being careful
you do not pinch or beak the wiring. You will then nd two metal thumb-spring plates which you will need to
slightly li so that you can turn the lower portion of the solar attic fan to the right so it can be removed and
reattached to the top part of the unit.
