Soliday FIXED SUNSAILS User manual
sunsails
FIXED SUNSAILS
•INSTRUCTION MANUAL
• SAFETY INSTRUCTIONS
• MOUNTING TIPS
• MATERIAL- AND CARE INSTRUCTIONS
• PRODUCT GUARANTEE
www.soliday.eu

architektur design form
THE ART OF SHADE
A Soliday sunsail is a quality product. Practical de-
sign for extensive shadowing, combined with the
architecture of clear lines and shapes of modern
interior design. With Soliday you count on a sun-
sail professional with the largest offer in Europe.
The product range reaches from sunsails to measu-
re over manually rollup systems up to the fully au-
tomatic rollup sunsail system. This is supplemen-
ted by a large selection of useful accessories with
extended features as well as a large selection of
sunscreen cloths and colors.
I wish you much pleasure and relaxed hours under
your Soliday sunsail. We gladly are at your disposal
for any questions.
Congratulations!
You made a good choice!
You will receive helpful information
on the following pages, so that your
sunsail can be used safely and reli-
ably. When passing on the sunsail
please be absolutely sure to enclo-
se the instruction manual.
Your Oliver Balaz
CEO Soliday
2
Content
Soliday sunsail
Product description
Safety- and warning notices – what are the
characteristics of a sunsail?
Helpful advice for planning a sunsail
Mounting instruction, accessories and advice
Step 1 – Sail types
Step 2 – What needs to be paid
attention to before installing!
Step 3 – Determining the
attachment points
Step 4 – Mounting the attachment
points on walls
Step 5 – Mounting of additional
attachment points
Instruction for concrete foundations
Step 6 – Mounting the sunsail
Material- & care notes
Sunsail made of Austronet
Sunsail made of Austrosail
Sunsail made of Austrosail Nano
Soliday stainless steel masts
Soliday aluminum masts
Questions that might arise after the purchase
FAQ/ general emerging issues
General warranty &
product guarantee
Product guarantee for sunsail cloths
4
5
3
4
5
6
7
8
9
10
16
16
16
18
18
19
21
22
sunsails
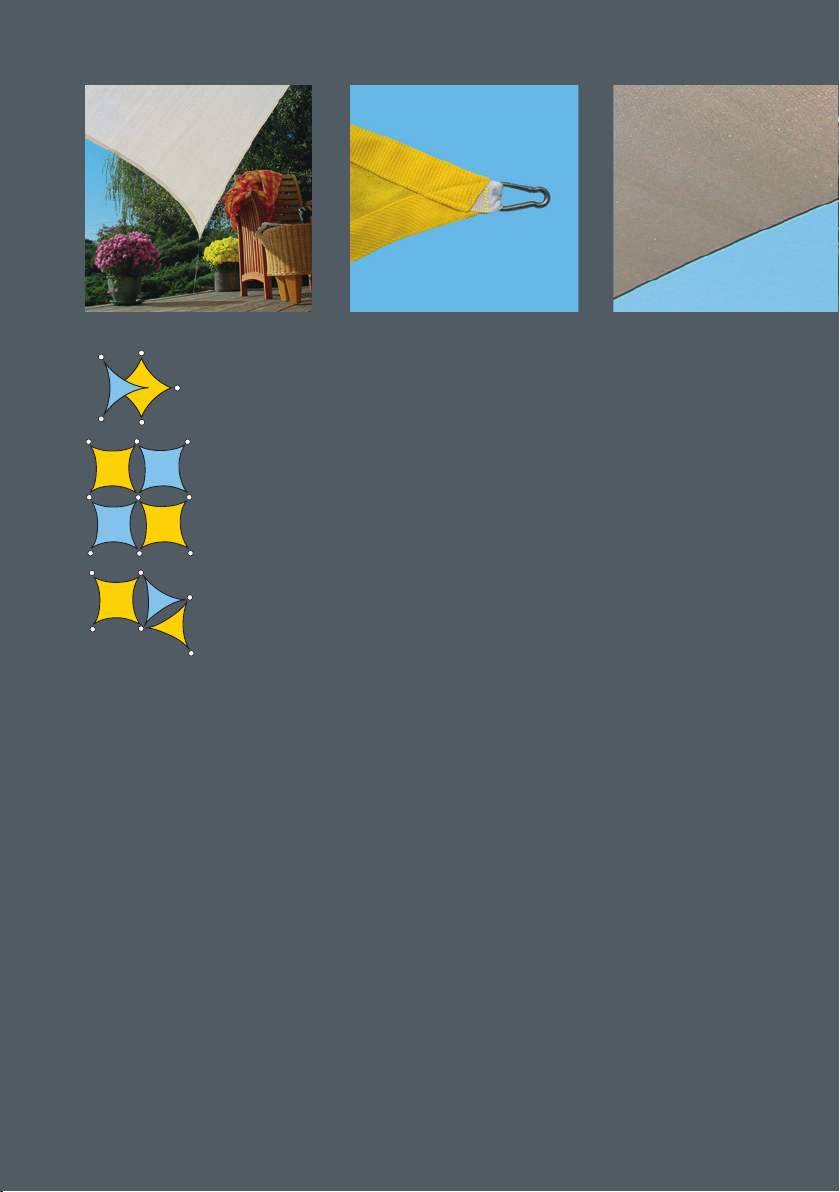
SOLIDAY SUNSAIL – PRODUCT DESCRIPTION
Each Soliday sunsail has an elegant concave cutting form. In Soliday´s as-
sortment you will find materials that are specifically chosen to fulfill the per-
manent and difficult outdoor requirements of a sunsail.
A Soliday sunsail is manufactured according to an exactly defined geometry,
which has been steadily improved in longstanding use to guarantee an op-
timal design. The side-edges of the sunsail have a concave alignment. The
concave cutting gives the sail the well known and beloved design (aesthetic),
but primarily it is responsible for a perfect tension of the sunsail. The side-
edges of a Soliday sunsail are seamed with a robust circular strap. The strap
serves as hanging point on the sail corners and is responsible for the optimal
distribution of forces of the sunsail in an evenly stretched condition.
SAFETY – AND WARNING NOTICES
Before using your sunsail as shade provider, resp. as protection from light rain, you should
urgently read the instruction manual carefully.
If possible, mount the sunsail in a place that it sheltered from the wind. Make use of the wind
shade and the protection of house walls, house corners, trees, hedges, etc.
Do not let any fire or open flame burn near the sunsail. Do not use your barbecue grill under
the shady construction.
Periodically check your sunsail for damages and abrasion, this increases the safety level.
Please note that a sunsail is not constructed for unusual environmental influences, so for
instance if there is hail, snow or strong rainfall the sunsail must immediately be dismounted.
When strong winds or storms come up, the sunsail must be taken down.
Do not put any objects on the sunsail.
A sunsail cannot be walked upon, it may not be used as trampoline or hammock. It serves so-
lely as protection from the sun and possibly light rain and may not be used for other purposes.
l
l
l
l
l
l
l
l
4
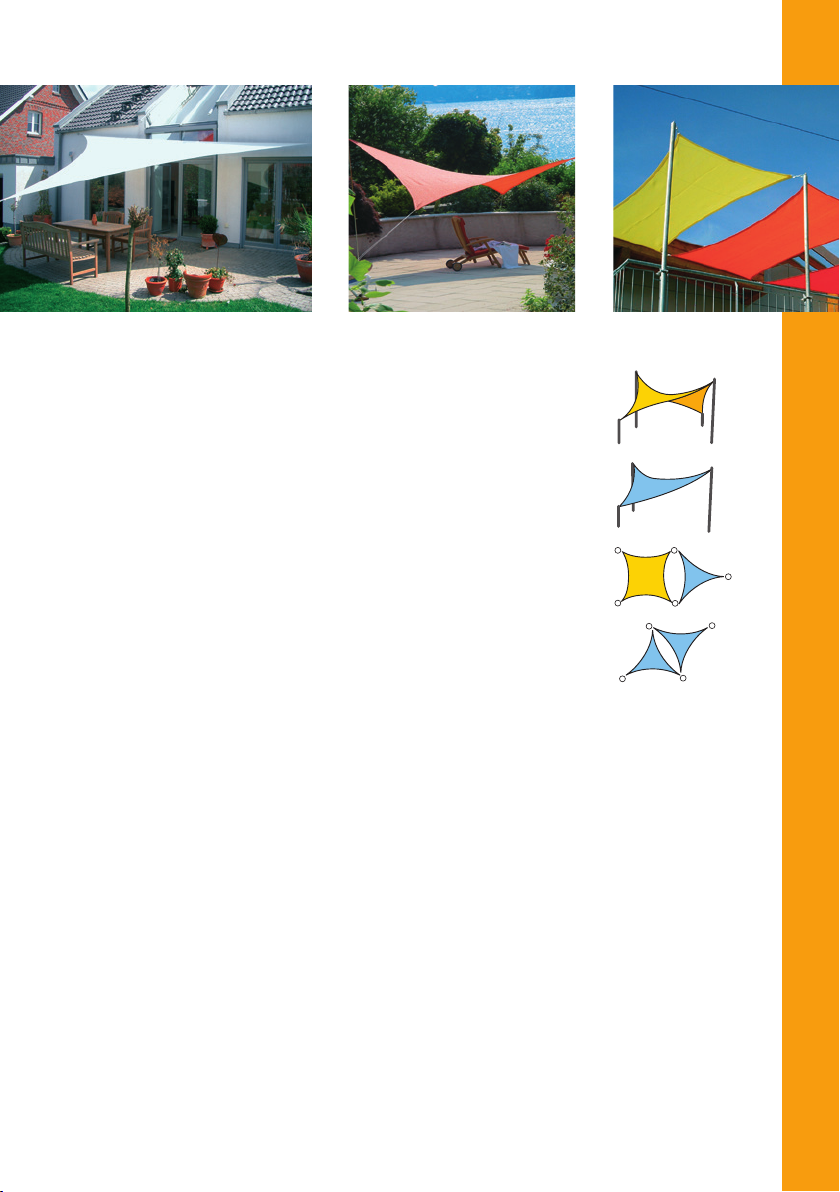
Mounting instruction, accessories and advice
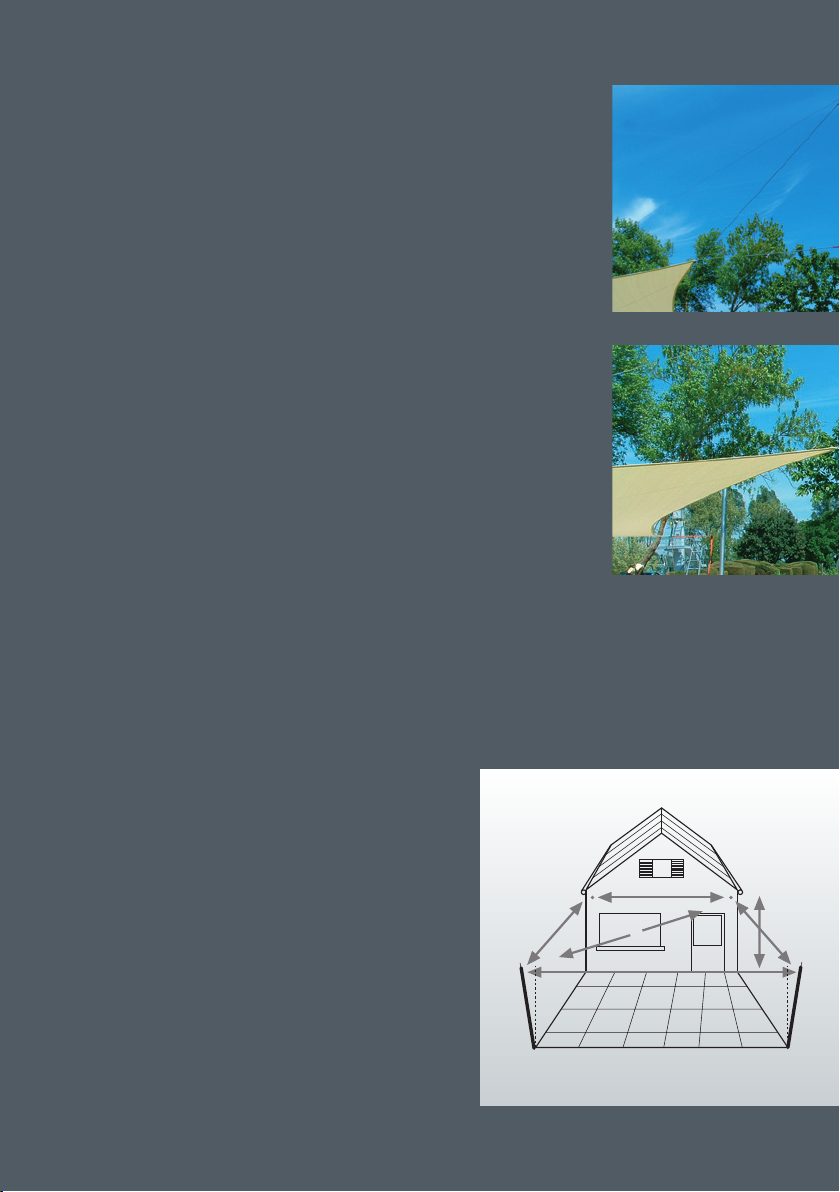
The sail form and the characteristic of the sunsail are significantly de-
termined by the height of the attachment points. The classic saddle
sail is a very modern shape, where the diagonal points are in about the
same height and the sail corners are pulled down strongly on the left
and the right. With this variation make sure there is enough free space
under the sail, resp. pay attention to the passage height.
The airy character and the shape of the sunsail unfold better when the
attachment points are in different heights. There are no limits to be ad-
venturesome. If the shade provider should additionally fulfill the pro-
tective function with light rain, you must pay attention that the inclina-
tion of the sail is at least 15 – 25 degrees and no water pockets can form
(the place in the sail where water accumulates) in tensioned condition.
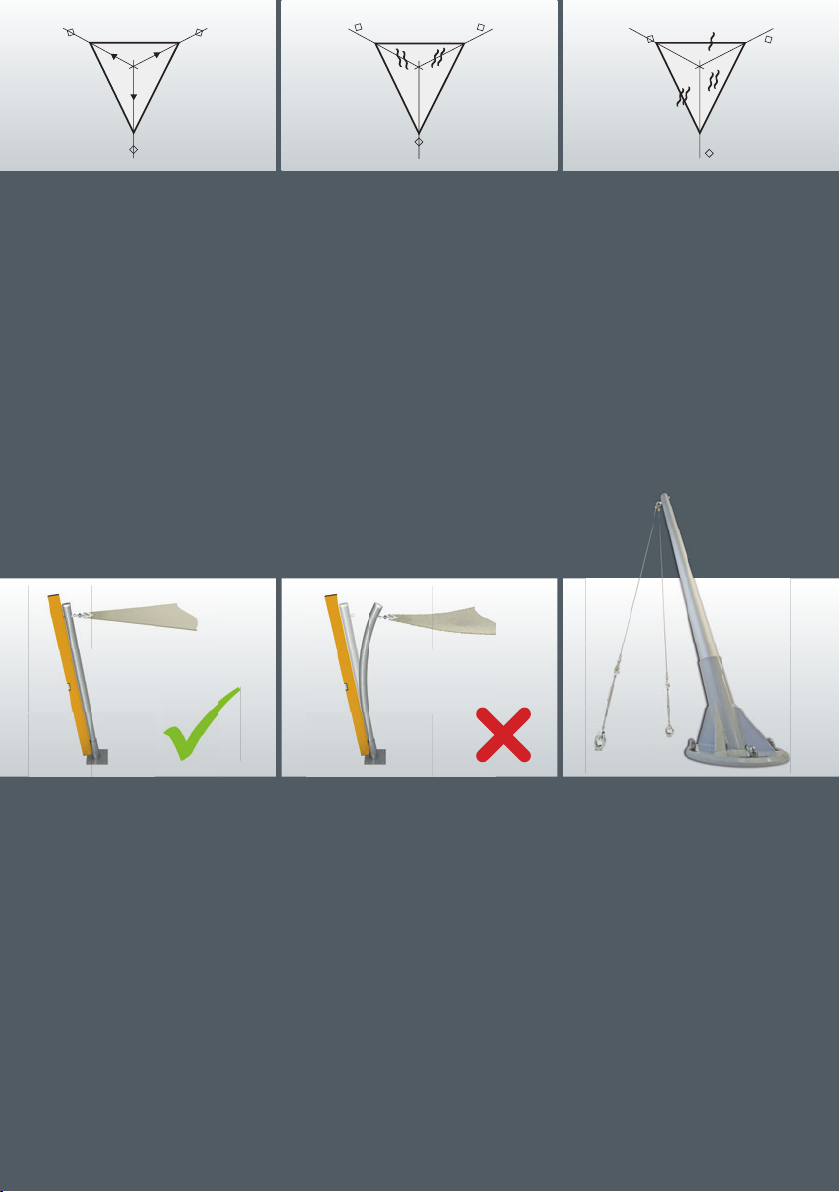
STEP 1 – SAIL TYPES
STEP 2 – WHAT YOU NEED TO PAY ATTENTION TO BEFORE THE INSTALLMENT
Before mounting, make enquiries at your local city administration or local building autho-
rities about possibly existing building regulations in your area.
Suitable place – if possible, mount the sunsail in a place that is sheltered from the wind.
Make use of the wind shade and the protection of house walls, house corners, trees,
hedges, etc.
Size of the sunsail
Determine when and where you want to have shade
Position the sail so that one attachment point, resp. mast is in the west. With a gliding
carriage you will be able to lower the sail there and adjust the shade. Perfectly suitable as
well as glare protection in the later afternoon or as sight protection for unloved glances.
Is it possible to move a mast? Beware: make sure to check existing telephone-, electrical
lines or water pipes before the digging or drilling work begins.
l
l
l
l
l
l
5
architektur design form
STEP 3 –
DETERMINING THE ATTACHMENT POINTS
You can use house walls, trees, masts, railings, ground anchors,
etc. as attachment points.
Make sure to check the stability of the attachment points. A sun-
sail holds just as well as its attachments hold. If you are not sure
about the stability of the structure, resp. the resistance of the at-
tachment point, you should urgently get the advice of a specialist,
resp. builder.
The required resistance of the attachment points is further depen-
dent on the size of the sunsail and the impact of wind forces. The
place and handling of the sunsail are the main decisive factors for
the mounting. (Will you be taking the sunsail down when it rains
or when it is windy? Which inclined position will the sunsail have?
Is the sunsail protected from wind or is it in an exposed position?
Is the sunsail in the open country or in front of a wall?) The impact
of wind and rain forces can vary depending on the position of the
sail. These circumstances absolutely need to be considered when
mounting the sail.
l
l
l
Advice
In the beginning give special attention to the
fully installed sunsail. Soon you will notice the
behavior in all weathers. With strong wind the
sail must be dismounted. Using Soliday security
clamps additionally heightens the safety. Infor
-
mation on page 14, resp. on www.soliday.eu
6

Mounting instruction, accessories and advice
The resilience of the attachment points is dependent on the struc-
ture. A well dowelled screw, resp. an adhesive anchor in concrete
can hold 800 kg in comparison to a simple brick wall with 100 – 150
kg (information without warranty).
An adhesive anchor is a screw, resp. a threaded rod that is adhe-
red in the wall with a special adhesive and a dowel. This kind of
attachment holds the best. Further helpful information for the pro-
per attachment on the wall of your house can be found under www.
Fischerwerke.de.
Choose the kind of attachment screws that are best suited for your
underground (concrete, Ytong, brick, wood, etc.).
If you are not sure about the durability of the structure, resp. the sta-
bility of the attachment points, you should urgently get the advice of
a specialist, resp. builder.
Beware: do not insert any screws, resp. adhesive anchors closer
than 10 cm to the end of a brick (corner of the house, window- or
door frame).
For the attachment on the wall of the house use the adapter plate,
resp. the ringbolt (only for very solid underground like concrete) –
also see accessories.
SCHRITT 4 – MONTAGE DER
BEFESTIGUNGSPUNKTE AN WÄNDEN
l
l
l
l
l
l
Advice
Does your house have a thermal insulation? Then use distance pieces
when attaching the adapter plate. These are available in any well as
-
sorted iron hardware store. Distance pieces are aluminum, resp. me
-
tal tubes that are pushed over the screws and thus ensure a strong
space between the wall and the plasterwork. Choose the length of the
distance pieces so that the attachment plate has a distance of about 1
– 2 cm from the plasterwork. This way you avoid possible abrasion and
damages on the house façade.
7
Stainless steel wall plate
For robust attachment on brickwork
measurement : 15x15 cm
distance of the holes: 11 cm
inner diameter drilling: 12,5 mm
Stainless steel wall plate 25x5 cm
distance of the holes : 6,5 / 9,0 / 6,5 cm
inner diameter drilling: 12,5 mm
Corner wall plate for internal
and external corners
measurement : 15 x 15 x 15 cm
distance of the holes : 11 cm
inner diameter drilling : 12,5 mm
Ringbolt
M8x80 mm, M8x100 mm
for a neat attachment as adhesive anchor
on walls and brickwork. Made of stain-
less steel with closed ring and cover flap
.
Wood ringbolt
8x80 mm
for attachment on walls, wood and brick-
work. Made of stainless
steel with closed ring
.

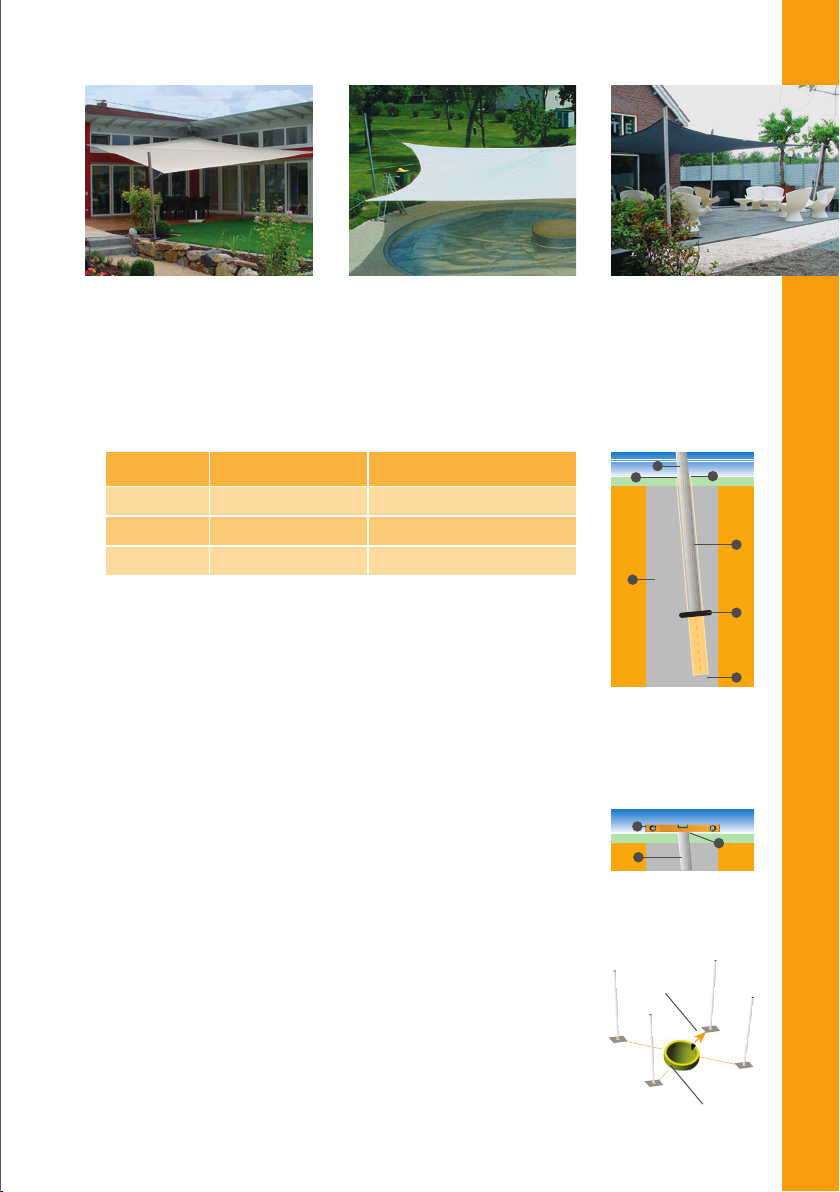
STEP 5 –
MOUNTING OF ADDITIONAL ATTACHMENT POINTS
Additional attachment points can easily be set with masts (te-
lescope mast, aluminum mast, Niro (corrosion-resistant) mast,
galvanized mast, droppole).
The masts can be set in a ground sleeve encased in concrete, bol-
ted in a fundament with a robust ground plate or attached to a wall
with brackets.
The dimensioning of the sunsail masts depends strongly on the lo-
cal occurrence. Will the sunsail be installed on a very windy place
of in an inner courtyard, will it possibly be protected by buildings,
trees or fences, is it on a rooftop terrace or in the middle of a gar-
den and is exposed to wind without protection? In any case the
dimensioning of the mast should be chosen large enough, resp.
additionally anchor the masts.
The sunsail must be removed with strong winds/storm.
For security you can install the security clamp, also see page 14
Depending on local occurrence and wind vulnerability it is recom-
mended to additionally anchor the masts with a tightrope.
Depending on wind vulnerability, angle of inclination and size
of the sunsail, the masts need to be additionally anchored with
strong rope, resp. tightrope if necessary.
l
l
l
l
l
l
Possibilities to stiffen the mounting
Droppole Stainless steel Aluminium
Possibilities to stiffen the mounting
Mast anchoring set consisting of:
· Ringbolt … for alu- and niro
(corrosion resistant) masts
· Stainless steel wire rope with
one-sided pressed-on eye terminal
· Wire rope turnbuckle with
stainless steel closed sleeve<<
· 2 pcs wire rope clips and thimble
Further accessories for telescope mast
Aluminum ground sleeve to set in
concrete
Steel ground plate, galvanized
and powder-coated
Stainless steel wall brackets for
attachment on walls (2 pcs)
200 cm
Extendable to 350 m
anchor mast with
a tightrope
1
1 2 3
2
3
Telescope mast
• Made of aluminum
• Individually adjustable mast height
from 200 cm to 350 cm
• Integrated gliding carriage for a
practical height adjustment of the
sunsail from 0 to 350 cm
• Integrated eyelet for anchoring
mast
8
Telescope mast
• Made of aluminum
• Individually adjustable mast height
from 200 cm to 350 cm
• Integrated gliding carriage for a
practical height adjustment of the
sunsail from 0 to 350 cm
• Integrated eyelet for anchoring
mast
1. Embed the fundament. The chart shows you guidelines for the
size of the fundament. Dig at least 80 cm deep because of
frost protection.
2. Place a layer of gravel of about 10 cm.
3. The ground sleeve is already sloped in an inclination of 10°
on the upper side (ground level) and marked with a notch.
4. Insert the included twist anchor (metal mandrel) into the
bore intended for this use at the lower end of the ground sleeve.
Nowplacethe ground sleeveinto thegravel. Thus, thecondensation
water and the rain water can drain into the ground.
5. Position the ground sleeve properly:
a) the ground sleeve must be positioned so that the notch shows
in the direction of the diagonally opposing attachment points
(mast, wall plate, etc.).
b) The diagonal upper side already provides the 10° inclination.
Put the spirit level on the upper side of the ground sleeve and
position it horizontally. Beware! Take care of the electricity supply
with Soliday C systems!
6. Mix concrete according to manufacturer instructions.
Fill in the cement from above into the fundament up to about 20
cm under the ground level.
7. Compress the cement and let it harden according to manufacturer
instructions.
8. Place the fundament, possibly an earth- and lawn layer, and cover
the ground sleeve, so that no contamination gets into the ground
sleeve.
Mounting instruction, accessories and advice
INSTRUCTION FOR GROUND FUNDAMENTS
WITH SOLIDAY GROUND SLEEVE
l
l
l
l
l
l
l
l
9
SAIL LENGTH & WIDTH DEPTH
– 20 m240 x 40 cm
– 30 m2
– 60 m2
50 x 50 cm
80 x 80 cm
80 cm
120 cm
100 cm
13
4
5
6
7
1. Mast
2. Locking screw
3. Notch
4. Ground sleeve
5. Concrete
6. Metal mandrel
7. Gravel
1
2
3
1. Spirit level
2. Notch
3. Ground sleeve
Positioning
notch
Locking screw
2

architektur design form
STEP 6 –
SUNSAIL ATTACHMENT TYPES
Lay down your sail loosely on the ground between the determined
attachment points.
Begin with the first sunsail corner and attach it with your chosen at-
tachment device. (The tensioning device still must be loose). Proceed
in the same way with each sunsail corner. Make sure that the sunsail
is in the middle of the attachment points. Small direction discrepan-
cies can very quickly lead to wrinkling.
Optional professional accessories can be found in our Soliday shop
www.soliday.eu
l
Design advice
When the attachment points
are on different levels (height
difference: 0,5 – 3m) the
concave modern lines and
clear forms of the interior de-
sign elements “Sunsail” are
brought to the fore.
So that a Soliday sunsail obtains its shape, it is necessary to optimally
tension the sunsail between the attachment points.
The classic Soliday sunsail has a concave cutting of the side edges and
is delivered with an integrated belt strap. On the sunsail corners there
are belt strap loops, resp. D-rings. The sunsails are manufactured in
such a way, that they show the ordered measurements (up to max. 4%)
in the finished tensioned condition. A sail is measured from the outer-
most point of the corner and delivered. (Belt strap loop to belt strap
loop, resp. D-ring to D-ring). The concavely manufactured side edges
grant an optimal tensioning of the sunsail.
BEWARE
If the sail is additionally planned as weather protection, resp. for long
term use, pay attention to the sail inclination of at least 15 degrees.
Rainwater must be able to drain off. Pay attention that no water bulges
can form – the sail can be damaged permanently. (To be considered with
the Soliday sunsail made of the material Austronet as well.)
FOR CHECKING PURPOSES
Squirt water with a garden hose onto the sunsail and check the optimal
water drainage.
l
l
Min. 10%
distance of the
side length
Min. 10%
distance of the
side length
10
Mounting instruction, accessories and advice
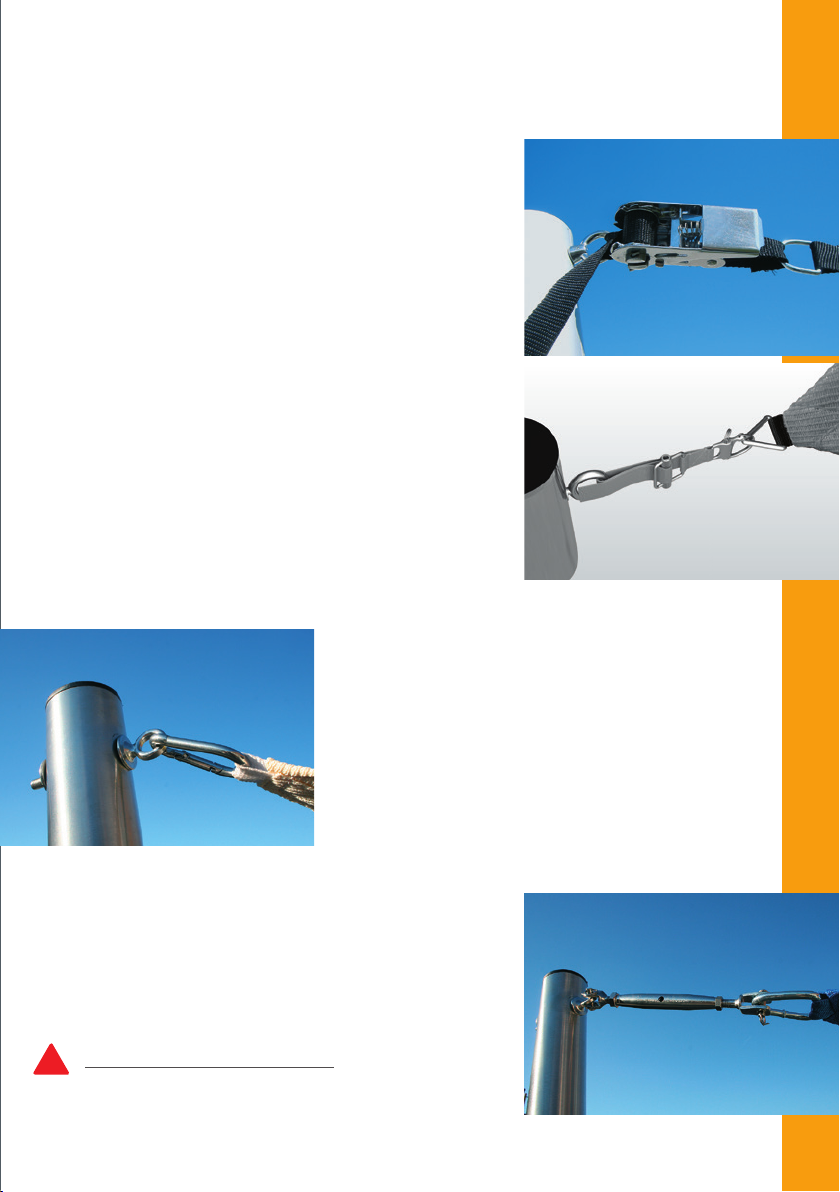
The easiest clamping device: stainless steel ratchet strap
As mounting aid, resp. as fixed tensioning aid you can use
a strap ratchet. Hinge it into the attachment point, resp.
around the mast on the one hand and then into the sunsail
corner on the other hand. Now you can easily and comfor-
tably tension the sunsail and fixate it with your choice of
attachment accessories or leave the strap ratchet in use.
The Soliday strap ratchet is made of high quality PES web-
bing and a stainless-steel ratchet, suitable for long-term
outside use.
Beware: The sail may not be tensioned over its capacity. Da-
mages of this kind are outside of the product liability.
Very simple tensioning device. Due to the additionally inte-
grated security shackle the sail can be easily and quickly
taken down if sudden gusts of wind occur.
ASSISTANCE FOR TENSIONING THE SUNSAIL
TENSIONING STRAP WITH SECURITY SHACKLE
This kind of attachment can be used, depending on cut-
ting and shape of the sail, only at one, resp. max. two at-
tachment points, if the geometry of the sail is not distur-
bed. This is immediately obvious in the wrinkling of the
sunsail. To have a crease-free, nicely tensioned sunsail, it
must be tensioned in the middle between the attachment
points. Stainless steel carbine: length: 7 cm.
RIGID ATTACHMENT: WITH A
STAINLESS-STEEL CARBINE
High quality design thread turnbuckle made of stainless
steel with closed sleeve.
M6 – fork/fork: 140 – 202 mm; tensioning distance: 62 mm
M10 – fork/fork: 196 – 280 mm; tensioning distance: 84 mm
M8 – hook/hook: 196 – 280 mm; tensioning distance: 84 mm
Distance attachment point – sunsail
When planning, resp. for the measurement specifications
of the sunsail consider that there must be a distance from
mast/wall to sunsail of at least 20 – 30 cm!
TENSIONING DEVICE: THREAD TURNBUCKLE
11
!

Simple and very effective tensioning of a sunsail that can be detached
anytime. Beware: for security reasons the rope must be additionally se-
cured with a half pelt, resp. with a knot after the clamp. Distance attach-
ment point – sunsail: over 6 cm – a couple of meters.
TENSIONING DEVICE:
WITH A 6 MM PES ROPE AND
A PROFESSIONAL TENSIONER
The clamp for a consistently detachable 6 mm rope eye. It is small, easy and quick to operate
without tools. Sharky is made of UV resistant synthetic with a high amount of glass fiber, hence
no corrosion. (Breaking load 600 kg). Even with wet rigging and after high strain Sharky is con-
sistently easy to open, resp. to adjust. A clean elegant solution for the attachment of the sunsail
using a rope.
Application: in combination with a professional rope tensioner; easy rope tensioning or with a
pulley and a security clamp.
FIXED CONNECTION: “SHARKY” THE QUICK RIGGING CLAMP
Elastic, individual and
strength conserving!
The quickly detachable connec-
tion can individually be mounted
in length and clamping force.
Minimum distance from mast/
wall to sail: 20 – 30 cm
TENSIONING DE-
VICE WITH A 6 MM
RUBBER ROPE
12

Mounting instruction, accessories and advice
With Soliday accessories your sails are flexible
FLEXIBLE SHADE WITH HEIGHT ADJUST-
MENT BY MEANS OF A GUIDE RAIL &
SECURITY CLAMP
Who doesn´t know the problem of constantly wandering shade?
The parasol is heaved in regular intervals around the sitting area.
No later than 15.30 the shade of the marquee is sticking to the
wall and isn´t where it should be.
With the 1,5 m long guide rail each sunsail can be variably and
flexibly adjusted - large scale shade that can be individually ad-
justed equitable to the time of day.
Additionally, you have sight protection and glare protection from
the evening sun. The inclination can be shifted during bad wea-
ther and the sunsail can be used as weather protection (at least
15° inclination, absolutely check and make sure that no water po-
ckets form).
Planning a sliding rail
First, you must determine where and at what time of the day you
need shade and where an inclination of the sunsail makes sense
for you. Ideally the guide rail is mounted in the west. This way
the shade can be optimally adjusted in the later afternoon and
evening.
Operation
On the high-quality guide rail there is a smooth-running sliding
carriage with a pulley. The sliding carriage can easily be adjusted
variably with a hand movement on a length of 1,5 m. Under the
sliding rail the 6 mm rope is wedged in with a Soliday security
clamp.
Beware
When mounting a sunsail with a Soliday security clamp make sure
not to use any D-rings, resp. carbines, wire rope tensioners or any
other hard objects on that corner. These must be removed in any
case. The sunsail corner is merely knotted with a 6 mm rope, resp.
wedged in with a Sharky rope clip and the rope in the security
clamp. Any kind of metal or hard object on this corner of the sail
can become a dangerous flying object with a sail flattering in the
wind and can damage objects and injure people.
Depending on the inclination, resp. positioning of the sunsail dif-
ferent tensioning conditions can occur with the height adjustment
on the side edges, that means the edges of the sunsail can pos-
sibly show a varying sagging.
13
1
2
With conventional awning
Shade after 15.00
Not adjustable.
With Soliday sunsail
Shade freely adjustable
with the Soliday height
adjustment
Abfluß Regen
Beware
Wrinkles can emerge when adjusting the inclination.
!

SPANNVORRICHTUNG:
MIT EINEM 6mm BZW. 4mm PES SEIL UND EINEM PROFISEILSPANNER
Einfache und sehr effektive Verspannung eines Sonnensegels, die jederzeit wieder lösbar ist.
Achtung: Zur Sicherheit muß nach der Klemme das Seil zusätzlich mit einem halben Schlag
bzw. mit einem Knoten nochmals gesichert werden.
The Soliday security clamp is an additional
protection for overload by strong wind or
rain, etc. It can be installed at one or many at-
tachment points. It is a rope clamp for a 4 – 6
mm professional rope with slight expansion,
which is attached to the sail led over a pulley.
Easy handling
The sail can be operated quickly and easily.
With strong wind the sail can be relieved by
hand, resp. be tensioned again afterwards.
The Soliday security clamp is continuously
adjustable and can be adapted to the requi-
rements at hand. The security clamp is exclu-
sively intended as predetermined breaking
point in an emergency. You must regularly
check its functional efficiency. The general
safety and operating conditions for sunsails
are valid despite the use of a Soliday security
clamp and should implicitly be followed.
Beware -important!
On the sunsail corner, where the auto-release
clamp is installed, the sunsail may have no D-
ring, resp. needs to be removed!
Hard objects that are under a freely fluttering
Soliday sunsail can lead to substantial inju-
ries and material damages.
THE SOLIDAY SECURITY
CLAMP – IN THE WORST CASE
14
THE PROPER CARE AND MAINTENANCE
OF YOUR SOLIDAY SUNSAIL
The material of the sunsail is, opposing to an awning, outside and
unprotected in any wind or weather condition. Therefore, the ma-
terial is exposed to a much higher strain. The utilized materials
at Soliday are selected according to stringent rules and functional
requirement profiles. Our materials are technical knittings and fa-
brics with the best requirements for sun protection. Still you must
pay attention to the appropriate treatment and care.
Material- & care notes
CARE/SERVICE/WINTERING & MAINTENANCE
FOR A LONG LIFE OF YOUR SUNSAIL
Remove the attachment devices carefully from the sail to avoid
damages.
Clean the sunsail thoroughly before dismounting. Pay attention
that no soiling like leaves, tree sprees, bird droppings, etc. are
on the sail.
Roll up the sunsail in dry condition and stow in a dry UV - light
protected place. This way you can avoid possible material disco-
loration, mold formation, wrinkling and unpleasant smell.
Check your sunsail regularly before each application for possi-
ble wear marks.
Avoid overstretching the material through water bags, hail or
snow loads. This can lead to lasting overstretching of the ma-
terial.
Beware: water bag = total write-off
l
l
l
l
l
MATERIAL & CARE INDICATION FOR SUNSAILS
MADE OF AUSTRONET MATERIAL (KNITTING)
Austronet is a very easy to clean and robust fabric. It is made
of environmentally friendly, highly tearproof HDPE Hostalen
strip bands and convinces with its high shadowing value and
light surface weight. Austronet is a wind – and air permea-
ble material – no heat accumulation under the sail. The materi-
al Austronet is very easy to clean. Just clean with water, resp. a
mild detergent up to 30°C and a soft brush, then rinse with the
garden hose. Using certain chemicals, such as chlorine, can
lead to premature disintegration. DO NOT put the fabric into
the washing machine or tumble dryer and do NOT scrub the fa-
bric with a hard brush, a scouring sponge or abrasive cleaners.
15
!

SPANNVORRICHTUNG:
MIT EINEM 6mm BZW. 4mm PES SEIL UND EINEM PROFISEILSPANNER
Einfache und sehr effektive Verspannung eines Sonnensegels, die jederzeit wieder lösbar ist.
Achtung: Zur Sicherheit muß nach der Klemme das Seil zusätzlich mit einem halben Schlag
bzw. mit einem Knoten nochmals gesichert werden.
Wash Austronet fabrics with liquid detergent (soap,
washing-up liquid) blended with water.
Soap solution: about 5%
Water temperature: about 30° C
Austronet fabrics can also be cleaned using a soft brush
Remove dust periodically
Cleaning with a high-pressure cleaner can be done from a
distance of about 1 m. The sail cloth must be laid down on
the ground (beware: otherwise bulges emerge).
If the sail is hung up to clean, you risk getting bulges in the
Austronet fabric.
It depends on the environmental influences (traffic, air
pollution, industry exhaust gases etc.) if it is necessary to
clean or not.
It is recommendable to clean regularly, depending on the
degree of soiling
If the sunsail is only cleaned after many years of imple-
menting, a new condition cannot be reached.
QUICK GUIDE, INDICATIONS AND CARE
RECOMMENDATION FOR
AUSTRONET FABRICS
l
l
l
l
l
l
l
l
l
l
MATERIAL- & CARE INDICATION FOR
SUNSAILS MADE OF
AUSTROSAIL FABRICS
Austrosail fabrics are high quality water-repellent coated tex-
tiles. These cloths stand out with their noble textile character,
good shadowing values and good outdoor capacities. They
stay resistant to rain when well cared for and when inclined
during a short light rainfall. With longer rain and stronger
wind, the sailcloth must be pulled in, resp. hung off to avoid
damages, resp. bulges.
Austrosail fabrics have special dirt repellent coating and are
water repellent. Suitable care products can also be found in
our internet shop under www.soliday.eu.
The cloths may not be exposed to strong mechanical use.
Using certain chemicals, for instance chlorine can lead to
premature decomposition, as the equipment of the Austrosa-
il fabrics could be affected. Do NOT put the fabrics into the
washing machine or in the tumble dryer and do NOT scrub with
a hard brush, a scouring sponge or a scouring detergent, as
the equipment of the Austrosail fabric could be affected.
AUSTROSAIL SAIL CLOTHS
ARE TAILORED SEWN
Which means you have the se-
curity of a water-resistant fa-
bric. Water can of course get
through by the seam. (Depen-
ding on the water column.)
There are limits to technolo-
gy. Under circumstances it
can happen that small dashes
of color, resp. weaving flaws
occur. From our present point
of view these causes cannot
be solved due to product
technical reasons. This does
not count as objection, resp.
reason for complaint.
16
MATERIAL- & CARE INDICATION FOR
SUNSAILS MADE OF
AUSTROSAIL FABRICS
Material- & care notes
QUICK GUIDE & INDICATION
CARE RECOMMENDATION FOR
AUSTROSAIL CLOTHS
Please be very careful with all cleaning procedures.
Soap solution: about 5 %, resp. special cleansing products can
also be found in our internet shop.
Temperature of water: about 10 – 20° C
You can also clean Austrosail cloths from dried and superficial
dirt using a soft brush.
Dust should periodically be removed.
Contamination like foliage or similar dirtying should be removed
immediately (protection from microbial infestation).
Single greasy or dirty strips are best removed with an eraser.
Persistent spots can be washed off the Austrosail fabric with
customary, preferably liquid detergent resolved in water. Then
rinse thoroughly with cold water. If necessary, post treat with
special impregnation product.
Damp parts need to be dry before pulling in the sail.
Special care products can be found in our internet shop under
wws.soliday.eu
If cleaning is necessary or not, depends on the influence of the
environment (traffic, air pollution, industrial exhaust gas, etc.).
Depending on the degree of soiling it is recommended to clean
regularly.
If the sail cloth is only cleaned after years of implementing a
new condition cannot be obtained.
Austrosail fabrics are equipped with a special impregnation
that diminishes with each cleansing.
l
l
l
l
l
l
l
l
l
l
l
l
l
l
YOUR SUNSAIL FABRIC IS
NOT MENTIONED HERE?
As innovative pioneers for sunsails Soliday constantly tests
new sunscreen fabrics with even better characteristics. Should
your Soliday fabric not be mentioned here, you can find the cur-
rent material- service- and care indications in the internet under
www.soliday.eu/Segeltuch
17
SPANNVORRICHTUNG:
MIT EINEM 6mm BZW. 4mm PES SEIL UND EINEM PROFISEILSPANNER
Einfache und sehr effektive Verspannung eines Sonnensegels, die jederzeit wieder lösbar ist.
Achtung: Zur Sicherheit muß nach der Klemme das Seil zusätzlich mit einem halben Schlag
bzw. mit einem Knoten nochmals gesichert werden.
Stainless steel is corrosion-resistant. A certain amount of care
needs to be taken of stainless steel surfaces, so that a good vi-
sual appearance is preserved, and deposits are removed, that
could affect the corrosion-resistance under circumstances.
With outdoor application ensure with regular cleaning that
no deposits can occur due to air pollution. Cleaning is impor-
tant especially on coasts, close to frequented roads, close to
swimming pools with chlorine in the water, in industrial atmo-
spheres – where ever a concentration of chlorides and Sulphur
dioxide can be found. Injuries of the stainless-steel coating
through sharp objects like tools, knives, etc. are also harmful.
These kinds of deposits and mechanical injuries can pene-
trate the passive protection coating of the stainless steel and
lead to a punctiform corrosion phenomena. With the brushed
and smoothened surfaces fingerprints are the beginning phe-
nomenon. After a couple of cleaning rounds with conventio-
nal stainless-steel detergents (available in any super-, resp.
construction market) the corrosion protection and the nice
stainless-steel look is reproduced.
MATERIAL & CARE INDICATIONS
FOR STAINLESS STEEL MASTS
Care & cleaning advice
For the care and cleaning of stainless steel use a conventional de-
tergent that can be found in any supermarket of your choice. After
cleaning use a care oil (available in any construction market) –
about 3 times yearly. This way you are sure of perfect cleaning,
caring and look of your Soliday sail mast.
MATERIAL & CARE INDICATIONS
FOR ALUMINUM MASTS
Staub, Flecken und leichte Verschmutzungen entfernen Sie
ganz einfach mit lauwarmem Wasser. Hartnäckige Schmutz-
stellen lösen sich leicht, wenn Sie einige Spritzer eines her-
kömmlichen Reinigungsmittels ins Wasser geben. Vermeiden
Sie in jedem Fall eine trockene Reinigung – dabei können
Kratzer auf der Oberfläche entstehen. Zusätzlich gibt es noch
Eloxalreiniger, die dem Aluminium seinen matten Schimmer
wieder geben und gleichzeitig die Oberfläche konservieren.
18
Questions that might arise after the purchase
1. YOUR SUNSAIL MEASUREMENT IS NOT IN
ACCORDANCE TO THE ORDERED MEASUREMENT?
You received your sunsail and the sunsail looks much smaller than
when you ordered it?
In order for the sunsail to keep its shape it is necessary to optimal-
ly tension the sunsail between the attachment points. Consider
that a sunsail is made of textile fabric and every sailcloth is stret-
ched under tension. A Soliday sunsail is cut and manufactured in
such a way, that even after many years of hard outdoor use it keeps
its shape. In order for this to be achieved, the sunsail has to be
re-tensioned every once in a while. Soliday already includes this
coefficient of expansion in the calculation. That means that upon
delivery the sunsail, depending on the fabric, can show up to mi-
nus 4 % of the original edge length. All Soliday sunsails are provi-
ded with a concave cut to achieve a perfect form with a minimum of
sagging. When tensioning the sail these concave lines are pulled
into straight lines to achieve the optimal form of the sail. During
this process the sail edges become longer again. Additionally, you
need space for the sail tensioning, resp. mounting between sail tip
and attachment point.
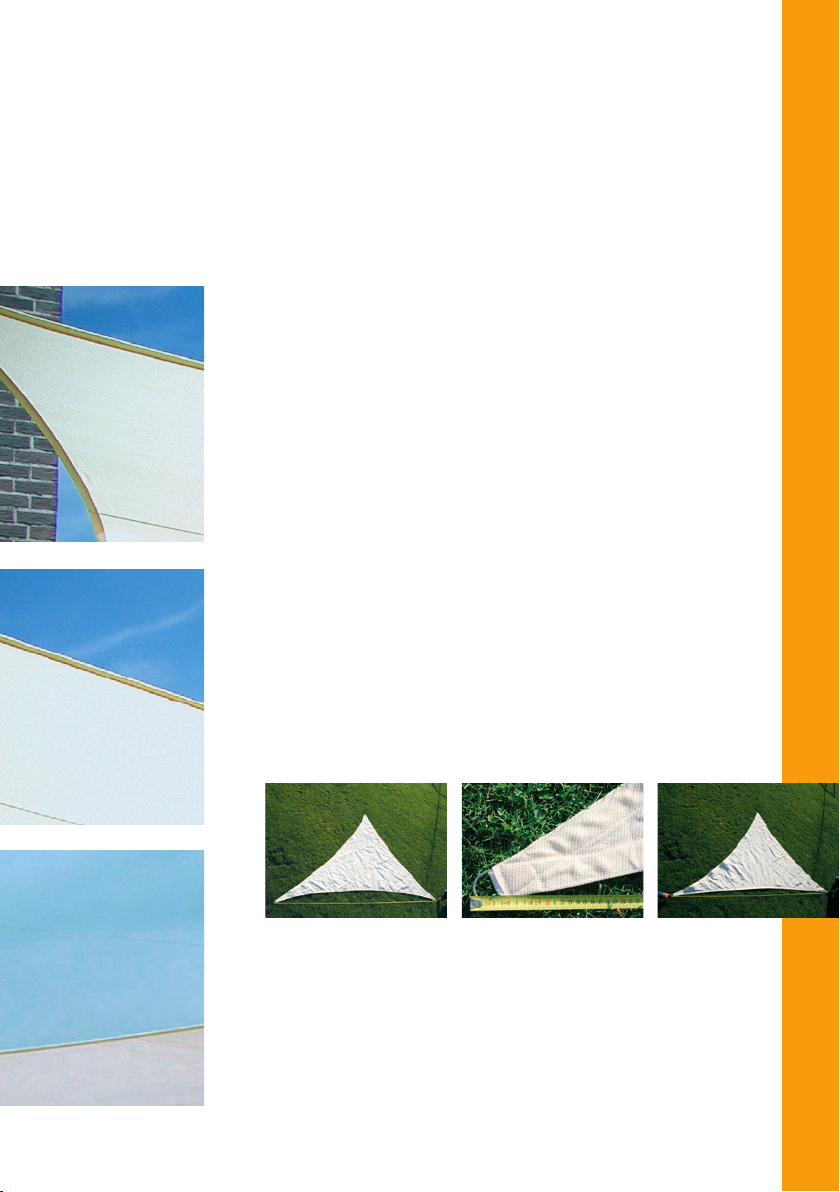
2. MEASURING METHOD TO VERIFY
THE MEASUREMENT OF THE SAIL
Spread the sail loosely… The sunsail is measured
beginning from the outermost
point of the corner. This point
serves as attachment point
of the sail, resp. for further
attachment accessories.
Then the side
length is
tensioned and
measured under
tension. The
measuring tape
is positioned at
the outermost
point of the sail
corner- i.e. incl.
belt strap loop,
D-ring or carbine.
19
SPANNVORRICHTUNG:
MIT EINEM 6
mm
BZW. 4
mm
PES SEIL UND EINEM PROFISEILSPANNER
Einfache und sehr effektive Verspannung eines Sonnensegels, die jederzeit wieder lösbar ist.
Achtung: Zur Sicherheit muß nach der Klemme das Seil zusätzlich mit einem halben Schlag
bzw. mit einem Knoten nochmals gesichert werden.
In opposition to a wooden plate or a roof, sail cloth is a flexible ma-
terial. When tensioning the sunsail pay attention to do this exactly in
the center of all attachment points. Even small shifts of the sunsail
in one direction lead to shifts in the balance of powers in the sunsail
and are crucial facts for wrinkling, sagging or varying tension of the
sunsail edges.
Check the deflection of your masts.
Diameter, material strength and height of the masts are crucial fac-
tors for the stiffness of a mast. However, masts always yield a bit
depending on size, weight of fabric and tensioning strength of the
sunsail.
Corrective measures: if you did not measure the sunsail in pre-ten-
sioned condition of the masts, resp. too little scope was considered
for the tensioning, you can pretty easily solve this problem by clam-
ping the masts backwards by means of ropes/wire ropes and thus
giving the masts additional stability, resp. bringing them back into
the original condition.
3. DOES THE SUNSAIL WRINKLE STRON-
GLY IN TENSIONED CONDITION?
4. THE SUNSAIL IS NOT HANGING TIGHT-
LY STRETCHED BETWEEN THE MASTS.
Wrong
The sunsail is lying beyond the center
and cannot be tensioned properly.
The consequence is wrinkling.
Wrong
The consequence is wrinkling
Correct
Correct wrong solution
20
Table of contents
Popular Patio Furniture manuals by other brands


Shadowspec
Shadowspec UMBRELLAS Care & maintenance instructions

PATIOJOY
PATIOJOY HW70896 manual

Patioflare
Patioflare PF-CS314 Series Assembly instruction

Style selections
Style selections FZS71014L-A Assembly instructions

Glatz
Glatz SUN COMFORT FLEX ROOF Directions for use

Essential Garden
Essential Garden YJAUC-001 owner's manual


