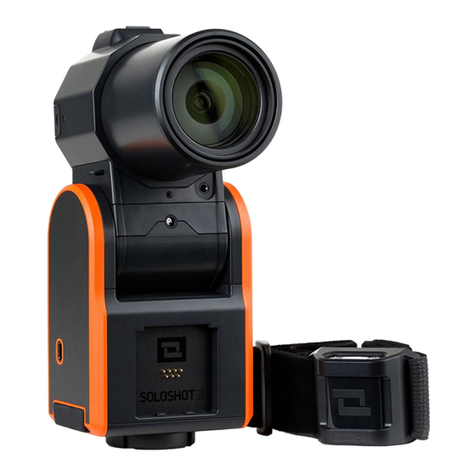
Soloshot Soloshot3 User manual

Quick Start 2-5
Track Settings 6-7
Camera Settings 8-9
Multi-Mode 10
Time Lapse 11
Interim User Manual
Confidential: For Internal Use Only

QUICK START
1. Setup Tripod
a]Connect Base to Tripod
b]Click Camera into place
Don’t forget to remove lens
cap before powering on.
Ensure Base securely
connected to Tripod
using provided tool.
Ensure Base is level. There is a small level-
ing bubble on the Tripod that will help.
Avoid setup under powerlines, in dense
Urban environments or under trees or
building overhangs. An unobstructed view
of the sky for both Tag and Base will ensure
best performance.
2. Power On
a]Power on Tag
b]Power on Base
1b
3. Launch Track App
1a
3
PRO TIPS
!
2

4. Sync Tag to Base
a]Ensure Tag has GPS lock
Typically takes a minute
or two.
c]Dock Tag into front of Base,
leave docked for 5-seconds,
then remove.
You won’t have to do this
again as your Base will
remember this Tag.
BEFORE GPS LOCK AFTER GPS LOCK
b]Select TAG MANAGER
4a 4a
4b
d]Toggle TRACKING ON for your
Tag
e]Exit TAG MANAGER and return
to TRACK APP
!
!
4d
4c 4c

5. Start Calibration
a]Press the START/SETTINGS
button
b]Press START
Successful Auto-Calibration
The Base will spin for one-minute
as it calibrates, and then snap to the
subject.
Auto-Calibration fails
It’s possible that auto-calibration
fails due to external GPS interference
in your filming environment. In this
case, proceed to the Base and follow
the prompts on the touchscreen to
complete the manual calibration.
Defaults settings
Tracking Settings TILT ON
Field of View (FOV) Medium
Framing Center
Camera Settings 1080p60
PRO TIP
After a successful calibration, move laterally and/or circle around the Base a few
times, at about 20-30 feet to ensure that the Camera’s smart tracking technology
has locked onto you.
6. Record On / Off
a]From the TAG, press and hold
the (+) BUTTON to toggle
record on/off.
b]The Base will also reflect that
recording is on.
Record ON Record OFF
!
5a
6a 6a
5b

PRO TIP
You can also pause tracking from the Tag by double-
tapping the (+) BUTTON
PRO TIP
To PAUSE TRACKING and STOP
RECORD from the Base while you’rve
filming, simply exit out of the TRACK
APP and return to the Homescreen.
Tracking ON Tracking OFF
c]To PAUSE TRACKING from
Base while you’re filming, follow
these steps:
1] Press the START SETTINGS
2] Select PAUSE
3] The Base will indicate that
tracking is paused, but
record is still on.
4] To resume tracking, press
START/SETTINGS again, and
then RESUME.
c1 c2
c3

TRACKING
1. Track Settings
a]Enter the Track App and press
START/SETTINGS BUTTON.
b]Select Tracking Settings.
c]Adjust the settings depending
on your needs. Here is a list
with the recommended settings
that should cover most
activities.
Field of View: Medium or tight
Framing: Center or bottom
middle
Trajectory: 3-secs
No need to adjust this
Tilt Mode
On
For use when filming
activities with lots of vertical
movement such as snowboard
ing, paragliding and RC flying.
This relies on auto-calibration
meaning no manual input is
required by the user.
Surf + Turf
For most use cases when
tracking a Tag on a level
surface such as team sports
or surfing. Basic manual input
is required by the user in the
form of 2 button presses.
Off
For use when locking tilt and
zoom is desired. Select this
mode and then use arrows to
manually set desired tilt and
zoom.
d] Exit Tracking Settings.
!
!
PRO TIPS
You can change Track Settings at any time.
Use Surf + Turf in areas that do not have elevation changes, meaning on a level
playing field.
1a 1b
Off Off

How to setup in Surf + Turf Mode:
1. Sync your Tag to the Base, Repeating Step 4 in the Quick Start section
on page 3, and toggle tracking on for your Tag.
2. Press START/SETTINGS and then START
3. When prompted, about 3-seconds, place Tag over Base and press
(+) BUTTON.
4. Proceed to the level at which you’ll be performing your activity, ensure that
you’re centered in front of the Camera and press (+) BUTTON again.
You must be at least 20 ft. from the Base when doing the second button press.
5. Calibration in Surf + Turf mode is now complete.
NOTES
The LED light on front of Base will go from a rapid blinking to a slow and steady
blink when calibration is complete.
Use the LED on front of Base to center yourself in front of Camera. The LED is
brightest when directly facing the Base/Camera.
PRO TIP
You can use the arrows and zoom
buttons–mentioned above under
TILT MODE OFF–to manually adjust
the position of subject in the
viewfinder.
!
!
!

CAMERA SETTINGS
1. Video Mode
a) To adjust record resolution, go
to the TRACK APP and select
CAMERA SETTINGS
b) By default, the Camera is in
VIDEO MODE and set to
1080p60. Select RESOLUTION
and choose your new
resolution.
c) c) Then exit out of CAMERA
SETTINGS. You’ll need to
resume tracking and recording
by pressing the START
BUTTON.
It may be confusing, but the
START BUTTON is displayed
as a “pause” icon.
2. Single Photo Mode
a) To switch to Photo Mode, go
to the TRACK APP and select
CAMERA SETTINGS
b) Select PHOTO MODE
c) The Photo Mode Settings
will appear. From this menu,
you’ll be able to adjust the
PHOTO MODE - Single or Burst
- and the DELAY time from
when you trigger the shutter.
d) To trigger a single photo,
press the (+) BUTTON on Tag,
and the Camera will take a
12MP still image.
1a
1c
1b
!
2a 2b
2c
Optic65 Resolution Options
4k @ 30 fps
2.7k @ 30 fps
1080p @ 30, 60, 120 fps
720p @ 240 fps
(future firmware update)

3. Burst Photo Mode
a) To take multiple (burst)
photos, adjust the Photo Mode
to BURST.
b) The Burst Photo Mode Settings
will appear. From this menu,
you’ll be able to adjust the
Burst Rate and Delay.
c) To trigger photo bursts, press
the (+) BUTTON on Tag and the
Camera will rapid fire based on
your settings.
3a 3a
3b

MULTI MODE
1. Sync New Tags
Sync the additional Tag(s) to the
Base, Repeating Step 4 in the
Quick Start section on page 3,
and toggle tracking on for each.
The TAG MANAGER is accessible
via the TRACK APP or the Tag
MANAGER APP.
2. Toggle Tracking On
Each new Tag will now be
visible in the TAG MANAGER.
Toggle tracking on for each
Tag you’d like to follow/track.
3. Select Follow Mode
Enter Multi-Mode by selecting
an option under FOLLOW MODE:
Closest to Base
Fastest moving Tag
Button Press to call Camera/Base
!
1
23

TIME LAPSE
1. Launch Time-Lapse App
Launch the TIME-LAPSE APP
from the Homescreen and follow
the prompts.
2. Select Settings
Select your preferred settings:
Interval: Time interval to take each
photo (IE: a 1 second interval is
1 photo every second)
Number of frames: Total
number of images to be taken
(IE: 300 frames or images)
Elapsed Time: Time it will take
to complete the time lapse
(IE: 300 frames shot every
1 second is 300 seconds, or
5 minutes)
3. Set Start Point
Use the ARROWS and ZOOM
BUTTONS to select a starting
point for your time-lapse.
Once desired zoom level is set
at START point, it cannot be
adjusted when selecting your
END point.
4. Set End Point
5. Start Time-Lapse
!
1
2
3 4
5

FCC 15.21 statement:
This device complies with Part 15 of the FCC rules. Its operation is subject to
the following two conditions:
(1) This device may not cause harmful interference, and
(2) this device must accept any interference received, including interference
that may cause undesired operation.
Changes or modifications not expressly approved by H4 Engineering Inc, dba
Soloshot Inc would void the user’s authority to operate this produce.
FCC 15.105 statement
Note: This equipment has been tested and found to comply with the limits for
a Class B digital device, pursuant to part 15 of the FCC Rules. These limits are
designed to provide reasonable protection against harmful interference in a
residential installation. This equipment generates, uses and can radiate radio
frequency energy and, if not installed and used in accordance with the instruc-
tions, may cause harmful interference to radio communications. However, there
is no guarantee that interference will not occur in a particular installation. If
this equipment does cause harmful interference to radio or television recep-
tion, which can be determined by turning the equipment off and on, the user is
encouraged to try to correct the interference by one or more of the following
measures:
- Reorient or relocate the receiving antenna.
- Increase the separation between the equipment and receiver.
- Connect the equipment into an outlet on a circuit different from that to which
the receiver is connected.
- Consult the dealer or an experienced radio/TV technician for help.
RSS-GEN statement
This product complies with Industry Canada IC: RSS-210
IC NOTICE
This device complies with Industry Canada license-exempt RSS standard(s).
Operation is subject to the following 2 conditions
(1) This device may not cause interference, and
(2) This device must accept any interference, including interference that may
cause undesired operation of the device.
Cet appareil est conforme avec Industrie Canada, exempts de licence standard
RSS (s). Son fonctionnement est soumis aux deux conditions suivantes:
1) ce dispositif ne peut pas causer d’interférences, et
2) ce dispositif doit accepter toute interférence, y compris les interférences qui
peuvent causer un mauvais fonctionnement de l’appareil.
Other manuals for Soloshot3
1
Table of contents
Other Soloshot Digital Camera manuals
Popular Digital Camera manuals by other brands
Canon
Canon EOS Rebel SL1/100D manual
Panasonic
Panasonic DMCFX700 - DIGITAL STILL CAMERA Instrucciones básicas de funcionamiento
FujiFilm
FujiFilm FinePix S1500 owner's manual

FujiFilm
FujiFilm FINEPIX A205 Brochure & specs
Olympus
Olympus Stylus m790SW instruction manual
TVB Tech
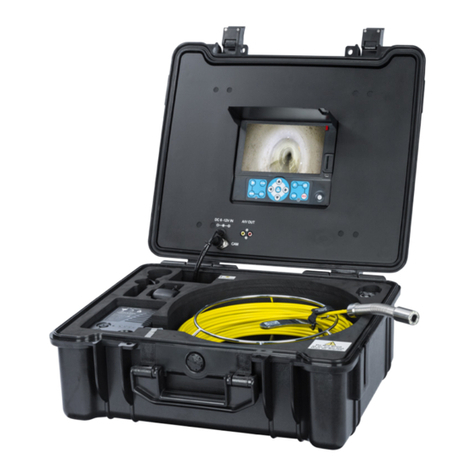
TVB Tech 3199F-23 Operation manual
