Soltec Lounge User manual
HEALTH
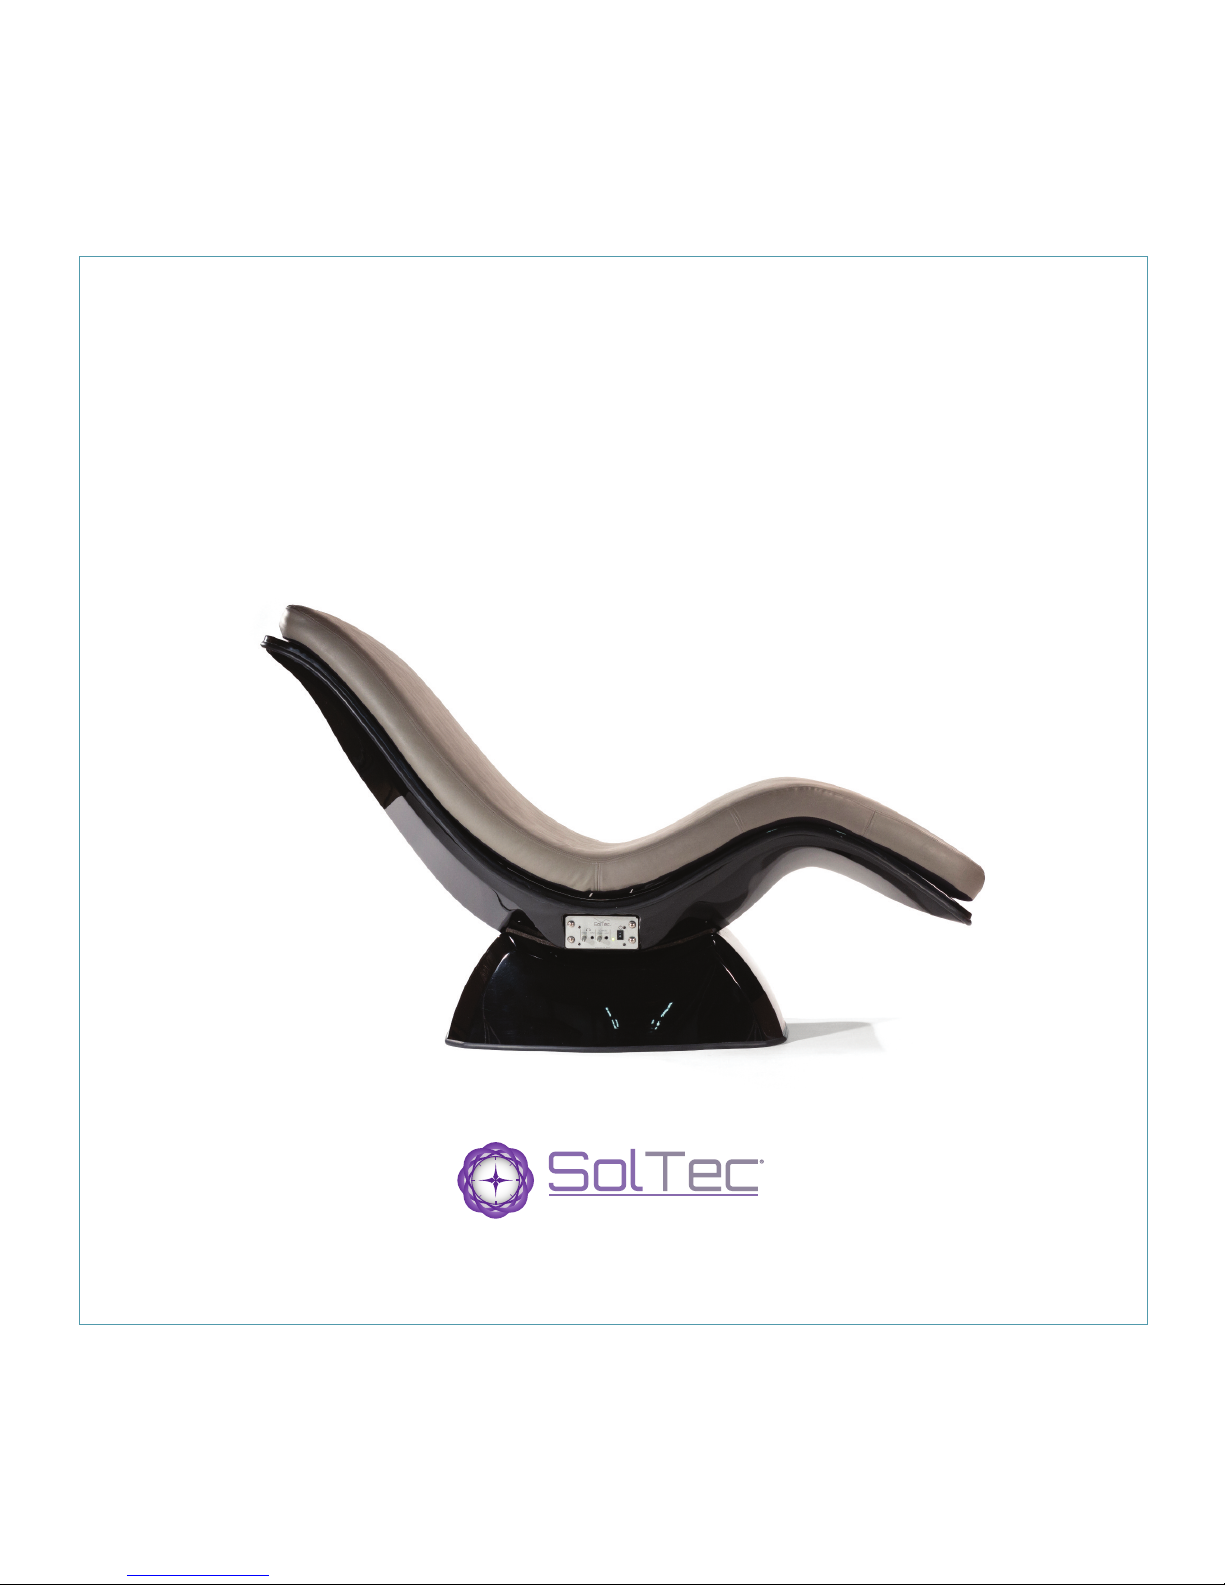
SolTec®Lounge
SolTecHealth.com
USERS’ GUIDE

MEDITATION
Table of Contents
Page 1 Letter from CEO, Dr. Dan Cohen
Pages 2 - Contents of the Box
Pages 5 - 9 Asssembly Instructions
Pages 10 - 15 Operating Instructions
Pages 16 - 17 Music Input and
Connection Options

MADE EASY
Welcome to creativity and calm!
A quiet setting, a comfortable position, an open attitude—you are a mere three
steps from tranquility. So sit back, quiet your mind, and allow the innovative ideas
buried within you to unravel.
Studies show that even brief meditative respites from a hectic life can reduce
stress, boost creativity, increase focus, and improve job satisfaction.
It’s no wonder innovative workplaces such as Walt Disney, Google, and Intel
regularly fold meditation sessions into their employees’ work days.
So, welcome to the calm. Sit back and let your mind do what it is meant to do.
It will thank you.

The tranquility you crave
is already within you; you just
need to find ways to access it.

HEALTH
“Thank you very much for purchasing the SolTec®Lounge.
My dream since adolescence was to understand the
mind/brain relationship and determine for myself if my
mind was more than just the workings of my brain. I
wanted to know if we indeed did have a spiritual aspect
to ourselves or what some would call a higher mind. I
became a meditator early on without success after years
of meditation. I also went to medical school and ultimately
became a neurologist, again in the hope of furthering my
understanding. It was only after developing and using the
technology in the SolTec Lounge that I found what I was
looking for.
Many people purchase the SolTec Lounge for stress reduction or to solve a medical or
emotional issue. I think those folks have made a wise choice and if they use the lounge
regularly they are very likely to be successful. I tell them, when they do a session, the
fastest way to heal is to simply let go. They ask, “Let go of what?” My response is, “Let go
of everything you think you know and believe, everything in your head and simply feel
your body. Whenever a thought comes to mind, stop and direct your attention to your
body and just feel with an open mind and an open heart.” If you do this one simple thing
every time you do a session you will make excellent progress. I wish you well on your
journey and I hope you find what you are looking for.”
Dr. Dan Cohen
DAN COHEN
Chairman and CEO
1

Assembly Instructions
Think - inside
the box
Please read all instructions before assembling to ensure proper functioning.
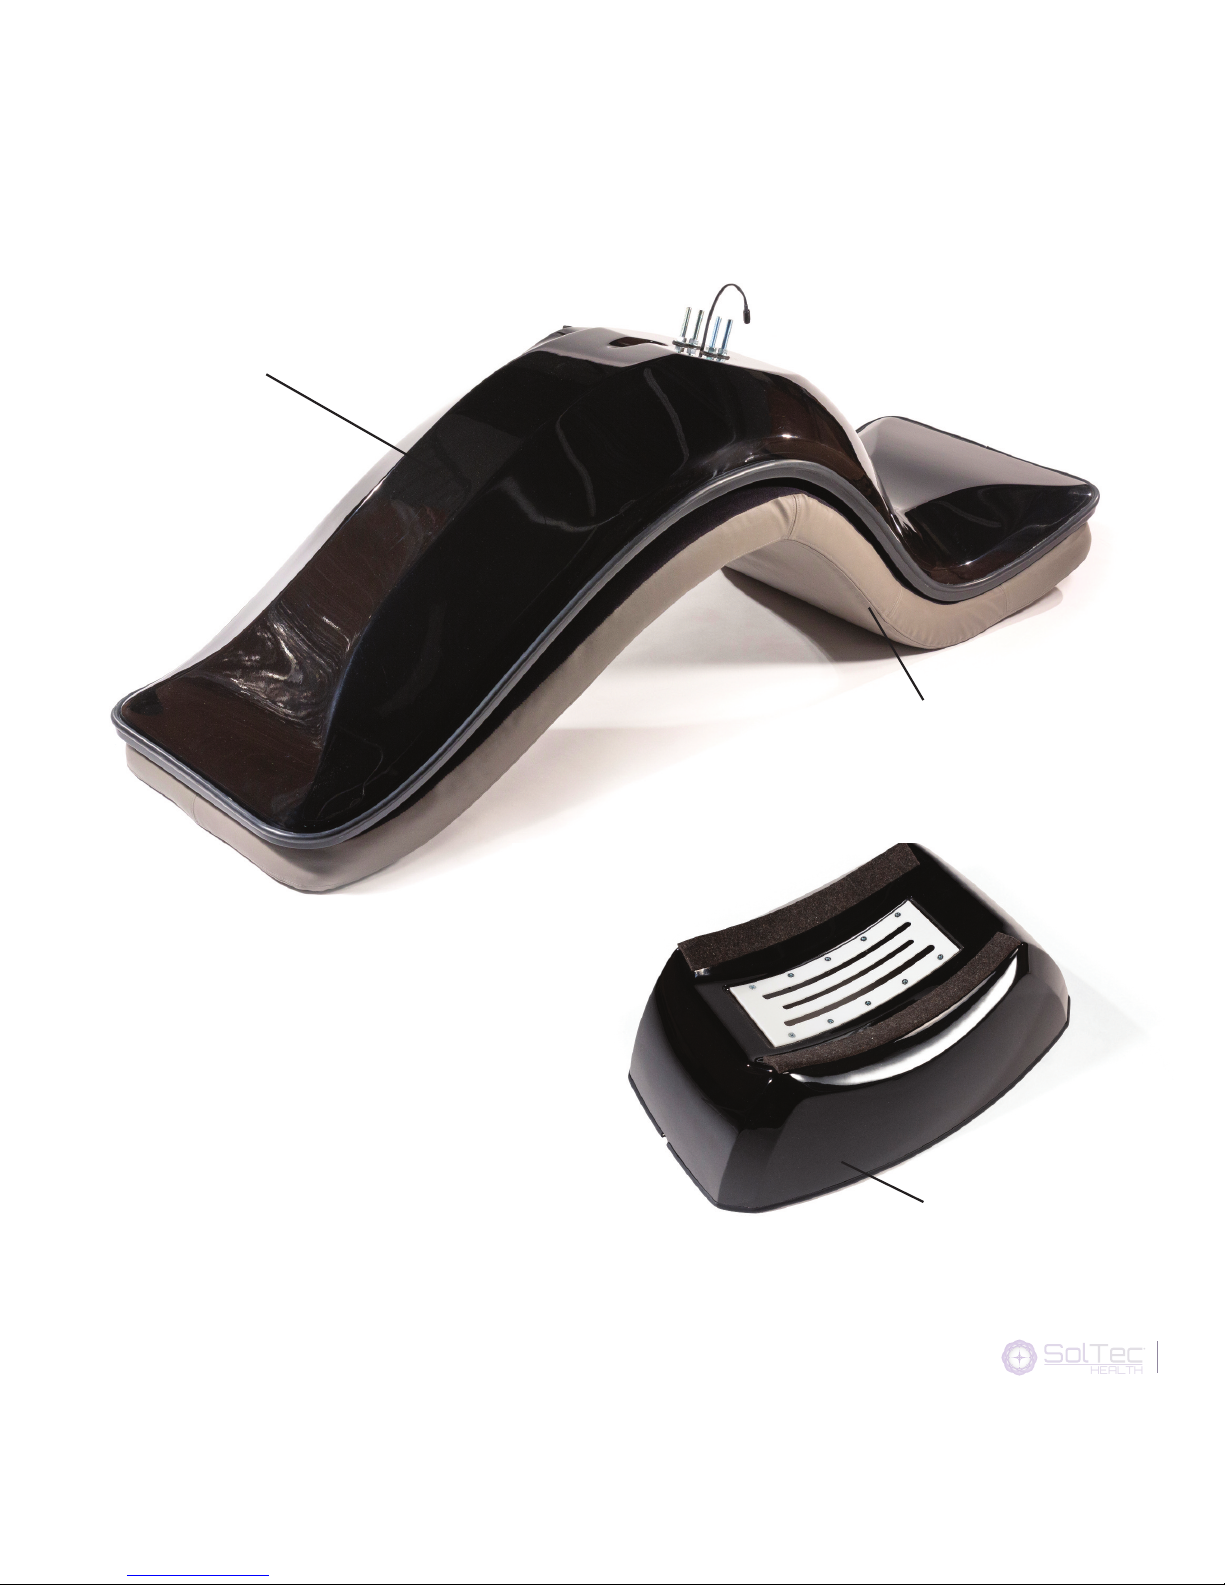
Seat Base Lounge component box
Step 1: Remove the contents of the carton. The contents include the following:
HEALTH
2
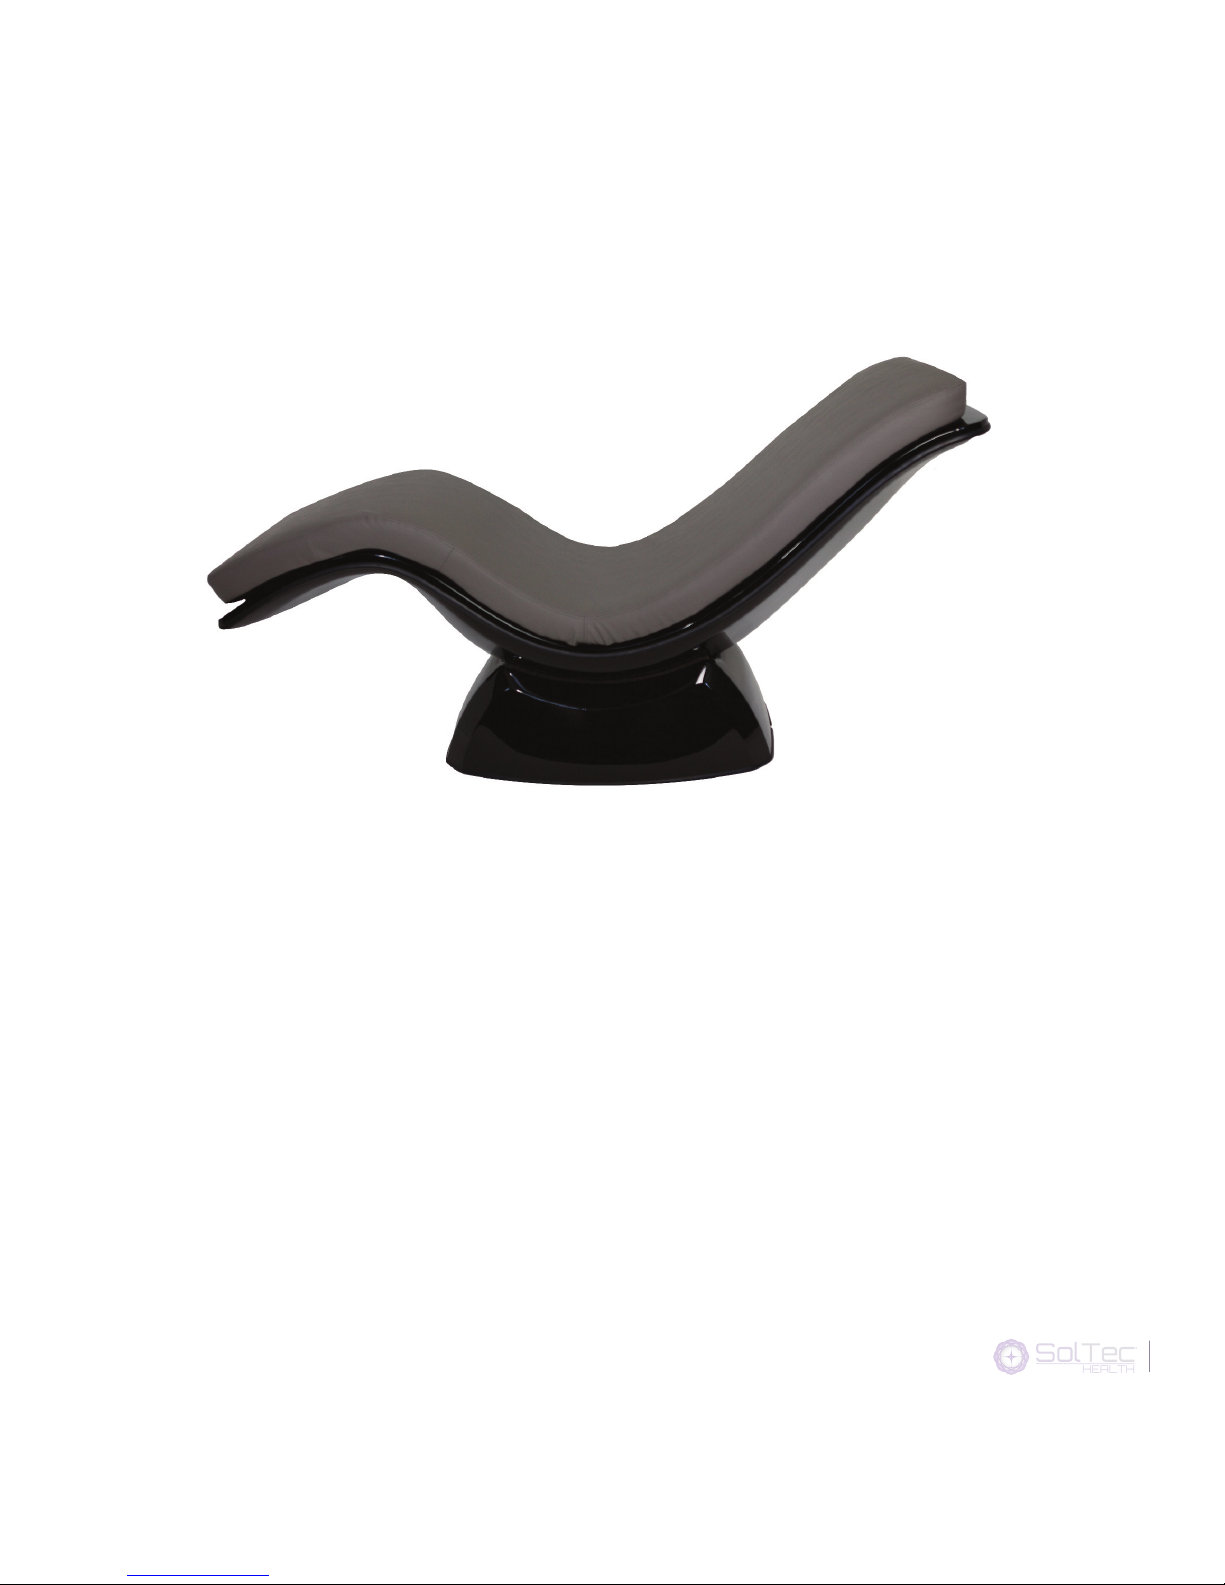
When you remove the seat section
from the carton, place it pad-side
down on the floor as shown.
Never place the Lounge on its
side because pressure on the
knob(s) could damage the
amplifier.
Seat
Base
Seat pad
3
HEALTH
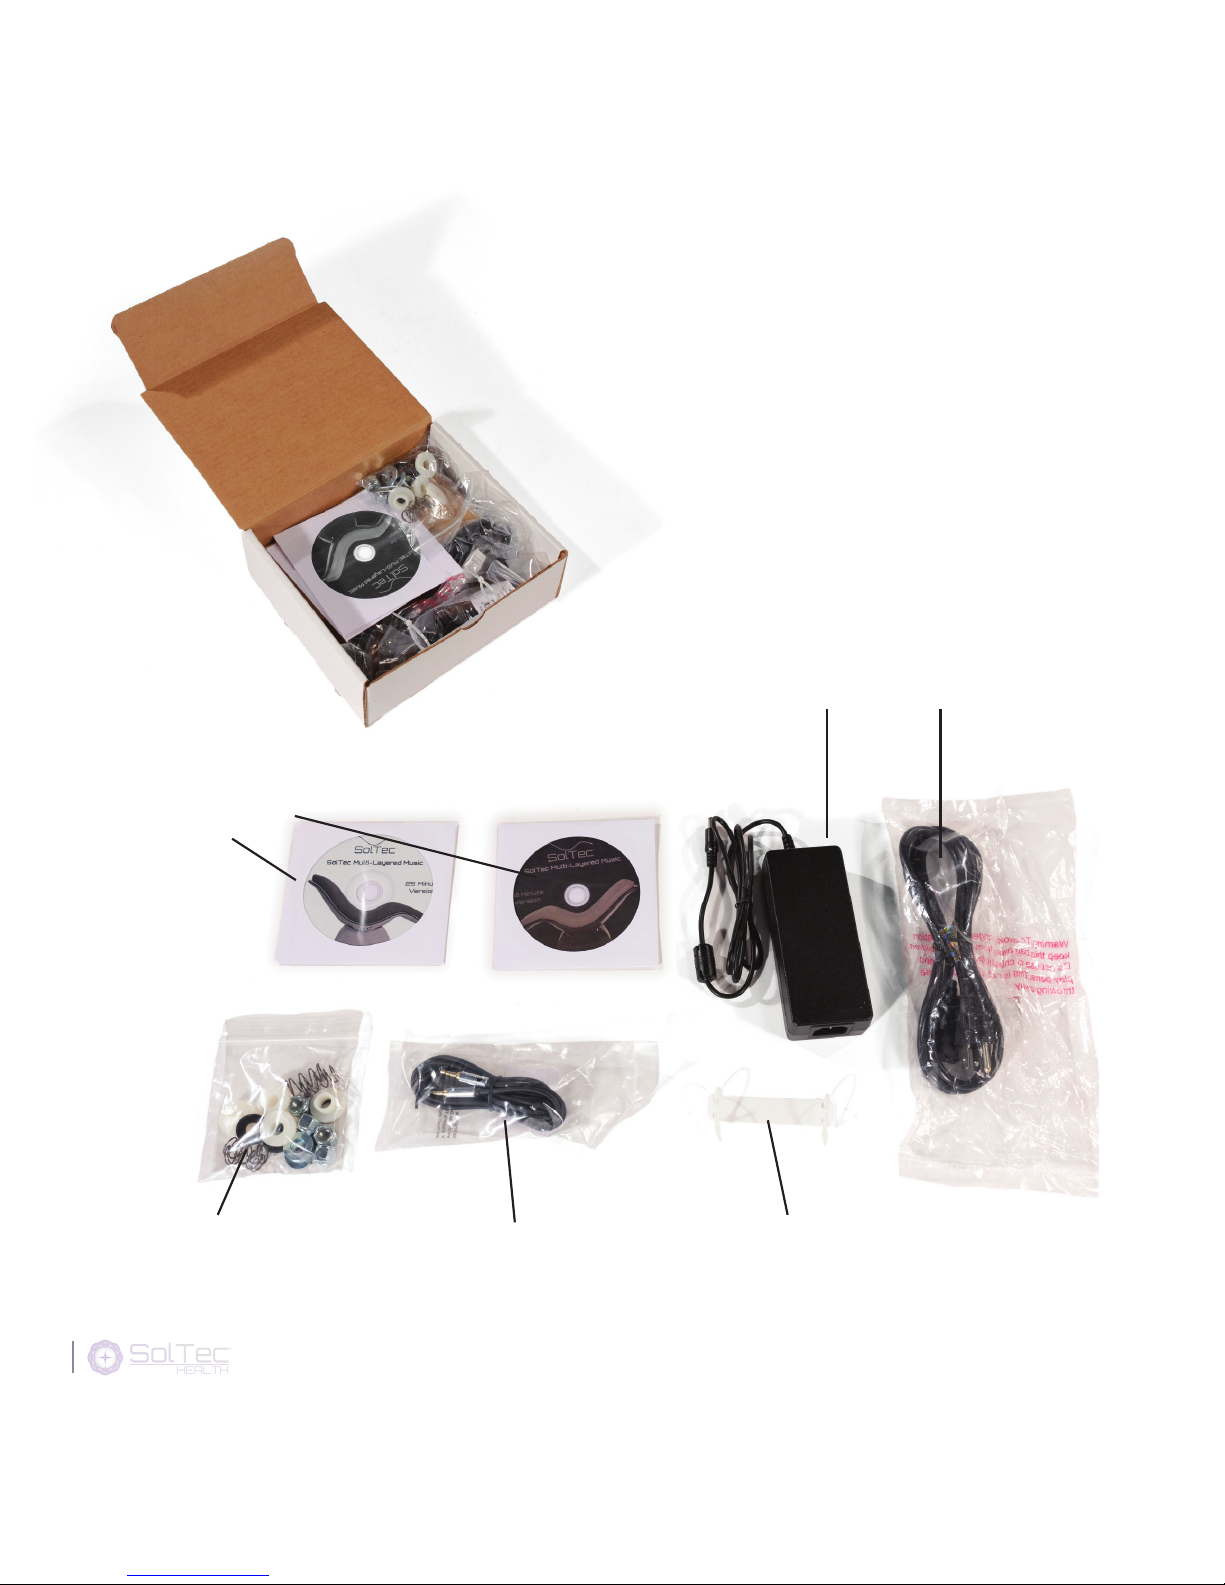
Lounge component box
Power supply
and power cable
Music CD’s
Hardware Audio cable Zip tie fasteners
HEALTH
4
Step 2:
Place the base on the seat as shown. The notch in the base should face the rear-most part
(head-chest end) of the seat. Make sure that each pair of bolts protrudes through the
lateral slits of the base and that the amplifier cable protrudes through the middle slit. .
Base
Notch
Back
Front
Amplifier cable
HEALTH

Step 3:
To secure the seat to the base, you will use the following hardware in this order:
nylon bushing, spring, steel washer, rubber washer, lock nut.
First, slip the nylon bushing (neck-down
into the slit) around one of the bolts.
Then, in this order, slide the spring, the
steel washer, rubber washer, and lock
nut. No tools are required as you only
need to finger-tighten the lock nut.
Repeat the process for all four bolts.
HEALTH
6
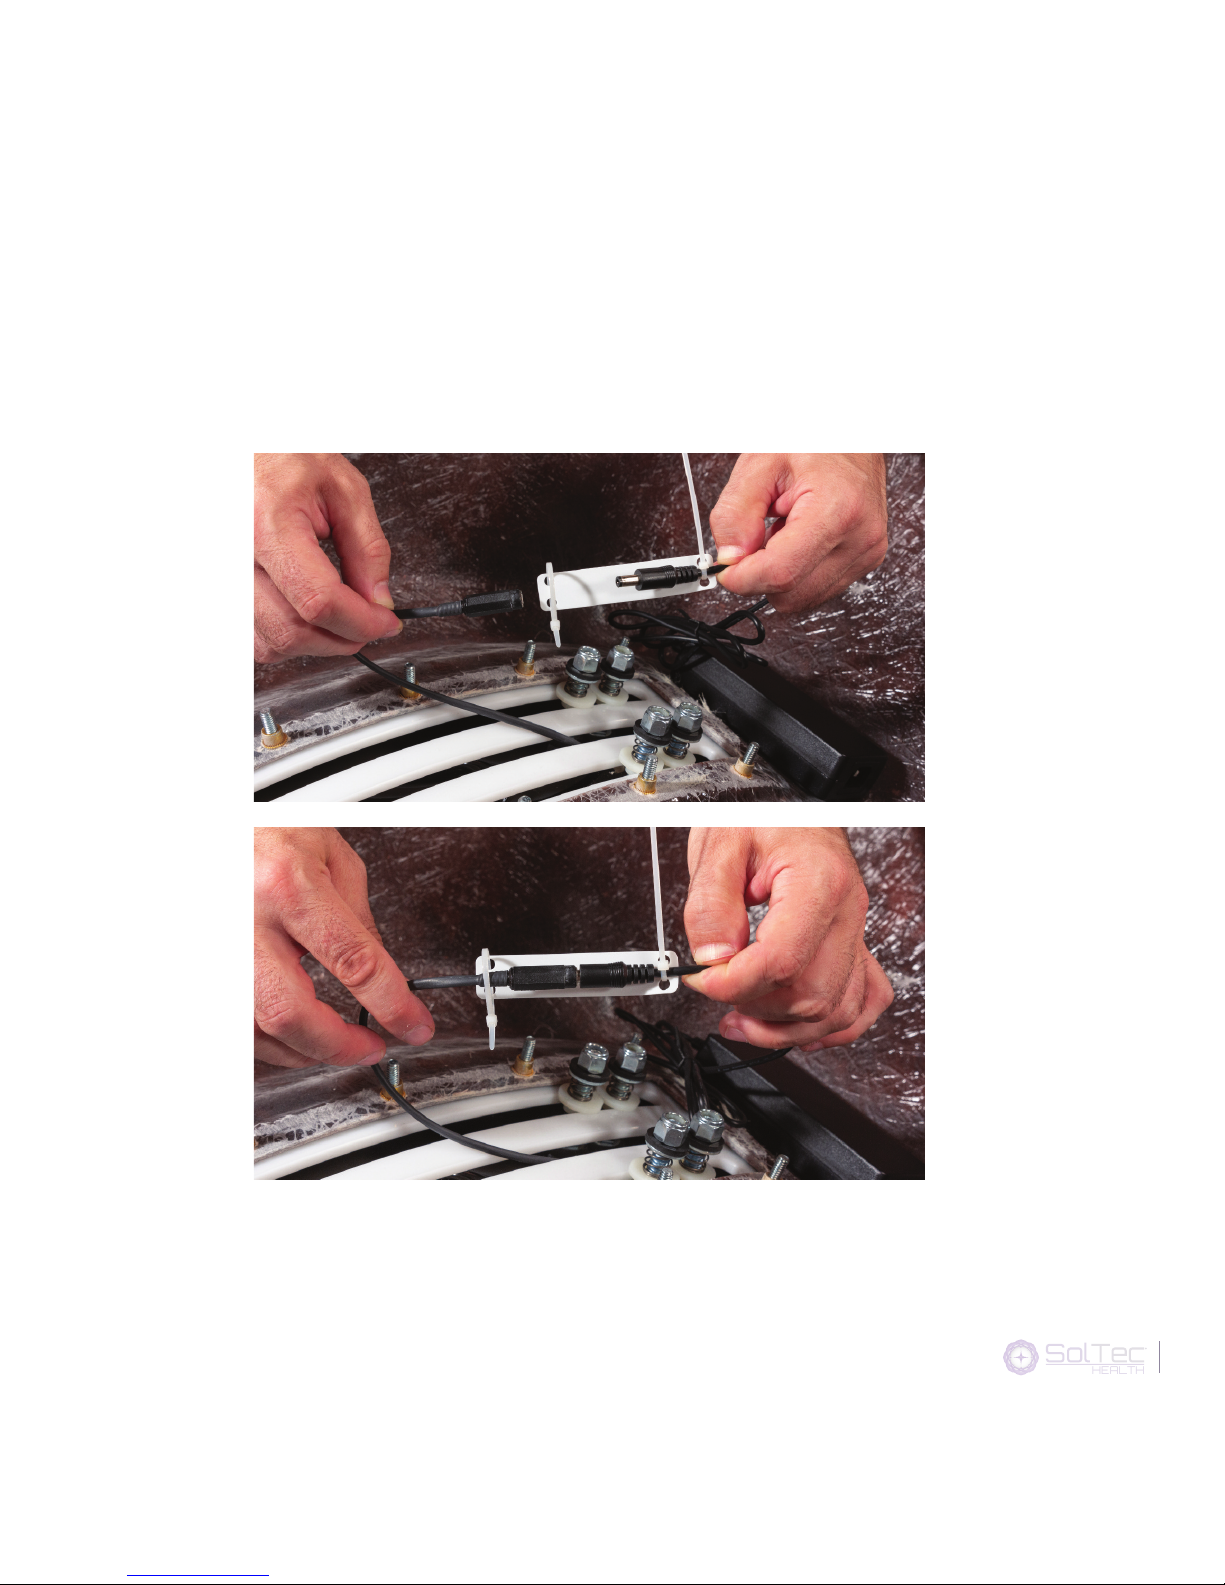
Step :
Using the zip-tie fastener, secure the amplifier cable to the power supply. This will help
maintain the connection. First, secure the bottom zip-tie to the amplifier cable.
Next, plug the power cable (cable attached to the power supply) into the amplifier
cable. Then, secure the power supply cable using the top zip-tie fastener as shown
above. The zip ties should be secured tightly around the cables.
7
HEALTH
Step 5:
HEALTH
8
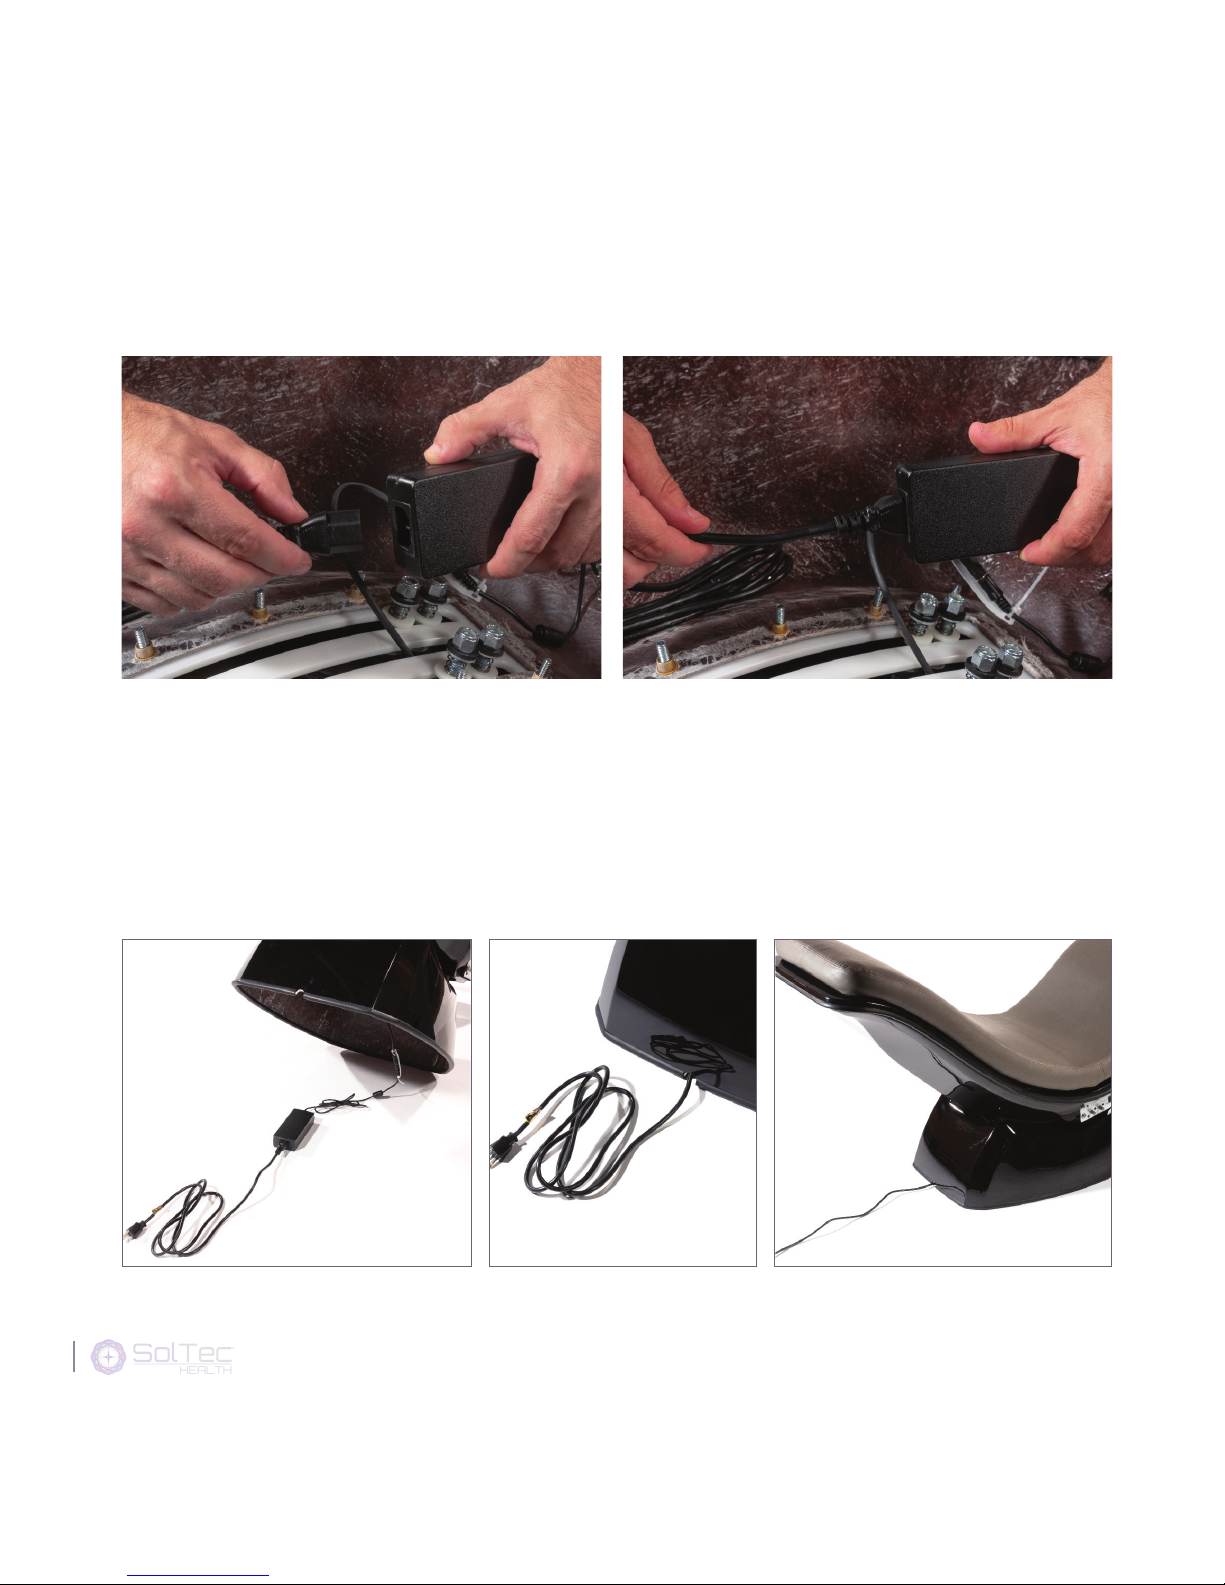
Plug the power cable into the power supply and place the power supply on the floor
at the location where the base will cover it when you place the SolTec Lounge in an
upright position. Next, lift and place the SolTec Lounge on top of the power supply
with the power cord exiting from the notch at the back end of the base as shown
below. The power supply should be located underneath the base so that the cable
slack can accommodate seat movement.
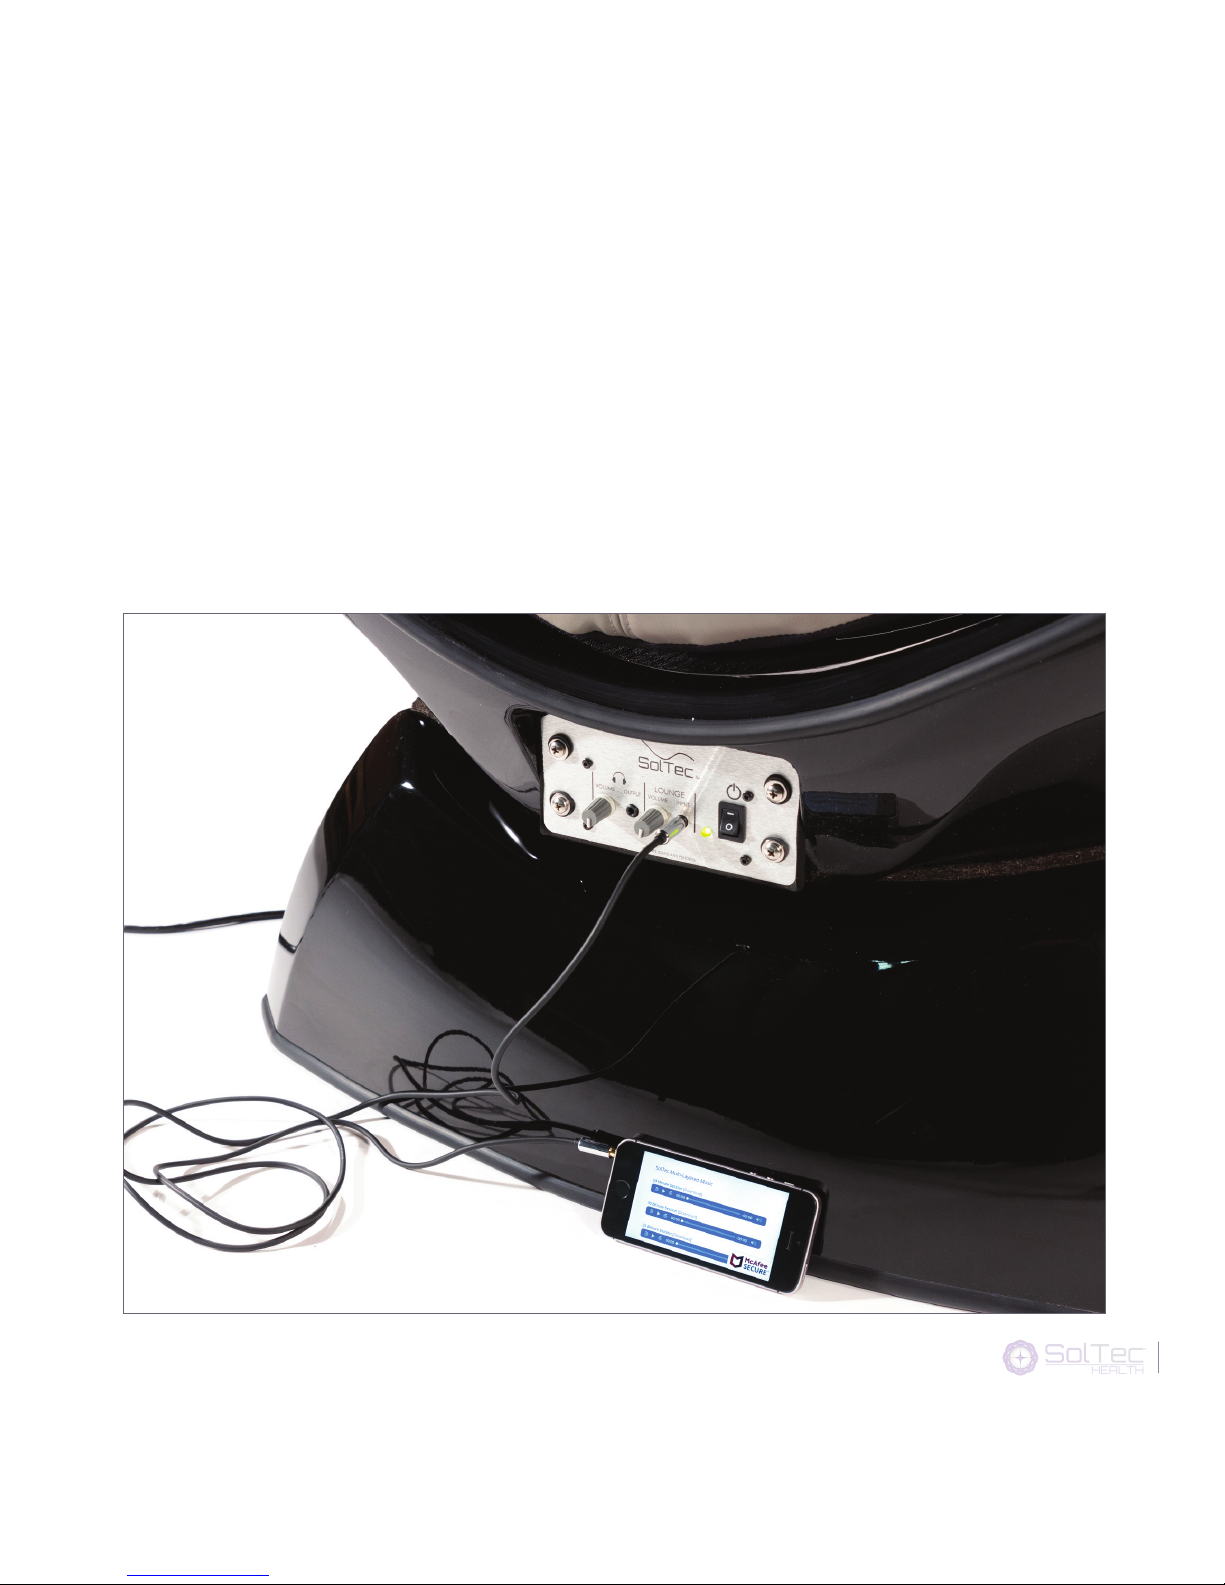
Step 6:
Plug the power cable into a wall outlet. For a simple setup, connect your device
(Smartphone, Mp3 or CD player) to the amplifier using the audio cable supplied. Turn
on your device, and then turn the SolTec amplifier switch on (green light should be lit).
Press play and you should hear and feel whatever music you are playing. Adjust the
volume on your device to the desired level.
If using a Smartphone go to SolTecHealth.com for easy music download instructions.
9
HEALTH

Operating Instructions
Please also refer to www.SolTecHealth.com/music-instructions/ and watch the
Operating Instructions and User Instructions videos for more information.
Turn Power On
Once the SolTec Lounge is assembled, plug the 3-prong power cable provided with
the power supply (the small rectangular AC/DC converter) into a grounded wall
outlet. Switch the on/off switch (on the input faceplate on the side of the Lounge) on.
The LED indicator should be lit green.
HEALTH
10

If it is not lit at all (not green, yellow, or red), make sure the power cable is firmly
plugged into both the power supply and the wall outlet (which must be active). If
the LED is still not lit, then make sure the connection between the cable from the
power supply is firmly connected to the amplifier power cable (step 4 in the
assembly instructions). This connection is located underneath the base of the
Lounge where the power supply should be located.
If all the connections are in place and the power light is still not lit and the wall
outlet is active (when you plug other electrical equipment they work), then the
connection at the back of the amplifier will need to be checked. Call us to guide
you through this process.
LED Power Indicator Warnings – LED indicator is RED or YELLOW
If the LED is lit red (amplifier short – contact us for Service) or yellow (over-temp
condition – turn power off and wait minutes and try again). If the LED turns
11
HEALTH
How to Use the SolTec Lounge
1. Allow yourself to drift off into a drowsy, sleep-like state and feel your
relaxed body.
2. If/when a thought comes to mind, direct your attention to your body
and feel it, note how relaxed it feels and then drift off again.
3. If another thought comes to mind repeat step 2.
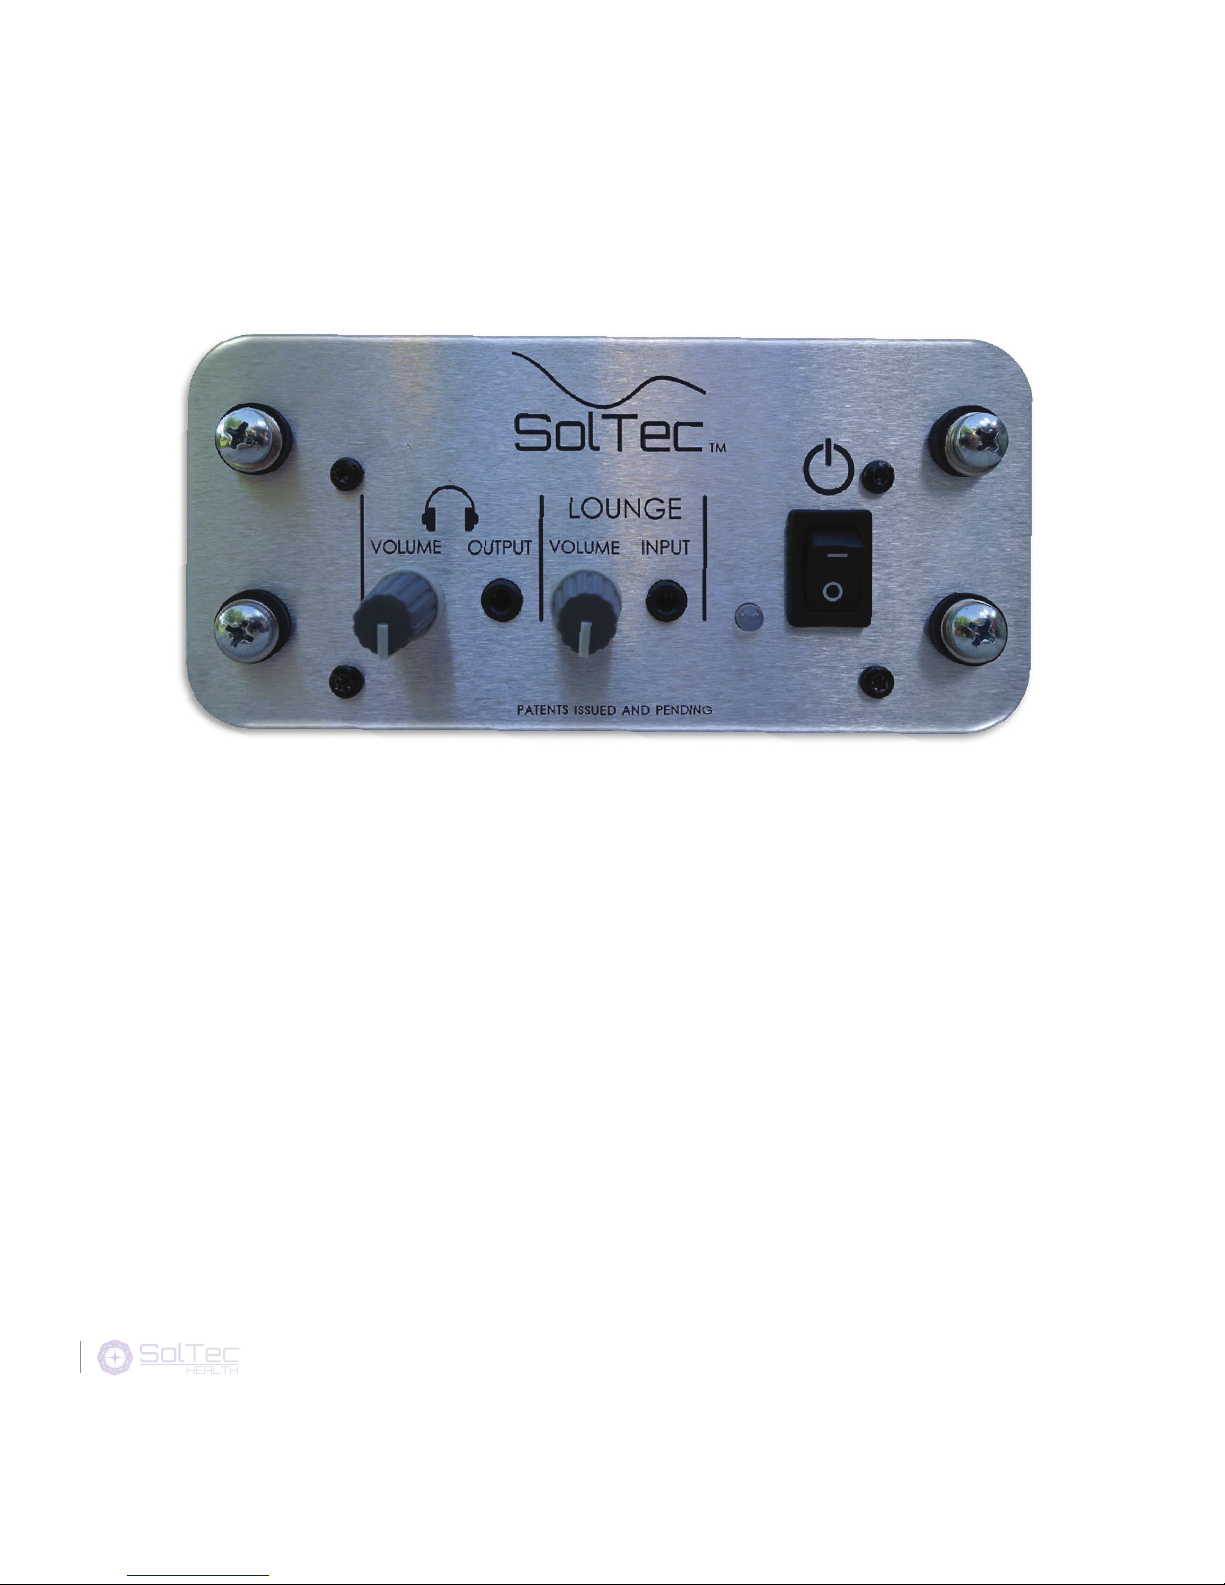
Amplifier Faceplate
Volume Adjustment – For Vibration and Sound
Turn on the sound source (CD or mp3 player) and any connected devices (splitter or
splitter/amplifier) that you may be using between the sound source and the SolTec
Lounge and adjust the volume on the sound source device and any connected device
to obtain the desired level of vibration through the Lounge. Most of the vibration
comes from the transducer under the seat. If you desire less vibration, lower the
volume on the CD player or mp3 device. If you want more vibration, adjust your mp3
or CD player volume to be higher. When you are adjusting the volume, focus on the
vibration from the Lounge and not the sound volume.
HEALTH
12
Music should also be playing through the Lounge transducers behind the user’s back.
The sound from these transducers creates most of the sound that you hear (without
headphones) in the room. If that sound is too high or low, adjust the Lounge
volume knob shown in the diagram on page 12 once you have the desired level
of vibration.
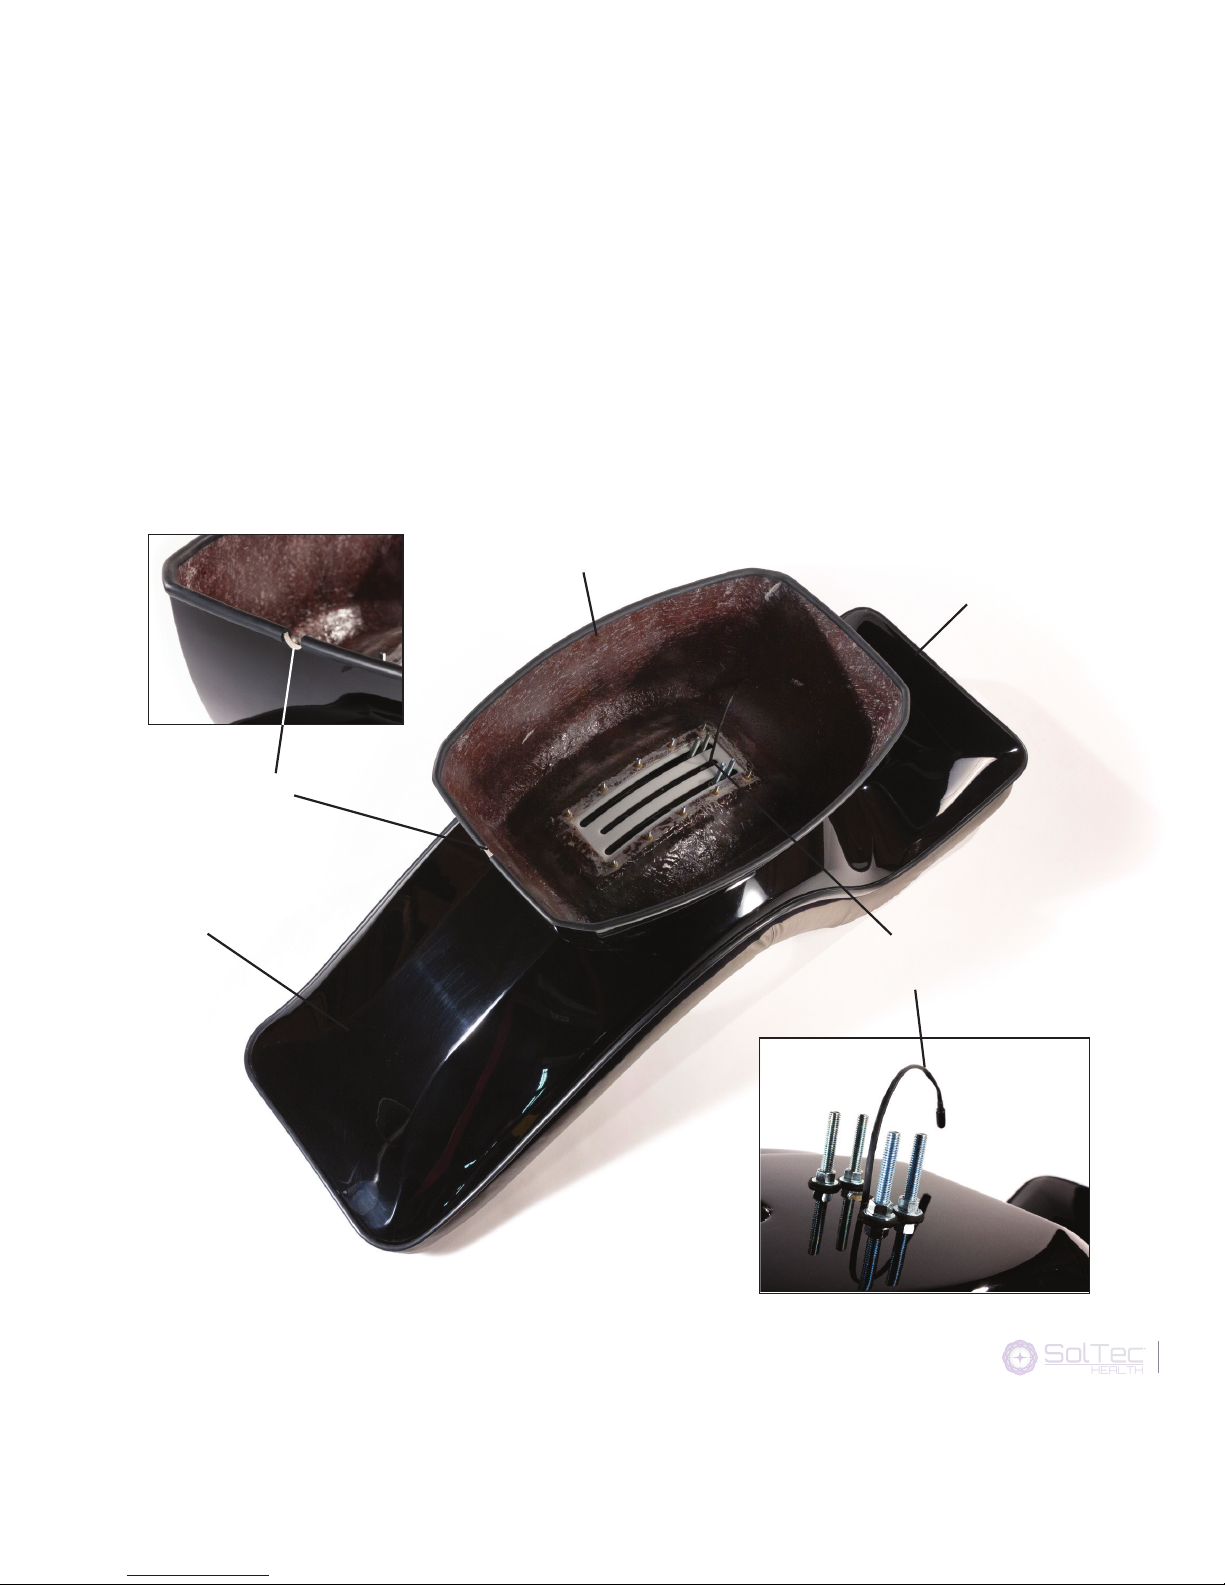
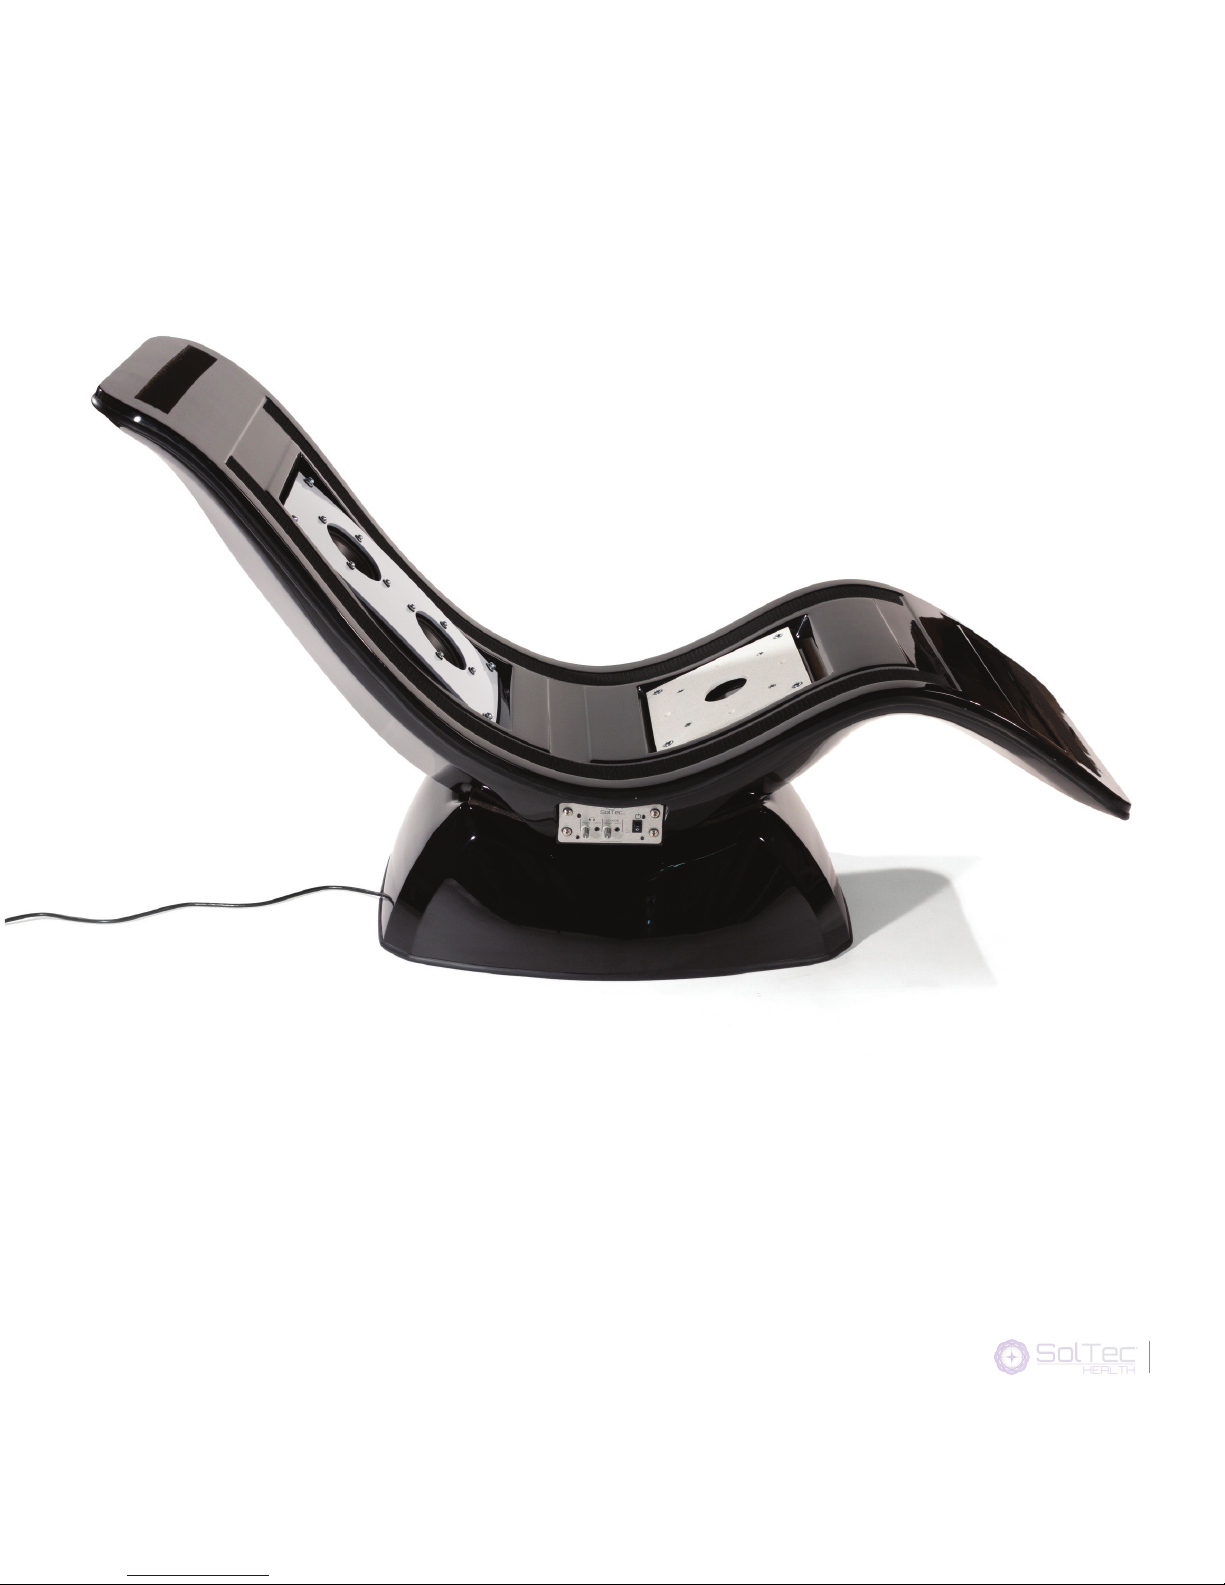
Chair without cushion
showing transducers
13
HEALTH

If you have a version 2 (older version not pictured) amplifier (without the Lounge
volume knob – only one volume knob on the amplifier) then adjust both the levels of
vibration and sound by changing the volume setting o the mp3 or CD player.
Headphone Usage
If you wish to use headphones, plug the headphone into the headphone jack on the
side of the Lounge. Before placing the headphones on your ears, turn the headphone
volume knob counter-clockwise to the off position (all the way). Then place the headphones
on your ears and slowly turn the headphone volume knob clockwise until the desired
volume is achieved. The headphone volume knob only adjusts the volume of the music
through the headphones and not through the other transducers in the Lounge. It is
sometimes helpful to use headphones to block out ambient noise, even when the
headphone volume is turned off.
HEALTH
14
Recline Adjustment
The Lounge recline position can be manually adjusted. From behind the Lounge, hold
both sides of the seat toward the top of the back and slide the seat on the base. If you
are of moderate height, you can straddle the Lounge with your legs (before sitting
down) and make adjustments by grasping the sides of the unit and shifting the seat on
the base.
When the Lounge is occupied, the zero-gravity of the seating and the pressure from
the weight of the occupant will create sufficient friction to prevent the seat from sliding
on the base; therefore, it is best to adjust the level of recline before you sit down.
1
HEALTH

Music Input Connection Options
The following are the simplest options for connecting relatively inexpensive portable
consumer electronic music devices to one or more SolTec Lounge units.
One Seat Operation – iPod (mp3 player) or portable CD player Lounge
Note: Do not use an iPod Nano as that device does not produce
enough volume.
Hook-up between iPod (mp3 player) or portable CD player and
SolTec Lounge:
Step 1: Use the audio cable supplied with the right angled stereo mini plugs on both
ends to connect between the headphone output jack on the portable CD or mp3
player and the Lounge Input jack on the SolTec Lounge.
Step 2: Turn on CD player or mp3 player and adjust volume on those devices to attain
the desired sound/vibration level in the SolTec Lounge.
Multiple Seat Operation (2 to 10 or more lounges) – iPod (mp3 player) or
portable CD player Splitter Lounge
An example of a low cost, fully functional 4 channel amplified Splitter is the ART
HeadAmp 4 from Sweetwater – http://www.sweetwater.com/store/detail/HeadAmp4/
A splitter that can link up to 10 lounges can be found at:
https://www.bhphotovideo.com/c/product/612993-
REG/Rolls_RA102_RA102_10_Channel_Professional_Headphone.html
HEALTH
16
Table of contents
Popular Indoor Furnishing manuals by other brands

Serta
Serta SOFA BED Assembly instructions

Amart Furniture
Amart Furniture FRESIAN 72360 Assembly instruction

Furniture of America
Furniture of America CM7187N Assembly instructions

Rauch
Rauch M2591 Assembly instructions

Flash Furniture
Flash Furniture MK-LCKR001-GG Assembly instructions

Manhattan Comfort
Manhattan Comfort Cooper BE 53 Assembly instructions

Winners Only
Winners Only BTP1002K Assembly instructions

Ethnicraft
Ethnicraft OAK BOK 51495 Assembly instructions

opendesk
opendesk Studio Desk Assembly instructions

Techly
Techly ICA-TB 3533W Assembly instruction

Golden
Golden MAXICOMFORT Orion owner's manual

STRUCTUBE
STRUCTUBE BELFORT Assembly instructions


