SOMLOS G1 User manual


02
TABLE OF CONTENTS
How to Properly Handle your Sømløs
Maintenance
Know Your Sømløs Mower
Search Method
How to Use your Sømløs
Control Panel
Mowing and Startpoints
Cleaning and Maintaining your mower
How to change the Blades
Winter Storage
03-06
07
07
08
09
09
10-11
12-14
14
14
15-21
21
21-22
23-24
24-31
32
33
34
34
34
35
Full Menu Diagram
31
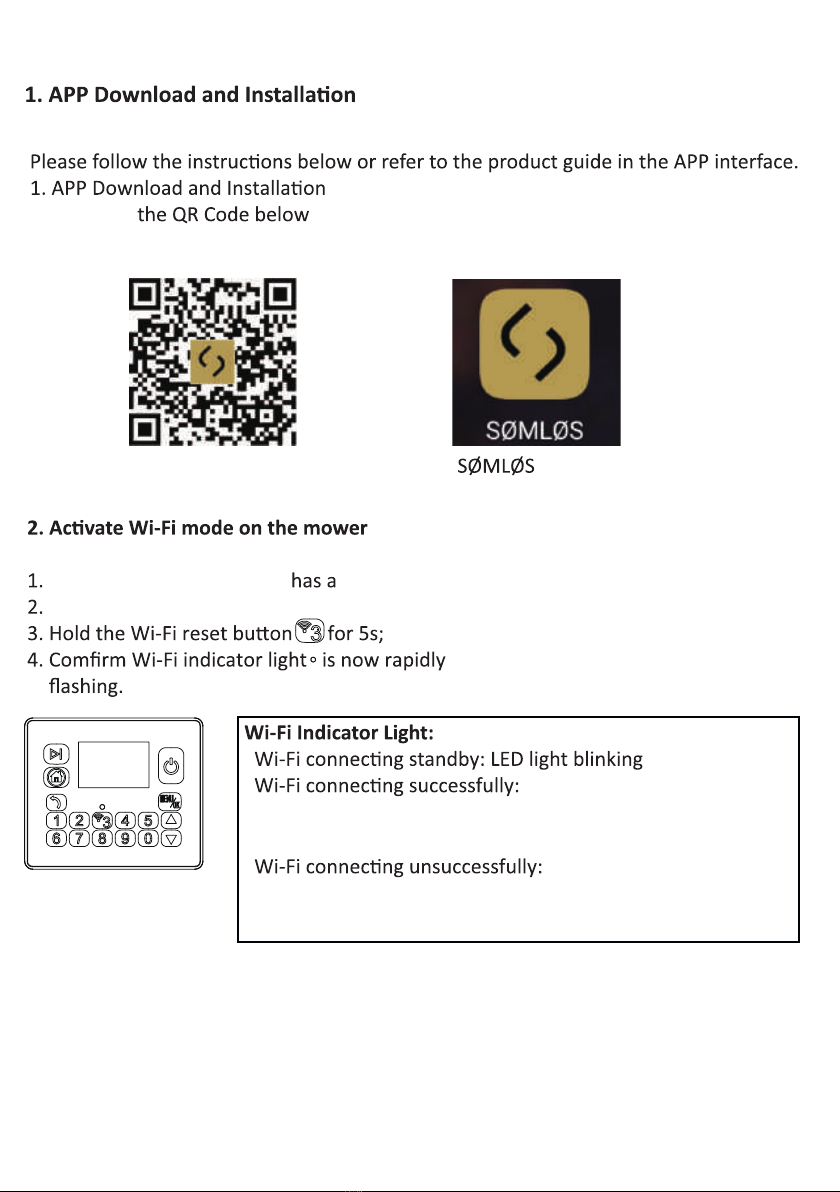
This product can be remotely controlled via the mobile phone APP.
Please scan to download and install APP.
APP Download QR Code APP Icon
Please ensure your garden strong Wi-Fi signal.
Step1
;
03

04
Open APP,
sign up and login;
Then choose to add
device;
Find "Small Home,
then select "Mower"
under this category;
Open APP and select the "Add device". See images below.
Ensure the Wi-Fi
indicator light is
now r
password according
to your setup;
Mower connects
will be prompted to
success
Notice: If your mower fails to connect to your wifi , do the following steps
1) Reboot your mower (Turn OFF then back ON again)
2) Make sure that you have entered your wifi password correctly
3) Make sure that your wifi 's network frequency is 2.4G
4) Do a speedtest to check if your wifi speed is strong

05
your Sømløs app, go to
TIMER >> it will go to
Set you desired mowing
be the earlier than your
To enter the startpoints,
select STARTPOINT
your lawn where the mower
done, choose CONFIRM to
have made.
date you want your lawn
(
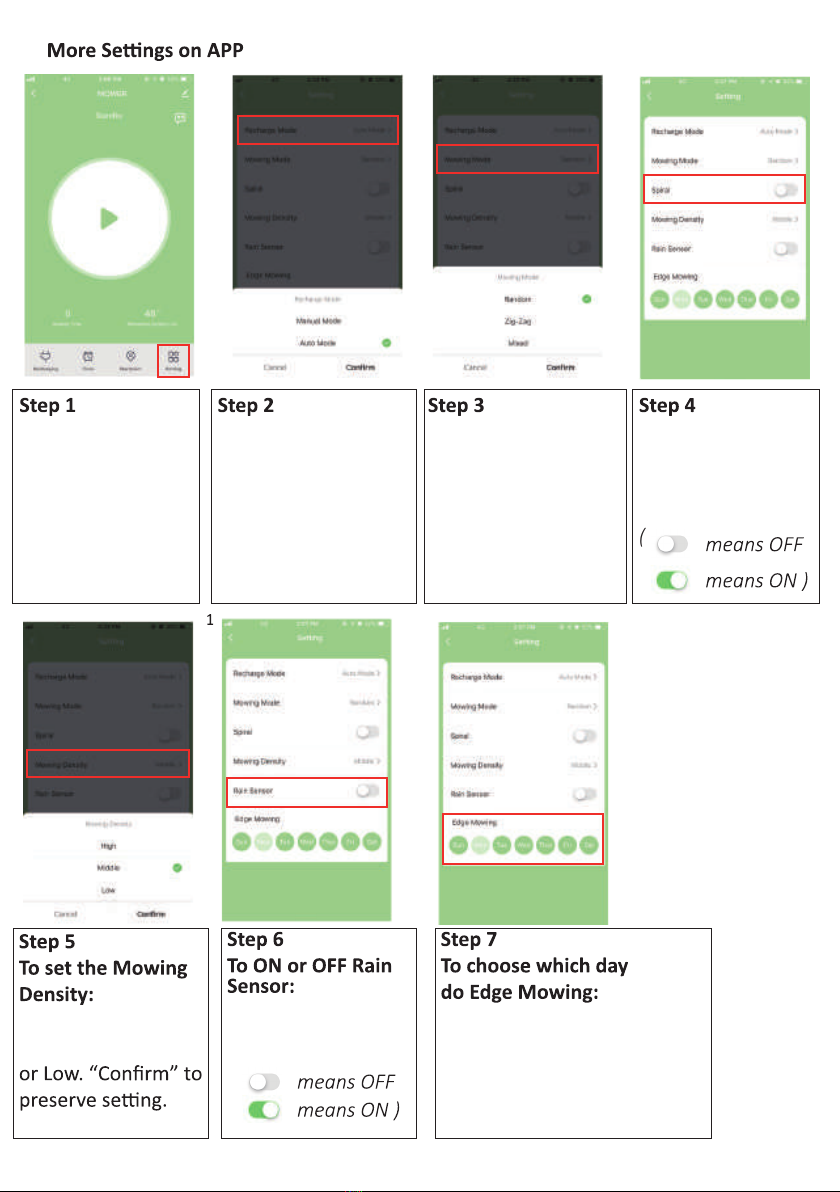
ow-
ing Density then
choose High, Middle,
Select RAIN
SENSOR, slide the
enable the Rain sensor
(
06
You can program your mower
to do Edge mowing . Just
select the date when you
Go to SETTING to
setup your
Set the Recharge
Mode to "Auto" so
the mower will return
CONFIRM to save
your choice.
Set your Mowing
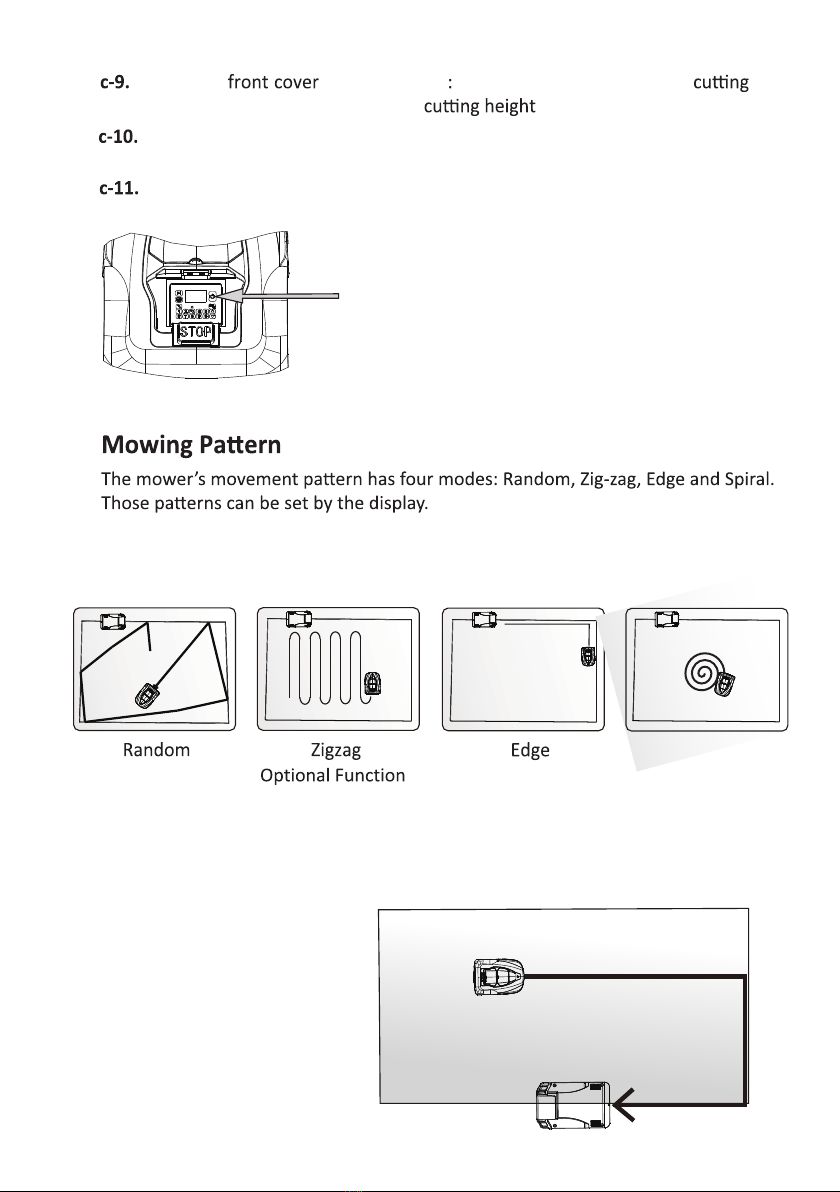
Random
Zig-zag
or Mixed
Select CONFIRM to
save your choice.
slide the ON/OFF

SAFETY PRECAUTIONS
07
to avoid damages.
the mower.
electrical wiring such as lead cable wire.
caused it to stop.
Never use a high-pressure washer or even running water to clean the mower.
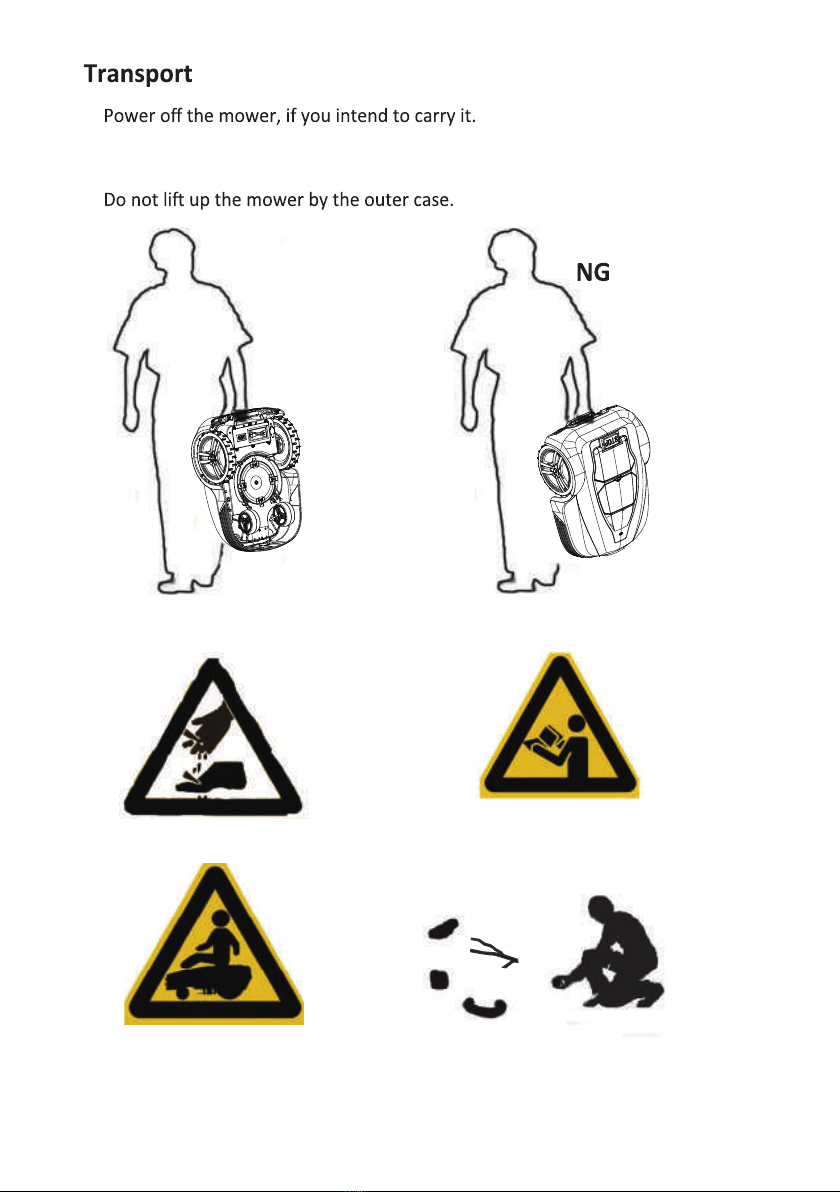
Do not ride or sit on the mower, children and pets should be away
the mower or carry it around when the power is on.
Do not allow the
08
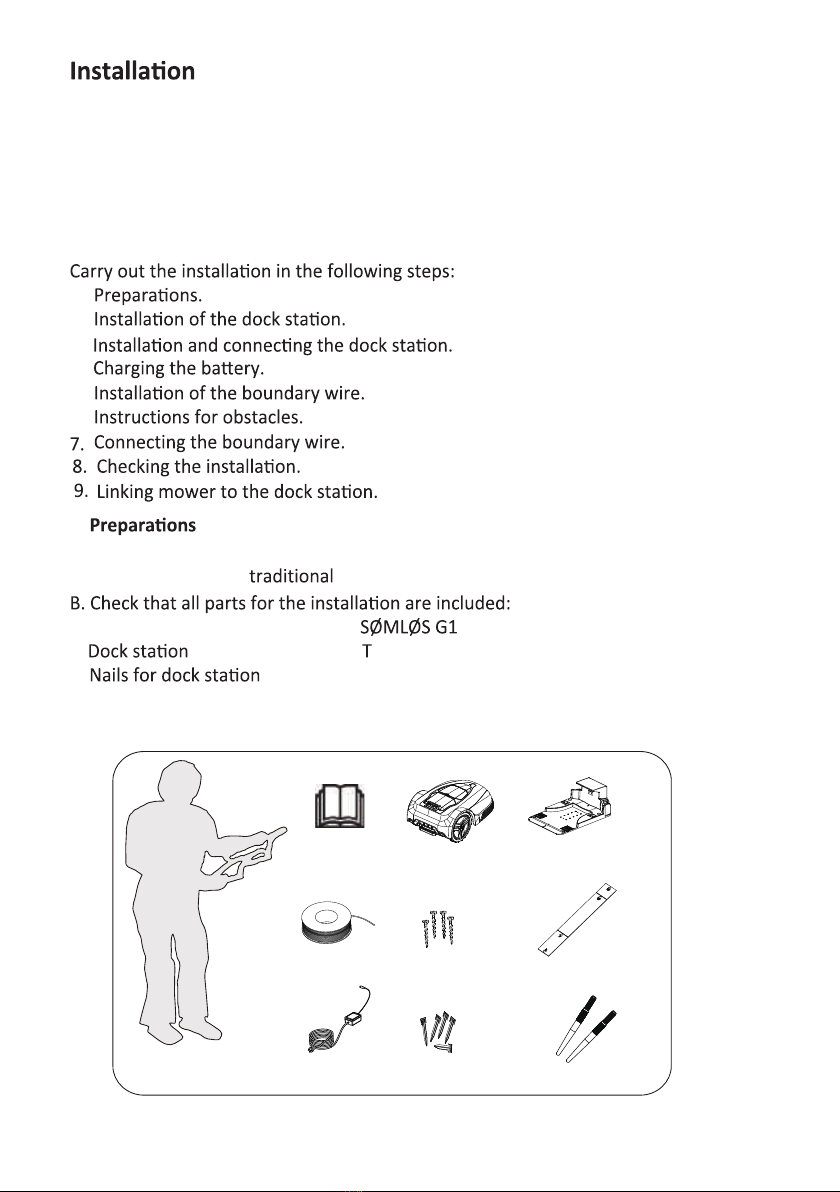
1.
2.
When carrying, use the handle located at the rear under the mower.
3.
OK
Correct way Incorrect way
Read the
Do not ride and sit on the mower.
Clear your lawn on any obstacles.
garden tools, etc.

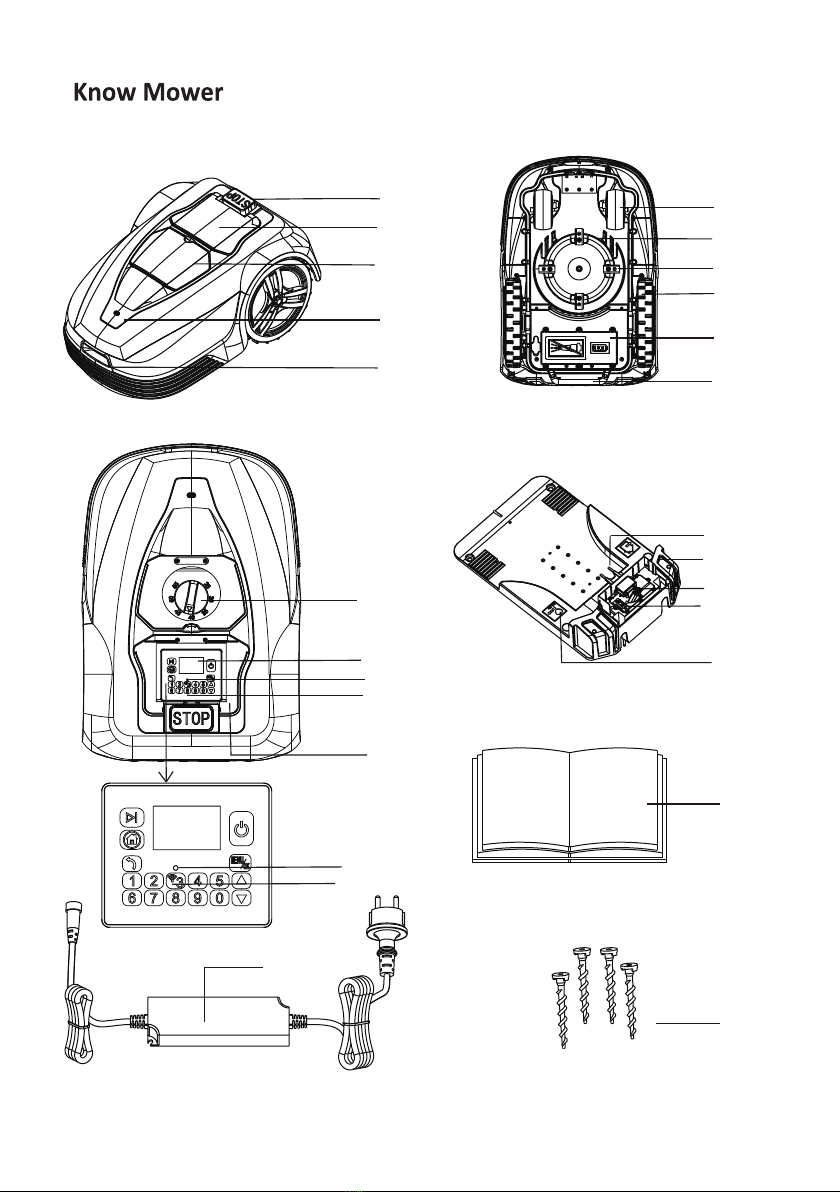
PARTS IDENTIFICATION
09
;
3.
Wire
Laid in a loop around mower's area. The Wire is laid around
the edges the lawn and around and plants, so the mower will not
mower to
4.
onnected between the and a
is connected to the wall and to the
c. To recharge your mower
10
1
2
3
4
11
6
7
8
12
13
17
18
19
14
5
9
10
22
23
20
24
21
15
15
14
16
1.
2. The control panel cover
3.
4. Rain sensor
5.
6. Front wheel
7. Blade plate
8. Blade
9. Rear wheel
10.
11. Handle
12.
a nob
13. LCD display
25 26 27
28
14. Wi-Fi indicator light
17.
Charging electrodes
19. Power connector
20. Boundary connector
21.
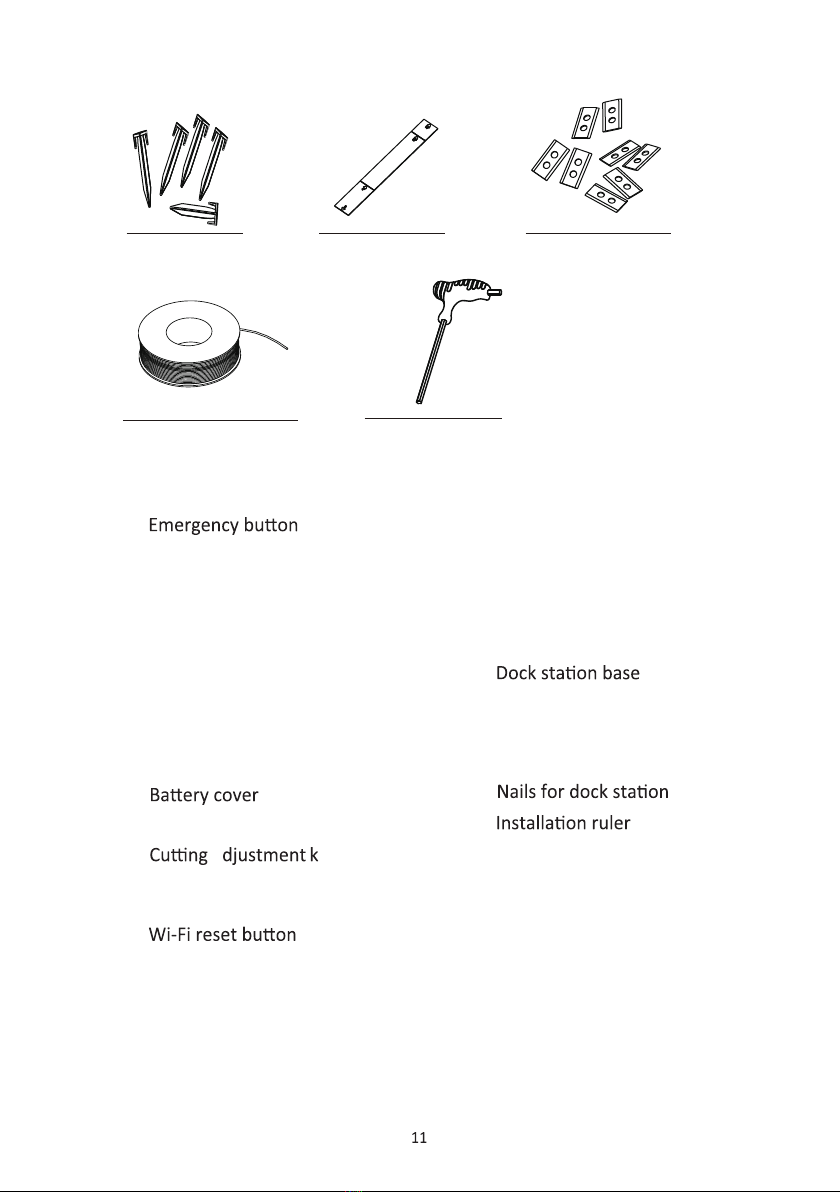
22. Operator’s manual
23. Power adapter
25.
26.
27. Spare blades
28.
Boundary wire
24.
29
29.
hcnerwnellA
18. Signal indicator light
15.
16. Keyboard
12
A. Capacity
B.
b-1.
mower should not the d
ed
on.
b-4.
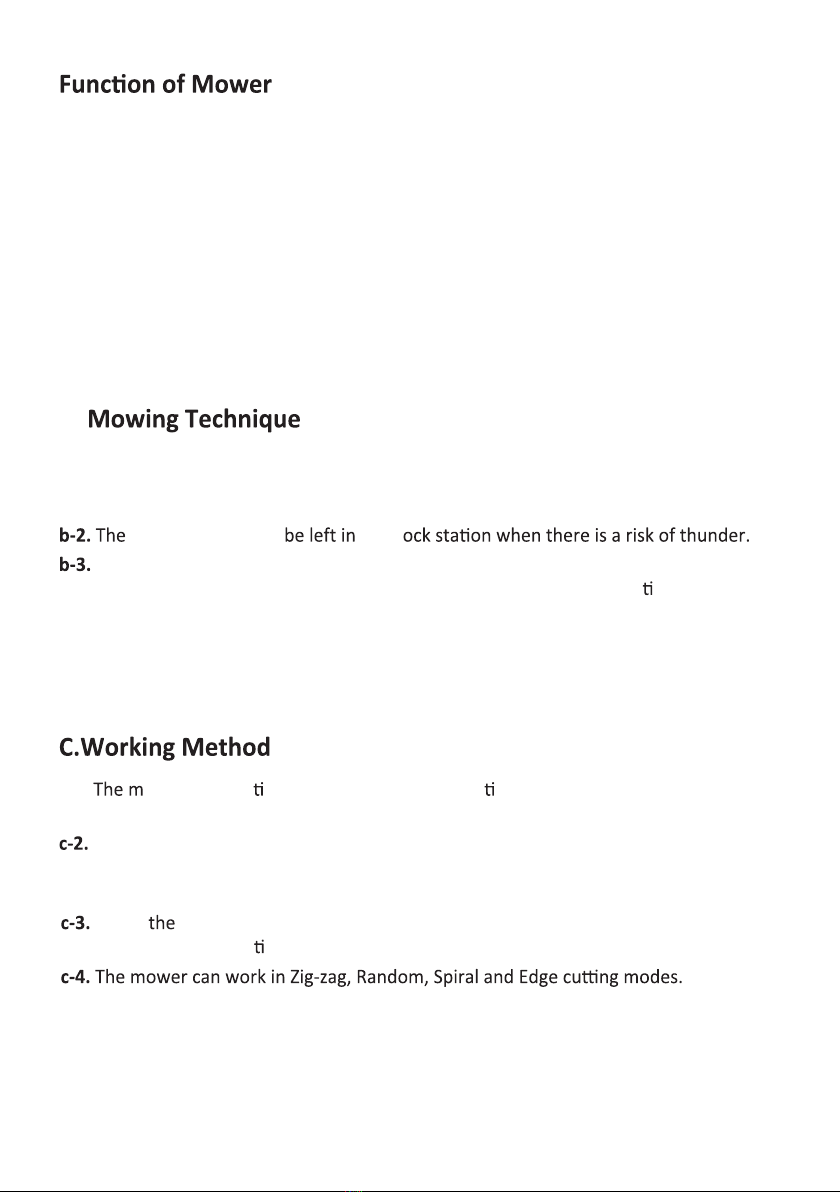
c-1. ower automa cally mows the lawn. It con nuously combines
mowing and charging.
When mower hits an obstacle higher than 6 cm, the mower reverses
and selects a new direc on.
-
results.
obstacles must be removed prior to mowing
receives and process it. It enables your mower to mow your lawn and recharge

can access it but opening the cover panel
13
When the rain is too heavy, the ower and go to the
gniwomehtdna,potslliwrewomeht,seerged03nahteromepolsehtI
motor will stop in one sencond.
Mower can not pass Mower can pass Mower can pass ,
Mower will stop
30
14
Under the
.
there is a rotate to increase
e to reduce .
Please sure that there are no obstacles along the boundary wire.
Spiral
Retuning to the Charging Station
13
1.
2.
3.
4.
5.
6.
1.
A.
please mow it using a lawn mower. Then collect the clippings.
a. Operator's manual
c.
e.
g. Adapter
b.
d. he boundary wire
h.
I. charging plug
abc
e
d f
g h I
15
16
2.
a.
b.
c.
d.
e.
The low voltage cable may cross the area. It must be either pegged
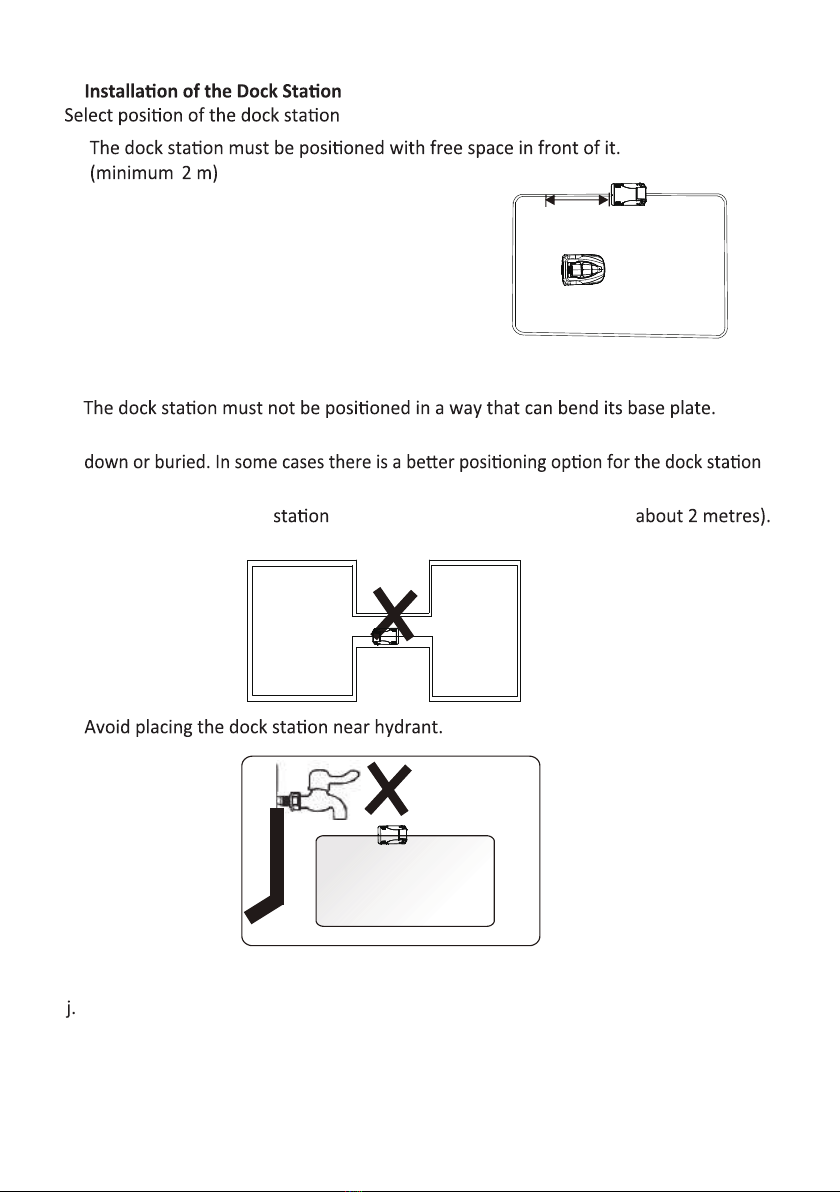
. Avoid placing the in a narrow passage narrower than
g.
h.
Avoid the adapter be exposed to direct sunlight.
More than 2m
NOT be more than 2cm.

17
3.
a.
b.
c.
d.
Connect the adapter power cord to a 1
0 2
ower is supplied with one or two As soon as the
is connected, you can charge the
a.
you want to the boundary wire in the it
to peg down the boundary wire ter the eas insert
b.
you don’t to insert pegs you can bury the wire, or you can
c. Laid in a loop around mower’s area. It is to begin burying wire
one end the then the boundary wire round the
d.
1
2
3
4
From here Start bury From here Start bury

18
e.
the corners, don’t lay the boundary wire at a sharp or right
has 35cm space to the wall or other obstacles; a radius at least 50cm
Sharp angle Right angle
Obtuse angle
Arc an
set the corner less than 10 degree,the boundary wire should be set on a flat ground, then the performance will be good,
do not to set the boundary wire on a deep slope, there is limitation on that condition
gle
Cross
Min.35cm
Min.30cm
Min.50cm
Max. 1.5cm
Min.2m
Min.1.2m
Boundary Wire
Grass height should less
than 7cm
Min.1.2m
Mention: While your neighbor’s robot mower working near garden, you should keep the
boundary wire minimum 2m to the neighbor’s, for prevent from mix signal or bad effects.

19
.
a.
ig trees, poles
burying the boundary wire.
b. Use boundary wire to protect your flowers
c.
burying boundary wire.
d. sure to lay the boundary to the ground. the boundary wire
is loose or looped on the ground, the mower will cut the wire and the signal
may beive.
The lawn mower can detect the signal the boundary wire within a 20m
radius.
ok
ok
ok
ok
Radius Max. 20m

20
e.
Use a hammer to the pegs in the ground. care when
pegs and sure the wire is on the lawn; the distance between pegs
should be approximately 100cm. The distance between pegs should be
30~50cm .
Don’t let the boundary wire
g. you intend to bury the boundary wire, sure to place the boundary wire
between 1 m and 15 m into the ground; the boundary wire should not be
looped under the ground.
7.
Max.15 m
boundary wire
Earth
100cm
20
Straight Length
>200cm
A
B
VIEW A
VIEW B
Straight Length
>30cm
Other manuals for G1
1
This manual suits for next models
1
Table of contents
Other SOMLOS Lawn Mower manuals


Popular Lawn Mower manuals by other brands


Agria
Agria 3600 BM Unihamster compact operating instructions

Wolf Garten
Wolf Garten 700 Series Original operating instructions

Black & Decker
Black & Decker CLM3820 Original instructions

Mountfield
Mountfield M4 owner's manual

RHINO
RHINO TW26 Operator's manual and part's manual

Webb
Webb WER18HP Operator's manual and parts list