Somogyi Elektronic home CYCLONE Series User manual

KPE 6039G, KPE 9039G
CYCLONE series
instruction manual
eredeti használati utasítás
návod na použitie
manual de utilizare
Bedienungsanleitung
uputstvo za upotrebu
návod k použití
uputa za uporabu
2F3-1
KPE 6039G
KPE 9039G


3
KITCHEN EXHAUST HOOD, CYCLONE SERIES
Carefully read the instructions for use before using the appliance.
Illustrations contained in this instructions for use are only for reference, and always the actual version of the product applies.
ADVICE AND RECOMMENDATIONS
This instructions for use applies to multiple versions of the appliance. Accordingly, it may contain the description of functions, which do not apply to
your actual appliance.
WARNINGS
INSTALLATION
• The manufacturer does not assume responsibility for damage due to erroneous or incorrect installation.
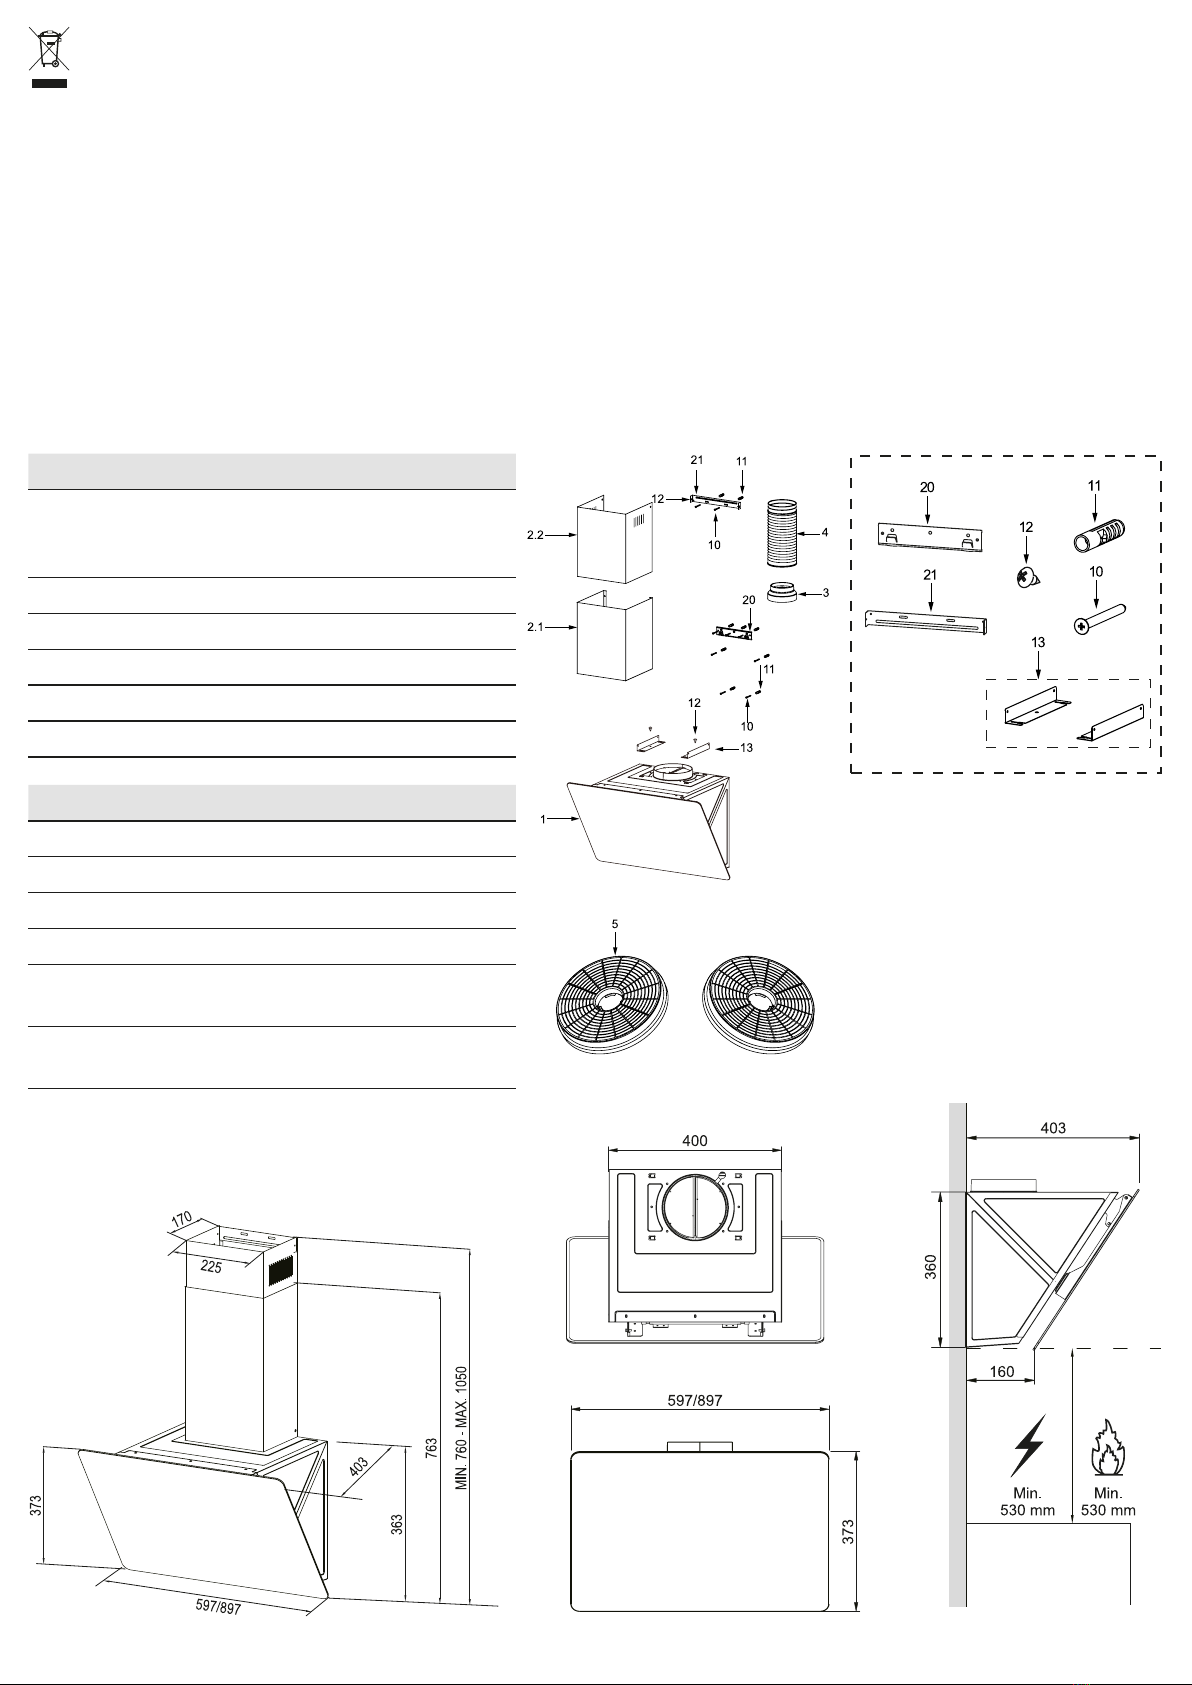
• The minimum safety distance between the cooktop and the exhaust hood is 650mm (some models may be
installed lower, refer to the sections on dimensions and installation).
• Verify, that the available mains voltage complies with the rated voltage of the exhaust hood indicated on the
product label inside the appliance.
• In case of appliances with class I. contact protection, verify, whether the household power supply provides
adequate earth protection.
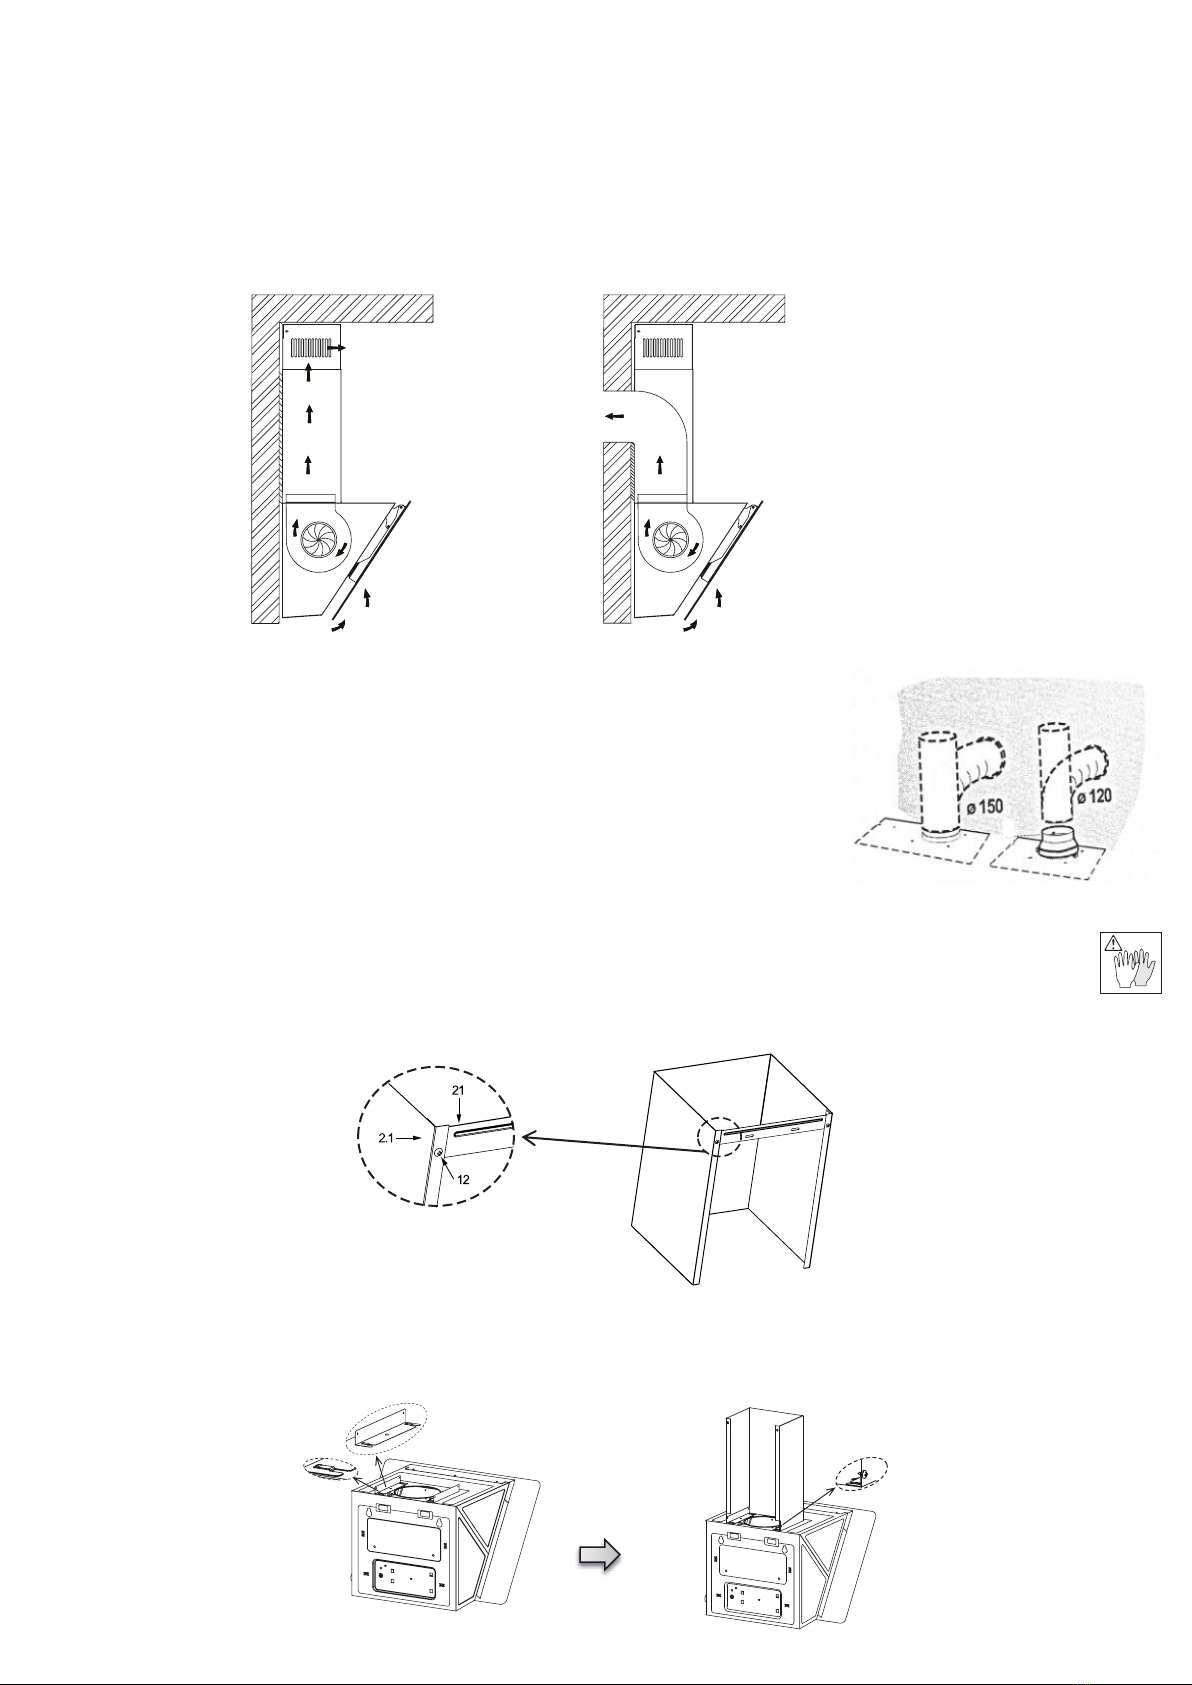
• Connect the exhaust hood to an exhaust duct with a pipe of at least 120mm diameter. Keep the length of
the exhaust duct to the minimum, as much as possible.
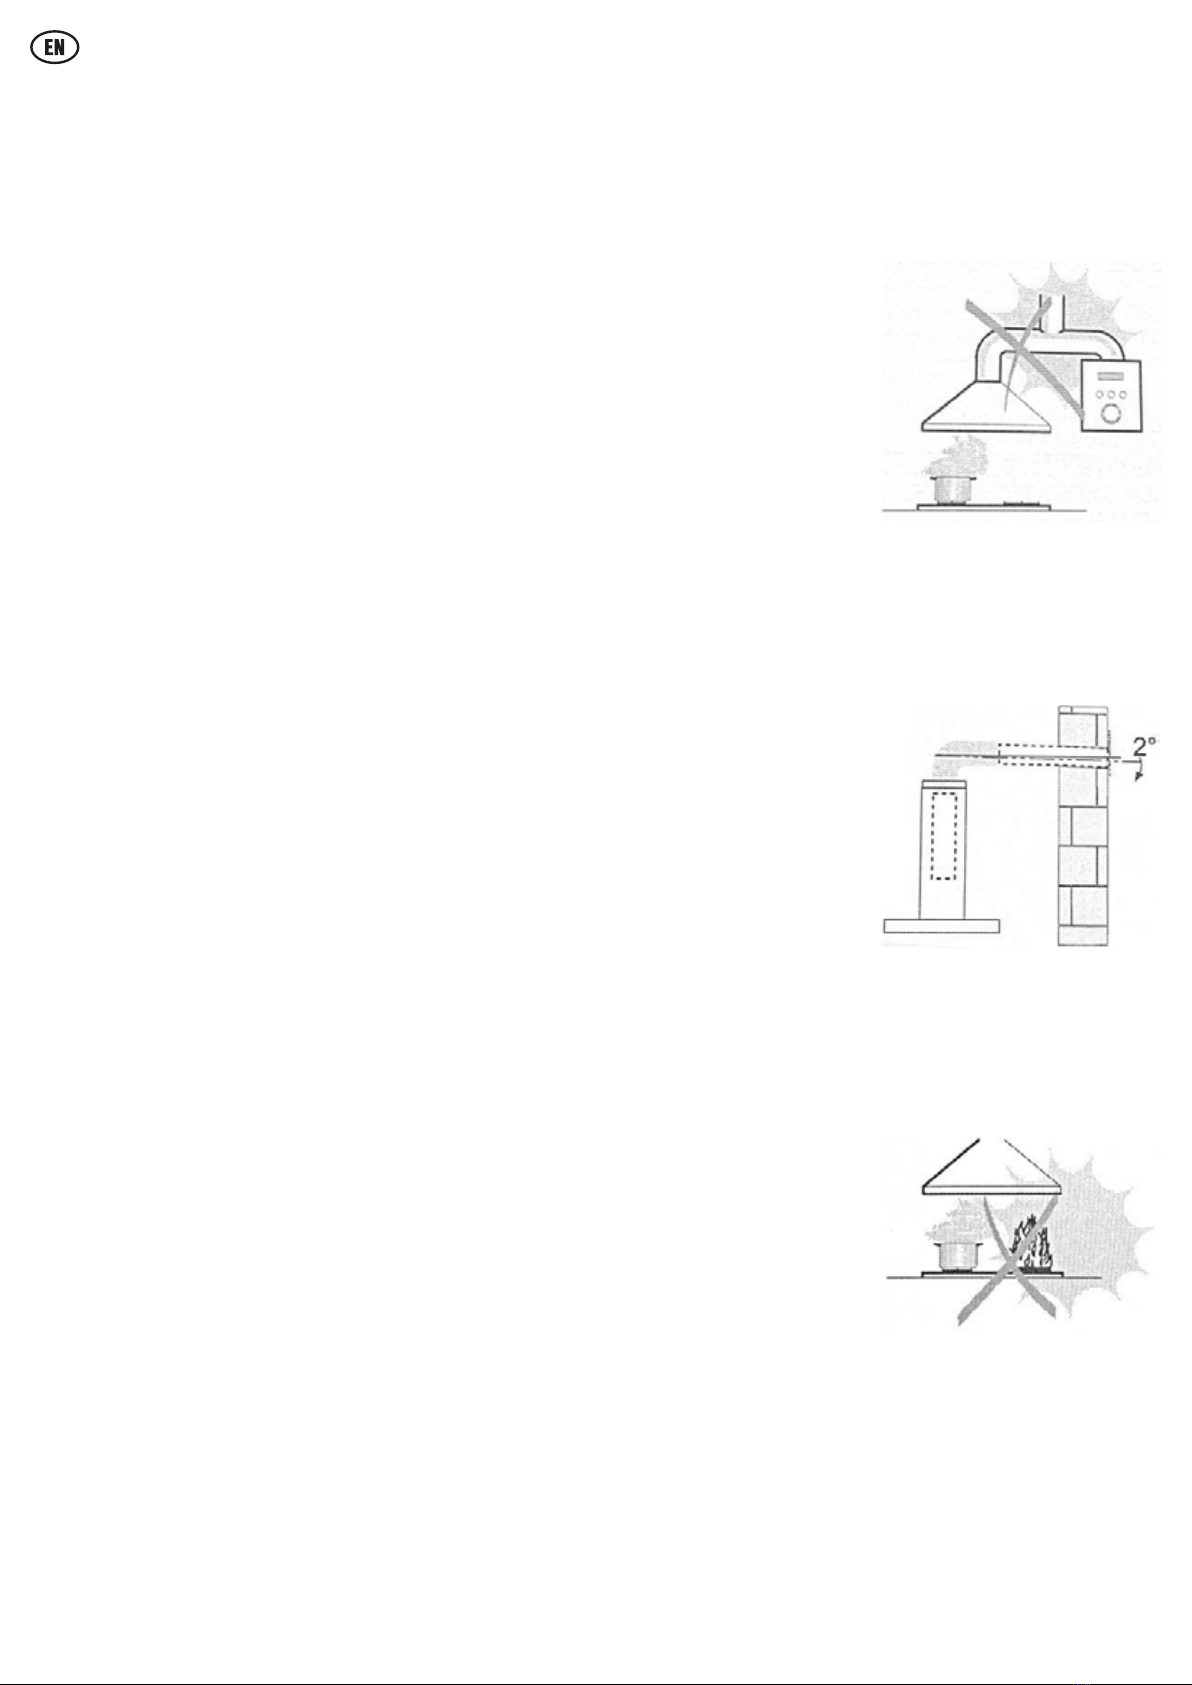
• Do not connect the exhaust hood to the flue of appliances, which produce combustion products, or exhaust
gases (gas heaters, fireplaces, etc.).
• If the exhaust hood is used with appliances other than electric (e.g. stove with gas burner), adequate
ventilation must be ensured within the room, in order to prevent the backflow of exhaust gases. The kitchen
should have an opening directly connected to outdoor air, to ensure the entry of fresh air.
If the kitchen exhaust hood is used with appliances powered by other sources, than electricity, the negative
pressure within the room may not exceed the 0.04 mbar value, in order to prevent the reverse suction of
smoke and gases indoors by the exhaust hood.
• In event of damage to the supply cable, the cable must only be replaced by the manufacturer or at an
authorized service location, to avoid any potential risks.
• In case the installation instructions of a stove with a gas burner specifies a greater installation height, that
distance shall be applied. Always observe the requirements applicable to air replacement.
USE
• Ensure adequate ventilation in the room, if the kitchen exhaust hood is used simultaneously with other
appliances using gas or other fuel types (this does not apply to exhaust hoods, which return the air into the
room when set to recycling ventilation).
• This exhaust hood is exclusively designed for household use, to eliminate smells in the kitchen.
• Never use the exhaust hood for purposes other than designated.
• Never leave a high open flame burning under the exhaust hood.
• Set the flame intensity so that it is directed towards the bottom of the pan, and it does not extend around
the sides.
• Fryers should be continuously monitored during use: oil can catch fire, if overheated.
• Avoid the use of open flames under the exhaust hood, as this presents a risk of fire.
• This appliance can be used by children aged 8 years or above and persons with reduced physical, sensory
or mental capabilities or lack of experience and knowledge, provided that they are supervised or have been
given instructions concerning the safe use of the appliance and understand the hazards involved.
• Keep children supervised. Do not allow children to play with the appliance.
• Cleaning and user maintenance may not be carried out by children without proper supervision.
• CAUTION:Accessible parts of the exhaust hood may become hot, if used together with cooking appliances.
MAINTENANCE
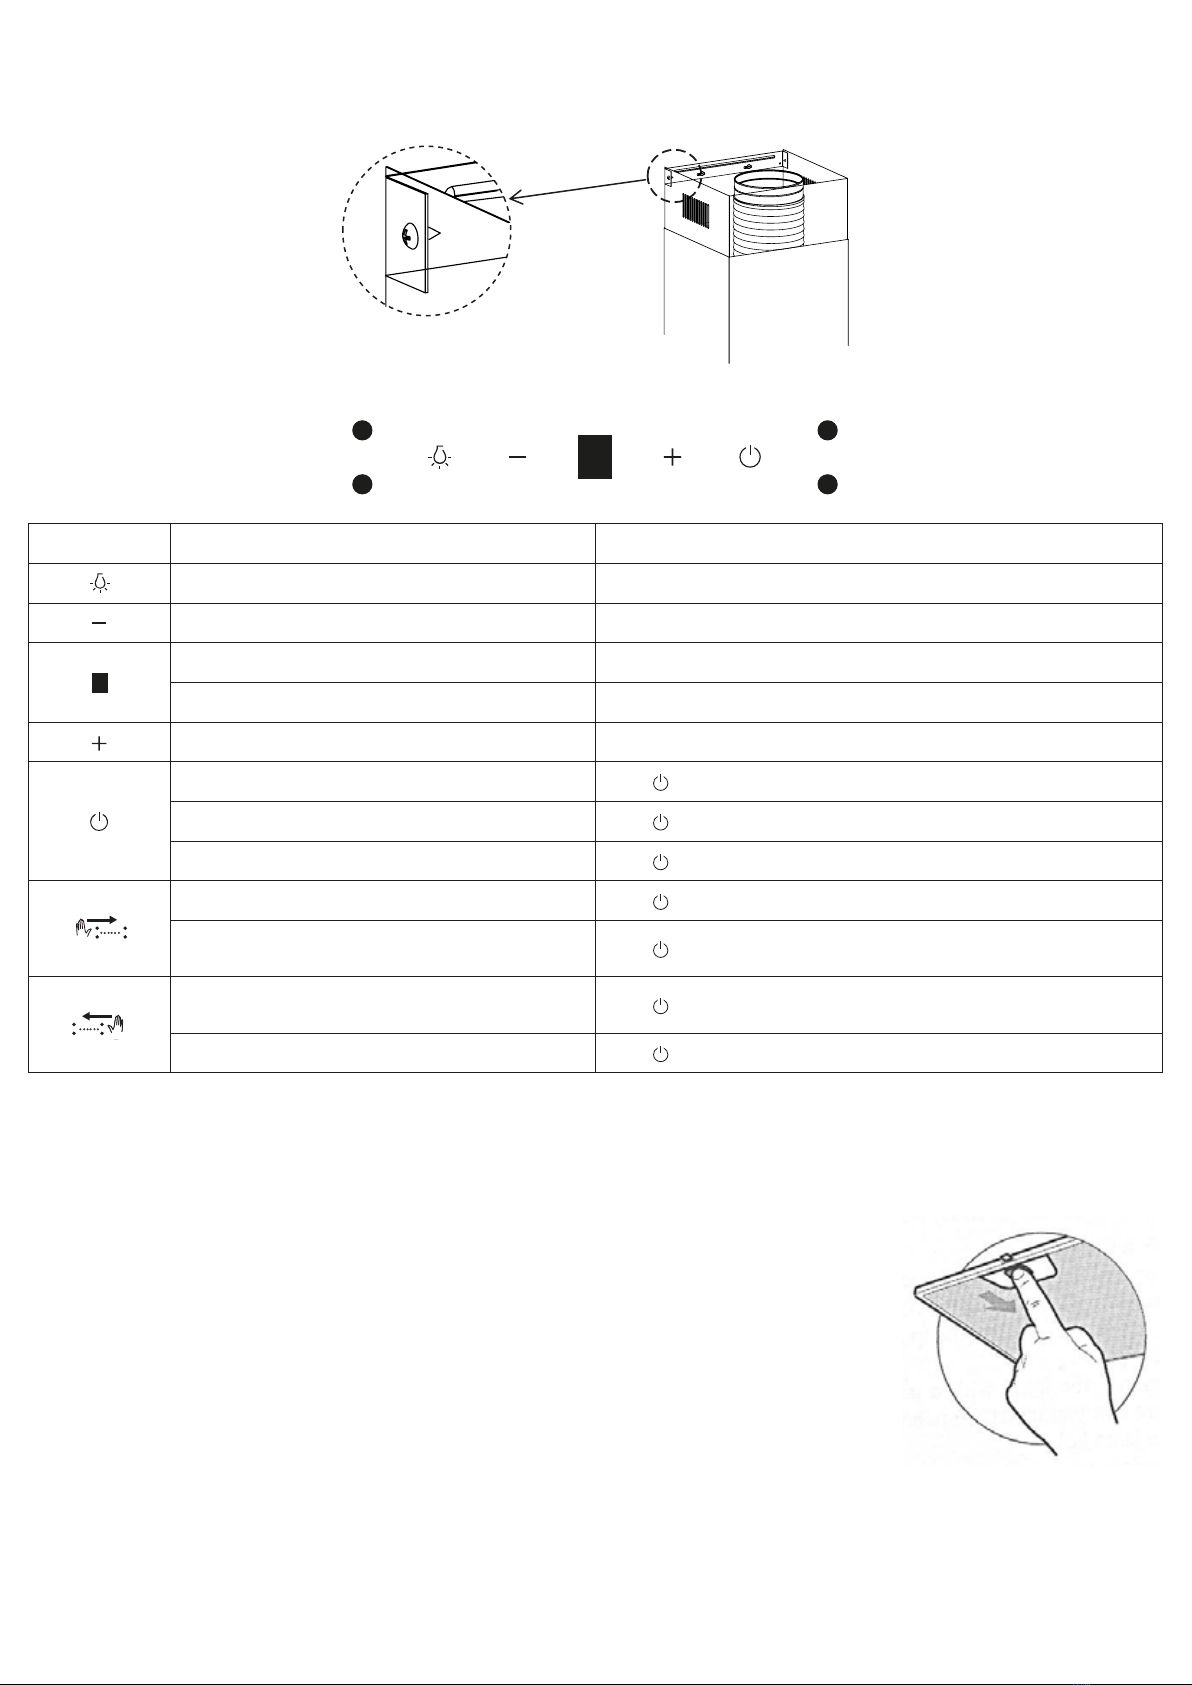
• Regularly clean the kitchen exhaust hood and its filter, according to the given instructions.
• Before starting any maintenance work on the appliance, disconnect the plug from the mains socket.
• Clean the exhaust hood with a moistened cloth and neutral liquid detergent.
• This appliance serves up to 4 cooktop units.

4
DISPOSAL
Waste equipment must be collected and disposed separately from household waste because it may contain components hazardous to the
environment or health. Used or waste equipment may be dropped off free of charge at the point of sale, or at any distributor which sells
equipment of identical nature and function. Dispose of product at a facility specializing in the collection of electronic waste. By doing so, you
will protect the environment as well as the health of others and yourself. If you have any questions, contact the local waste management
organization. We shall undertake the tasks imposed upon the manufacturer pursuant to the relevant regulations and shall bear all associated
costs arising from such.
MAIN PARAMETERS
Rated voltage and frequency: 220–240 V~ / 50 Hz
Drive motor rated input: 105 W
Grease filter: KPE 6090/A
Carbon filter set (2 pcs): KPE 6090/C
Under certain circumstances, electric appliances carry a risk.
PARTS
DIMENSIONS
Ref. Quantity Product Parts
1 1 Kitchen exhaust hood and
accessories:
Controls, lighting, fan, filter.
2.1 1Decorative cover sheet, bottom part
2.2 1Decorative cover sheet, top part
3 1 Reducer (optional)
4 1 Exhaust pipe (optional)
5 2 Activated carbon filter (optional)
Ref. Menny. Installation Parts
10 7Bolts 5 x 50
11 7Dowels
12 6Bolts 4.2 x 9.5
13 2Installation bracket
20 1Exhaust hood mounting bracket
(optional)
21 1Cover sheet fastening bracket
(optional)

5
INSTALLATION
DRILLING AND MONTING THE BRACKET
Firstly, prepare the following drawings:
• Draw a vertical line running up to the ceiling, or the top boundary in the centreline of the area, where the a exhaust canopy will be installed.
• Draw a horizontal line Aat a height of 1270–1560 mm above the cooktop.
• Draw a horizontal line Bat a height of at least 887 (840 optional) mm above the cooktop.
• Draw a horizontal line Cat a height of at least 717 mm above the cooktop.
Marking points:
• Mark a point (1) on horizontal line A, at a distance of 40 mm to the right of the vertical reference line.
• Repeat the same on the other side, and verify, whether the two marks are in level.
• Mark a point (2) on horizontal line B, at a distance of 80 (135 optional) mm to the right of the vertical reference line.
• Repeat the same on the other side, and on the vertical reference line, and verify, whether the three marks are in level.
• Mark a point (3) on horizontal line C, at a distance of 112.5 mm to the right of the vertical reference line.
• Repeat the same on the other side, and verify, whether the two marks are on the same horizontal line.
Installation of brackets:
• Drill a hole at the marked points (1) (2) (3), with a
∅
10 mm drill bit.
• Fit the dowels 11 into the holes (1) (2) (3).
• Install the exhaust hood mounting bracket 20 with the 3 bolts 10 (5 x 50) included.
• Install the cover sheet fastening bracket 21 with the 2 bolts 10 (5 x 50) included.
Hang the exhaust hood on the wall:
• Fold down the glass panel by pulling the bottom edge towards yourself. When folded down, it should be hanging vertically by its top edge.
• Remove the metal grease filter from behind the glass panel.
• Hang the exhaust hood on the mounting bracket 20.
• Level the exhaust hood horizontally.
right wrong
• Fasten the bolts 10 into the dowels 11 at the marked points (3) through the inside of the exhaust hood.
• Place the metal grease filter back.
• Close back the glass panel by pushing the bottom edge towards the wall until secured.
Optional
(optional)
(optional)
This manual suits for next models
2
Table of contents
Languages:
Other Somogyi Elektronic Ventilation Hood manuals
Popular Ventilation Hood manuals by other brands

Gorenje
Gorenje S3 IHGC963S4X manual

KOBE
KOBE ISX2136SQB-1 Installation instructions and operation manual

U.S. Products
U.S. Products ADVANTAGE-100H Information & operating instructions

Kuppersberg
Kuppersberg DUDL 4 LX Technical Passport

Framtid
Framtid HW280 manual

Thermador
Thermador HGEW 36 FS installation manual