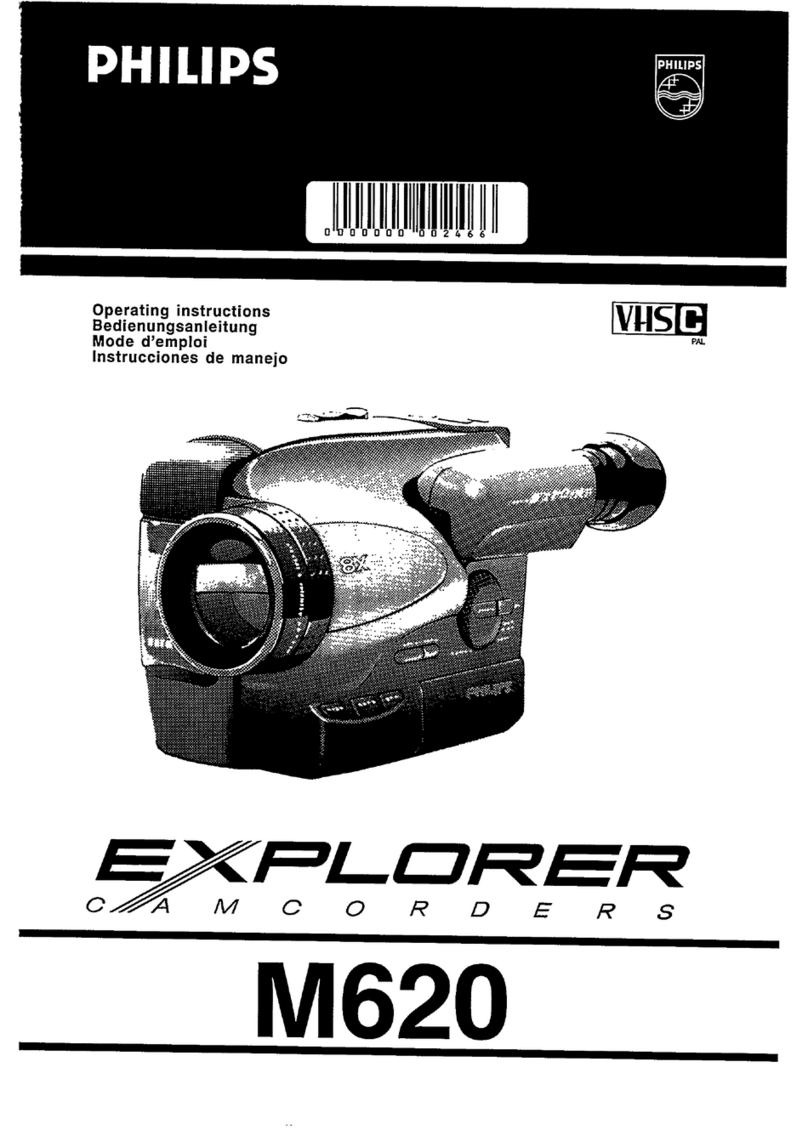
Sony Ruvi CCD-CR1E User manual

3-864-023-11(1)
CCD-CR1E
OperatingInstructions EN
Mode d’emploi F
Bedienungsanleitung D
àÌÒÚ Û͈Ëfl ÔÓ ËÒÔÓθÁÓ‚‡Ì˲ RF
©1998 by Sony Corporation
Video Camera Recorder CCD-CR1E
Video Camera
Recorder

2EN
Table of contents
Congratulations on your purchase of this Sony camcorder. With your camcorder you
can capture life’s precious moments with superior picture and sound quality.
WARNING
To prevent fire or shock hazard, do not expose the unit to rain or moisture.
To avoid electrical shock, do not open the cabinet.
Refer servicing to qualified personnel only.
English
Welcome!
Before you begin ..................................... 3
Identifying the parts ............................... 5
Getting started ...................... 8
Installing the batteries ............................ 8
Using house current ............................. 10
Charging the battery pack ................... 11
Shooting............................... 12
Camera recording ................................. 12
Photo recording..................................... 14
Advanced operations ........................... 15
Playing back......................... 20
Playing back........................................... 20
Watching on a TV screen ..................... 23
Editing .................................. 24
Editing onto another tape .................... 24
Additional information....... 25
Resetting the date and time ................. 25
Tips for using batteries......................... 27
Precautions............................................. 30
Trouble check ........................................ 32
Warning indicators ............................... 34
Self-diagnosis display........................... 35
Using your camcorder abroad ............ 36
Specifications ......................................... 37
Index ....................................................... 38

3EN
Before you begin
Before operating the unit, please read this manual thoroughly, and retain it for future
reference.
About the recording system
•The picture and sound are recorded onto the video cartridge for this camcorder.
•The video cartridge for this camcorder is installed already. You can only use the VD-
CR1 video cartridge.
•The video cartridge can be recorded for about 30 minutes camera recording and about
350 still pictures per about 5 seconds.
•It is recommended to edit the recorded pictures onto another tape for saving.
Using this manual
As you read through this manual, buttons and settings on the camcorder are shown in
capital letters.
e.g., Press START/STOP.
You can hear the beep sound to confirm your operation.
Note on TV color systems
TV color systems differ from country to country. To view your recordings on a TV, you
need a PAL system-based TV.
Precaution on copyright
Television programs, films, video tapes, and other materials may be copyrighted.
Unauthorized recording of such materials may be contrary to the provision of the
copyright laws.
Contents of the recording cannot be compensated if recording or playback is not made
due to a malfunction of the camcorder, video cartridge, etc.
EN
3EN

4EN
[a] [b]
Before you begin
Precautions on camcorder care
•TheLCDscreenismanufacturedusinghigh-precisiontechnology.However,there
may be some tiny black points and/or bright points (red, blue or green in color)
that constantly appear on the LCD screen. These points are normal in the
manufacturing process and do not affect the recorded picture in any way. Over
99.99% are operational for effective use.
•Do not let the camcorder get wet. Keep the camcorder away from rain and sea water.
Letting the camcorder get wet may cause the unit to malfunction, and sometimes this
malfunction cannot be repaired [a].
•Never leave the camcorder exposed to temperatures above 60°C (140°F), such as in a
car parked in the sun or under direct sunlight [b].
•Do not let sand get into the camcorder. When you use the camcorder on a sandy
beach or in a dusty place, protect it from the sand or dust. Sand or dust may cause the
unit to malfunction, and sometimes this malfunction cannot be repaired.

5EN
START/STOP
MODE BACK
LIGHT
5SEC
Identifying the parts
1Slide cover (p. 20)
2Zoom lever (p. 15)
3START/STOP button (p. 12)
4Open knob for video cartridge
compartment (p. 31)
5END SEARCH button (p. 18, 22)
6PHOTO SCAN button (p. 21, 22)
7Lens
8Remote sensor
You can use the remote commander
supplied with other Sony camcorders or
VCRs. Set the command mode to
VTR 2. See the instruction manual
supplied with the VCR about the
command mode.
9Recording lamp (p. 12, 14)
0Microphone
!¡ START/STOP MODE switch (p. 13)
!™ BACK LIGHT button (p. 17)
!£ Video control buttons (p. 22)
pSTOP (stop)
0REW (rewind)
(PLAY (playback)
)FF (fast-forward)
PPAUSE (pause)

6EN
Identifying the parts
!¢ Recording lamp (p. 12, 14)
!∞ DATE button (p. 19, 25)
!§ TIME button (p. 19, 25)
!¶ A/V OUT jack (p. 23)
!• SPEAKER ON/OFF switch (p. 20)
!ª MACRO lock switch (p. 15)
@º PHOTO button (p. 14)
@¡ POWER ON/OFF switch (p. 12)
@™ Cord cover (p. 10)
@£ LCD screen (p. 12, 14, 20)
@¢ Speaker (p. 20)
otherwise you cannot attach the tripod
securely and the screw may damage the
camcorder.
@• Hand strap
The hand strap is already attached.
@∞ OPEN (BATT) release lever (p. 8)
@§ Cartridge eject lever (p. 31)
@¶ Tripod receptacle (p. 15)
Make sure that the length of the tripod
screw is less than 6.5 mm (9/32 in.),

7EN
12
40min
MACRO
REC
END
SEARCH
0:00:00
4 7 1998
12:00:00
Operation indicators
Identifying the parts
7Tape counter (p. 12)/Self-diagnosis
functions indicator (p. 35)/5SEC mode
indicator (p. 13)/Photo recording
indicator (p. 14)
8Remaining tape indicator
9END SEARCH indicator (p. 18, 22)/
PHOTO SCAN indicator (p. 21, 22)
0Date and time indicator (p. 19, 25)
1Video control mode (p. 22)
2Mirror mode indicator (p. 16)
3Remaining battery time indicator
4Warning indicators (p. 34)
5Backlight indicator (p. 17)
6MACRO indicator (p. 15)
5min 0min
Attaching the lens cap
Attach the supplied lens cap to the lens.
(1)Fit the edge of the lens cap to the hollow.
(2)Push the lens cap until it clicks.
When you shoot, open the lens cap.

8EN
1
2
Getting started
Installing the batteries
Before using your camcorder, you first need to install two LR6 (size AA) Sony batteries
or the charged battery pack. Use the supplied LR6 (size AA) Sony batteries or the NP-
F10 "InfoLITHIUM" battery pack.
When you install or remove the batteries, be sure to turn off the camcorder to prevent
misoperation of the camcorder.
You can also use house current as a power source. (P. 10)
(1)To open the lid of the battery compartment, slide the OPEN (BATT) release
lever at the bottom of the camcorder to the left, then slide it toward you and
release.
(2)Install two LR6 (size AA) batteries or the battery pack in the direction of the
arrow. Then close the lid and slide it until it clicks.
Note on LR6 (size AA) batteries
•Be sure to install two LR6 (size AA) batteries with correct polarity.
•You can not use LR6 (size AA) batteries in a cold environment. Use the NP-F10 battery
pack .
Battery life
When using two LR6 (size AA) Sony batteries or the NP-F10 rechargeable battery pack:
Battery LR6(sizeAA)batteries NP-F10
Continuous recording 60 minutes 90 (80) minutes
time*
Typical recording time** 30 minutes 50 (45) minutes
Playing time on LCD 60 minutes 90 (80) minutes
Numbers in parentheses of NP-F10 indicate the time when you use a normally charged
battery.
* Approximate continuous recording time at 25°C (77°F). Battery life will be shorter if
you use the camcorder in a cold environment.
** Approximate minutes when recording while you repeat recording start/stop and
turning the power on/off. The actual battery life may be shorter.

Getting started
9EN
Installing the batteries
Note on remaining battery time indication during recording
When using the "InfoLITHIUM" battery, remaining battery time is displayed on the
LCD screen. However, the indication may not be displayed properly, depending on the
conditions and circumstances of use.
To remove batteries
Open the lid of the battery compartment and remove the batteries.
When removing batteries
Always turn the camcorder upside down so that batteries do not fall out when you
open the lid.

10EN
12
34
Using house current
When you install or remove the battery shaped block of the connecting cord, turn off
the camcorder to prevent misoperation of the camcorder.
(1)To open the lid of the battery compartment, slide the OPEN (BATT) release
lever at the bottom of the camcorder to the left, then slide it toward you and
release.
(2)Install the battery shaped block of the DC connecting cord in the direction of
the arrow. Open the cord cover and pass the cord through. Then close the lid
and slide it until it clicks.
(3)Connect the DC connecting cord to the AC adaptor/charger.
(4)Connect the power cord to the AC adaptor/charger and a wall outlet.
WARNING
The power cord must be changed only at a qualified service shop.
Note
Keep the AC adaptor/charger away from the camcorder if the picture is affected.

Getting started
11EN
12
Charge the battery pack on a flat surface without vibration. The supplied battery pack
NP-F10 is charged a little at the factory. To charge the battery pack, use the supplied
AC-VF10 AC adaptor/charger.
(1)Fit and slide the battery pack in the direction of the arrow.
(2)Connect the power cord to the AC adaptor/charger and a wall outlet. The
CHARGE lamp (orange) lights up. Charging begins.
When the CHARGE lamp goes out, normal charge is completed. For full charge,
which allows you to use the battery longer than usual, leave the battery pack attached
for about 1 hour after normal charge is completed.
To remove the battery pack
Slide the battery pack in the direction of the arrow.
Charging time
When using the NP-F10 rechargeable battery pack:
Charging time* 145 (85) minutes
The number in parentheses indicates the time when you use a normally charged
battery.
* Approximate minutes to charge an empty battery pack using the supplied charger.
(Lower temperatures require a longer charging time.)
Charging the battery pack

12EN
1
32
POWER
ON/OFF
40min
0:00:01
5s
40min REC
5s
Shooting
Camera recording
Beforeyourecordone-timeevents,youmaywanttomakeatrialrecordingtomake
surethatthecamcorderisworkingcorrectly.
(1)Makesurethatthepowersourceisinstalled.(p.8,10)
(2)WhilepressingthesmallbuttononthePOWERswitch,slideit inthedirection
ofthearrow.Thesmallbuttonlightsupgreen.
(3)PressSTART/STOP.Thecamcorderrecordsforabout5secondsandstops.
Thetapecounterdisappearsandfivedotsappear. Thedotsdisappearatarate
ofonepersecond.Theredlampslightup.
Toextendtherecordingtimein5SECmode,p ressSTART/STOPagainbefore
allthedotsdisappear. Recordingcontinuesforabout5secondsfromthe
moment you press START/STOP.
Adjusting the LCD panel angle
AdjusttheLCDpaneltotheangleyouwant.
Note
Tosavebatterypowerandpreventthebatteryandtapefromwearingdown,thepower
turnsoffautomaticallyifyoudonotoperatethecamcorderfor5minuteswhilethe
videocartridgeisinsertedandthepowerison.Tostartrecording,turnthepoweron
againandpressSTART/STOP.

Shooting
13EN
START/STOP
MODE
5SEC
Selecting the START/STOP mode
Yourcamcorderhasthreecamerarecordingmodes. Thesemodesenableyoutotakea
seriesofquickshotsresultinginalivelyvideo.
Set START/STOP MODE to the desired mode.
5SEC:WhenyoupressSTART/STOP,thecamcorderrecordsforabout5seconds
andthenstopsautomatically(factorysetting).
ANTI GROUND SHOOTING : The camcorder records only while you press
downSTART/STOPsothatyoucanavoidrecordingunnecessaryscenes.
:RecordingstartswhenyoupressSTART/STOP,andstopswhenyoupressit
again.
Camera recording

14EN
1
3,42
POWER
ON/OFF
PHOTO
40min
0:00:01
5s
Photo recording
Youcanrecordastillpicturelikeaphotographforaboutfiveseconds. Photorecording
isusefulwhenyouwanttoenjoyapicturesuchasaphotographorwhenyouprinta
pictureusingavideoprinter.
(1)Makesurethatthepowersourceisinstalled.(p.8,10)
(2)WhilepressingthesmallbuttononthePOWERswitch,slideitinthedirection
ofthearrow.Thesmallbuttonlightsupgreen.
(3)Keeppressing PHOTO lightlyuntilastillpictureand " CAPTURE" appear
ontheLCDscreen. Tochangethestillpicture,releasePHOTO,selectstill
pictureagain,andkeeppressingPHOTOlightlyagain.
(4)PressPHOTOdeeper. ThestillpictureontheLCDscreenisrecordedfor
aboutfiveseconds. Thetapecounterdisappearsandfivedotsappear. The
dotsdisappearatarateofonepersecond.Theredlampslightup.Thesound
duringthosefivesecondsisalsorecorded.
Adjusting the LCD panel angle
AdjusttheLCDpaneltotheangleyouwant.
To prevent camera-shake
Whenshootingastillpicture,theslightestmovementofthecamcorderisnoticeable. To
preventcamera-shake,holdthecamcorderfirmlyoruseatripod.

Shooting
15EN
3
2
Using the zoom feature
Zoomingisarecordingtechniquethatletsyouchangethesizeofthesubjectinthe
scene.
Formoreprofessional-lookingrecordings,usethezoomfunctionsparingly.
“T”side: fortelephoto(subjectappearscloser)
“W”side: forwide-angle(subjectappearsfartheraway)
When you shoot a subject using the telephoto zoom
Ifyoucannotgetasharpfocuswhileinextremetelephotozoom,movethe zoomlever
tothe“W”sideuntilthefocusissharp. Youcanshootasubjectthatisatleastabout
140cm(551/8in.)awayfromthelenssurfaceinthetelephotoposition,orabout40cm
(153/4in.)awayinthewide-angleposition. Whenyoushootasubjectcloserthan
about40cm(153/4in.),werecommendyoushootinmacro.
Shooting a subject closer – Macro
Evensmallsubjects,suchasflowers,insects,andimagesinphotographs,canliterally
fillthescreeninmacro. Youcanshootasubjectthatisatleastabout10cm(4in.)away
fromthelenssurfaceinmacro.
Werecommendyoutouseatripodwhenshootinginmacro.
(1)Bringthecamcorderascloseasnecessarytoobtainthedesiredsubjectsize.
(2)SlidetheMACROlockswitchinthedirectionofthearrow.
(3)Movethe zoomlevertothe“W”sideend. TheMACRO indicatorappears
ontheLCDscreen.
Advanced operations

16EN
[a] [b]
Letting the subject monitor the shot (Mirror mode)
YoucanturntheLCDpaneloversothatitfacestheotherwayandyoucanletthe
subjectmonitortheshot.
(1)TurntheLCDpanelupvertically. The indicator (Mirrormode) appears
andthedateandremainingtapeindicatorsdisappear.
(2)Startrecording.
[a] LCDscreenimage.
[b] Recordingimage.
To cancel mirror mode
TurntheLCDpaneldowntowardthecamcorderbody.
Notes on mirror mode
•ThepictureontheLCDappearsasamirror-imagewhilerecordinginmirrormode.
TheRECindicatorappearsas r. Theotherindicatorsmaynotappearinmirror
mode.
•Whilerecordinginmirrormode,youcannotoperatetheDATEandTIME.
Advanced operations

Shooting
17EN
BACK
LIGHT
[a]
[b]
Shooting with backlighting
Whenyoushootasubjectwiththelightsourcebehindthesubjectorasubjectwitha
lightbackground,usetheBACKLIGHTfunction.
PressBACKLIGHT.The cindicatorappearsontheLCDscreen.
[a] Subjectistoodarkbecauseofbacklight.
[b] Subjectbecomesbrightwithbacklightcompensation.
After shooting
BesuretoreleasethisadjustmentconditionbypressingBACKLIGHTagain. The c
indicatordisappears.Otherwise,thepicturewillbetoobrightundernormallighting
conditions.
This function is also effective under the following conditions:
•Asubjectwithalightsourcenearbyoramirrorreflectinglight.
•Awhitesubjectagainstawhitebackground. Especiallywhenyoushootaperson
wearingshinyclothesmadeofsilkorsyntheticfiber,hisorherfacetendstobecome
darkifyoudonotusethisfunction.
Advanced operations

18EN
END
SEARCH
Searching for the end of the picture
Press END SEARCH during stop.
Thetapestartsrewindingorfast-forwardingandthelast5secondsoftherecorded
portionplayback. Thenthetapestopsattheendoftherecordedpicture.
If you start recording after using END SEARCH
Occasionally,thetransitionbetweenthelastsceneyourecordedandthenextscenemay
notbesmooth.
Advanced operations

Shooting
19EN
DATE
TIME
DATE TIME
4. 7.1998
4. 7.1998
10:30:00
TIME DATE
10:30:00
Recording with the date/time
Beforeyoustartrecordingorduringrecording,pressDATEand/orTIME. Youcan
recordthedateand/ortimedisplayedontheLCDscreenwiththepicture.PressDATE
(orTIME),thenpressTIME(orDATE)todisplaythedateandtimetogether.Exceptfor
thedateand/ortimeindicator,noindicatorontheLCDscreenisrecorded.
TheclockissetatthefactorytoLondontimefortheUnitedKingdomandParistimefor
theotherEuropeancountries. Youcanresettheclock.(p.25)
PressDATEand/orTIMEbeforeyoustartrecordingorduringrecording.
Note on recording with the date and/or time
Onceyourecordthedateand/ortime,youcannoteraseit.
To stop recording with the date and/or time
PressDATEand/orTIMEagain. Thedateand/ortimeindicatordisappears.The
recordingcontinues.
To finish recording
WhilepressingthesmallbuttononthePOWERswitch,slideittoturnoffthe
camcorder.Andremovethebatteries.
Werecommendyouturnoffthecamcordertopreventwearingdownthebattery while
youdonotusethecamcorder.
Advanced operations

20EN
SPEAKER
OFF ON
2
1
3
4
You can monitor the playback picture on the LCD screen.
(1)Makesurethatthepowersourceisinstalled.(p.8,10)
(2)WhilepressingthesmallbuttononthePOWERswitch,slideitinthedirection
ofthearrow.Thesmallbuttonlightsupgreen.
(3)Press 0torewindthetape.
(4)Press (tostartplayback.
You can also monitor the picture on a TV screen, after connecting the camcorder to a TV
or VCR.
Adjusting the LCD panel angle
Adjust the LCD panel to the angle you want.
When playing back in the dark
You may find it difficult to view the LCD screen in the dark. We recommend you to
monitor the playback picture on the LCD screen where there is more light.
To turn off the speaker
Slide the SPEAKER ON/OFF switch to OFF. To turn on the speaker, slide it to ON.
Playing back
Playing back
Speaker
Table of contents
Languages:
Other Sony Camcorder manuals

Sony
Sony Handycam HDR-TD10 User manual

Sony
Sony CYBER-SHOT DSC-F717 User manual

Sony
Sony HXR-NX5U User manual

Sony
Sony Handycam DCR-PC7E User manual

Sony
Sony Handycam DCR-SX30E User manual

Sony
Sony HDW-650 User manual

Sony
Sony Handycam HDR-CX300 User manual

Sony
Sony Computer Applications Guide User guide

Sony
Sony Handycam DCR-HC26E User manual

Sony
Sony PMW-F3L User manual

Sony
Sony CCD-Z1 User manual

Sony
Sony Handycam DCR-DVD301 User manual

Sony
Sony DVCAM DSR-PD150 User manual

Sony
Sony DSR-250 User manual

Sony
Sony FCBEX1000P User manual

Sony
Sony PXW-Z450 User manual

Sony
Sony D8MM-01 Installation guide

Sony
Sony NEX-VG20 Handycam® User manual

Sony
Sony EA50 User manual

Sony
Sony FCBEX48E User manual