manuals.online logo
Brands
  1. Home
  2. •
  3. Brands
  4. •
  5. Sony
  6. •
  7. CD Player
  8. •
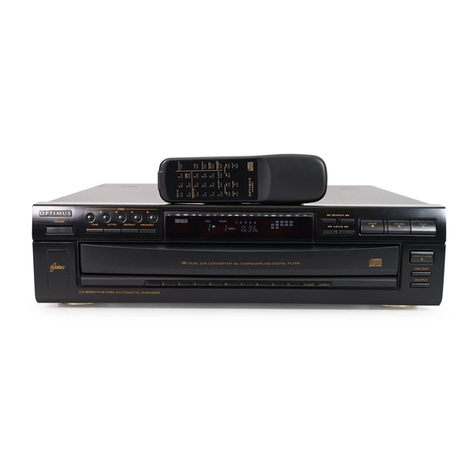
  9. Sony CDP-557ESD User manual

Sony CDP-557ESD User manual

Other manuals for CDP-557ESD

3

This manual suits for next models

2

Other Sony CD Player manuals

Sony HCD-RG333 User manual

Sony

Sony HCD-RG333 User manual

Sony Walkman D-NE730 User manual

Sony

Sony Walkman D-NE730 User manual

Sony Discman D-181 User manual

Sony

Sony Discman D-181 User manual

Sony DVD-NS78H User manual

Sony

Sony DVD-NS78H User manual

Sony D-555 User manual

Sony

Sony D-555 User manual

Sony CFD-68 User manual

Sony

Sony CFD-68 User manual

Sony MZ-R50 Analog PCLink User manual

Sony

Sony MZ-R50 Analog PCLink User manual

Sony CDX-GT410U - Fm/am Compact Disk Player User manual

Sony

Sony CDX-GT410U - Fm/am Compact Disk Player User manual

Sony MZ-R3 User manual

Sony

Sony MZ-R3 User manual

Sony Walkman MZ-N910 User manual

Sony

Sony Walkman MZ-N910 User manual

Sony Discman D-848K User manual

Sony

Sony Discman D-848K User manual

Sony CFD-Z125 - Cd Radio Cassette-corder User manual
Sony

Sony CFD-Z125 - Cd Radio Cassette-corder User manual

Sony CDX-646 Operating Instructions  (English,Español,... User manual

Sony

Sony CDX-646 Operating Instructions (English,Español,... User manual

Sony CDX-GT31MP User manual

Sony

Sony CDX-GT31MP User manual

Sony CFD-565 User manual

Sony

Sony CFD-565 User manual

Sony CFD-V5 - Cd Radio Cassette-corder User manual
Sony

Sony CFD-V5 - Cd Radio Cassette-corder User manual

Sony CDP-311 - Compact Disc Player User manual

Sony

Sony CDP-311 - Compact Disc Player User manual

Sony CDX-GT414U User manual

Sony

Sony CDX-GT414U User manual

Sony CDP-M555ES - Es 400 Disc Cd Changer User manual

Sony

Sony CDP-M555ES - Es 400 Disc Cd Changer User manual

Sony CDX-GT350S Product guide

Sony

Sony CDX-GT350S Product guide

Sony CDP-CE575 - Disc Carousel User manual

Sony

Sony CDP-CE575 - Disc Carousel User manual

Sony CFM-A50 User manual

Sony

Sony CFM-A50 User manual

Sony CDX-GT40U User manual

Sony

Sony CDX-GT40U User manual

Sony CDX-R6550 User manual

Sony

Sony CDX-R6550 User manual

Popular CD Player manuals by other brands

Arcam CD23 Handbook

Arcam

Arcam CD23 Handbook

Sanyo MCD-Z1F Service manual

Sanyo

Sanyo MCD-Z1F Service manual

JVC RC-ST3SL instructions

JVC

JVC RC-ST3SL instructions

Technics SL-P9066 operating instructions

Technics

Technics SL-P9066 operating instructions

Marantz HD-CD1 quick start guide

Marantz

Marantz HD-CD1 quick start guide

Philips AZ1140 Instrukcja obs?ugi

Philips

Philips AZ1140 Instrukcja obs?ugi

Alpine 7909 owner's manual

Alpine

Alpine 7909 owner's manual

JVC CH-X350 instructions

JVC

JVC CH-X350 instructions

RCA RP-7923 instruction manual

RCA

RCA RP-7923 instruction manual

Pioneer DEH-P3550MP XM Operation manual

Pioneer

Pioneer DEH-P3550MP XM Operation manual

Philips Shockproof AX2102 brochure

Philips

Philips Shockproof AX2102 brochure

Philips CD582 user manual

Philips

Philips CD582 user manual

Philips AZ 6821 operating manual

Philips

Philips AZ 6821 operating manual

Lasonic MSU-2020 user manual

Lasonic

Lasonic MSU-2020 user manual

Denon DCD-1420 Service manual

Denon

Denon DCD-1420 Service manual

Panasonic SJ-MR100 operating instructions

Panasonic

Panasonic SJ-MR100 operating instructions

Onkyo DX-7210 instruction manual

Onkyo

Onkyo DX-7210 instruction manual

Cambridge Audio SONATA CD30 manual 

Cambridge Audio

Cambridge Audio SONATA CD30 manual 

manuals.online logo
manuals.online logoBrands
  • About & Mission
  • Contact us
  • Privacy Policy
  • Terms and Conditions

Copyright 2025 Manuals.Online. All Rights Reserved.

SONY.
jconipaer
Compact
Disc
Player
Wise
CDP-557ESD
CDP-707ESD
CDP-337ESD
Operating
Instructions
—
page
2
Before
operating
the
unit,
please
read
this
manual
thoroughly
and
retain
it
for
future
reference.
Mode
d’emploi_.
page
30
Avant
la
mise
en
service
de
cet
apparelt,
pritre
de
lire
attentivement
‘¢8
mode
d'emploi
que
l'on
conservera
pour
toute
référence
ultérieure.
Manual.de
instrucciones
—
pagina
58
Antes
de
utilizar
la
Unidad,
fea
este
manual
detenidamente
y
consérvelo
para
fuluras
referencias.
©
1987
by
Sony
Corporation
Warning
‘To
prevent
fire
or
shock
hazard,
do
not
expose
the
unit
to
rain
or
moisture.
‘To
avoid
electrical
shack,
do
not
open
the
cabinet.
Refer
servicing
fo
qualified
personnel
only,
DANGER
lavisible
faser
radiation
when
open
and
intetock
failed
or
dateated.
Avoid
direct
exposure
to
beam.
CAUTION
Use
of
controls
or
adjustments
or
performance
ot
procedures
other
than
those
specified
herein
may
result
in
hazardous
radiation
exposure.
This
Compact
Disc
player
is.
classified
as
a
CLASS
1
LASER
product.
The
CLASS
1
LASER
PRODUCT
fabol
is
located
on
the
rear
exterior.
CLASS
1
LASER
PRODUCT
Laser
component
in
this
product
Is
capable
of
emitting
radiation
exceeding
the
limit
for
Class
1.
NOTICE
FOR
THE
CUSTOMERS
IN
THE
UNITED
KINGDOM
IMPORTANT
“The
wires
in
this
mains
lead
ere
coloured
in
accordance
‘with
the
following
code:
Blue:
Neutrat
Brown:
Live
AAs
the
colours
of
the
wires
in
the
mains
lead
of
this
‘apparatus
may
not
correspond
with
the
coloured
markings.
identifying
the
terminals
in
your
plug
proceed
as
follows:
‘The
wire
which
is
coloured
biue
must
be
connected
to
the
terminal
which
is
marked
with
the
letter
N
or
coloured
black.
‘The
wire
which
is
coloured
brown
must
be
connected
to
the
terminal
which
is
marked
with
the
letter
L
or
coloured
red,
FOR THE
CUSTOMERS
IN
CANADA
CAUTION:
‘TO
PREVENT
ELECTRIC
SHOCK,
DO
NOT
USE
THIS
POLARIZED
AC
PLUG
WITH
AN
EXTENSION
CORD,
RECEPTACLE
OR
OTHER
OUTLET UNLESS
THE
BLADES
CAN
BE
FULLY
INSERTED
TO
PREVENT
BLADE
&XPOSURE.
Differences
among
the
CDP-857ESD,
the
CDP-707ESD
and
the
CDP-337ESD
This
instruction
manual
covers
the
CDP-SE7ESD,
the
CDP-707ESD
and
the
COP337ESD.
Their
performance
‘and
operatian
are
identical.
They
differ
only
in
their
front
panel
design
and
technical
specifications.
As
for
the
specifications,
refer
to
“Specifications”,
‘The
following
models
are
supplied
wit
panels,
while
the
other
models
are
nat:
COP-707ESD
(for
U.S.A
and
Canada)
(CDP-67ESD
(ior
European
countries)
‘The
illustrations
used
in
this
manual
are
of
the
CDPT07ESD.
Table
of
Contents
Note
on
the
transit
SC101
ameeeenr
nen
‘When
you
use the
CD
player
for
the
first
time
Features
..
Precautions
‘Operating
voltage
installation
Location
of
COmtTO8S
men
|
Basic
operation,
Playing
a
6180
omen
nen
Locating
a
particularsetection
Locating
a
particular
point
in
a
selection
..
Playing
a
Single
Sel26tiON
-mmmmmnen
ae
‘Stopping
play
for
a
moment
automatically
et
the
beginning
of
each
sslection
.
Inserting
a
blank space
between
selections.
—.m
‘Advanced
operation
Playing
in
the
desived
Ofer
mereanmon
Playing
in
a
random
Order
c1mnnmnnnn
Paying
repeatedty
‘Custom
file
operation’
On
custom
files
.......
Writing
a
comment
about
a
dIs¢
..--saumne
Keeping
the
program
in
memory
———amnemners
Giving
adise
Indexes
a6
you
WANE
meee
Other
way
to.use:
‘Timer
activated
playing
-ennermmnenn
Maintenance
Specifications
..
Troubleshooting
GUIDE
eru-wsernenennmsnaens
Before
operating
the
CD
player,
be
sure
to
tum
the
transit
sorew
as
described
on
the
label
on
‘the
bottom
of
the
unit.
{Remove
the
cap
of
the
screw.
2
Tum
the
screw
180
degrees
counterclockwise
using
the
supplied
sorewdiver,
Do
not
turn
the
screw
excessively,
or
the
unit
may
be
damaged.
‘When
transporting
the
unit
again,
tum
the
transit
sorew
in
the
reverse
direction.
When
You
Use
the
CD
Player
for
the
First
Time
‘Tum
on
tha
power
by
pressing
POWER
while
keeping
ERASE
end
FILE
pressed.
‘This
with
clear
the
internal
memory
if
you
have
been
instructed
how
to
use
the
custom
file
function
at
the
shop
you
purchased
the
CD
player.
Thus
the
player
retums
the
same
status
as
it
was
manufactured
at
factory,
Features
Custom
file
function
*Dlee
memo
function
for
writing
a
comment
about
a
disc.
(page
21)
«Program
bank
function
for
storing
a
progremmed
playing
onder.
(page
23}
‘Custom
index
function
for
assigning
your
own
index
point
to
any
desired
position
on
alse.
(page
24)
Program
play
‘You
can
play
up
to
20
selections
In
the
desired
order.
Pause
‘can
be
also
programmed.
You
can
atso
confirm
the
total
playing
tine
while
choosing
the
selection
to
bs
programmed.
Variety
of
playing
modes
Single
play
(page
14},
program
play
(page
15),
shuffie
play
{page
18)
and
repeat
play
(page
19)
as
well
as
norma!
continuous
play
of
a
whole
disc.
Large
and
easy-to-read
window
display
‘Shows
the
elapsed
playing
time,
the
remaining
time
of
the
salaction
being
played,
the
remaining
time
of
the
whole
disc
‘or
the
remaining
programmed
selaction
numbers.
The
display
contains
a
music
calendar
indicating
all
the
‘numbers
of
the
selections
on
the
disc
(up
to
20).
Precautions’
-
‘On
safely
+
Before
operating
the
unit,
be
eure
that
the
operating
‘eltage
of
your
unitis
Identical
with thet
of
your
local
Power
supply.
‘©
Should
any
liquid
or
solid
object
fall
into
the
cabinet,
Unplug
the
unit
and
have
it
checked
by
quelified
personnel
before
operating
it
any
further.
:
*
Unplug
the
unit
from
the
wall
outlet
if
It
wil!
not
be
used
fora
long
time.
To
disconnect
the
cord,
pull
it
out
by
‘Grasping
the
plug.
Never
pull
the
cord
itsest.
The
nameplate
Indicating
operating
voltage,
power
consumption,
etc.
s
located
on
the
rear
of
the
unit.
As
the
laser
bearn
usad
in
this
compact
disc
player
is
harmful
to
the
eyes,
do
not
attempt
to
disassemble
the
cabinet.
Refer
servicing
to
qualified
personne!
only.
On
‘When
the
unit
Is
not
used,
tum
the
power
off,
to
conserve
‘energy
and
to
extend
the
useful
life
of
your
unit.
Important
‘Since
the
CD
system
boasts
a
wide
dynamic
range,
the
‘peaks
of
high
level
Inputs
are
recorded
with
high
fidelity,
‘and
the
noise
level
is
very
lov.
Do
not
turn
up
the
volume
while
Fistening
to
a
portion
‘with
no
audio
signals
or
very
iow
level
inputs.
H
you
do,
the
speakers
may
be
damaged
when
8
peak
level
portion
fs
played.
If
you
have
any
questions
or
problems
conceming
your
unit,
please
contact
your
nearest
Sony
deater.
Before
connecting
the
unit
to
the
power
source,
check
that
the
operating
voitage
of
your
unit
is
the
same
as
the
local
power
tine
voltage.
neta
|
:
:
f
‘Witiors
Saran
Motel
|
a
eorsced
|
‘Opsrating
wottage
ote
ores
“Operating
woth
COP.
European
|
Oparates
on
220VAG(or2s0v
AC
|
|
COP.
Other
Operates
on
either
120,
2200¢
s57ES0
|
countries
|
adjustable
by
authorized
Sony
ss7esp
{countries
|
240
AC,
S060
Hz
COR
personnal,
S60HZ
‘The
voltage
solactor
is
located
on
S37ESD
the
rear
panel.
tthe
selector
United
‘Operates
on
240V
AG
(or
220V
AC
i
Kingdom
|
adjustable
By
authorized
Sony
traiat
bermsel,
econssck
18
A2,
personnel
£0
He
power
ord
end
tum
the
selector
=
with
a
coin
ora
similar
object
so
coF
USA
and
|
Operates
on
120VAG,
60Hz
that
the
arrow
maikof
the
yoresD
_|
Canada
selector
points
to
the
proper
voltage
figure.
TP
CHEL
ele
Notes
on
Installation
Place
the
unit
ina
location
with
adequate
2ir
circulation
to
prevent
intemal
haat
buildup
In
the
unit.
This
way.
\
A
Da
not
place
the
unit
on
a
soft
surface,
such
as
arug
that
would
block
the
ventilation
holes
on
the
bottom.
Not
this
way.
7
Do
not
install
the
unit:
—
near
heat
sources
such
as
radiators
or
air
ducts,
—
Ina
placa
subject
to
direct
sunlight,
excessive
dust,
mechanical
vibration
or
shook.
Installing
Batteries
Install
the
batteries
in
the
supplied
remote
commander
for
remote
control
operation.
10
FS
(size
AA)
batteries
‘On
moisture
condensation
Ifthe
player
Is
brought
directly
from
a
cold
to.a
warm
location,
or
is
placed
in
a
very
damp
room,
moisture
may
‘condense
on
the
lens
Inside
the
unit.
Should
this
occur,
the
player
wilt
not
operate.
tn
this,
‘case,
remove
the
disc
and
leave
the
player
turned
on
for
about
an
hour
until
the
moisture
evaporates.
tl
Do
aot
throw
away
the
carton
and
the
packing
material
Iwill
be
an
ideal
container
wien
transporting
the
unit
for
repeie
work,
ete
‘Fo
avoid
damage
catisad
by
battery
leakage
and
corrosion
‘When
the
commander
will
not
be
used
for
long
time,
remove
the
batteries.
‘Onbettory
life
About
haif
a
year
of
normal
operation
can
be
expected
wien
using
the
Sony
SUM
NS)
batteries.
When
the
batteries
are
run
down,
the
remote
commander
wil
not
‘operate
the
unit.
this
case,
replace
both
batteries
with
new
ones.
1H
2ke
3
12-3
fale}
1
elo]
(1)
LINE
OUT
(audio
output)
jacks
[QDIGITAL
OUT
(digital
audio
output)
jacks
FIXED:
Output
the
signal
at
the
fixed
level
Output
the
digital
audio
signals.
VARIABLE:
Output
the
signal
at
ths
level
set
by
the
LINE
OUTIHEADPHONE
LEVEL
coniroljor
LINE
OUT
VOLUME
buttons
on
the
remote
commander).
{Z]
OUTPUT
SELECTOR
Selects
the
output
connectors
to
be
used.
DIGITAL
OUT:
Digital
signal
is
output
through
the
DIGITAL
QUT
jacks.
No
signal
is
output
through
the
LINE
OUT
jacks
or
the
HEADPHONES
jack.
LINE
OUT:
Audio
signat
is
output
through
the
LINE
OUT
Jacks
or
the
HEADPHONES
jack.
No
signal
is
output
through
the
DIGITAL
OUT
jacks.
(Be
sure
to
set
to
this
position
when
you
tisten
to
the
music
through
the
headphones
or
the
LINE
OUT
jacks)
COAXIAL:
To
be
connected
to
a
digital
input
jack
of
the
amplifier
or
the
D/A
converter
unit.
OPTICAL:
To
be
connected
to
the
amplfierhaving
an
optical
input
jack.
Note:
If
the
LINE
OUT/HEADPHGNE
LEVEL
control
is
turned
while
recording
through
the
VARIABLE
LINE
OUT
jacks,
the
level
of
the
recorded
sound
will
be
different
from
that
set
bythe
recording
level
controls
of
the
tape
deck,
Notes:on
Connection
Tum
off
the
amplifier
before
making
connections,
‘=
Be
sure
to
insert
the
plugs
firmly
into
the
jacks.
Looss
connactions
may
cause
hum
and
noise,
+
Leave
a
tittle
slack
in
the
connecting
cord
to
allow
for
inadvertent
shock
or
vibration.
Connect
the
red
plug
of
the
eupplied
connecting
cord
to
the
right-channel
jack
(R)
of
the
amplifier
and
the
white
plug
to
the
Jeft-channel
jack
(L).
Otherwise,
the
right
and
left
channels
will
be
reversed.
+
>
toan
ACoutlet
toanACoutiet
tllustration:
CDP-7O7ESD
‘Audio
signal
connecting
cord
(supplied)
{_
T
Connecting
DIA
converter
unit
and
amplifier
‘Sony
DAS-702ES
DIA
converter
unit
or
other
equivalent
D/A
converter
using
a
digital
audio
interface
can
be
connected
to
the
DIGITAL
OUT
jack.
IRustration:
COP-707ESD
lal)
—f
\O|O)
>
toanAcoutlet
Bo
surato
set
to
DIGITAL
OUT
side.
|
Digital
connecting
cord
(optional)
DIA
converter
unit
*
>
toanACoutlet
ex
ce
>
toanACoutlet
Digits
signat
is
output
theough
tie
DIGITAL
OUT
jack
In
this
case,
sound
does
not
come
through
the
LINE
OUT
jacks
and
the
HEADPHONES
jack.
8
Connecting
an
amplifier
having
an
optical
input
connector
IMlustration:
COP-707ESD
eX}
Be
suretosetto
DIGITAL
OUT
side.
Amplifier
‘Optical
cabie
foptional,
=>
toan
ACoutlet
=.
toan
ACoutlet
Location
of
Controls
Front Pane!
Refer
to
the
pages
indicated
In
@
for
detalls.
‘The
luatratdn
stows
the
fant
parel
of
ie
eee
ce
tenet
or
DRSIES
ie
é
Sight
sitfent,
but
locations
ane
funerion
ofthe
controle
ae
Identical.“
2
20
{over
20)
button
@:
CHECK
{program
check)
button
@
‘Ao
INDEX
button
@:
CLEAR
(program
cleat)
button
@
REPEAT
button
@-
FILE
(custom
tile}
button
@)
@
@
A.
SPACEIPAUSE
(auto
space/auto
pause)
button
®
DISPLAY
button
@
@
Numeric
buttons
®:
INDEX
MODE
button
®
Disc
compartment
PLAY
MODE
buttons
PROGRAM
button
@
SHUFFLE
button
©
CONTINUEISINGLE
button
@
D
LINE
OUT/HEADPHONE
LEVEL
control
@
POWER
switch
®.
Remote
sensor
@)——-—~
TIMER
ewitch
@
HEADPHONES
jack
(openictose)
button
ERASE
(memory
erase)
button
@)
-<44
p>
(manual
search)
buttons
Oe
itd
bi
(AMS*)
buttons
©
©
@
>
(play)
bution
@
Display
window
HE
{pause)
button
@-
1s
(lop)
button
@
*
AMS
lean
abbreviation
of
Automatic
Music
Sensor.
10