Sony DVP-F25 User manual

SERVICE MANUAL
CD/DVD PLAYER
SPECIFICATIONS
DVP-F25
RMT-D151A/D151E
US Model
Canadian Model
AEP Model
UK Model
Argentina Model
Mexico Model
Hong Kong Model
Singapore Model
Australian Model
New Zealand Model
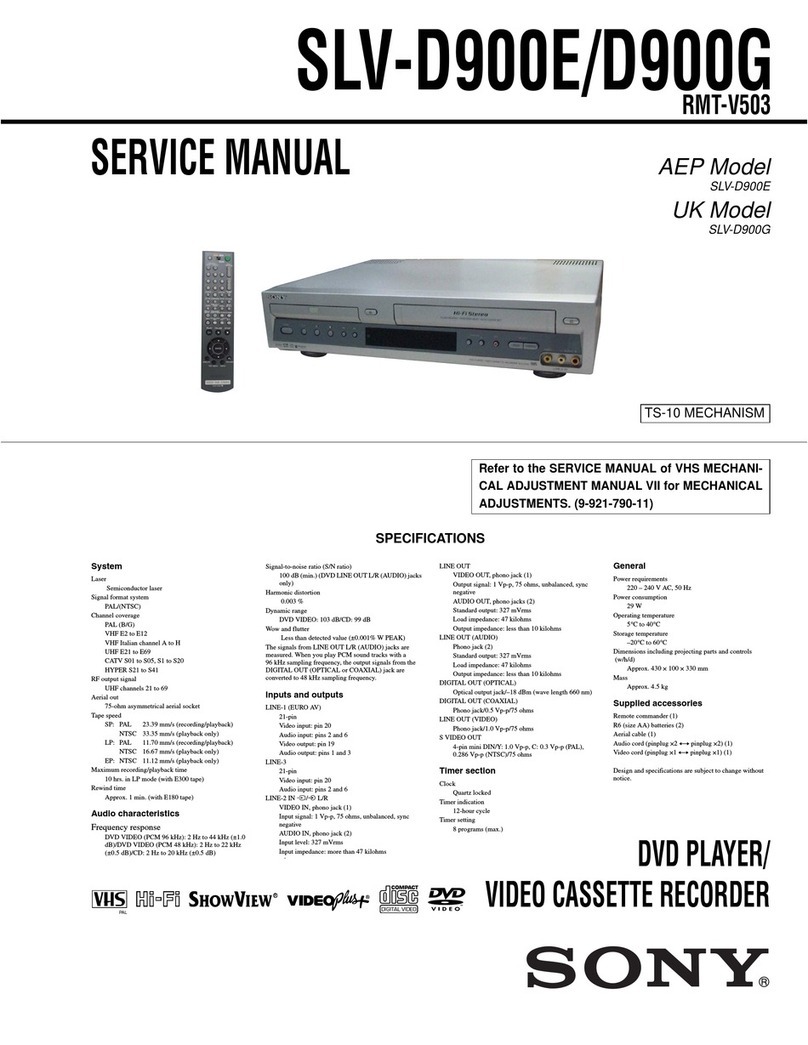
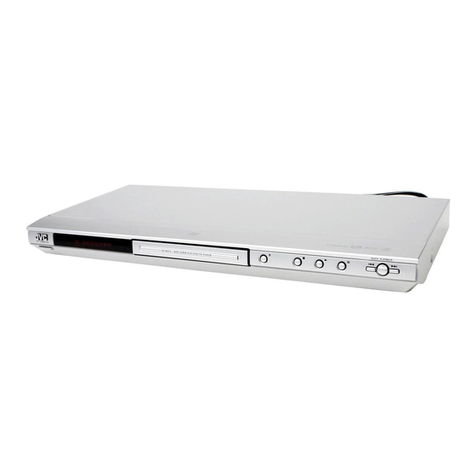
Photo : DVP-F25
RMT-D151E
System
Laser: Semiconductor laser
Signal format system:
:
PAL/NTSC
Audio characteristics
Frequency response: DVD VIDEO (PCM
96 kHz): 2 Hz to 44 kHz (±1.0 dB)/DVD
VIDEO (PCM 48 kHz): 2 Hz to 22 kHz
(±0.5dB)/CD:2Hzto20kHz(±0.5 dB)
Signal-to-noise ratio (S/N ratio): 115 dB
(AUDIO OUT L/R jacks only)
Harmonic distortion: 0.003 %
Dynamic range: DVD VIDEO: 103 dB/CD:
99 dB
Wow and flutter: Less than detected value
(±0.001% W PEAK)
When you play PCM sound tracks with a
96 kHz sampling frequency, the output
signals from the DIGITAL OUT (OPTICAL)
j
ack are converted to 48 kHz sampling
frequency.
Outputs
(Jack name: Jack type/Output level/Load
impedance)
AUDIO OUT L/R: Phono jack/2 Vrms/
10 kilohms
DIGITAL OUT (OPTICAL): Optical
output jack/-18 dBm (wave length:
660 nm)
COMPONENT VIDEO OUT (Y, CB, CR):
Phono jack/Y: 1.0 Vp-p/CB, CR:
0.7 Vp-p/75 ohms
VIDEO OUT: Phono jack/1.0 Vp-p/75 ohms
S VIDEO OUT: 4-pin mini DIN/
Y: 1.0 Vp-p/C: 0.3 Vp-p (PAL),
0.286 Vp-p (NTSC)/75 ohms
General
Power requirements:
2
US,Canadian,Mexico model:
120V AC, 60 Hz
Other country model:
20 to 240 V AC, 50/60 Hz
Power consumption: 9W
Dimensions (approx.): 196 ×61 ×265 mm
(wid
(7 3/4× 2 1/2× 10 1/2in.)
th/height/depth) incl. projecting
parts
Mass (approx.): 1.8 kg (3 lb 14 oz.)
Operating temperature: 5°C to 35 °C
Operating humidity: 25 % to 80 %
Supplied accessories
See page 1-3.
Specifications and design are subject to
change without notice.
(except US/Canadian
model)
NTSC (US/Canadian
model)
(41 °F to 95 °F)

— 2 —
SAFETY-RELATED COMPONENT WARNING!!
COMPONENTS IDENTIFIED BY MARK 0OR DOTTED LINE WITH
MARK 0ON THE SCHEMATIC DIAGRAMS AND IN THE PARTS
LIST ARE CRITICAL TO SAFE OPERATION. REPLACE THESE
COMPONENTS WITH SONY PARTS WHOSE PART NUMBERS
APPEAR AS SHOWN IN THIS MANUAL OR IN SUPPLEMENTS
PUBLISHED BY SONY.
1. Check the area of your repair for unsoldered or poorly-soldered
connections. Check the entire board surface for solder splashes
and bridges.
2. Check the interboard wiring to ensure that no wires are
"pinched" or contact high-wattage resistors.
3. Look for unauthorized replacement parts, particularly
transistors, that were installed during a previous repair. Point
them out to the customer and recommend their replacement.
4. Look for parts which, through functioning, show obvious signs
of deterioration. Point them out to the customer and
recommend their replacement.
5. Check the B+ voltage to see it is at the values specified.
6. Flexible Circuit Board Repairing
• Keep the temperature of the soldering iron around 270˚C
during repairing.
• Do not touch the soldering iron on the same conductor of the
circuit board (within 3 times).
• Be careful not to apply force on the conductor when soldering
or unsoldering.
SAFETY CHECK-OUT
After correcting the original service problem, perform the following
safety checks before releasing the set to the customer.
CAUTION
Use of controls or adjustments or performance of procedures
other than those specified herein may result in hazardous radiation
exposure.
WARNING!!
WHEN SERVICING, DO NOT APPROACHTHE LASER EXIT WITH
THE EYE TOO CLOSELY. IN CASE IT IS NECESSARY TO
CONFIRM LASER BEAM EMISSION, BE SURE TO OBSERVE
FROM A DISTANCE OF MORETHAN 25 cm FROMTHE SURFACE
OF THE OBJECTIVE LENS ON THE OPTICAL PICK-UP BLOCK.
CAUTION:
The use of optical instrument with this product will increase eye
hazard.
Unleaded solder
Boards requiring use of unleaded solder are printed with the lead-
free mark (LF) indicating the solder contains no lead.
(Caution: Some printed circuit boards may not come printed with
the lead free mark due to their particular size.)
: LEAD FREE MARK
Unleaded solder has the following characteristics.
•Unleaded solder melts at a temperature about 40°C higher than
ordinary solder.
Ordinary soldering irons can be used but the iron tip has to be
applied to the solder joint for a slightly longer time.
Soldering irons using a temperature regulator should be set to
about 350°C.
Caution: The printed pattern (copper foil) may peel away if the
heated tip is applied for too long, so be careful!
•Strong viscosity
Unleaded solder is more viscous (sticky, less prone to flow) than
ordinary solder so use caution not to let solder bridges occur such
as on IC pins, etc.
•Usable with ordinary solder
It is best to use only unleaded solder but unleaded solder may
also be added to ordinary solder.

—3 —
TABLE OF CONTENTS
1. GENERAL
Precautions ············································································· 1-1
About this Manual ································································· 1-1
This Player Can Play the Following Discs ···························· 1-1
Notes about the Discs ··························································· 1-2
Index to Parts and Controls ···················································· 1-2
Guide to On-Screen Displays (Control Bar) ··························1-3
Simple Start Guide ···································································· 1-3
Quick Overview ····································································· 1-3
Step 1: Unpacking ································································· 1-3
Step 2: Inserting Batteries into the Remote ··························· 1-3
Step 3: TV Hookups ······························································1-3
Step 4: Playing a Disc ···························································· 1-4
Hookups ····················································································· 1-4
Hooking Up the Player ··························································1-4
Step 1: Connecting the Video Cords ······································1-4
Step 2: Connecting the Audio Cords ····································· 1-5
Step 3: Attaching the Jack Cover and Stand ··························1-6
Step 4: Connecting the Power Cord ······································· 1-7
Step 5: Quick Setup ······························································· 1-7
Playing Discs ············································································· 1-7
Playing Discs ········································································· 1-7
Searching for a Particular Point on a Disc
(Scan, Slow-motion Play) ··················································· 1-8
Resuming Playback from the Point Where You Stopped the
Disc (Multi-disc Resume) ··················································· 1-8
Using the DVD’s Menu. ························································ 1-8
Playing VIDEO CDs with PBC Functions (PBC Playback) ··
1-9
Playing an MP3 Audio Track ················································· 1-9
Various Play Mode Functions (Programme Play, Shuffle Play,
Repeat Play, A-B Repeat Play) ··········································· 1-9
Searching for a Scene ······························································ 1-11
Searching for a Title/Chapter/Track/Index/Scene
(Search mode) ··································································· 1-11
Viewing Information About the Disc ······································· 1-11
Checking the Playing Time and Remaining Time ··············· 1-11
Sound Adjustments ·································································· 1-12
Changing the Sound ····························································· 1-12
TV Virtual Surround Settings (TVS) ··································· 1-12
Enjoying Movies ····································································· 1-12
Changing the Angles ···························································· 1-12
Displaying the Subtitles ······················································· 1-12
Adjusting the Picture Quality (BNR) ·································· 1-13
Adjusting the Playback Picture
(CUSTOM PICTURE MODE)········································· 1-13
Enhancing the Playback Picture (DIGITAL VIDEO
ENHANCER) ··································································· 1-13
Using Various Additional Functions ········································ 1-14
Locking Discs (CUSTOM PARENTAL CONTROL,
PARENTAL CONTROL) ················································· 1-14
Controlling Your TV with the Supplied Remote ················· 1-15
Settings and Adjustments ························································ 1-15
Using the Setup Display ······················································ 1-15
Setting the Display or Sound Track Language
(LANGUAGE SETUP) ···················································· 1-15
Settings for the Display (SCREEN SETUP) ······················· 1-16
Custom Settings (CUSTOM SETUP) ································· 1-16
Settings for the Sound (AUDIO SETUP) ···························· 1-16
Additional Information ···························································· 1-17
Troubleshooting ··································································· 1-17
Self-diagnosis Function (When letters/numbers appear in the
display) ············································································· 1-17
Glossary ··············································································· 1-18
Language Code List ····························································· 1-18
2. DISASSEMBLY
2-1. UPPER CASE ASSEMBLY ············································ 2-2
2-2. LOWER CASE ································································ 2-2
2-3. CONTROL PANEL ASSEMBLY ··································· 2-2
2-4. COVER ············································································ 2-2
2-5. SW-377 BOARD, IF-96 BOARD ··································· 2-3
2-6. MECHANISM DECK ····················································· 2-3
2-7. CHUCKING ARM BLOCK ··········································· 2-3
2-8. MD-90 BOARD, LEVER ASSEMBLY ·························· 2-3
2-9. BASE (C) ASSEMBLY ··················································· 2-4
2-10. OPTICAL DEVICE ························································ 2-4
2-11. BU HOLDER, RACK (L) ··············································· 2-4
2-12. GATE ASSEMBLY, COVER (C) ···································· 2-4
2-13. ROLLER (SLIDER) ························································ 2-5
2-14. SLIDER (L), SLIDER (R)··············································· 2-5
2-15. IR-42 BOARD ·································································2-5
2-16. POWER BLOCK ····························································· 2-5
2-17. MB-106 BOARD ·····························································2-6
2-18. AV-68 BOARD ································································ 2-6
2-19. SLIDERS (L) AND (R) PHASE ADJUSTMENT ··········2-6
2-20. INTERNAL VIEWS ························································ 2-7
2-21. CIRCUIT BOARDS LOCATION ··································· 2-8
3. BLOCK DIAGRAMS
3-1. OVERALL BLOCK DIAGRAM ···································· 3-1
3-2. RF/SERVO BLOCK DIAGRAM ···································· 3-3
3-3. SIGNAL PROCESSOR BLOCK DIAGRAM ················ 3-5
3-4. SYSTEM CONTROL BLOCK DIAGRAM ··················· 3-7
3-5. VIDEO BLOCK DIAGRAM ·········································· 3-9
3-6. AUDIO BLOCK DIAGRAM ········································ 3-11
3-7. INTERFACE CONTROL BLOCK DIAGRAM ··········· 3-13
3-8. POWER BLOCK DIAGRAM (1/2) ······························ 3-15
3-9. POWER BLOCK DIAGRAM (2/2) ······························ 3-17
4. PRINTED WIRING BOARDS AND
SCHEMATIC DIAGRAMS
4-1. FRAME SCHEMATIC DIAGRAM ································ 4-1
4-2. PRINTED WIRING BOARDS AND
SCHEMATIC DIAGRAM ·············································· 4-4
•MB-106 (DVD/CD, RF AMP, DIGITAL SERVO,
MOTOR DRIVE, SERVO, AV DECODER, SD RAM,
SYSTEM CONTROL, AUDIO ADC, PLL, POWER,
INTERFACE CONTROL)
PRINTED WIRING BOARD ························· 4-7
•MB-106 (DVD/CD, RF AMP, DIGITAL SERVO) (1/8)
SCHEMATIC DIAGRAM ···························· 4-11
•MB-106 (MOTOR DRIVE) (2/8)
SCHEMATIC DIAGRAM ···························· 4-13
•MB-106 (SERVO) (3/8)
SCHEMATIC DIAGRAM ···························· 4-15
•MB-106 (AV DECODER) (4/8)
SCHEMATIC DIAGRAM ···························· 4-17
•MB-106 (SD RAM) (5/8)
SCHEMATIC DIAGRAM ···························· 4-19
•MB-106 (SYSTEM CONTROL) (6/8)
SCHEMATIC DIAGRAM ···························· 4-21
•MB-106 (INTERFACE CONTROL) (7/8), IR-42 (IR),
SW-377 (FUNCTION KEY), IF-96 (FRONT KEY)
SCHEMATIC DIAGRAMS ·························· 4-23
•MB-106 (POWER, AUDIO ADC, PLL) (8/8)
SCHEMATIC DIAGRAM ···························· 4-25
•AV-68 (AV OUT)
PRINTED WIRING BOARD ······················· 4-27
•AV-68 (AV OUT)
SCHEMATIC DIAGRAM ···························· 4-29
•MD-89 (FUNCTION SWITCH 1),
MD-90 (FUNCTION SWITCH), MD-91 (SWITCH)
PRINTED WIRING BOARDS ····················· 4-31
•MD-89 (FUNCTION SWITCH 1),
MD-90 (FUNCTION SWITCH), MD-91 (SWITCH)
SCHEMATIC DIAGRAM ···························· 4-33
—4 —
•POWER BLOCK (ZSSR216GA/ZSSR216HA)
PRINTED WIRING BOARD ······················· 4-35
•POWER BLOCK (ZSSR216GA/ZSSR216HA)
SCHEMATIC DIAGRAM ···························· 4-37
•IR-42 (IR), SW-377 (FUNCTION KEY),
IF-96 (FRONT KEY)
PRINTED WIRING BOARDS ····················· 4-39
5. IC PIN FUNCTION DESCRIPTION
5-1. SYSTEM CONTROL PIN FUNCTION
(MB-106 BOARD IC104: MB91307RPFV-G-BND-E1) ·
5-1
6. TEST MODE
6-1. GENERAL DESCRIPTION ··········································· 6-1
6-2. STARTING TEST MODE ··············································· 6-1
6-3. SYSCON DIAGNOSIS ··················································· 6-1
6-4. DRIVE AUTO ADJUSTMENT ······································ 6-5
6-5. DRIVE MANUAL OPERATION ··································· 6-7
6-6. MECHA AGING ··························································· 6-11
6-7. EMERGENCY HISTORY ············································ 6-11
6-8. VERSION INFORMATION ········································· 6-11
6-9. VIDEO LEVEL ADJUSTMENT ·································· 6-11
6-10. IF CON SELF DIAGNOSTIC FUNCTION ················· 6-12
7. ELECTRICAL ADJUSTMENT
7-1. POWER SUPPLY CHECK ············································· 7-1
7-2. ADJUSTMENT OF VIDEO SYSTEM ··························· 7-2
7-3.
ADJUSTMENT RELATED PARTS ARRANGEMENT ··
7-4
8. REPAIR PARTS LIST
8-1. EXPLODED VIEWS ······················································ 8-1
8-1-1.OVERALL SECTION ····················································· 8-2
8-1-2.MECHANISM DECK SECTION-1 ······························· 8-3
8-1-3.MECHANISM DECK SECTION-2 ······························· 8-4
8-1-4.MAIN CHASSIS SECTION ··········································· 8-5
8-2. ELECTRICAL PARTS LIST ·········································· 8-6

1-1
SECTION 1
GENERAL
DVP-F25
This section is extracted from
instruction manual. (3-077-370-41)
3
Precautions
On safety
• Caution – The use of optical instruments
with this product will increase eye hazard.
• Should any solid object or liquid fall into
the cabinet, unplug the player and have it
checked by qualified personnel before
operating it any further.
On power sources
• The player is not disconnected from the AC
power source (mains) as long as it is
connected to the wall outlet, even if the
player itself has been turned off.
• If you are not going to use the player for a
long time, be sure to disconnect the player
from the wall outlet. To disconnect the AC
power cord (mains lead), grasp the plug
itself; never pull the cord.
On placement
• Place the player in a location with adequate
ventilation to prevent heat build-up in the
player.
• Do not place the player in a location near
heat sources, or in a place subject to direct
sunlight, excessive dust, or mechanical
shock.
• Do not install the appliance in a confined
space, such as a bookcase or built-in
cabinet.
On operation
• If the player is brought directly from a cold
to a warm location, or is placed in a very
damp room, moisture may condense on the
lenses inside the player. Should this occur,
the player may not operate properly. In this
case, remove the disc and leave the player
turned on for about half an hour until the
moisture evaporates.
• Do not insert a disc with non-standard shape
(e.g., card, heart) into the player. The disc
may not be ejected and cause a malfunction.
• When you move the player, take out any
discs. If you don’t, the disc may be
damaged.
On adjusting volume
Do not turn up the volume while listening to
a section with very low level inputs or no
audio signals. If you do, the speakers may be
damaged when a peak level section is played.
On installing the player on the wall
If the player falls down, a serious injury or
damage may result. Observe the following
instructions to prevent the player from falling
down.
• Install the player on a wall strong enough to
hold the player using two proper screws for
the wall material and strength.
Install the player on a vertical and flat wall
where reinforcement is applied. If you are
not sure about the wall strength or screws,
contact a screw shop or installer.
• Install the player straight.
• Do not install the player at high position.
• Do not lean or hang on the player.
• Do not load anything on the player.
• Do not pull the connecting cords when the
player is on the wall.
• Be careful not to trip on the connecting
cords.
• When you operate the player, do not use
excessive force to operate the player, or
insert or remove the disc.
• When cleaning, do not put hand on the
player or use excessive force.
4
On cleaning
Clean the cabinet, panel, and controls with a
soft cloth slightly moistened with a mild
detergent solution. Do not use any type of
abrasive pad, scouring powder or solvent
such as alcohol or benzine.
On cleaning discs
Do not use a commercially available cleaning
disc. It may cause a malfunction.
If you have any questions or problems
concerning your player, please consult your
nearest Sony dealer.
IMPORTANT NOTICE
Caution: This player is capable of holding a
still video image or on-screen display image
on your television screen indefinitely. If
you leave the still video image or on-screen
display image displayed on your TV for an
extended period of time, you risk permanent
damage to your television screen.
Projection televisions are especially
susceptible to this.
7
About this Manual
•Instructions in this manual describe the
controls on the remote. You can also use the
controls on the player if they have the same
or similar names as those on the remote.
•The meaning of the icons used in this
manual is described below:
* MP3 (MPEG1 Audio Layer 3) is a standard
format defined by ISO (International Standard
Organization)/MPEG which compresses audio
data.
This Player Can Play the
Following Discs
The “DVD VIDEO”logo is a trademark.
Region code
Your player has a region code printed on the
bottom of the unit and only will play DVD
VIDEO discs (playback only) labeled with
identical region codes. This system is used to
protect copyrights.
DVDs labeled will also play on this
player.
If you try to play any other DVD, the message
“Playback prohibited by area limitations.”
will appear on the TV screen. Depending on
the DVD, no region code indication may be
labeled even though playing the DVD is
prohibited by area restrictions.
Example of discs that the player
cannot play
The player cannot play the following discs:
•All CD-ROMs (including PHOTO CDs)/
CD-Rs/CD-RWs other than those recorded
in the following formats:
–music CD format
–video CD format
–MP3 format that conforms to ISO9660*
Level 1/Level 2, or its extended format,
Joliet
•Data part of CD-Extras
•DVD-RWs in VR mode
•DVD-ROMs
•DVD Audio discs
•HD layer on Super Audio CDs
* A logical format of files and folders on CD-
ROMs defined by ISO (International Standard
Organization).
Also, the player cannot play the following
discs:
•A DVD with a different region code.
•A disc that has a non-standard shape (e.g.,
card, heart).
•A disc with paper or stickers on it.
•A disc that has the adhesive of cellophane
tape or a sticker still left on it.
Note
Some CD-Rs, CD-RWs, DVD-Rs, or DVD-RWs
(in video mode) cannot be played on this player due
to the recording quality or physical condition of the
disc, or the characteristics of the recording device.
Furthermore, the disc will not play if it has not been
correctly finalized. For more information, see the
operating instructions for the recording device.
Icon Meaning
Functions available for DVD
VIDEOs or DVD-Rs/DVD-
RWs in video mode
Functions available for VIDEO
CDs or CD-Rs/CD-RWs in
video CD format
Functions available for DATA
CDs (CD-ROMs/CD-Rs/CD-
RWs containing MP3* audio
tracks)
Functions available for music
CDs or CD-Rs/CD-RWs in
music CD format
Format of discs
DVD VIDEO
VIDEO CD
Music CD
ALL
DVP–XXXX
00V 00Hz
00W
NO.
0-000-000-00
X
Region code
c
continued

1-2
8
Note that discs created in the Packet Write format
cannot be played.
Note on playback operations of
DVDs and VIDEO CDs
Some playback operations of DVDs and
VIDEO CDs may be intentionally set by
software producers. Since this player plays
DVDs and VIDEO CDs according to the disc
contents the software producers designed,
some playback features may not be available.
Also, refer to the instructions supplied with
the DVDs or VIDEO CDs.
Copyrights
This product incorporates copyright
protection technology that is protected by
method claims of certain U.S. patents, other
intellectual property rights owned by
Macrovision Corporation, and other rights
owners. Use of this copyright protection
technology must be authorized by
Macrovision Corporation, and is intended for
home and other limited viewing uses only
unless otherwise authorized by Macrovision
Corporation. Reverse engineering or
disassembly is prohibited.
Notes about the Discs
•To keep the disc clean, handle the disc by its
edge. Do not touch the surface.
•Do not expose the disc to direct sunlight or
heat sources such as hot air ducts, or leave it
in a car parked in direct sunlight as the
temperature may rise considerably inside
the car.
•After pressing Aon the player to eject the
disc, do not leave the disc as it is. Remove it
completely from the player.
•After playing, store the disc in its case.
•If glue is present on the outer edge of the
disc, wipe the edge of the disc with the side
of a pen or pencil so that the glue is spread
evenly along the edge before inserting the
disc into the player. Be sure not to touch the
playback side of the disc when wiping the
edge.
•If burrs remain on the outer edge of the disc,
remove them by rubbing with the side of a
pen or pencil. If burrs are not removed,
discs may not load properly into the player,
or fragments of plastic adhering to the
playback side of the disc may cause
skipping in the sound.
•Clean the disc with a cleaning cloth.
Wipe the disc from the centre out.
•Do not use solvents such as benzine,
thinner, commercially available cleaners, or
anti-static spray intended for vinyl LPs.
9
Index to Parts and Controls
For more information, refer to the pages indicated in parentheses.
Front panel
ADisc slot (31)
BA(eject) button (32)
CN(playback) button (31)
D[/1(on/standby) button/indicator (31)
The indicator lights up in green when the
power is on and lights up in red when the
player is in standby mode.
E(remote sensor) (14)
Fx(stop) button (32)
GX (pause) button (32)
HScrew hole for the stand (27)
IDisc window (31)
J(remote sensor) (14)
KIllumination (65)
Lights up in blue when the power is on.
c
continued
10
Rear panel
ACOMPONENT VIDEO OUT (Y, CB,
CR) jacks (18)
BAUDIO OUT L/R jacks (22) (23) (24)
CVIDEO OUT jack (18)
DS VIDEO OUT jack (18)
EDIGITAL OUT (OPTICAL) jack (23)
(24) (25)
FCONTROL S IN jack (18)
To remove the jack cover
The player is sold with the jack cover
attached. Press both of the parts marked with
to remove the jack cover. You will find
the jacks and the power cord illustrated
above.
Jack cover
11
Remote
ATV [/1(on/standby) button (60)
BZEJECT button (32)
CNumber buttons (35)
The number 5 button has a tactile dot.*
DCLEAR button (39)
ESUBTITLE button (51)
FAUDIO button (48)
G./>PREV/NEXT (previous/
next) buttons (32)
Hm/MSCAN/SLOW
buttons (33)
IXPAUSE button (32)
JHPLAY button (31)
The Hbutton has a tactile dot.*
KC/X/x/cbuttons (35)
LDISPLAY button (12)
MTOP MENU button (35)
N[/1(on/standby) button (31)
OVOL (volume) +/–buttons (60)
The + button has a tactile dot.*
PTV/VIDEO button (60)
QENTER button (33)
RPICTURE MODE button (53)
SANGLE button (51)
TSUR (surround) button (49)
UTIME/TEXT button (46)
VREPEAT button (42)
WREPLAY button (32)
XSEARCH MODE button (45)
YxSTOP button (32)
ZENTER button (33)
wj ORETURN button (36)
wk MENU button (35) (37)
* Use the tactile dot as a reference when operating
the player.

1-3
12
Guide to On-Screen
Displays (Control Bar)
The following explains the Control Bar. The
Control Bar is used for making adjustments to
the settings or displaying information during
playback.
The displayed contents differ according to the
type of disc being played. The numbers in
parentheses indicate reference pages.
Displaying the Control Bar during
playback
The following displays appear when the
DISPLAY button is pressed repeatedly
during playback. You can select the setting
that suits the current playback item and view
the related information.
◆Display 1
The following play modes
1
~
4
can be set.
The indicator lights up in blue when activated.
Example: When Repeat Play is selected. (The
display will differ when A-B Repeat Play is
set.)
ARepeat Play (42)
BShuffle Play (41)
CProgramme Play (39)
DA-B Repeat Play (43)
EUnit being repeated in this example.
FPlayback status (NPlayback,
XPause, xStop, etc.)
m
◆Display 2
The following play modes
7
~
qs
can be set.
The indicator lights up in blue when activated.
Example: When “TVS”is set.
GTVS (49)
H“BNR”(52)
I“CUSTOM PICTURE MODE”(53)
J“DIGITAL VIDEO ENHANCER”
(54)
K“ANGLE”(51)
The indicator lights up in blue when
various angles are recorded on the
scene.
LAppears when the player outputs the
signal in NTSC format.
m
◆Display 3
The following playback information is
displayed.
Example: When playing a DVD.
MTIME/TEXT icon (46)
NDisc type
OTitle number of the DVD (46)
PChapter number of the DVD (46)
QPlaying time or remaining time (46)
m
◆Display 4 (DVD playback only)
RFormat of the current audio signal (49)
CHAPTER
NTSC
T41
–
8
DVD T 1:01:57
DOLBY DIGITAL 3 / 2 .1
qk
13
m
◆No display
m
◆Return to Display 1
Displaying the Control Bar in
stop mode
The following displays appear when the
DISPLAY button is repeatedly pressed
during stop mode. You can make basic
adjustments and customize the player to suit
your viewing preferences.
◆Display 1
The following settings can be made.
ASETUP (62)
•Select QUICK to make the minimum
number of basic adjustments for using the
player.
•Select CUSTOM to make a full range of
adjustments.
•Select RESET to return the
SETUP
adjustments to the default settings.
BPARENTAL CONTROL (56)
•Set this to limit the playback of selected
discs on this player.
m
◆Display 2
Shows the same information as Display 1
during playback.
m
◆Display 3
Shows the same information as Display 2
during playback.
m
◆Display 4
Shows the same information as Display 3
during playback.
m
◆No display
m
◆Return to Display 1
QUICK
CHAPTER
NTSC
T41
–
8
DVD T 1:01:57
14
Simple Start Guide
Quick Overview
A quick overview presented in this guide will
give you enough information to start using the
player for your enjoyment. To use the
surround sound features of this player, refer
to “Hookups”on page 17.
Notes
•You cannot connect this player to a TV that does
not have a video input or SCART (EURO AV)
jack.
•Be sure to disconnect the power of each
component before connecting.
Step 1: Unpacking
Check that you have the following items:
•Audio/video cord (pinplug ×3 ypinplug
×3) (1)
•Remote commander (remote) (1)
•R6 (size AA) batteries (2)
•Stand (1)
•Screw (1)
•An EURO AV adaptor is included with
some models.
Step 2: Inserting
Batteries into the
Remote
You can control the player using the supplied
remote. Insert two R6 (size AA) batteries by
matching the 3and #ends on the batteries
to the markings inside the compartment.
When using the remote, point it at the remote
sensor on the player.
Notes
•Do not leave the remote in an extremely hot or
humid place.
•Do not drop any foreign object into the remote
casing, particularly when replacing the batteries.
•Do not expose the remote sensor to direct light
from the sun or a lighting apparatus. Doing so
may cause a malfunction.
•If you do not use the remote for an extended
period of time, remove the batteries to avoid
possible damage from battery leakage and
corrosion.
15
Simple Start Guide
Step 3: TV Hookups
Remove the jack cover from the player (see fig. Aand page 10).
Connect the supplied audio/video cord and the power cord in the order (1~3) shown below.
Be sure to connect the power cord last.
After connecting the cords, attach the jack cover (page 26).
When connecting to a standard 4:3 screen
TV
Depending on the TV type, the image of some
discs may not fit your TV screen.
If you want to change the aspect ratio, please
refer to page 64.
If your TV has a SCART (EURO AV) jack
Attach the supplied EURO AV adaptor to the
TV, and connect to the player using the
supplied audio/video cord.
When connecting to a monaural TV
Use a stereo-mono conversion cord (not
supplied). Connect the VIDEO OUT jack on
the player to the TV’s video input jack, and
connect the AUDIO OUT L/R jacks to the
TV’s audio input jack.
For Asian models only
To change the colour system
The colour system of the player is set to
NTSC or PAL. If the on-screen menu of the
player does not appear on the TV, change the
colour system of the player to the same colour
system (PAL or NTSC) of your TV. To
change the colour system, hold ?/1down for
a few seconds while pressing Xon the player.
1Audio/video
cord (supplied) 2Power source
CD/DVD Player
to video input
to audio input
TV
to VIDEO OUT
to AUDIO
OUT L/R
3Power source
l: Signal flow
(red) (yellow)
(red)
(white)
(yellow)
(white)
(red)(white)(yellow)
(yellow)
(white)
(red)

1-4
16
Step 4: Playing a Disc
ATurn on the TV.
BPress [/1on the player.
CSwitch the input selector on your
TV so that the signal from the
player appears on the TV screen.
DInsert the disc in the player so that
the labeled (or non-playback) side
appears through the disc window.
EPress N.
The player begins playing the disc.
After Step 5
Depending on the disc, a menu may be
displayed on the TV screen. If so, select the
item you want from the menu and play the
DVD (page 35) or VIDEO CD disc (page 36).
To stop playing
Press x.
To remove the disc
Press A.
Remove the disc from the player.
To turn off the player
Press [/1. The player enters standby mode
and the power indicator lights up in red.
The labeled (or non-playback) side
appears through the disc window.
17
Hookups
Hookups
Hooking Up the Player
Follow Steps 1 to 5 to hook up and adjust the settings of the player.
Before you start, disconnect the power cords, check that you have all of the supplied accessories,
and insert the batteries into the remote (page 14). Remove the jack cover (page 10).
Notes
•Plug cords securely to prevent unwanted noise.
•Refer to the instructions supplied with the components to be connected.
c
continued
18
Step 1: Connecting the Video Cords
Connect this player to your TV monitor, projector, or AV amplifier (receiver) using a video cord.
Select one of the patterns Athrough C, according to the input jack on your TV monitor,
projector, or AV amplifier (receiver).
l: Signal flow
Component video
cord (not
supplied)
(yellow)
Audio/video cord
(supplied)
TV, projector or AV
amplifier (receiver)
CD/DVD player
TV, projector or AV
amplifier (receiver)
(green)
S VIDEO
cord (not
supplied)
TV, projector or AV
amplifier (receiver)
(red)
(blue)
(yellow)
(green)
(blue)
(red)
to VIDEO
OUT
Control S cord (not
supplied)
to CONTROL S IN
to COMPONENT
VIDEO OUT
to S VIDEO
OUT
Audio/video cord
(supplied)
TV
EURO AV adaptor
(supplied with some
models)
(yellow) (yellow)
(yellow)
TV or video component
with CONTROL S jack
(green)
(blue)
(red)
19
Hookups
AIf you are connecting to a video input jack
Connect the yellow plug of the audio/video cord (supplied) to the yellow (video) jacks. You will
enjoy standard quality images.
Use the red and white plugs to connect to the audio input jacks (page 22). (Do this if you are
connecting to a TV only.)
BIf you are connecting to an S VIDEO input jack
Connect an S VIDEO cord (not supplied). You will enjoy high quality images.
CIf you are connecting to a SCART (EURO AV) input jack
Connect the supplied EURO AV adaptor to the SCART (EURO AV) input jack of the TV and
connect the player and the EURO AV adaptor using the audio/video cord (supplied). Connect
the yellow plugs of the audio/video cord to the yellow (video) jacks. Use the red and white plugs
to connect the audio input jack (page 22).
DIf you are connecting to a monitor, projector, or AV amplifier (receiver)
having component video input jacks (Y, CB, CR)
Connect the component via the COMPONENT VIDEO OUT jacks using a component video
cord (not supplied) or three video cords (not supplied) of the same kind and length. You will
enjoy accurate colour reproduction and high quality images.
If your TV or video component has a CONTROL S connector
You can control the player by pointing the remote at the remote sensor on the TV or video component. This
feature is convenient when you placed the player and the TV or video component away from each other.
Connect the TV or video component via the CONTROL S IN connectors using the control S cord (not
supplied). Refer to the instructions supplied with the component to be connected.
Yellow (Video)
White (L)
Red (R)
Yellow (Video)
White (L)
Red (R)
Red (R)
White (L)
Yellow (Video)
Yellow (Video)
White (L)
Red (R)
TV
EURO AV adaptor
Green
Blue
Red
Green
Blue
Red
c
continued

1-5
20
Notes
•Connect the player directly to the TV. If you pass the player signals via the VCR, etc., you may not receive
a clear image on the TV screen.
•For Asian models only
You can switch the player’s colour system to match the colour system of the connected TV (page 15).
When you play a disc recorded in the NTSC colour system, the player outputs the video
signal or the Setup Display etc. in the NTSC colour system and the picture may not appear
on the PAL colour system televisions. In this case, remove the disc.
VCR
CD/DVD player TV
Connect
directly
21
Hookups
Step 2: Connecting the Audio Cords
Refer to the chart below to select the connection that best suits your system. Be sure to also read
the instructions for the components you wish to connect.
Select a connection
Select one of the following connections, through .
* Manufactured under license from Dolby
Laboratories. “Dolby,”“Pro Logic,”and the
double-D symbol are trademarks of Dolby
Laboratories.
** “DTS”and “DTS Digital Out”are trademarks
of Digital Theater Systems, Inc.
Components to be connected Connection Your setup
TV
•Surround effects: TVS DYNAMIC (page 50),
TVS WIDE (page 50)
(page 22) Example
Stereo amplifier (receiver) and two speakers
•Surround effects: TVS STANDARD (page 50)
or
MD deck/DAT deck
•Surround effects: none
(page 23) Example
AV amplifier (receiver) having a Dolby*
Surround (Pro Logic) decoder and 3 to 6
speakers
•Surround effects: Dolby Surround (Pro Logic)
(page 67)
(page 24) Example
AV amplifier (receiver) with a digital input jack
having a Dolby Digital, MPEG audio, or DTS**
decoder and 6 speakers
•Surround effects: Dolby Digital (5.1ch) (page 67),
DTS (5.1ch) (page 68), MPEG audio (5.1ch)
(page 68)
(page 25) Example
A D
A
B
C
D
c
continued
22
Connecting to your TV
This connection will use your TV speakers for sound.
* The yellow plug is used for video signals (page
18).
zHint
When connecting to a monaural TV, use a stereo-
mono conversion cord (not supplied). Connect the
AUDIO OUT L/R jacks to the TV’s audio input
jack.
A
TV
l: Signal flow
CD/DVD player
(white)
(red)
Audio/video
cord (supplied)
to audio input
(yellow)*
(white)
(red)
to AUDIO
OUT L/R
EURO AV adaptor (supplied with some
models) to connect to the SCART (EURO
AV) input jack
(red)(white)
(yellow)*
23
Hookups
Connecting to a stereo amplifier (receiver) and 2 speakers/Connecting to
an MD deck or DAT deck
If the stereo amplifier (receiver) has audio input jacks L and R only, use . If the amplifier
(receiver) has a digital input jack, or when connecting to an MD deck or DAT deck, use .
In this case, you can also connect the player directly to the MD deck or DAT deck without using
your stereo amplifier (receiver).
zHint
In connection , you can use the supplied
audio/video cord instead of using a separate audio
cord.
Note
If you select one of the TVS effects (page 49) while
playing a disc, no sound will come from your
speakers with the connection.
B
B-1
B-2
CD/DVD player
or
Stereo amplifier (receiver)
MD deck/DAT deck
Front (L)
Front (R)
[Speakers]
(white)
(red)
(red)
(white)
Optical digital cord
(not supplied)
Stereo audio
cord (not
supplied)
to audio input to optical digital input
to AUDIO OUT L/R to DIGITAL OUT
(OPTICAL)
l: Signal flow
(red) (white)
B-1
B-2
c
continued

1-6
24
Connecting to an AV amplifier (receiver) having a Dolby Surround (Pro
Logic) decoder and 3 to 6 speakers
You can enjoy the Dolby Surround effects only when playing Dolby Surround audio or multi-
channel audio (Dolby Digital) discs.
If your amplifier (receiver) has L and R audio input jacks only, use . If your amplifier
(receiver) has a digital input jack, use .
Note
When connecting 6 speakers, replace the monaural
rear speaker with a centre speaker, 2 rear speakers
and a subwoofer.
C
C-1
C-2
CD/DVD player
or
Front (R)Front (L)
Rear (R)
Subwoofer
l: Signal flow
Rear (L)
Amplifier (receiver) with Dolby
Surround decoder
Centre Rear (mono)
Stereo audio
cord (not
supplied)
[Speakers]
Optical digital cord
(not supplied)
(red)(white)
to optical digital input
[Speakers]
to audio input
(white)
(red)
to AUDIO OUT L/R to DIGITAL OUT
(OPTICAL)
(red) (white)
25
Hookups
Connecting to an AV amplifier (receiver) with a digital input jack having
a Dolby Digital, MPEG audio, or DTS decoder, and 6 speakers
This connection will allow you to use the Dolby Digital, MPEG audio, or DTS decoder function
of your AV amplifier (receiver). You are not able to enjoy the surround sound effects of this
player.
Note
After you have completed the connection, be sure to
set “DOLBY DIGITAL”to “DOLBY DIGITAL”
and “DTS”to “ON”in Quick Setup (page 28). If
your AV amplifier (receiver) has an MPEG audio
decoder function, set “MPEG”to “MPEG”(page
68). Otherwise, no sound or a loud noise will come
from the speakers.
D
Front (R)
Front (L)
Rear (R)
AV amplifier (receiver) having
a decoder
Subwoofer Centre
Optical digital cord
(not supplied)
[Speakers]
CD/DVD player
l: Signal flow
[Speakers]
Rear (L)
to optical digital input
to DIGITAL OUT
(OPTICAL)
26
Step 3: Attaching the Jack Cover and Stand
You can use the player laid flat, or in an
upright position by attaching the supplied
stand to the rear or side of the player. You can
also install the player on the wall.
Attaching the jack cover (Using
the player laid flat)
1Gather all the connecting cords
together and let them pass through the
centre of the opening at the back of the
player.
2Attach the jack cover carefully so as
not to pinch the cords.
3Place the player flat on a level
surface.
Notes
•Make sure that the connecting cords are not
trapped by the jack cover.
•Do not apply downword force to the player with
the disc window facing down. Doing so may
cause scratches or damage to the player.
•If you use commercially available cords, it is
recommended that you use cords similar in size to
the cords provided with the player. If the cords are
too thick or stiff, or the plug is too large, you may
not be able to attach the jack cover securely. If
you cannot attach the jack cover, you do not have
to attach the jack cover.
Using the player in the upright
position
Make sure you attach the supplied stand.
To stand the player on its rear
1Attach the stand to the screw hole of the
jack cover using the supplied screw.
2Place the player upright on the stand.
27
Hookups
To stand the player on its side
1Attach the stand to the screw hole on the
side of the player using the supplied
screw.
2Place the player on the stand.
Notes
•Use the supplied stand only when you use the
player in an upright position. Do not attach the
stand when you use the player laid flat.
•To move the player, hold the player itself. If you
hold the stand, it may break.
•Do not use the player in an upright position
without attaching the stand. If you do not attach it,
the player will be unstable and may fall over.
Installing the player on the wall
Attach the jack cover (page 26).
Fasten screws (not supplied) to the wall at the
same height 80 mm apart. The screws should
protrude by 5 to 6 mm.
Remove the seals covering the hanging holes.
Hang the player on the screws. Push the
player tightly against the wall.
Notes
•Use the screws that matches the wall material and
strength.
•Install the player on a vertical and flat wall where
reinforcement is applied. Do not install the player
if the wall is not vertical, flat or strong enough.
•Contact a screw shop or installer regarding the
wall material or screws to be used.
•After the player has been used for long time on the
wall, the wall behind or above the player may
discolour or peel off by radiation of heat from the
player depending on the wall material.
•Sony will refrain from any responsibility on the
accident or damage caused by improper
installation, lack of durability of the wall or
screws, improper operation, natural calamity, etc.
80 mm
5 to 6 mm
4.2 mm
9.2 mm

1-7
28
Step 4: Connecting the Power Cord
Plug the player and TV mains leads (power cord) into a mains.
Step 5: Quick Setup
Follow the steps below to make the minimum number of basic adjustments for using the player.
To skip an adjustment, press >. To return to the previous adjustment, press ..
The on-screen display differs depending on the player model.
1Turn on the TV.
2Press [/1.
3Switch the input selector on your
TV so that the signal from the
player appears on the TV screen.
“Press [ENTER] to run QUICK SETUP.”
appears at the bottom of the screen. If this
message does not appear, select
“QUICK”under “SETUP”in the Control
Bar to run Quick Setup (page 63).
4Press ENTER without inserting a
disc.
The Setup Display for selecting the
language used in the on-screen display
appears.
The available languages differ depending
on the player model.
5Press X/xto select a language.
The player uses the language selected
here to display the menu and subtitles as
well.
6Press ENTER.
The Setup Display for selecting the
aspect ratio of the TV to be connected
appears.
LANGUAGE SETUP
OSD:
DVD MENU:
AUDIO:
SUBTITLE:
ITALIANO
ESPAÑOL
NEDERLANDS
DANSK
SVENSKA
FRANÇAIS
ENGLISH
ENGLISH
DEUTSCH
SCREEN SETUP
TV TYPE:
SCREEN SAVER:
BACKGROUND:
16:9
4:3 LETTER BOX
4:3 PAN SCAN
16:9
29
Hookups
7
Press X/xto select the setting that
matches your TV type.
◆If you have a wide-screen TV or a 4:3
standard TV with a wide-screen mode
•16:9 (page 64)
◆If you have a 4:3 standard TV
•4:3 LETTER BOX or 4:3 PAN SCAN
(page 64)
8
Press ENTER.
The Setup Display for selecting the type
of jack used to connect your amplifier
(receiver) appears.
9
Press X/xto select the type of jack
(if any) you are using to connect to
an amplifier (receiver), then press
ENTER.
Choose the item that matches the audio
connection you selected on pages 22 to
25 ( through ).
•If you connect just a TV and nothing
else, select “NO.”Quick Setup is
finished and connections are complete.
•Select “AUDIO OUTPUT L/R.”Quick
Setup is finished and connections are
complete.
•Select “DIGITAL OUTPUT.”The Setup
Display for “DOLBY DIGITAL”appears.
10
Press X/xto select the type of
Dolby Digital signal you wish to
send to your amplifier (receiver).
Choose the signal that matches the audio
connection you selected on pages 23 to
25 ( through ).
•D-PCM (page 67)
•DOLBY DIGITAL (only if the
amplifier (receiver) has a Dolby Digital
decoder) (page 67)
11
Press ENTER.
“DTS”is selected.
12
Press X/xto select whether or
not you wish to send a DTS signal
to your amplifier (receiver).
Choose the item that matches the audio
connection you selected on pages 23 to
25 ( through ).
•OFF (page 68)
•ON (only if the amplifier (receiver) has
a DTS decoder) (page 68)
13
Press ENTER.
Quick Setup is finished. All connections
and setup operations are complete.
If your AV amplifier (receiver) has an
MPEG audio decoder, adjust the
“MPEG”setting (page 68).
YES
NO
Is this player connected to an amplifier
(receiver) ? Select the type of jack you
are using.
AUDIO OUTPUT L/R
DIGITAL OUTPUT
AD
A
B-1 C-1
B-2 C-2 D
B D
AUDIO SETUP
AUDIO ATT:
AUDIO DRC:
DIGITAL OUT:
DOLBY DIGITAL:
MPEG:
OFF
STANDARD
ON
DOWNMIX: DOLBY SURROUND
D-PCM
DTS: DOLBY DIGITAL
D-PCM
B-2 C-2
D
AUDIO SETUP
AUDIO ATT:
AUDIO DRC:
DIGITAL OUT:
DOLBY DIGITAL:
MPEG:
OFF
STANDARD
ON
DOWNMIX: DOLBY SURROUND
D-PCM
PCM
DTS: OFF
OFF
ON
B D
B-2 C-2
D
c
continued
30
Enjoying the surround sound
effects
To enjoy the surround sound effects of this
player or your amplifier (receiver), set the
following items as described below for the
audio connection you selected on pages 23 to
25 ( through ). Each of these is the
default setting and does not need to be adjusted
when you first connect the player. Refer to
page 62 for using the Setup Display.
Audio Connection (pages 22 to 25)
•No additional settings are needed.
•Set “DOWNMIX”to “DOLBY
SURROUND”(page 67).
•If the sound distorts even when the volume
is turned down, set “AUDIO ATT”to “ON”
(page 66).
•Set “DOWNMIX”to “DOLBY
SURROUND”(page 67).
•Set “DIGITAL OUT”to “ON”(page 67).
B D
A
B-1 C-1
B-2 C-2 D
31
Playing Discs
Playing Discs
Playing Discs
Depending on the DVD or VIDEO CD, some
operations may be different or restricted.
Refer to the operating instructions supplied
with your disc.
1
Turn on your TV.
2
Press [/1.
The player turns on and the power
indicator lights up in green.
3
Switch the input selector on your
TV so that the signal from the
player appears on the TV screen.
◆When using an amplifier (receiver)
Turn on the amplifier (receiver) and
select the appropriate channel so that you
can hear sound from the player.
4
Insert a disc in the player.
5
Press H.
The player starts playback (continuous
play). Adjust the volume on the TV or the
amplifier (receiver).
Depending on the disc, a menu may
appear on the TV screen. For DVDs, see
page 35. For VIDEO CDs, see page 36.
To turn off the player
Press [/1. The player enters standby mode.
zHint
You can have the player turn off automatically
whenever you leave it in stop mode for more than
30 minutes. To turn on this function, set “AUTO
POWER OFF”in “CUSTOM SETUP”to “ON”
(page 65).
Notes on playing DTS sound tracks on a CD
•When playing DTS-encoded CDs,
excessive noise will be heard from the
analog stereo jacks. To avoid possible
damage to the audio system, the consumer
should take proper precautions when the
analog stereo jacks of the player are
connected to an amplification system. To
enjoy DTS Digital Surround™playback, an
external 5.1-channel decoder system must
be connected to the digital jack of the
player.
•Set the sound to “STEREO”using the
AUDIO button when you play DTS sound
tracks on a CD (page 48).
•Do not play DTS sound tracks without first
connecting the player to an audio
component having a built-in DTS decoder.
The player outputs the DTS signal via the
DIGITAL OUT (OPTICAL) jack even if
“DTS”in “AUDIO SETUP”is set to “OFF”
in the Setup Display (page 68), and may
?/1(power) button/
indicator
The labeled (or non-playback) side
appears through the disc window.
c
continued

1-8
32
affect your ears or cause your speakers to be
damaged.
Notes on playing DVDs with a DTS sound
track
•DTS audio signals are output only through
the DIGITAL OUT (OPTICAL) jack.
•When you play a DVD with DTS sound
tracks, set “DTS”to “ON”in “AUDIO
SETUP”(page 68).
•If you connect the player to audio
equipment without a DTS decoder, do not
set “DTS”to “ON”in “AUDIO SETUP”
(page 68). A loud noise may come out from
the speakers, affecting your ears or causing
the speakers to be damaged.
Notes
•When you insert an 8-cm (3-inch) disc, insert the
disc slowly at the centre of the disc slot. If you
cannot eject the disc, consult your nearest Sony
dealer.
•No adapter is required in order to play 8-cm (3-
inch) discs on this player. If an adapter is used,
damage to the player may result; therefore, never
use an adapter when playing 8-cm (3-inch) discs.
Additional operations
zHint
The Replay function is useful when you want to
review a scene or dialog that you missed.
Note
You may not be able to use the Replay function with
some scenes.
To Operation
Stop Press x
Pause Press X
Resume play after
pause
Press Xor Nor H
Go to the next chapter,
track, or scene in
continuous play mode
Press >
Go back to the
previous chapter,
track, or scene in
continuous play mode
Press .
Stop play and remove
the disc
Press Aor Z
Replay the previous
scene (DVD only)
Press REPLAY
33
Playing Discs
Locking the disc slot (Child Lock)
You can lock the disc slot to prevent children
from ejecting a disc.
When the player is in standby mode, press
ORETURN, ENTER, and then [/1on the
remote.
“Locked”appears on the TV screen when you
press the A/Zbutton on the player or the
remote.
The A/Zbutton on the player and the remote
do not work while the Child Lock is set.
To unlock the disc slot
When the player is in standby mode, press
ORETURN, ENTER, and then [/1again.
Note
Even if you select “RESET”under “SETUP”in the
Control Bar (page 62), the disc slot remains locked.
Searching for a
Particular Point on a
Disc (Scan, Slow-motion Play)
You can quickly locate a particular point on a
disc by monitoring the picture orplaying back
slowly.
Note
Depending on the DVD/VIDEO CD, you may not
be able to do some of the operations described.
Locating a point quickly by
playing a disc in fast forward or
fast reverse (Scan)
Press mor Mwhile playing a
disc. When you find the point you want, press
Hto return to normal speed. Each time you
press mor Mduring scan, the
playback speed changes. Three speeds are
available. With each press the indication
changes as follows:
Playback direction
Opposite direction
×2B(DVD/CD only) t1Mt2M
×2b(DVD only) t1mt2m
c
continued
34
The “×2B”/“×2b”playback speed is about
twice the normal speed. The “2M”/“2m”
playback speed is faster than “1M”/
“1m.”
Watching frame by frame (Slow-
motion play)
Press mor Mwhen the player is
in pause mode. To return to the normal speed,
press H.
Each time you press mor M
during Slow-motion play, the playback speed
changes. Two speeds are available. With each
press the indication changes as follows:
Playback direction
2 y1
Opposite direction (DVD only)
2 y1
The “2 y”/“2 ”playback speed is slower
than “1 y”/“1 .”
Resuming Playback from
the Point Where You
Stopped the Disc (Multi-disc
Resume)
The player stores the point where you stopped
the disc for up to 6 discs and resumes
playback the next time you insert the same
disc. When you store a resume playback point
for the 7th disc, the resume playback point for
the first disc is deleted.
1
While playing a disc, press xto
stop playback.
“Disc resumes from this point.”appears
on the TV screen.
2
Press H.
The player starts playback from the point
where you stopped the disc in Step 1.
zHints
•To play from the beginning of the disc, press x
twice, then press H.
•For CDs and DATA CDs, the player remembers
the resume playback point for the current disc
unless the disc is ejected, the power cord plug is
disconnected, or only for DATA CDs, the player
enters standby mode.
35
Playing Discs
Notes
•“MULTI-DISC RESUME”in “CUSTOM
SETUP”must be set to “ON”(default) for this
function to work (page 66).
•The resume playback point for the current disc is
cleared when:
–you change the play mode.
–you change the settings on the Setup Display.
•This function may not work with some discs.
•Resume Play does not work during Shuffle Play
and Programme Play.
Using the DVD’s Menu
A DVD is divided into long sections of a
picture or a music feature called “titles.”
When you play a DVD which contains
several titles, you can select the title you want
using the TOP MENU button.
When you play DVDs that allow you to select
items such as the language for the subtitles
and the language for the sound, select these
items using the MENU button.
1Press TOP MENU or MENU.
The disc’s menu appears on the TV
screen.
The contents of the menu vary from disc
to disc.
2Press C/X/x/cor the number
buttons to select the item you want
to play or change.
3Press ENTER.
Number
buttons

1-9
36
Playing VIDEO CDs with
PBC Functions (PBC Playback)
PBC (Playback Control) allows you to play
VIDEO CDs interactively by following the
menu on the TV screen.
1Start playing a VIDEO CD with PBC
functions.
The menu for your selection appears.
2Select the item number and track
you want using X/xor the number
buttons.
3Press ENTER.
4Follow the instructions in the
menu for interactive operations.
Refer to the instructions supplied with the
disc, as the operating procedure may
differ depending on the VIDEO CD.
To return to the menu
Press ORETURN.
zHint
To play without using PBC, press ./> while
the player is stopped to select a track, then press H
or ENTER.
“Play without PBC.”appears on the TV screen and
the player starts continuous play. You cannot play
still pictures such as a menu.
To return to PBC playback, press xtwice then
press H.
Notes
•Depending on the VIDEO CD, “Press ENTER”in
Step 3 may appear as “Press SELECT”in the
instructions supplied with the disc. In this case,
press H.
•The PBC functions of Super VCDs do not work
with this player. Super VCDs are played in
continuous play mode only.
Number
buttons
37
Playing Discs
Playing an MP3 Audio
Track
You can play back DATA CDs (CD-ROMs/
CD-Rs/CD-RWs) recorded in MP3 (MPEG1
Audio Layer 3) format.
1
Insert a DATA CD in the player.
2
Press H.
The player starts to play the first MP3
audio track in the first album on the disc.
Notes
•The playback order may be different from the
edited order. See “The playback order of MP3
audio tracks”(page 38) for details.
•This player can play MP3 audio tracks recorded in
the following sampling frequencies:
32 kHz, 44.1 kHz, 48 kHz.
Selecting an album and track
1
Press MENU.
The list of MP3 albums recorded on the
DATA CD appears.
2
Select an album using X/xand
press ENTER.
The list of tracks contained in the album
appears.
3
Select a track using X/xand press
ENTER.
The selected track starts playing.
When a track or album is being played, its
title is shaded.
To go to the next or previous page
Press cor C.
To return to the previous display
Press ORETURN.
To turn off the display
Press MENU.
Notes
•Only the letters in the alphabet and numbers can
be used for album or track names. Anything else
is displayed as an asterisk (*).
•ID3 tags cannot be displayed.
1 ( 3 0 )
ROCK BEST HIT
KARAOKE
JAZZ
R&B
MY FAVORITE SONGS
CLASSICAL
SALSA OF CUBA
BOSSANOVA
JAZZ
1 (90 )
01SHE IS SPECIAL
02ALL YOU NEED IS ...
03SPICY LIFE
04HAPPY HOUR
05RIVER SIDE
06
5
07TAKE TIME,TAKE TIME
c
continued
38
About MP3 audio tracks
You can play MP3 audio tracks on CD-
ROMs, CD-Rs, or CD-RWs. However, the
discs must be recorded according to ISO9660
level 1, level 2, or Joliet format for the player
to recognize the tracks.
You can also play discs recorded in Multi
Session.
See the instructions of the CD-R/RW device
or recording software (not supplied) for
details on the recording format.
To play a Multi Session CD
This player can play Multi Session CDs when
an MP3 audio track is located in the first
session. Any subsequent MP3 audio tracks,
recorded in the later sessions, can also be
played back.
When audio tracks and images in music CD
format or video CD format are recorded in the
first session, only the first session will be
played back.
Notes
•If you put the extension “.MP3”to data not in
MP3 format, the player cannot recognize the data
properly and will generate a loud noise which
could damage your speaker system.
•The player cannot play audio tracks in MP3PRO
format.
The playback order of MP3 audio tracks
The playback order of albums and tracks
recorded on a DATA CD is as follows.
◆Structure of disc contents
When you insert a DATA CD and press H,
the numbered tracks are played sequentially,
from 1through 7. Any sub-albums/tracks
contained within a currently selected album
take priority over the next album in the same
tree. (Example: Ccontains Dso 4is played
before 5.)
When you press MENU and the list of MP3
albums appears (page 37), the albums are
arranged in the following order: AtBt
CtDtFtG. Albums that do not
contain tracks (such as album E) do not
appear in the list.
zHints
•If you add numbers (01, 02, 03, etc.) to the front
of the track names, the tracks will be played in
that order.
•Since a disc with many trees takes longer to start
playback, place your albums within the first two
trees.
ROOT
Tree 1 Tree 2 Tree 3 Tree 4 Tree 5
album
track
39
Playing Discs
Notes
•Depending on the software you use to create the
DATA CD, the playback order may differ from
the illustration above.
•The playback order above may not be applicable
if there are more than a total of 200 albums and
tracks in the DATA CD.
•The player can recognize up to 100 albums (the
player will count just albums, including albums
that do not contain MP3 audio tracks). The player
will not play any albums beyond the first 100
albums. Of the first 100 albums, the player will
play no more than a combined total of 200 albums
and tracks.
Various Play Mode
Functions (Programme Play,
Shuffle Play, Repeat Play, A-B Repeat
Play)
You can set the following play modes:
•Programme Play (page 39)
•Shuffle Play (page 41)
•Repeat Play (page 42)
•A-B Repeat Play (page 43)
Note
The play mode is canceled when:
–the player enters standby mode by pressing [/1.
–you eject the disc.
Creating your own programme
(Programme Play)
You can play the contents of a disc in the
order you want by arranging the order of the
titles, chapters, or tracks on the disc to create
your own programme.
You can programme up to 99 items.
1Press DISPLAY twice while the player
is in stop mode.
The following Control Bar appears.
Number
buttons
c
continued

1-10
40
2Press C/cto select
(PROGRAM), then press ENTER.
3Press c.
The cursor moves to the title or track row
“T”(in this case, “01”).
4Select the title, chapter, or track you
want to programme.
◆When playing a DVD
For example, select chapter “03”of title
“02.”
Press X/x or the number buttons to select
“02”under “T,”then press ENTER.
Next, press X/xor the number buttons to
select “03”under “C,”then press
ENTER.
◆When playing a VIDEO CD or CD
For example, select track “02.”
Press X/xor the number buttons to select
“02”under “T,”then press ENTER.
5To programme other titles, chapters,
or tracks, repeat Steps 3 to 4.
The programmed titles, chapters, and
tracks are displayed in the selected order.
6Press Hto start Programme Play.
Programme Play begins.
When the programme ends, you can
restart the same programme again by
pressing H.
To stop Programme Play
Press CLEAR.
To turn off the display
Press DISPLAY repeatedly until the display
is turned off.
To cancel or change a programme
1
Follow Steps 1 and 2 of “Creating your
own programme (Programme Play).”
2
Select the programme number of the title,
chapter, or track you want to cancel or
PROGRAM
1. TITLE
ALL CLEAR
2. TITLE ––
3. TITLE ––
4. TITLE ––
5. TITLE ––
6. TITLE ––
7. TITLE ––
T
––
01
02
03
04
05
“TRACK”is displayed when you
play a VIDEO CD or CD.
Titles or tracks recorded on a
disc
PROGRAM
1. TITLE ––
ALL CLEAR
2. TITLE ––
3. TITLE ––
4. TITLE ––
5. TITLE ––
6. TITLE ––
7. TITLE ––
TC
ALL
01
02
03
04
05
06
––
02
03
04
05
01
Chapters recorded on a disc
PROGRAM
1. TITLE ––
ALL CLEAR
2. TITLE ––
3. TITLE ––
4. TITLE ––
5. TITLE ––
6. TITLE ––
7. TITLE ––
C
ALL
03
04
05
06
T
––
01
02
03
04
05
02
01
T
––
01
02
03
04
05
PROGRAM
1. TITLE 0 2 –0 3
ALL CLEAR
2. TITLE ––
3. TITLE ––
4. TITLE ––
5. TITLE ––
6. TITLE ––
7. TITLE ––
Selected title and chapter
PROGRAM
1. TRACK 0 2
ALL CLEAR
2. TRACK ––
3. TRACK ––
4. TRACK ––
5. TRACK ––
6. TRACK ––
7. TRACK ––
0:15:30
––
01
02
03
04
05
T
Selected track
Total time of the programmed
tracks
41
Playing Discs
change using X/xor the number buttons,
and press c.
3Follow Step 5 for new programming. To
cancel a program, select “--”under “T,”
then press ENTER.
To cancel all the titles, chapters, or tracks
in the programme
1Follow Steps 1 and 2 of “Creating your
own programme (Programme Play).”
2Press X and select “ALL CLEAR.”
3Press ENTER.
zHint
You can do Repeat Play or Shuffle Play of the
programmed titles, chapters, or tracks. During
Programme Play, follow the steps of “Repeat Play”
(page 42) or “Shuffle Play”(page 41).
Note
When playing Super VCDs, the total time of the
programmed tracks does not appear on the screen.
Playing in random order (Shuffle
Play)
You can have the player “shuffle”titles,
chapters, or tracks. Subsequent “shuffling”
may produce a different playing order.
1Press DISPLAY during playback.
The following Control Bar appears.
2Press C/c to select (SHUFFLE),
then press ENTER repeatedly to select
the item to be shuffled.
◆When playing a DVD
•TITLE
•CHAPTER
◆When playing a VIDEO CD or CD
•TRACK
◆When Programme Play is activated
•ON: shuffles titles, chapters, or tracks
selected in Programme Play.
TITLE
c
continued
42
To return to normal play
Press CLEAR, or select “OFF”in Step 2.
To turn off the Control Bar
Press DISPLAY repeatedly until the Control
Bar is turned off.
zHints
•You can set Shuffle Play while the player is
stopped. After selecting the “SHUFFLE”option,
press H. Shuffle Play starts.
•Up to 200 chapters in a disc can be played in
random order when “CHAPTER”is selected.
Playing repeatedly (Repeat Play)
You can play all of the titles, albums or tracks
on a disc or a single title, chapter, album, or
track repeatedly.
You can use a combination of Shuffle or
Programme Play modes.
1Press REPEAT during playback.
The following Control Bar appears.
2Press REPEAT repeatedly to select the
item you want to set.
◆When playing a DVD
•DISC: repeats all of the titles.
•TITLE: repeats the current title on a
disc.
•CHAPTER: repeats the current
chapter.
◆When playing a VIDEO CD or CD
•DISC: repeats all of the tracks.
•TRACK: repeats the current track.
◆When playing a DATA CD (MP3 audio)
•DISC: repeats all of the albums.
•ALBUM: repeats the current album.
•TRACK: repeats the current track.
◆When Programme Play or Shuffle Play
is activated
•ON: repeats Programme Play or
Shuffle Play.
DISC
43
Playing Discs
To return to normal play
Press CLEAR, or select “OFF”in Step 2.
zHint
You can set Repeat Play while the player is stopped.
After selecting the “REPEAT”option, press H.
Repeat Play starts.
Repeating a specific portion (A-
B Repeat Play)
You can play a specific portion of a title,
chapter or track repeatedly. (This function is
useful when you want to memorize lyrics, etc.)
1Press DISPLAY during playback.
The following Control Bar appears.
2Press C/cto select (A-B
REPEAT).
3During playback, when you find the
starting point (point A) of the portion to
be played repeatedly, press ENTER.
The starting point (point A) is set.
4When you reach the ending point
(point B), press ENTER again.
The set points are displayed and the
player starts repeating this specific
portion.
A13
–
0:27:34 B
c
continued

1-11
44
To return to normal play
Press CLEAR.
To turn off the Control Bar
Press DISPLAY repeatedly until the Control
Bar is turned off.
Note
When you set A-B Repeat Play, the settings for
Shuffle Play, Repeat Play, and Programme Play are
canceled.
45
Searching for a Scene
Searching for a Title/
Chapter/Track/Index/
Scene (Search mode)
You can search a DVD by title or chapter, and
you can search a VIDEO CD/CD/DATA CD
by track, index, or scene. As titles and tracks
are assigned unique numbers on the disc, you
can select the desired one by entering its
number. Or, you can search for a scene using
the time code.
1
Press SEARCH MODE.
The following display appears.
“--
(
**
)”appears next to the icon (
**
refers to a number).
The number in parentheses indicates the
total number of titles, tracks, indexes,
scenes, etc. of the disc.
2
Press SEARCH MODE repeatedly
to select the search method.
◆When playing a DVD
(TITLE)
(CHAPTER)
(TIME/TEXT)
(NUMBER INPUT)
Select “TIME/TEXT”to search for a
starting point by inputting the time code.
◆When playing a VIDEO CD
(TRACK)
(INDEX)
◆When playing a VIDEO CD with PBC
Playback
(SCENE)
(INDEX)
◆When playing a CD
(TRACK)
(INDEX)
◆When playing a DATA CD (MP3 audio)
(ALBUM)
(TRACK)
3
Select the number of the title,
track, scene, time code, etc. you
want using the number buttons.
For example, to find the scene at 2 hours,
10 minutes, and 20 seconds after the
beginning, select “TIME/TEXT”in Step
2 and enter “2:10:20.”
If you make a mistake
Cancel the number by pressing CLEAR,
then select another number.
4
Press ENTER.
The player starts playback from the
selected number.
zHint
If you are playing a disc and it is necessary to enter
a number, select “NUMBER INPUT”in Step 2.
Number
buttons
––
(10)
46
Viewing Information About the
Disc
Checking the Playing
Time and Remaining
Time
You can check the playing time and
remaining time of the current title, chapter, or
track. Also, you can check the DVD/CD text
or track name (MP3 audio) recorded on the
disc.
1Press DISPLAY repeatedly during
playback until (TIME/TEXT)
appears.
2Press ENTER repeatedly to change
the time information.
The display and the kinds of time that you
can change depend on the disc you are
playing.
◆When playing a DVD
•T *:*:*(hours:minutes:seconds)
Playing time of the current title
•T–*:*:*
Remaining time of the current title
•C *:*:*
Playing time of the current chapter
•C–*:*:*
Remaining time of the current chapter
◆When playing a VIDEO CD (with PBC
functions)
•*:*(minutes:seconds)
Playing time of the current scene
◆When playing a VIDEO CD (without
PBC functions) or CD
•T *:*(minutes:seconds)
Playing time of the current track
•T–*:*
Remaining time of the current track
•D *:*
Playing time of the current disc
•D–*:*
Remaining time of the current disc
◆When playing a DATA CD (MP3 audio)
•*:*(minutes:seconds)
Playing time of the current track
◆When playing a Super VCD
•T *:*(minutes:seconds)
Playing time of the current track
To turn off the Control Bar
Press DISPLAY repeatedly until the Control
Bar is turned off.
To check the DVD/CD text or track name
(MP3 audio)
Press ENTER repeatedly in Step 2 to display
text recorded on the DVD/CD/DATA CD.
The DVD/CD text appears only when text is
recorded in the disc. You cannot change the
text. If the disc does not contain text, “NO
TEXT”appears.
For DATA CDs, only the track name of the
MP3 audio track appears.
T41
–
8
DVD T 1:01:57
Time
information
Title, track (CD/
VIDEO CD), scene, or
album number
Chapter, index, or
track (DATA CD)
Disc type
BRAHMS SYMPHONY
47
Viewing Information About the Disc
zHints
•When playing VIDEO CDs with PBC functions,
the scene number and the playing time are
displayed.
•You can also check the time information and text
by pressing TIME/TEXT repeatedly.
Notes
•Depending on the type of disc being played, the
disc’s text or track name may not be displayed.
•The player can only display the first level of the
DVD/CD text, such as the disc name or title.
•Playing time of MP3 audio tracks may not be
displayed correctly.

1-12
48
Sound Adjustments
Changing the Sound
When playing a DVD recorded in multiple
audio formats (PCM, Dolby Digital, MPEG
audio, or DTS), you can change the audio
format. If the DVD is recorded with
multilingual tracks, you can also change the
language.
With CDs, DATA CDs, or VIDEO CDs, you
can select the sound from the right or left
channel and listen to the sound of the selected
channel through both the right and left
speakers. For example, when playing a disc
containing a song with the vocals on the right
channel and the instruments on the left
channel, you can hear the instruments from
both speakers by selecting the left channel.
1
Press AUDIO during playback.
The following display appears.
The number in parentheses indicates the
total number of available audio signals.
2
Press AUDIO repeatedly to select
the desired audio signal.
◆When playing a DVD
Depending on the DVD, the choice of
language varies.
When 4 digits are displayed, they
indicate a language code. Refer to
“Language Code List”on page 74 to see
which language the code represents.
When the same language is displayed two
or more times, the DVD is recorded in
multiple audio formats.
◆When playing a VIDEO CD, CD, or
DATA CD (MP3 audio)
The default setting is underlined.
•STEREO: The standard stereo sound
•1/L: The sound of the left channel
(monaural)
•2/R: The sound of the right channel
(monaural)
◆When playing a Super VCD
The default setting is underlined.
•1:STEREO: The stereo sound of the
audio track 1
•1:1/L: The sound of the left channel of
the audio track 1 (monaural)
•1:2/R: The sound of the right channel of
the audio track 1 (monaural)
•2:STEREO: The stereo sound of the
audio track 2
•2:1/L: The sound of the left channel of
the audio track 2 (monaural)
•2:2/R: The sound of the right channel of
the audio track 2 (monaural)
Note
While playing a Super VCD on which the audio
track 2 is not recorded, no sound will come out
when you select “2:STEREO,”“2:1/L”or “2:2/R.”
AUDIO
DISPLAY
1(4):
ENGLISH
49
Sound Adjustments
Checking the audio signal
format
If you press DISPLAY repeatedly during
playback, the format of the current audio
signal (Dolby Digital, MPEG audio, DTS,
PCM, etc.) appears as shown below.
Example:
Dolby Digital 5.1 ch
About audio signals
Audio signals recorded in a disc contain the
sound elements (channels) shown below.
Each channel is output from a separate
speaker.
•Front (L)
•Front (R)
•Centre
•Rear (L)
•Rear (R)
•Rear (Monaural): This signal can be either
the Dolby Surround Sound processed
signals or the Dolby Digital sound’s
monaural rear audio signals.
•LFE (Low Frequency Effect) signal
Note
If “DTS”is set to “OFF”in “AUDIO SETUP,”the
DTS track selection option will not appear on the
screen even if the disc contains DTS tracks (page
68).
TV Virtual Surround
Settings (TVS)
When you connect a stereo TV or 2 front
speakers, TVS (TV Virtual Surround) lets
you enjoy surround sound effects by using
sound imaging to create virtual rear speakers
from the sound of the front speakers (L: left,
R: right) without using actual rear speakers.
TVS was developed by Sony to produce
surround sound for home use using just a
stereo TV.
1Press SUR during playback.
The following Control Bar appears.
2Press SUR repeatedly to select
one of the TVS sounds.
Refer to the following explanations given
for each item.
•TVS DYNAMIC
•TVS WIDE
•TVS NIGHT
•TVS STANDARD
To cancel the setting
Select “OFF”in Step 2.
3 / 2 .1
DOLBY DIGITAL
Rear (L/R)
Front (L/R)
+ Centre LFE (Low Frequency
Effect)
TVS DYNAMIC
c
continued
50
◆TVS DYNAMIC
Creates virtual rear speakers from the sound
of the front speakers (L, R) without using
actual rear speakers (shown below).
This mode is effective when the distance
between the front L and R speakers is short,
such as with built-in speakers on a stereo TV.
◆TVS WIDE
Creates virtual rear speakers from the sound
of the front speakers (L, R) without using
actual rear speakers. The virtual speakers are
reproduced as shown in the illustration
below.
This mode is effective when the distance
between the front L and R speakers is short,
such as with built-in speakers on a stereo TV.
◆TVS NIGHT
Large sounds, such as explosions, are
suppressed, but the quieter sounds are
unaffected. This feature is useful when you
want to hear the dialog and enjoy the
surround sound effects of “TVS WIDE”at
low volume.
◆TVS STANDARD
Creates virtual rear speakers from the sound
of the front speakers (L, R) without using
actual rear speakers. The virtual speakers are
reproduced as shown in the illustration
below. Use this setting when you want to use
TVS with 2 separate speakers.
Notes
•When the playing signal does not contain a signal
for the rear speakers, the surround effects will be
difficult to hear.
•When you select one of the TVS modes, turn off
the surround setting of the connected TV or
amplifier (receiver).
•Make sure that your listening position is between
and at an equal distance from your speakers, and
that the speakers are located in similar
surroundings.
•“TVS NIGHT”only works with Dolby Digital
discs. However, not all discs will respond to the
“TVS NIGHT”function in the same way.
•When you use the DIGITAL OUT (OPTICAL)
jack to listen to MPEG audio signals and set
“MPEG”to “MPEG”in “AUDIO SETUP,”no
sound will come from your speakers if you select
one of the TVS modes.
TV
TV
L : Front speaker (left)
R : Front speaker (right)
: Virtual speaker
LR
51
Enjoying Movies
Enjoying Movies
Changing the Angles
If various angles (multi-angles) for a scene
are recorded on the DVD, the indicator
on the Control Bar lights up in blue. This
means that you can change the viewing angle.
1Press ANGLE during playback.
The following Control Bar appears.
The number in parentheses indicates the
total number of angles.
2Press ANGLE repeatedly to select
the angle number.
The scene changes to the selected angle.
Note
Depending on the DVD, you may not be able to
change the angles even if multi-angles are recorded
on the DVD.
Displaying the Subtitles
If subtitles are recorded on the discs, you can
change the subtitles or turn them on and off
whenever you want while playing a DVD.
1Press SUBTITLE during playback.
The following display appears.
The number in parentheses indicates the
total number of available subtitles.
2Press SUBTITLE repeatedly to
select the language.
Depending on the DVD, the choice of
language varies.
When 4 digits are displayed, they
indicate a language code. Refer to
“Language Code List”on page 74 to see
which language the code represents.
2(7)
SUBTITLE
1(8):ENGLISH
c
continued

1-13
55
Enjoying Movies
To cancel the “DIGITAL VIDEO
ENHANCER” setting
Select “OFF”in Step 2.
To turn off the Control Bar
Press DISPLAY repeatedly until the Control
Bar is turned off.
Note
Depending on the disc or the scene being played,
noise found in the disc may become more apparent.
If this happens, it is recommended that you use the
BNR function (page 52) with the DVE function. If
the condition still does not improve, reduce the
Digital Video Enhancer level, or select “SOFT”
(DVD only) in Step 2 above.
52
To turn off the subtitles
Select “OFF”in Step 2.
Note
Depending on the DVD, you may not be able to
change the subtitles even if multilingual subtitles
are recorded on it. You also may not be able to turn
them off.
Adjusting the Picture
Quality (BNR)
The Block Noise Reduction (BNR) function
adjusts the picture quality by reducing the
“block noise”or mosaic like patterns that
appear on your TV screen.
1Press DISPLAY twice during
playback.
The following Control Bar appears.
2Press C/cto select (BNR),
then press ENTER repeatedly to
select a level.
•1: reduces the “block noise.”
•2: reduces the “block noise”more than
1.
•3: reduces the “block noise”more than
2.
1
53
Enjoying Movies
To cancel the “BNR”setting
Select “OFF”in Step 2.
To turn off the Control Bar
Press DISPLAY repeatedly until the Control
Bar is turned off.
Notes
•If the outlines of the images on your screen should
become blurred, set “BNR”to “OFF.”
•Depending on the disc or the scene being played,
the “BNR”effect may be hard to discern.
Adjusting the Playback
Picture
(CUSTOM PICTURE MODE)
You can adjust the video signal of the DVD or
VIDEO CD from the player to obtain the
picture quality you want. Choose the setting
that best suits the programme you are
watching.
1
Press PICTURE MODE during
playback.
The following Control Bar appears.
2
Press PICTURE MODE repeatedly
to select the setting you want.
The default setting is underlined.
•STANDARD: displays a standard
picture.
•DYNAMIC 1: produces a bold
dynamic picture by increasing the
picture contrast and the colour
intensity.
•DYNAMIC 2: produces a more
dynamic picture than DYNAMIC 1 by
further increasing the picture contrast
and the colour intensity.
•CINEMA 1: enhances details in dark
areas by increasing the black level.
DYNAMIC 1
c
continued
54
•CINEMA 2: White colours become
brighter and black colours become
richer, and the colour contrast is
increased.
zHint
When you watch a movie, “CINEMA 1”or
“CINEMA 2”is recommended.
Enhancing the Playback
Picture (DIGITAL VIDEO
ENHANCER)
The Digital Video Enhancer (DVE) function
makes the picture appear clear and crisp by
enhancing the outlines of images on your TV
screen. Also, this function can soften the
images on the screen.
1Press DISPLAY twice during
playback.
The following Control Bar appears.
2Press C/cto select (DIGITAL
VIDEO ENHANCER), then press
ENTER repeatedly to select a
level.
•1: enhances the outline.
•2: enhances the outline more than 1.
•3: enhances the outline more than 2.
•SOFT: softens the image (DVD only).
ENTER
DISPLAY
1

1-14
58
3Press X/xto select “PLAYER t,”
then press ENTER.
◆If you have not entered a password
The display for registering a new
password appears.
Enter a 4-digit password using the
number buttons, then press ENTER.
The display for confirming the password
appears.
◆When you have already registered a
password
The display for entering the password
appears.
4Enter or re-enter your 4-digit password
using the number buttons, then press
ENTER.
The display for setting the playback
limitation level appears.
5Press X/xto select “STANDARD,”
then press ENTER.
The selection items for “STANDARD”
are displayed.
6Press X/xto select a geographic area
as the playback limitation level, then
press ENTER.
The area is selected.
When you select “OTHERS t,”select
and enter a standard code in the table on
page 59.
7Press X/xto select “LEVEL,”then
press ENTER.
The selection items for “LEVEL”are
displayed.
8Select the level you want using X/x,
then press ENTER.
Parental Control setting is complete.
The lower the value, the stricter the
limitation.
To turn off the Parental Control function
Set “LEVEL”to “OFF”in Step 8.
PARENTAL CONTROL
Enter a new 4-digit password, then
press
.
ENTER
PARENTAL CONTROL
Enter password, then press
.
ENTER
PARENTAL CONTROL
LEVEL: OFF
USA
STANDARD:
PARENTAL CONTROL
LEVEL: OFF
USA
STANDARD: USA
OTHERS
PARENTAL CONTROL
LEVEL: OFF
OFF
STANDARD:
8:
7:
6:
5:
NC17
R
PARENTAL CONTROL
LEVEL:
STANDARD: USA
4: PG13
59
Using Various Additional Functions
To play a disc for which Parental Control is
set
1Insert the disc and press H.
The display for entering your password
appears.
2Enter your 4-digit password using the
number buttons, then press ENTER.
The player starts playback.
zHint
If you forget your password, remove the disc and
repeat Steps 1 to 3 of “Parental Control (limited
playback).”When you are asked to enter your
password, enter “199703”using the number
buttons, then press ENTER. The display will ask
you to enter a new 4-digit password. After you enter
a new 4-digit password in Step 4, replace the disc in
the player and press H. When the display for
entering your password appears, enter your new
password.
Note
When you play DVDs which do not have the
Parental Control function, playback cannot be
limited on this player.
Area Code
Changing the password
1Press DISPLAY while the player is in
stop mode.
The Control Bar appears.
2Press X/xto select (PARENTAL
CONTROL), then press ENTER.
The options for “PARENTAL
CONTROL”appear.
3Press X/x to select “PASSWORD
t,”then press ENTER.
The display for entering the password
appears.
4Enter your 4-digit password using the
number buttons, then press ENTER.
5Enter a new 4-digit password using the
number buttons, then press ENTER.
6To confirm your password, re-enter it
using the number buttons, then press
ENTER.
Standard Code
number
Argentina 2044
Australia 2047
Austria 2046
Belgium 2057
Brazil 2070
Canada 2079
Chile 2090
China 2092
Denmark 2115
Finland 2165
France 2174
Germany 2109
India 2248
Indonesia 2238
Italy 2254
Japan 2276
Korea 2304
Malaysia 2363
Mexico 2362
Netherlands 2376
New Zealand 2390
Norway 2379
Pakistan 2427
Philippines 2424
Portugal 2436
Russia 2489
Singapore 2501
Spain 2149
Sweden 2499
Switzerland 2086
Thailand 2528
United
Kingdom
2184
Standard Code
number
c
continued
56
Using Various Additional
Functions
Locking Discs
(CUSTOM
PARENTAL CONTROL, PARENTAL
CONTROL)
You can set two kinds of playback restrictions
for the desired disc.
•Custom Parental Control
You can set playback restrictions so that the
player will not play inappropriate discs.
•Parental Control
Playback of some DVDs can be limited
according to a predetermined level such as
the age of the users. Scenes may be blocked
or replaced with different scenes.
The same password is used for both Parental
Control and Custom Parental Control.
Custom Parental Control
You can set the same Custom Parental
Control password for up to 40 discs. When
you set the 41st-disc, the first disc is canceled.
1Insert the disc you want to lock.
If the disc is playing, press xto stop
playback.
2Press DISPLAY while the player is in
stop mode.
The following Control Bar appears.
3Press X/xto select (PARENTAL
CONTROL), then press ENTER.
The options for “PARENTAL
CONTROL”appear.
4Press X/xto select “ON t,”then
press ENTER.
◆If you have not entered a password
The display for registering a new
password appears.
Enter a 4-digit password using the
number buttons, then press ENTER.
The display for confirming the password
appears.
◆When you have already registered a
password
The display for entering the password
appears.
Number
buttons
QUICK
ON
PLAYER
PASSWORD
OFF
PARENTAL CONTROL
Enter a new 4-digit password, then
press
.
ENTER
PARENTAL CONTROL
Enter password, then press
.
ENTER
57
Using Various Additional Functions
5Enter or re-enter your 4-digit password
using the number buttons, then press
ENTER.
“Custom parental control is set.”appears
when you enter your password.
To turn off the Custom Parental Control
function
1Follow Steps 1 through 3 of “Custom
Parental Control.”
2Press X/xto select “OFF t,”then press
ENTER.
3Enter your 4-digit password using the
number buttons, then press ENTER.
To play a disc for which Custom Parental
Control is set
1Insert the disc for which Custom Parental
Control is set.
The “CUSTOM PARENTAL
CONTROL”display appears.
2Enter your 4-digit password using the
number buttons, then press ENTER.
The player is ready for playback.
zHint
If you forget your password, enter the 6-digit
number “199703”using the number buttons when
the “CUSTOM PARENTAL CONTROL”display
asks you for your password, then press ENTER.
The display will ask you to enter a new 4-digit
password.
Parental Control (limited
playback)
Playback of some DVDs can be limited
according to a predetermined level such as the
age of the users. The “PARENTAL
CONTROL”function allows you to set a
playback limitation level.
1Press DISPLAY while the player is in
stop mode.
The following Control Bar appears.
2Press X/xto select (PARENTAL
CONTROL), then press ENTER.
The options for “PARENTAL
CONTROL”appear.
CUSTOM PARENTAL CONTROL
Custom parental control is already
set. To play, enter your password
and press
.
ENTER
Number
buttons
QUICK
ON
PLAYER
PASSWORD
OFF
c
continued

1-15
60
If you make a mistake entering your
password
Press Cbefore you press ENTER and input
the correct number.
If you make a mistake
Press O RETURN.
To turn off the display
Press DISPLAY repeatedly until the display
is turned off.
Controlling Your TV with
the Supplied Remote
You can control the sound level, input source,
and power switch of your TV with the
supplied remote. Set the appropriate
manufacturer’s code.
1While holding down TV [/1, press the
number buttons to select your TV’s
manufacturer’s code (see the table
below).
2Release TV [/1.
Number
buttons
61
Using Various Additional Functions
Code numbers of controllable TVs
If more than one code number is listed, try
entering them one at a time until you find the
one that works with your TV.
You can control your TV using the buttons
below.
Notes
•Depending on the unit being connected, you may
not be able to control your TV using some of the
buttons.
•If you enter a new code number, the code number
previously entered will be erased.
•When you replace the batteries of the remote, the
code number you have set may be reset to the
default setting. Set the appropriate code number
again.
Manufacturer Code number
Sony (default) 01
Grundig 11
Hitachi 24
JVC 33
LG 06
Panasonic 17, 49
Philips 06, 08
Samsung 06
Sanyo 25
Sharp 29
Thomson 43
Toshiba 38
By pressing You can
TV [/1Turn the TV on or off
VOL +/–Adjust the volume of the TV
TV/VIDEO Switch the TV’s input source
between the TV and other
input sources
62
Settings and Adjustments
Using the Setup Display
By using the Setup Display, you can make
various adjustments to items such as picture
and sound. You can also set a language for the
subtitles and the Setup Display, among other
things. The on-screen displays differ
depending on the player model. For details on
each Setup Display item, see pages from 63 to
68.
Note
Playback settings stored in the disc take priority
over the Setup Display settings and not all the
functions described may work.
1Press DISPLAY when the player is
in stop mode.
The Control Bar appears.
2Press X/xto select (SETUP),
then press ENTER.
3Press X/xto select “CUSTOM,”
then press ENTER.
The Setup Display appears.
4Press X/xto select the setup item
from the displayed list:
“LANGUAGE SETUP,”“SCREEN
SETUP,”“CUSTOM SETUP,”or
“AUDIO SETUP.”Then press
ENTER.
The Setup item is selected.
Example: “SCREEN SETUP”
5Select an item using X/x, then
press ENTER.
The options for the selected item appear.
Example: “TV TYPE”
QUICK
LANGUAGE SETUP
MENU:
AUDIO:
SUBTITLE: ORIGINAL
ENGLISH
OSD: ENGLISH
ENGLISH
SCREEN SETUP
TV TYPE:
SCREEN SAVER:
BACKGROUND:
16:9
ON
JACKET PICTURE
Selected item
Setup items
SCREEN SETUP
TV TYPE:
SCREEN SAVER:
BACKGROUND:
16:9
4:3 LETTER BOX
4:3 PAN SCAN
16:9
Options
63
Settings and Adjustments
6
Select a setting using X/x, then
press ENTER.
The setting is selected and setup is
complete.
Example: “4:3 PAN SCAN”
To turn off the display
Press DISPLAY repeatedly until the display
is turned off.
To enter the Quick Setup mode
Select “QUICK”in Step 3. Follow from Step
5 of the Quick Setup explanation to make
basic adjustments (page 28).
To reset all of the “SETUP”settings
1Select “RESET”in Step 3 and press
ENTER.
2Select “YES”using X/x.
You can also quit the process and return
to the Control Bar by selecting “NO”
here.
3Press ENTER.
All the settings explained on pages 63 to
68 return to the default settings. Do not
press [/1 while resetting the player as it
takes a few seconds to complete.
Setting the Display or
Sound Track Language
(LANGUAGE SETUP)
“LANGUAGE SETUP”allows you to set
various languages for the on-screen display or
sound track.
Select “LANGUAGE SETUP”in the Setup
Display. To use the display, see “Using the
Setup Display”(page 62).
◆OSD (On-Screen Display)
Switches the display language on the screen.
◆MENU (DVD only)
You can select the desired language for the
disc’s menu.
◆AUDIO (DVD only)
Switches the language of the sound track.
When you select “ORIGINAL,”the language
given priority in the disc is selected.
◆SUBTITLE (DVD only)
Switches the language of the subtitle recorded
on the DVD.
When you select “AUDIO FOLLOW,”the
language for the subtitles changes according to
the language you selected for the sound track.
zHint
If you select “OTHERS t”in “MENU,”
“SUBTITLE,”and “AUDIO,”select and enter a
language code from “Language Code List”on
page 74 using the number buttons.
Note
When you select a language in “MENU,”
“SUBTITLE,”or “AUDIO”that is not recorded on
the DVD, one of the recorded languages will be
automatically selected.
SCREEN SETUP
TV TYPE:
SCREEN SAVER:
BACKGROUND:
4:3 PAN SCAN
ON
JACKET PICTURE
Selected setting
LANGUAGE SETUP
OSD:
MENU:
AUDIO:
SUBTITLE:
ENGLISH
ENGLISH
ORIGINAL
ENGLISH

1-16
66
◆PAUSE MODE (DVD only)
Selects the picture in pause mode.
◆TRACK SELECTION (DVD only)
Gives the sound track which contains the
highestnumber of channels priority when you
play a DVD on which multiple audio formats
(PCM, DTS, MPEG audio, or Dolby Digital
format) are recorded.
Notes
•When you set the item to “AUTO,”the language
may change. The “TRACK SELECTION”setting
has higher priority than the “AUDIO”settings in
“LANGUAGE SETUP”(page 63).
•If you set “DTS”to “OFF”(page 68), the DTS
sound track is not played even if you set “TRACK
SELECTION”to “AUTO.”
•If PCM, DTS, MPEG audio, and Dolby Digital
sound tracks have the same number of channels,
the player selects PCM, DTS, Dolby Digital, and
MPEG audio sound tracks in this order.
◆MULTI-DISC RESUME (DVD/VIDEO CD
only)
Switches the Multi-disc Resume setting on or
off. Resume playback can be stored in
memory for up to 6 different DVD/VIDEO
CD discs (page 34).
Settings for the Sound
(AUDIO SETUP)
“AUDIO SETUP”allows you to set the sound
according to the playback and connection
conditions.
Select “AUDIO SETUP”in the Setup
Display. To use the display, see “Using the
Setup Display”(page 62).
The default settings are underlined.
◆AUDIO ATT (attenuation)
If the playback sound is distorted, set this
item to “ON.”The player reduces the audio
output level.
This function affects the output of the
AUDIO OUT L/R jacks.
◆AUDIO DRC (Dynamic Range Control)
(DVD only)
Makes the sound clear when the volume is
turned down when playing a DVD that
conforms to “AUDIO DRC.”This affects the
output from the following jacks:
–AUDIO OUT L/R jacks
–DIGITAL OUT (OPTICAL) jack only when
“DOLBY DIGITAL”is set to “D-PCM”
(page 67).
AUTO The picture, including subjects
that move dynamically, is
output with no jitter. Normally
select this position.
FRAME The picture, including subjects
that do not move dynamically,
is output in high resolution.
OFF No priority given.
AUTO Priority given.
ON Stores the resume settings in
memory for up to 6 discs (The
settings remain in memory even
if you select “OFF.”)
OFF Does not store the resume
settings in memory. Playback
restarts at the resume point only
for the current disc in the player.
OFF Normally, select this position.
ON Select this when the playback sound
from the speakers is distorted.
STANDARD Normally select this position.
TV MODE Makes the low sounds clear
even if you turn the volume
down.
WIDE
RANGE
Gives you the feeling of being
at a live performance.
AUDIO SETUP
AUDIO ATT:
AUDIO DRC:
DIGITAL OUT:
OFF
STANDARD
ON
DOWNMIX: DOLBY SURROUND
DOLBY DIGITAL:
MPEG: D-PCM
PCM
DTS: OFF
67
Settings and Adjustments
◆DOWNMIX (DVD only)
Switches the method for mixing down to 2
channels when you play a DVD which has
rear sound elements (channels) or is recorded
in Dolby Digital format. For details on the
rear signal components, see “Checking the
audio signal format”(page 49). This function
affects the output of the following jacks:
–AUDIO OUT L/R jacks
–DIGITAL OUT (OPTICAL) jack when
“DOLBY DIGITAL”is set to “D-PCM”
(page 67).
◆DIGITAL OUT
Selects if audio signals are output via the
DIGITAL OUT (OPTICAL) jack.
Setting the digital output signal
Switches the method of outputting audio
signals when you connect a component such
as an amplifier (receiver) or MD deck with a
digital input jack.
For connection details, see page 21.
Select “DOLBY DIGITAL,”“MPEG”and
“DTS”after setting “DIGITAL OUT”to
“ON.”
If you connect a component that does not
conform to the selected audio signal, a loud
noise (or no sound) will come out from the
speakers, affecting your ears or causing the
speakers to be damaged.
◆DOLBY DIGITAL (DVD only)
Selects the type of Dolby Digital signal.
DOLBY
SUR-
ROUND
Select this when the player is
connected to an audio
component that conforms to
Dolby Surround (Pro Logic).
NORMAL Select this when the player is
connected to an audio
component that does not
conform to Dolby Surround (Pro
Logic).
ON Normally select this position. When
you select “ON,”see “Setting the
digital output signal”for further
settings.
OFF The influence of the digital circuit
upon the analog circuit is minimal.
D-PCM Select this when the player is
connected to an audio
component lacking a built-in
Dolby Digital decoder. You can
select whether the signals
conform to Dolby Surround
(Pro Logic) or not by making
adjustments to the
“DOWNMIX”item in
“AUDIO SETUP”(page 67).
DOLBY
DIGITAL
Select this when the player is
connected to an audio
component with a built-in
Dolby Digital decoder.
AUDIO SETUP
AUDIO ATT:
AUDIO DRC:
DOLBY DIGITAL:
MPEG:
OFF
STANDARD
DOWNMIX: DOLBY SURROUND
D-PCM
PCM
DTS: OFF
DIGITAL OUT: ON
c
continued
64
Settings for the Display
(SCREEN SETUP)
Choose settings according to the TV to be
connected.
Select “SCREEN SETUP”in the Setup
Display. To use the display, see “Using the
Setup Display”on page 62.
The default settings are underlined.
The on-screen displays differ depending upon
the player model.
◆TV TYPE
Selects the aspect ratio of the connected TV
(4:3 standard or wide).
Note
Depending on the DVD, “4:3 LETTER BOX”may
be selected automatically instead of “4:3 PAN
SCAN”or vice versa.
◆COLOR SYSTEM (VIDEO CD only; For
Asian models only)
Selects the colour system when you play a
VIDEO CD.
Notes
•You cannot change the colour system for DVDs.
•You can change the colour system of this player
according to the connected TV. See page 15.
16:9 Select this when you connect a
wide-screen TV or a TV with a
wide mode function.
4:3 LETTER
BOX
Select this when you connect a
4:3 screen TV. Displays a wide
picture with bands on the upper
and lower portions of the
screen.
4:3 PAN
SCAN
Select this when you connect a
4:3 screen TV. Automatically
displays the wide picture on the
entire screen and cuts off the
portions that do not fit.
SCREEN SETUP
TV TYPE:
SCREEN SAVER:
BACKGROUND:
16:9
ON
JACKET PICTURE
COLOR SYSTEM: AUTO
AUTO Outputs the video signal in the
system of the VIDEO CD,
either PAL or NTSC. If your
TV is the DUAL system, select
AUTO.
PAL Changes the video signal of an
NTSC VIDEO CD and outputs
it in the PAL system.
NTSC Changes the video signal of a
PAL VIDEO CD and outputs it
in the NTSC system.
4:3 PAN SCAN
4:3 LETTER BOX
16:9
65
Settings and Adjustments
◆SCREEN SAVER
The screen saver image appears when you
leave the player in pause or stop mode for 15
minutes, or when you play back a CD or
DATA CD (MP3 audio) for more than 15
minutes. The screen saver will help prevent
your display device from becoming damaged
(ghosting). Press Hto turn off the screen
saver.
◆BACKGROUND
Selects the background colour or picture on
the TV screen in stop mode or while playing
a CD or DATA CD (MP3 audio).
Custom Settings (CUSTOM
SETUP)
Use this to set up playback related and other
settings.
Select “CUSTOM SETUP”in the Setup
Display. To use the display, see “Using the
Setup Display”(page 62).
The default settings are underlined.
The on-screen displays differ depending upon
the player model.
◆AUTO POWER OFF
Switches the Auto Power Off setting on or
off.
For Asian models, the default setting is
“OFF.”
◆AUTO PLAY
Switches the Auto Play setting on or off. This
function is useful when the player is
connected to a timer (not supplied).
◆DIMMER
Adjusts the lighting of the blue illumination on
the player.
ON Turns on the screen saver.
OFF Turns off the screen saver.
JACKET
PICTURE
The jacket picture (still picture)
appears, but only when the
jacket picture is already
recorded on the disc (CD-
EXTRA, etc.). If the disc does
not contain a jacket picture, the
“GRAPHICS”picture appears.
GRAPHICS
A preset picture stored in the
player appears.
BLUE The background colour is blue.
BLACK The background colour is black. ON The player enters standby mode
when left in stop mode for more
than 30 minutes.
OFF Switches this function off.
ON Automatically starts playback
when the player is turned on.
BRIGHT Makes the lighting bright.
DARK 1 Makes the lighting dark.
DARK 2 Makes the lighting darker.
CUSTOM SETUP
AUTO POWER OFF:
AUTO PLAY:
DIMMER:
ON
OFF
BRIGHT
AUTO
PAUSE MODE: OFF
TRACK SELECTION: ON
MULTI-DISC RESUME:
c
continued
Other manuals for DVP-F25
3
Table of contents
Other Sony DVD Player manuals

Sony
Sony DVP-S350 User manual

Sony
Sony UBP-X800 User manual

Sony
Sony DVP-CX875P User manual

Sony
Sony DVPNS90V - HDMI/SACD 1080i Upscaling DVD... User manual

Sony
Sony DVP-SR160 User guide

Sony
Sony RMT-B119A User manual

Sony
Sony DVP-NS50P User manual

Sony
Sony DVP-SR760H User guide

Sony
Sony DVP-F41M User manual

Sony
Sony DVPC-X850D User manual

Sony
Sony DVP-SR370 User guide

Sony
Sony HCD-DZ275M User manual

Sony
Sony DVP-SR160 User manual

Sony
Sony MCE-F11 User manual

Sony
Sony DVP-S735D User manual

Sony
Sony VideoStore VSH-1000 User manual

Sony
Sony DVP-SR370 User manual

Sony
Sony DVP-S500D User manual

Sony
Sony SLV-D500P - Dvd Player/video Cassette... User manual

Sony
Sony DVP-K88P User manual