manuals.online logo
Brands
  1. Home
  2. •
  3. Brands
  4. •
  5. Sony
  6. •
  7. Mini Disc Recorder
  8. •
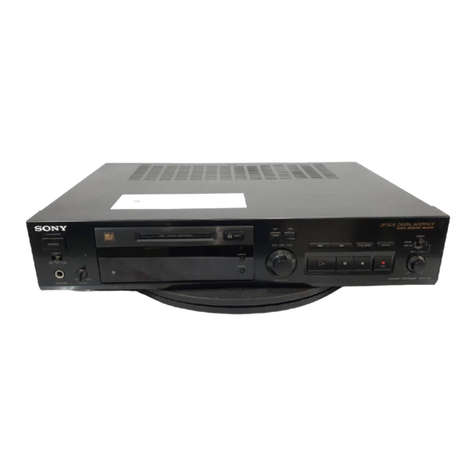
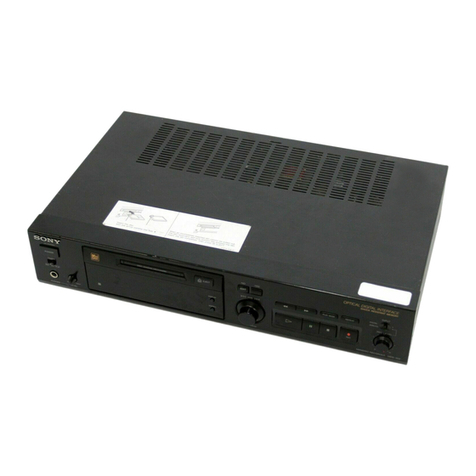
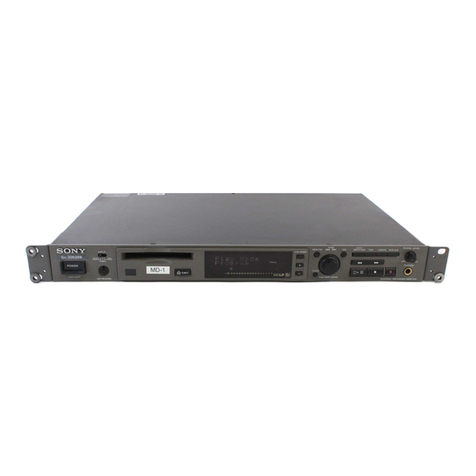
  9. Sony MDS-102/MD1 User manual

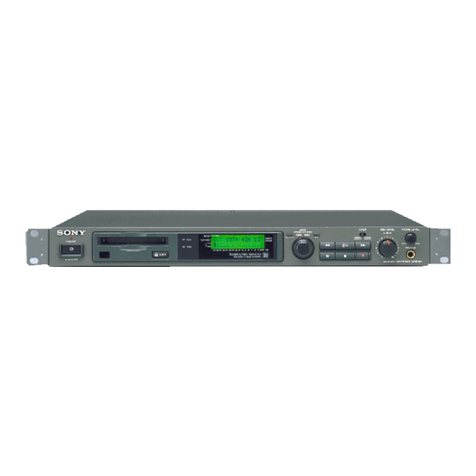
Sony MDS-102/MD1 User manual

Other Sony Mini Disc Recorder manuals

Sony MDM-X4 User manual

Sony

Sony MDM-X4 User manual

Sony Walkman MZ-R900DPC User manual

Sony

Sony Walkman MZ-R900DPC User manual

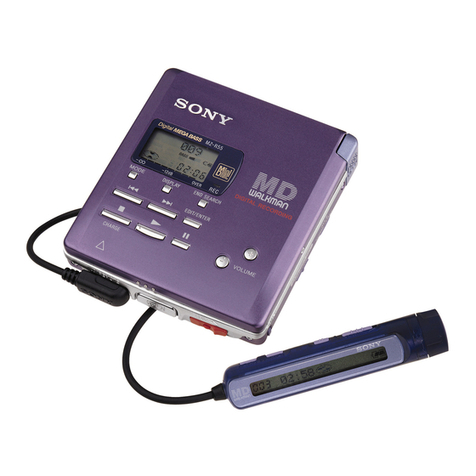
Sony MZ-R55 User manual

Sony

Sony MZ-R55 User manual

Sony MDM-X4 User manual

Sony

Sony MDM-X4 User manual

Sony Walkman MZ-NF810CK User manual

Sony

Sony Walkman MZ-NF810CK User manual

Sony MDS-B5 User manual

Sony

Sony MDS-B5 User manual

Sony MZ-R700 User manual

Sony

Sony MZ-R700 User manual

Sony MDS-DRE1 User manual

Sony

Sony MDS-DRE1 User manual

Sony MDS-302 - Hi-fi Mini Disc User manual

Sony

Sony MDS-302 - Hi-fi Mini Disc User manual

Sony WALKMAN MZ-NE410CK User manual

Sony

Sony WALKMAN MZ-NE410CK User manual

Sony MDS-E58 User manual

Sony

Sony MDS-E58 User manual

Sony 158MDXC800 User manual

Sony

Sony 158MDXC800 User manual

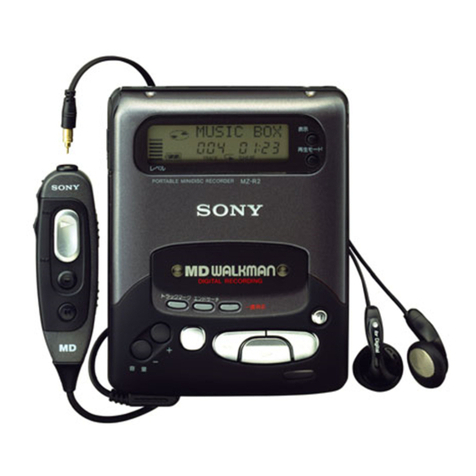
Sony MD Walkamn MZ-R2 User manual

Sony

Sony MD Walkamn MZ-R2 User manual

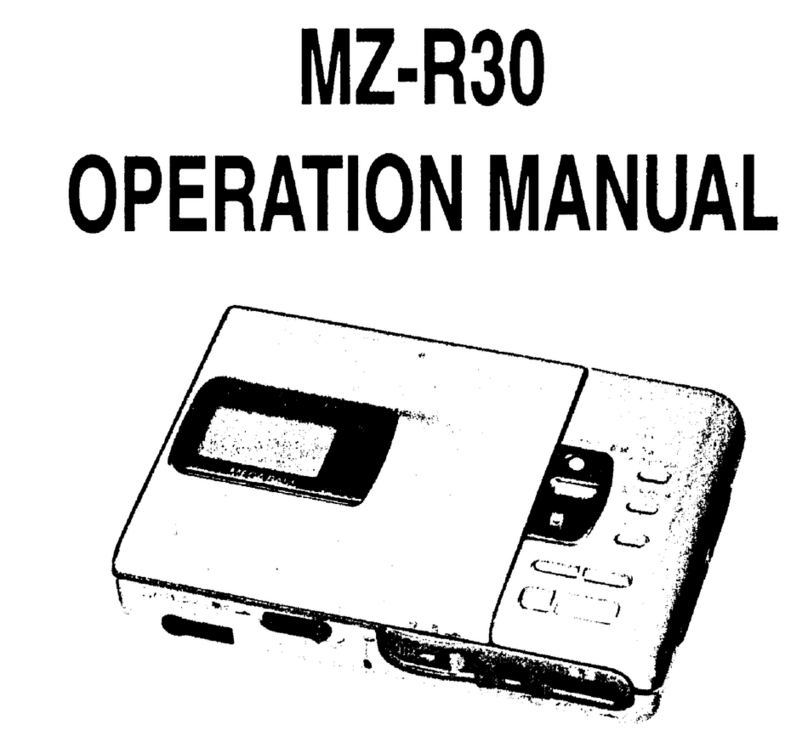
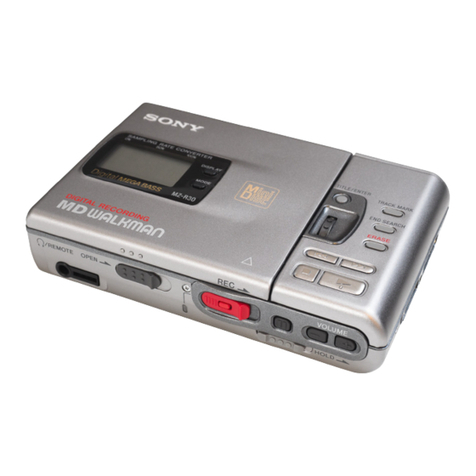
Sony MZ-R30 Analog PCLink User manual

Sony

Sony MZ-R30 Analog PCLink User manual

Sony MDS-W1 User manual

Sony

Sony MDS-W1 User manual

Sony Walkman MZ-R909 User manual

Sony

Sony Walkman MZ-R909 User manual

Sony MDS-101 User manual

Sony

Sony MDS-101 User manual

Sony MZ-NH700 User manual

Sony

Sony MZ-NH700 User manual

Sony MZ-R55 User manual

Sony

Sony MZ-R55 User manual

Sony MD Walkman MZ-R5ST User manual

Sony

Sony MD Walkman MZ-R5ST User manual

Sony MZ-1 User manual

Sony

Sony MZ-1 User manual

Sony MZ-R3 User manual

Sony

Sony MZ-R3 User manual

Sony Walkman MZ-G750DPC User manual

Sony

Sony Walkman MZ-G750DPC User manual

Sony MZ-R501 User manual

Sony

Sony MZ-R501 User manual

Popular Mini Disc Recorder manuals by other brands

Denon DMD-1000 operating instructions

Denon

Denon DMD-1000 operating instructions

Onkyo MD-2521 instruction manual

Onkyo

Onkyo MD-2521 instruction manual

Kenwood 1050MD instruction manual

Kenwood

Kenwood 1050MD instruction manual

Sharp IM-DR420H Operation manual

Sharp

Sharp IM-DR420H Operation manual

HHB Portadisc MDP500 Service manual

HHB

HHB Portadisc MDP500 Service manual

Yamaha MDX-M5 owner's manual

Yamaha

Yamaha MDX-M5 owner's manual

Onkyo MD-105TX instruction manual

Onkyo

Onkyo MD-105TX instruction manual

Onkyo MD-121 instruction manual

Onkyo

Onkyo MD-121 instruction manual

Pioneer MJ-D508 operating instructions

Pioneer

Pioneer MJ-D508 operating instructions

Pioneer MJ-D707 operating instructions

Pioneer

Pioneer MJ-D707 operating instructions

Aiwa AM-C75 operating instructions

Aiwa

Aiwa AM-C75 operating instructions

Kenwood DM-SE7 instruction manual

Kenwood

Kenwood DM-SE7 instruction manual

Kenwood DM-SE7 instruction manual

Kenwood

Kenwood DM-SE7 instruction manual

Kenwood DMF-9020 instruction manual

Kenwood

Kenwood DMF-9020 instruction manual

Onkyo MD-2321 instruction manual

Onkyo

Onkyo MD-2321 instruction manual

JVC XM-EX90 instruction manual

JVC

JVC XM-EX90 instruction manual

Yamaha MDX-596 owner's manual

Yamaha

Yamaha MDX-596 owner's manual

Yamaha MD8 owner's manual

Yamaha

Yamaha MD8 owner's manual

manuals.online logo
manuals.online logoBrands
  • About & Mission
  • Contact us
  • Privacy Policy
  • Terms and Conditions

Copyright 2025 Manuals.Online. All Rights Reserved.

~
MDS-102/MD1
SERVICE
MANUAL
¢MDS-MD71
is
mini
disc
recorder
in
DHC-MD1.
U.S.
and
foreign
patents
licensed
from
Dolby
Laboratories
Licensing
Corporation.
Photo:
MDS-102
AEP
Model
|
UK
Model
Singapore
Model
Mexican
Model
Tourist
Model
MDS-102
Canadian
Model
AEP
Model
Singapore
Model
MDS-MD1
Model
Name
Using
Similar
Mechanism
|
MDS-101
Mechanism
Type
MDM-1C
Base
Unit
Type
MBU-1
Optical
Pickup
Block
Type
KMS-140B
SPECIFICATIONS
MD
recorder
section
(MDS-102)
System
MiniDisc
digital
audio
system
Disc
MiniDisc
Laser:
Semiconductor
laser
Wavelength:
780
-
790nm
Laser
diode
properties
Material:
GaAJAs
Emission
duration:
continuous
Laser
output:
less
than
44.6
1W
(This
output
is
the
value
measured
at
a
distance
of
200
mm
from
the
lens
surface
on
the
optical
pick-up
block.)
Revolutions
400
rpm
to
900
rpm
(CLV)
Error
correction
Advanced
Cross
Interleave
Reed
Solomon
Code
(ACIRC)
Sampling
frequency
44.1
kHz
Modulation
system
EFM
(Eight-to-Fourteen
Modulation)
Number
of
channels
2
stereo
channels
Frequency
response
5
to
20,000
Hz
+
0.5
dB
Wow
and
flutter
Below
measurable
limit
MICROFILM
Inputs
Stereo
_|
mini-jack
600
ohms
{0.8
mVrms
|
0.3
mVrms
More
than
Vv
158
mV
47
kilohms
500
mVrms
mVrms
Optical
wave
lenghth
660
nm
|
Phono
Square
optical
connector
jack
—Continued
on
next
page—
MiniDisc
Recorder
SON
Y.
Outputs
Stereo
mini-
ack
|28mW
32
ohms
2
Vrms
ata
Ph
a
load
More
than
i
as
impedance
of
|
10
kilohms
50
kilohms
Optical
Square
optical
wave
connector
jack
idea
lenghth
660
nm
General
Power
requirements
110—
120/220
-
240
V
AC,
50/60
Hz
:
Mexican,
Singapore,
Tourist
model
220-230
V
AC,
50/60
Hz
:
AEP
model
240
V
AC,
50
Hz:
UK
model
Power
consumption
17
W
Dimensions
Approx
225
X
75
X
285
mm
(w/h/d)
(87/8
X
3X
11'/4
inches)
incl.
projecting
parts
Mass
Approx
2.8
kg
(6
lb
5
oz)
Supplied
accessories
*
Remote
commander
RM-D1M
(1)
¢
Sony
SUM-3
(NS)
batteries
(2)
¢
Audio
connecting
cords
(pin-jack
x
2
<>
pin-jack
x
2)
(2)
¢
Optical
cable
(1)
¢
Audio
(AU)
bus
cable
(1)
¢
Recordable
MD:
MDW-60
(1)
¢
AC
plug
adaptor
(1)
Design
and
specifications
are
subject
to
change
without
notice.
SAFETY-RELATED
COMPONENT
WARNING!!
COMPONENTS
IDENTIFIED
BY
MARK
A
OR
DOTTED
LINE
WITH
MARK
A
ON
THE
SCHEMATIC
DIAGRAMS
AND
IN
THE
PARTS
LIST
ARE
CRITICAL
TO
SAFE
OPERATION.
REPLACE
THESE
COMPONENTS
WITH
SONY
PARTS
WHOSE
PART
NUMBERS
APPEAR
AS
SHOWN
IN
THIS
MANUAL
OR
IN
SUPPLEMENTS
PUB-
LISHED
BY
SONY.
MD
Recorder
section
(MDS-MD1)
Recording
system
Magnetic
field
modulation
overwrite
system
Playback
scanning
system
Laser
Sampling
frequency
Coding
Frequency
response
Signal-to-noise
ratio
Wow
and
flutter
Output
jack
No-contact
optical
scanning
(using
a
semiconductor
laser)
Semiconductor
laser
(
A
=
780
nm)
44.1
kHz
Adaptive
Transform
Acoustic
Coding
(ATRAC)
5
Hz
to
20
kHz
+
0.5dB
90
dB
or
more
(during
playback)
Below
measurable
limit
Square
optical
connector
jack
:-18
dBm
Wavelength
of
emitted
light:
660
nm
Supplied
accessories
AM
loop
antenna
(1)
Remote
commander
(RM-S11MD)
(1)
Sony
SUM-3
(NS)
batteries
(2)
FM
antenna
(1)
AC
power
cord
(1)
Flat
cord
(1)
Speaker
cords
(2)
Optical
transmission
cable
(1)
General
Power
requirements
120
V
AC,
60
Hz
:
Canadian
model
220-230
V
AC,
50/60
Hz
:
AEP,
German,
Italian
model
110-
120/220
-
240
V
AC,
50/60
Hz
:
Singapore
model
Power
consumption
17
W
Dimensions
Approx
225
X
75
X
295
mm
(w/h/d)
(87/s
X
3X
115/s
inches)
Mass
Approx
2.8
kg
(6
Ib
3
oz)
Design
and
specifications
are
subject
to
change
without
notice.
ATTENTION
AU
COMPOSANT
AYANT
RAPPORT
A
LA
SECURITE!
LES
COMPOSANTS
IDENTIFIES
PAR
UNE
MARQUE
/\
SUR
LES
DIAGRAMMES
SCHEMATIQUES
ET
LA
LISTE
DES
PIECES
SONT
CRITIQUES
POUR
LA
SECURITE
DE
FONCTIONNEMENT.
NE
REMPLACER
CES
COM-
POSANTS
QUE
PAR DES
PIECES
SONY
DONT
LES
NUMEROS
SONT
DONNES
DANS
CE
MANUEL
OU
DANS
LES
SUPPLEMENTS
PUBLIES
PAR
SONY.
MODEL
IDENTIFICATION
TABLE
OF
CONTENTS
—
Specification
Labels
—
Section
Title
Page
MDS-102
1.
GENERAL
MDS-MD1
cneaas
MDS-MD1
SONY.
wmoveino.LZZZZZ
2.
DISASSEMBLY
2-1.
Case,
Front
Panel
srrtserssesesceceereeceseseeeseseesessenensseeesesonenens
2
MINIDISC
RECORDER
LLL
LL
LLL
SERIAL
NO.
MADE
IN
JAPAN
Canadian
model:
AC
:
120V
60Hz
AEP,
German,
Italian
model
:
AC
:
220—230V
~50/60Hz
UK
model
:
AC
:
240V~50Hz
Mexican,
Singapore,
3.
Tourist
model
:
AC
:110—-120/220—240V~50/60Hz
4.
5.
This
appliance
is
classified
as
CLASS
1
LASER
PRODUCT
a
CLASS
1
LASER
product.
LUOKAN
1
LASERLAITE
The
CLASS
1
LASER
KLASS
1
LASERAPPARAT
PRODUCT
MARKING
is
located
on
the
rear
exterior.
The
following
caution
label
is
located
inside
of
the
unit.
CAUTION
_
:
INVISIBLE
LASER
RADIATION
WHEN
OPEN,
AVOID
EXPOSURE
TO
BEAM.
.
USYNLIG
LASERSTRALING
VED
ABNING
NAR
ADVARSEL
:
SIKKERHEDSAFBRYDERE
ER
UDE
AF
FUNKTION.
UNDGAUDS
AETTELSE
FOR
STRANING.
VAROI
1
AVATTAESSA
JA
SUQJALUKITUS
OHITETTAESSA
DLET
ALTTIINA
LASERSATEILYLLE.
VARNING
_
:
LASERSTRALING
NER
DENNA
DEL
AR
OPPNAD
OCH
SPARREN
AR
URXOPPLAD.
ADVARSEL
:
USYNLIG
LASERSTRALING
NAR
DEKSEL
APNES
UNNGA
EKSPONERING
FOR
STI
EN.
7.
2-2.
DISP,
MIC
Board
2-3.
Power
Transformer
*:
2-4.
Back
Panel
Pere
ere
ee
ROC
OSESSOOCO
COT
OSCeCCVecerereecercerererreree
rer
rr
err
riry
2-5.
Mechanism
Deck
(MDMC-IC)
corctreresterete
etter
eeeeeeesensereannn
ees
35
2-6.
RF/SERVO
Board
2-7.
Base
Unit
(MBU-1)
2-8.
Loading
Motor
Assy
trtttsrrttrrerrrreeseesrereeeeneensenteateneeeeones
2-9.
Sled
Motor
eee
eeSePere
ere
rer
eee
eee
ee
rere
irerer
ree
rer
reer
rer
rr
rr
rrr
errr
irs
2-10.
Mini
Disc
Device
(KMS-140B)
TEST
MODE
ovvcccccscseccececeeceecesceseeeseneacsenscessesenecenes
38
ELECTRICAL
ADJUSTMENTS
-vvvveesceeseessceecseteereees
4l
DIAGRAMS
5-
1
,
Ic
Pin
Functions
Oe
RUE
CEES
EOC
OOSCOCOSCOOCOOeT
IS
er
errr
errr
rir
rir)
eee
verere
50
1C103_
EFM/ACIR
Encoder/Decoder
(CXD2525R)
IC110
Shockproof
Memory
Controller
(CXD2526AR)
vrrtrsrseetrseeetsees
IC111
System
Control
(M38067M8-126FP)
*++++*+**
1C301
Function/Display
Controller
(M38004MB8-11
1FP)
*+rrrrs+++++
56
5-2,
Block
Diagram
s1:ttsetstssssrtrseseeeeeeeeeseee
eee
eae
eteeteteeeeneneenes
59
5-3.
Circuit
Boards
Location
PA
nee
e
ener
emer
eer
nen
eer
e
rere
rere
eee
seers
nese
ees
64
5-4.
Semiconductor
Lead
Layouts
s+++ttsrererere
ve
65
5-5.
Printed
Wiring
Boards—RF
Section
«++++++++e++eeee*
eesereausens
66
5-6.
Schematic
Diagram—RF
Section—
°+++*
Cogs
Swans
gene
ese
saenvee
toe
69
5-7.
Schematic
Diagram—
Audio
Section
rr++++r+r+++
5-8.
Printed
Wiring
Boards—
Audio
Section—
5-9.
Printed
Wiring
Boards—
Digital
Section
svrrrrterstrettreeeseees
81
5-10.
Schematic
Diagram
—
Digital
Section
—
srrrtrrsrerreseesereteeteetceees
85
5-11.
Schematic
Diagram
—
Display
(MDS-102)
Section
—
*****
90
5-12.
Printed
Wiring
Board
—
Display
(MDS-102)
Section
—
*rrrrsstesree>
93
5-13.
Printed
Wiring
Board
—
Display
(MD1)
Section
—
strrrreretsereeeeeees
96
5-14.
Schematic
Diagram
—
Display
(MD1)
Section
—
svrrrstrtrrresseersesees
99
EXPLODED
VIEWS
6-1
F
Cabinet
Section
ore
eee
ere
reer
errr
errr
reer
ire
101
6-2.
Chassis
Section
crrrrcrcrtcttescerseceeeneecaneeersneseneeeesseereraeees
102
6-3.
Mechansim
Deck
Section-}
*
103
6-4.
Mechanism
Deck
Section-2
ccrrcercrercstenseevessesveusenracensecaas
104
6-5.
Base
Unit
Section
cecrrrrrrersetersserereceseesseseceeesseeeveeresseeee
105
ELECTRICAL
PARTS
LIST
-0:---ccecsececrsctecreceeteneesees
106
Te
PES
{MDS-102]
Moke)
diate
M-1
an
dal
Golalacel
ts
Front
panel}
1]
POWER
switch
Press
to
turn
on
the
unit;
press
again
to
change
to
stand-
by.
2)
Disc
compartment
Automatically
loads
an
inserted
disc.
3]
S
(eject)
button
Press
to
eject
the
disc
from
the
disc
compartment.
4)
Remote
sensor
Accepts
commands
from
the
remote
commander.
5]
EDIT/NO
button
Press
to
specify
or
cancel
the
various
editing
functions.
6]
<4 PP
(search)
buttons
Press
to
find
a
specific
point
within
a
track.
7)
YES
button
Press
to
perform
editing
functions
(ie.,
erasing,
dividing,
combining,
and
moving).
8]
D1)
(play/pause)
button
Press
to
start
playback
or
recording.
Press
during
playback
or
recording
to
pause
the
MD;
press
again
to
cancel
pause.
9]
0
(stop)
button
Press
to
stop
playback
or
recording,
or
to
erase
all
programmed
tracks.
(10
REC
(record)
@
button
Press
once
for
recording
pause.
Press
>If
to
start
recording.
Use
also
for
track
marking.
14]
REC
(recording)
LEVEL
control
Turn
to
adjust
the
recording
level
when
recording
from
analog
sources.
(9
MIC
(microphone)
jack
Connect
a
microphone
with
a
stereo
mini-plug
here.
Remote
commander
13]
AMS*
dial
Turn
to
cue
to
the
beginning
of
specific
tracks,
set
the
clock,
specify
the
playing
order
of
programmed
tracks,
edit
functions,
and
enter
text
data.
Press
to
play
or
pause
an
MD.
[14
CLOCK
SET
button
Press
to
set
the
clock.
[15
INPUT
SELECTOR
button
Press
to
select
the
input
signal
to
be
recorded.
Press
while
the
unit
is
stopped
to
select
“Analog
in”
to
record
through
the
LINE
IN
(analog)
jack.
Press
to
select
“Digital
in”
to
record
through
the
DIGITAL
IN
jack.
[1
P.
MODE
button
Press
to
select
playback
modes
(i.e.,
CONTINUE,
SHUFFLE,
and
PROGRAM).
(17]
DISPLAY
button
Press
to
display
the
title
of
the
current
track
and
the
remaining
playing
time
on
the
MD.
(1§
Display
window
Indicates
the
current
operating
status.
(19)
HEADPHONES
jack
Connect
headphones
with
a
stereo
mini-plug
here.
20
PHONE
(headphones)
LEVEL
control
Turn
to
adjust
the
volume
ofthe
headphones.
21]
ON/STANDBY
indicator
Lights
up
when
standby
mode
is
on.
AMS:
Automatic
Music
Sensor
[0
POWER
switch
Press
to
turn
on
the
unit;
press
again
to
turn
off
(change
to
stand-by).
(2)
DATE
buttons
DATE
RECORDED
button
Press
to
display
the
recording
date
of
a
track
during
playback.
DATE
PRESENT
button
Press
to
display
the
current
time
and
date.
[3]
REPEAT/A.SPACE/M.SCAN
buttons
REPEAT
button
Press
for
repeated
playback.
A-B
button
Press
for
repeated
playback
of
specific
portions
of
a
track.
A(auto).SPACE
button
Press
for
automatic
insertion
of
3-second
blank
spaces
between
tracks
during
playback.
M(music).SCAN
button
Press
to
scan
the
beginning
of
each
track
in
succession.
[4]
CD-SYNC.
operation
buttons
(use
for
synchronized
recording
with
a
Sony
CD
player)
STANDBY
button
Press
to
activate
recording
pause
prior
to
CD
synchro
recording.
START
button
Press
to
start
CD
synchro
recording.
STOP
button
Press
to
stop
CD
synchro
recording.
{5]
CD
PLAYER
operation
buttons
(Use
to
control
Sony
CD
players)
#4
(pause)
button
Press
to
pause
playback;
press
again
to
resume
playback.
Ke<¢
Pt
(AMS)
buttons
Press
to
find
the
beginning
of
a
track.
[6]
Operation
buttons
b>
(play)
button
Press
to
start
playback
or
recording.
If
(pause)
button
Press
during
playback
or
recording
to
pause
the
MD;
press
again
to
cancel
pause.
@
(stop)
button
Press
to
stop
playback
or
recording,
or
to
erase
all
programmed
tracks.
@
(record)
button
Press
once
for
recording
pause.
Press
>
or
(9
to
start
recording.
Use
also
for
track
marking.
4
PI
(AMS)
buttons
Press
to
find
the
beginning
of
a
track.
<4
P>
(search)
buttons
Press
to
find
a
specific
point
within
a
track.
Character/Numeric
buttons
Alphabet/Numeric
buttons
Use
to
specify
tracks
for
immediate
playback
or
to
create
programs
during
program
play.
Use
also
for
entering
disc
and
track
titles.
WRITE/CAPS,
WRITE/NUM
buttons
Press
to
select
the
character
mode.
WRITE/NAME
button
Press
to
apply
a
title.
CLEAR
button
Press
to
erase
a
track
title,
disc
title
or
programmed
track.
8]
PLAY
MODE
buttons
Press
to
select
the
playback
mode
(i.e.,
CONTINUE,
SHUFFLE,
or
PROGRAM).
Display
buttons
DISPLAY
button
Press
to
display
the
track
title
or
the
remaining
playing
time
during
MD
playback.
SCROLL
button
Press
to
scroll
titles
longer
than
12
characters.
Press
to
pause
scrolling.
{o)
"JENUBUT
UOTJONAYSUI
WOAS
TWY4ANAD
po}oR4]X9
SI
UOTIIIS
SIU
L
NOILOAS
Hooking
Up
the
System
You
can
connect
your
MDS-102
to
the
following
systems
in
either
a
digital
or
analog
configuration:
*
Sony
mini
Hi-Fi
component
systems
with
a
digital
output
jack
*
Sony
mini
Hi-Fi
component
systems
without
a
digital
output
jack
©
Other
audio
equipment
with
a
digital
output
jack
¢
Other
audio
equipment
without
a
digital
output
jack.
Illustrations
of
these
configurations
appear
on
pages
11
to
14.
Before
you
begin
¢
Turn
off
the
power
to
all
the
equipment
to
be
connected
before
making
any
connections.
*
Note
that
the
red
plug
of
the
supplied
audio
connecting
cord
is
for
right-channel
(R)
connection
and
the
white
plug
for
left-channel
(L)
connection.
If
another
connecting
cord
is
necessary,
use
the
optional
RK-C510HG
cord.
©
Insert
the
connecting
cords
fully
into
the
jacks.
A
loose
connection
may
cause
hum
pickup.
©
Pull
out
the
cords
by
grasping
the
plug,
not
the
wire.
Connecting
the
audio
connecting
cords
White
White
“w®@
Ow
MH@
Ow
Red
Red
Connecting
the
audio
bus
cable
Insert
the
cable
firmly.
The
time
display
appears
on
the
Mini
Hi-Fi
Component
Systems
(available
at
a
later
date)
instead
of
the
MD
unit
when
both
are
connected
by
audio
bus
cable.
10
Notes
on
the
optical
digital
input/output
jacks
Use
the
supplied
optical
cable
to
connect
digital
devices
with
a
sampling
frequency
of
44.1
kHz
(i.e,
DAT
decks,
amplifiers
with
digital
inputs,
DA
converter
units,
etc.)
to
the
optical
digital
input
and
output
jacks.
Recording
level
adjustment
is
not
necessary
when
recording
through
the
optical
cable
from
a
digital
source
since
the
output
level
is
fixed.
Connecting
the
optical
cable
Remove
the
plug.
insert
the
cable
firmly.
Digital
sources
with
different
sampling
frequencies
cannot
be
recorded
through
the
digital
input
jack
Only
CD,
MD
(premastered)
and
DAT
sources
with
a
sampling
frequency
of
44.1
kHz
can
be
recorded
through
the
digital
input
jack.
“Din
Unlock”
appears
in
the
display
window
when
you
attempt
to
record
digital
sources
with
a
sampling
frequency
different
from
that
of
the
MD
(such
as
32-
or
48-
kHz
DAT
or
BS).
To
record
these
sources
to
an
MD
you
must
connect
them
through
the
analog
LINE
IN
jacks.
Hooking
up
a
Sony
Mini
Hi-Fi
Component
System
Hooking
up
a
Sony
Mini
Hi-Fi
Component
System
through
the
digital
output
jack
(for
digital
recording)
LINE
IN
=
INE
OUT
=.
@
DIGITAL
IN
Lae
MDS-102
DAT
“Xt
DAT
IN
UL
OO
Amplifier
Cassette
deck/DAT
deck
To
a
wall
outlet
Connection
to
future
Sony
Mini
Hi-Fi
Component
Systems
with
AU-bus
connection
capability
enables
the
use
of
the
automatic
on/off
and
CD
synchro
recording
functions.
11
a
Kexe)
dfate
mel
eM
ant
D
A
ocan
Hooking
up
a
Sony
Mini
Hi-Fi
Component
System
Hooking
up
a
Sony
Mini
Hi-Fi
Component
System
without
a
digital
output
jack
(for
analog
recording)
LINE
IN
=
LINE
OUT
MDS-102
To
an
unswitched
outlet
or
wall
outlet
VIDEO/DAT
IN
Tuner/CD
player
VIDEO'DAT
md
Oo
Amplifier
Cassette
deck/DAT
deck
To
a
wall
outlet
Connection
to
future
Sony
Mini
Hi-Fi
Component
Systems
with
AU-bus
connection
capability
enables
the
use
of
the
automatic
on/off
and
CD
synchro
recording
functions.
Hooking
up
other
audio
equipment
Hooking
up
other
audio
equipment
with
digital
output
(for
digital
recording)
To
an
unswitched
outlet
or
wall
outlet
CD
player
etc.
To
an
AC
outlet
Connect
to
line
input
other
than
PHONO
To
a
wall
outlet
12
To
an
unswitched
outlet
or
wall
outlet
CD
player
etc.
LINE
OUT
To
an
AC
outlet
Connect
to
line
input
If
no
REC
OUT
selector
other
than
PHONO
is
provided
on
the
amplifier,
connect
LINE
OUT
of
the
MD
recorder
to
the
TAPE
IN
line
input
of
the
amplifier.
Amplifier
To
a
wall
outlet
13
Hooking
Up
the
System
Setting
the
Clock
Hooking
up
an
amplifier
with
digital
input,
DAT
deck
or
another
MiniDisc
recorder
By
setting
the
clock,
the
time
and
date
of
all
recordings
will
be
automatically
written
Connect
the
digital
input
of
the
respective
equipment
to
the
digital
output
of
your
MD
recorder.
to
the
MD.
When
you
play
back
a
recorded
track,
you
can
display
the
date
and
time
of
the
recording
in
the
display
window.
For
more
precise
time
and
date
stamping
of
recordings,
we
recommend
that
you
set
the
clock
at
least
once
a
week.
ateto)
aiare
Mel
Me
Mealladey
areal
Example:
Setting
the
clock
to
9:10
AM,
April
23,
1994.
3
After
setting
the
minutes,
press
the
AMS
dial
in
synchronization
with
a
time
signal.
MDS-102
23d
84m
94y
Microphone
v
SAT
09:19
1
Hold
down
CLOCK
SET
for
about
2
seconds
until
the
year
starts
to
flash.
The
clock
setting
proceeds
in
order
of
date,
then
Note
time.
Te
|
Connecting
a
microphone
to
the
MIC
jack
disables
all
CLOPK
SETO
~
other
source
inputs
Make
sure
that
the
microphone
is
disconnected
from
the
MIC
jack
|
when
not
in
use.
i
td @1
mode
|
[Notes]
To
change
the
time
and/or
date
1
Instep
2,
press
the
AMS
dial
until
the
item
to
be
changed
flashes.
2
Tum
the
AMS
dial
to
change
the
value.
3
Complete
the
setting
by
pressing
CLOCK
SET
or
the
AMS
dial
until
all
items
stop
flashing.
2
Turn
the
AMS
dial
to
enter
the
year,
month,
day,
hour,
and
minute.
Press
the
AMS
dial
after
entering
each
item.
To
display
the
current
date
and
time
Press
CLOCK
SET
on
the
front
panel
once
to
display
the
date,
then
had ind
oat
again
to
display
the
time.
When
using
the
remote
commander,
press
DATE
PRESENT.
The
date
appears,
followed
by
the
time.
)
Changing
the
display
mode
while
the
recorder
is
off
~
Press
DISPLAY
to
choose
either
no
display
or
display
of
the
current
time.
ee
aed
Bld
Mire
94y
When
the
power
cord
is
unplugged
for
a
long
time
The
memorized
settings
are
lost,
and
“STANDBY”
flashes
when
you
plug
in
and
turn
on
the
recorder
again.
If
this
happens,
set
the
clock
again.
14
15
FREE
a
EP
Ee
Tp
ee
Playing
an
MD
(Normal
Play)
You
can
play
back
an
MD
in
two
ways:
Playing
from
the
first
track
¢
Playing
from
a
specific
track
Playing
an
MD
from
the
first
track
1
Press
POWER
to
turn
on
the
recorder.
.
|
2
With
the
label
side
up
and
the
arrow
pointing
toward
the
opening,
slide
the
MD
into
the
disc
compartment
until
the
recorder
grips
it.
If
you
insert
the
MD
while
the
recorder
is
off,
the
recorder
will
turn
on
automatically.
The
disc
name
appears,
followed
by
the
total
number
of
tracks
(Tr)
and
total
disc
playing
time,
as
shown
at
the
top
of
the
next
column.
A
music
calendar
showing
all
the
track
numbers
appears
within
a
grid
if
the
MD
is
a
premastered
disc,
or
without
a
grid
if
the
MD
is
a
recordable
disc.
If
the
total
track
number
exceeds
25,
}
appears
to
the
right
of
number
25
in
the
music
calendar.
ee
16
Disc
name
Music
calendar
Total
number
of
tracks
Total
disc
playing
time
rea
68m
ae
3
Press
>i]
(@
)
or
the
AMS
dial.
The
MD
starts
playing.
The
current
track
number,
track
title
(if
labeled),
and
elapsed playing
time
of
the
current
track
light
up
in
the
display
window.
Current
track
number
To
pause
playback
Press
#8
(
11)
or
the
AMS
dial.
To
restart
playback,
press
Dil
(
B
or
ff)
or
the
AMS
dial
again.
To
stop
play
Press
0.
To
eject
the
disc
Press
2.
Locating
a
specific
track
Enter
the
number
of
the
track
on
the
remote
commander.
The
specified
track
will
begin
playing
immediately.
Example:
To
play
back
the
third
track
=n)
HW
Example:
To
play
back
the
26th
track
Bi
prea
Example:
To
play
back
the
100th
track
ea
4
t
/
Locating
the
beginning
of
a
track
(AMS)
The
AMS
function
allows
you
to
go
quickly
to
the
beginning
of
a
track
by
merely
specifying
its
number
in
the
display
window.
Turn
the
AMS
dial.
This
way
for
This
way
for
previous
tracks.
succeeding
tracks.
pe
rag
RT
VEE
ES
spt
Pree
ITO:
Press
<4
or
PPI.
peviels
ec
ee
e
Previous
tracks.
succeeding
tracks.
Hold
down
each
button
to
go
to
successive
tracks
in
the
respective
direction.
To
locate
the
beginning
of
the
current
track
Press
K@
once.
To
pause
playback
at
the
beginning
of
a
track
Tur
the
AMS
dial
(or
press
Kor
PPI
)
after
pausing
playback.
To
go
quickly
to
the
beginning
of
the
last
track
Turn
the
AMS
dial
counterclockwise
(or
press
Kd
)
immediately
after
inserting
the
MD.
17
Playing
Tracks
in
Random
Order
(SHUFFLE
Play)
Playing
an
MD
(Normal
Play)
Locating
a
position
within
a
track
(Search)
Displaying
the
title
and
remaining
playing
Displaying
the
recording
date
and
time
pokiae
Play
to
play
back
all
tracks
on
an
MD
in
random
time
of
a
track
Use
the
search
function
to
quickly
scan
a
track
either
Once
you've
set
the
built-in
clock,
the
recorder
will
forward
or
backward
during
playback
to
locate
a
specific
Press
DISPLAY
during
playback
to
display
the
title
and
automatically
record
the
recording
date
and
time
of
all
position.
remaining
playing
time
of
the
current
track.
“No
Name”
tracks.
Do
the
following
procedure
to
display
the
recording
appears
if
a
track
is
unlabeled.
To
label
a
recordable
disc
and
information
during
playback.
its
tracks,
see
“Labeling
Recordings”
on
page
43.
Remote
commander
operation
only
1
Keep
pressing
P.MODE
(SHUFFLE)
while
the
recorder
is
stopped
until
“SHUFFLE”
lights
up.
To
forward
scan
a
track
_
Hold
down
>
during
playback.
Press
DISPLAY
while
playing
back
a
track.
To
backward
scan
a
track
Ganetay
1
Locate
the
track
Bale
down
en
brine
Peyneer:
Press
4
or
PP
while
the
recorder
is
stopped
to
When
you
release
the
button,
the
recorder
begins
playing
Each
press
of
DISPLAY
changes
the
display
in
the
locate
the
track.
from
the
position
located
by
scanning.
following
order:
remaining
track
playing
time
—+ track
name
—
elapsed
playing
time
=
&
2
Press
>4l
(Bh
).
.
2
If
the
recorder
is
playing
or
paused,
enter
the
track
Shuffle
play
starts.
To
go
forward
or
backward
quickly
»
number
with
the
numeric
buttons,
or
keep
Hold
down
b>
or
#4
during
playback
pause.
The
recorder
pressing
4
or
PPI
until
the
number
of
the
track
scans
the
disc
at
160
times
the
normal
playing
speed.
Since
appears.
no
sound
is
output
at
this
time,
you
must
keep
track
of
the
Rotates
current
disc
location
through
the
information
that
appears
in
-
the
display
window.
2
-Bim
25s
Py
>
.
2
press
DATE
RECORDED.
Sta
ovis
The
track
number
flashes.
»
Note
a
aah
x
P
Pray
Tracks
that
are
only
a
few
seconds
in
length
may
be
too
short
to
scan
—
RECORDED
using
the
search
function.
For
such
tracks,
it
is
better
to
play
the
MD
HAPPY
CY
back
at
normal
speed.
Lo)
oon
K
SBS
=
7
aK
;
Specifying
tracks
during
shuffle
play
23d
B4m
9445
+7
©
To
play
the
next
track,
turn
the
AMS
dial
clockwise
(or
*
The
display
window
shows
up
to
12
characters
at
a
press
4).
time.
To
see
a
title
of
13
characters
or
more,
press
*
To
play
from
the
beginning
of
the
current
track
again,
turn
SCROLL
on
the
remote
commander.
o
the
AMS
dial
counterclockwise
(or
press
Kt
).
You
Press
SCROLL
again
to
pause
scrolling,
and
again
to
cannot
use
the
AMS
dial
(
K@
)
to
go
to
tracks
that
have
continue
scrolling.
oom
1
K
5
already
played.
©
If
no
title
is
recorded,
“No
Name”
appears,
followed
by
SAT
69:16
+
the
elapsed playing
time.
To
stop
shuffle
play
*
Each
press
of
DISPLAY
while
the
recorder
is
stopped
PressO.
changes
the
display
in
the
following
order:
” ”
:
res
For
premastered
discs:
Total
disc
playing
time
—
aners®
nee
tee
nae
3
eaten
To
cancel
shuffie
play
disc
name
without
a
date
and
time
stamp
function.
Keep
pressing
P.MODE
(CONTINUE)
until
“SHUFFLE”
For
recorded
discs:
Total
recorded
time
—>
remaining
disc
playing
time
—»
disc
name
The
previous
display
reappears
when
you
press
goes
off.
DATE
RECORDED
again
or
after
a
few
seconds
have
passed.
18
19
|
i
Playing
Tracks
in
a
Specific
Order
(PROGRAM
Play)
Program
play
allows
you
to
specify
the
playback
order
of
up
to
25
tracks.
1
Keep
pressing
P.MODE
(PROGRAM)
while
the
recorder
is
stopped
until
“PROGRAM”
lights
up.
2
a)
When
using
the
remote
commander:
Enter
the
track
number
with
the
numeric
buttons.
The
entered
track
number
is
programmed.
In
this
example,
“3”
is
pressed.
oo
Track
number
$6
Order
of
the
specified
track
%
|
3
Gn
65)
HE
emtonees
poy
eee
Total
program
play
time
When
programming
tracks
26
to
99,
press
>25
once
before
pressing
the
respective
numeric
buttons.
When
programming
tracks
100
and
above,
press
>25
twice
before
the
respective
numeric
buttons.
Example:
To
program
the
26th
track
mom)
@
Example:
To
program
the
100th
track
Ca
>
f
7
moa)
op
b)
When
using
the
front
panel:
You
can
monitor
the
total
program
time
as
you
enter
each
track
number.
4
Turn
the
AMS
dial
until
the
track
number
to
be
entered
lights
up.
ree
mas
Bet
O
3
@3m
@8s
2
Press
the
AMS
dial
or
P.
MODE.
The
selected
track
number
is
programmed.
P.MODE
O
3
83m
8s
HEE
mee
doe
oasis
3
Repeat
step
2
to
enter
other
tracks.
Each
time
you
enter
a
track,
the
total
program
time
is
recalculated
and
displayed.
You
can
program
up
to
25
tracks.
20
4
Press
>1i
(b>
)
or
the
AMS
dial.
Program
play
starts
from
the
first
track
of
the
program.
Checking
the
order
of
programmed
tracks
Turn
the
AMS
dial
(or
press
Kk
or
PPI
)
while
the
recorder
is
playing
or
paused.
The
track
numbers
appear
in
the
order
they
were
programmed.
To
erase
programmed
tracks
Press
CLEAR
while
the
recorder
is
stopped
to
erase
the
program
one
track
at
a
time
starting
from
the
end
of
the
program.
To
stop
program
play
Press
0.
To
cancel
program
play
Keep
pressing
P.MODE
(CONTINUE)
until
“PROGRAM”
disappears.
To
make
changes
to
a
program
*
To
change
a
track
just
entered:
Press
CLEAR,
then
repeat
the
programming
procedure
from
step
2
on
page
20.
*
To
change
all
tracks:
Press
D
while
the
recorder
is
stopped,
then
repeat
the
programming
procedure
from
step
2
on
page
20.
eYe-Talaliale
Mi
e-Lae)
(Music
Scan)
The
music
scan
function
automatically
plays
back
the
first
6,
10
or
20
seconds
of
each
track
in
succession
allowing
you
to
quickly
check
the
contents
of
the
disc.
Remote
commander
operation
only
Press
M.SCAN
while
the
recorder
is
stopped.
ne
y
The
scanning
time
appears.
Press
M.SCAN
to
select
a
scanning
time
of
6,
10,
or
20
seconds.
Scanning
time
SCAN
21