Scart Lead
(Supplied)
Rear of VCR
Antenna Cable
(Not Supplied)
Existing
aerial lead
V, L, R
connectors
Y, U, V connectors
(not required) Programme Sorting menu screen.
4Connecting an aerial
and VCR to the TV
5Switching on the TV
Connect the TV plug to a mains socket. Press the TV’s On/Off button to switch
on the TV.
6Automatically tuning the TV
Your television stations are now stored in your television’s memory.
When you first switch on your new TV you need to tune in all the available channels. The ‘Auto Tune’ feature will automatically search and store all the available channels for you.
The following instructions and illustrations will guide you through this procedure.
7Finding your video channel
Press the PROGR +/- buttons on your remote control until you find your video channel.
NOTE: If you wish to move your video channel to a different programme position, please refer to the ‘Re-arranging the TV channels’ section of the main instruction manual.
If you have connected a VCR to your TV, you now need to find your video channel.
1. With the TV set switched on, press the MENU button on the remote control to display the TV menu system on the TV
screen. Press the v or V buttons on the remote control joystick to highlight the symbol on the menu screen. Press the
Bbutton to enter the ‘Set Up’ menu.
2. Use the v or V buttons to highlight ‘Auto Tuning’. Press the Bbutton to start the ‘Auto Tuning’ procedure. The ‘Auto
Tuning’ menu appears on the TV screen asking you to confirm that you do wish to automatically tune the TV. Press the
OK button to confirm.
3. A new screen will be displayed asking you to confirm that an aerial is connected. Press the OK button to confirm that you
have connected an aerial. The TV will start to automatically search and store all of the available channels for you. This
may take a few minutes - please be patient and do not press any buttons.
4. Once the TV has tuned all available channels the ‘Programme Sorting’ menu will appear on the TV screen enabling you
to change the order of the channels on your TV. If you wish to change the channel order, press the v or V buttons to
select the channel you want to move then press the B button. Press the v or V buttons to select the new programme
number position for your selected channel then press the OK button to confirm. The selected channel now moves to its
new programme position and the other channels move accordingly. Repeat this procedure if you wish to sort the order of
other channels on your TV. (For a full explanation of the ‘Programme Sorting’ menu screen, please refer to the
‘Re-arranging the TV channels’ section of the main instruction manual.)
5. Press the MENU button to remove the menu from the TV screen.
6. Press the PROGR +/- buttons or the numbered buttons on the remote control to view the TV channels.
NOTE: If you would like to stop the autotune process at any stage, press the OK button.
On/Off button
MENU button
Joystick
(v,V,b,B, OK buttons)
PROGR +/-
buttons
Auto Tune menu screen.
Programme Sorting menu screen.
Auto Tune menu screen.
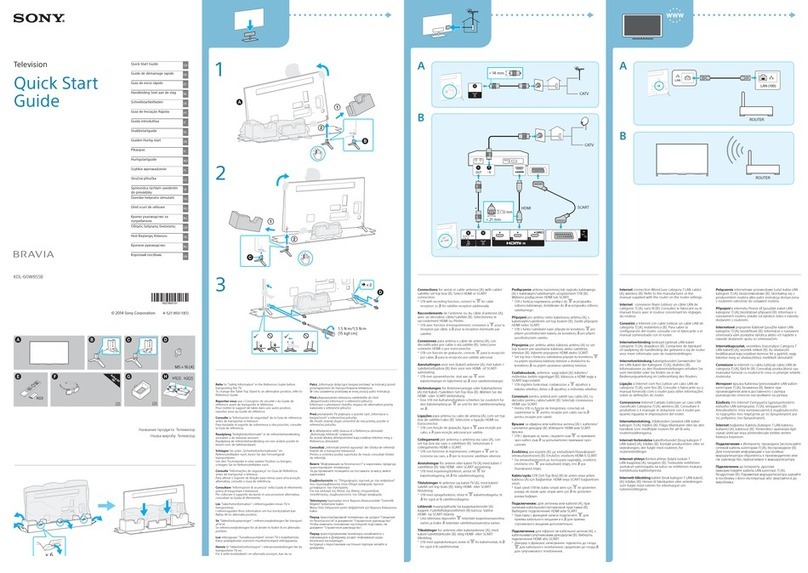
1. Connect your existing aerial lead to your VCR as shown.
2. Connect the Antenna Cable from the RF OUT socket on the back of the VCR to the
aerial socket on the back of the TV as shown.
3. Connect the supplied Scart Lead (phono jacks) from the audio/video sockets on the back
of the VCR to the AV2 socket on the rear of the TV (scart connector).
4. Connect the VCR to the mains and switch on.
5. Insert a pre-recorded tape into the VCR and press the ‘PLAY’ button. This will enable
the TV to locate and tune in your video channel during the ‘Auto Tuning’ procedure.
Alternatively,
If you wish to connect an S-Video VCR to the TV, or do not wish to connect a VCR to the TV, please
refer to the ‘Connecting an aerial and VCR to the TV’ section of the main instruction manual.


