f
OWNER’S
RECORD
WARNING
The
model
and
serial
numbers
are
located
at
the
rear.
Record
these
numbers
in
the
spaces
provided
below.
Refer
to
them
whenever
you
call
upon
your
Sony
dealer
regarding
this
product.
Model
No.
Serial
No.
oe)
ES
ES
WIG
ic.
cascees
cccedaredicescpeite
testinal
Mal
teceeecttiees
beasts
2
PreCatiti
ONS:
icscsciiissicacsescetecddscedesscveecheniy
orca
tee
eadeecseati
decoders
3
Features
::2
cans
Acre
hletscls
nied
ahs
wise
baie
adi
ens
a
ieleeeen
a
3
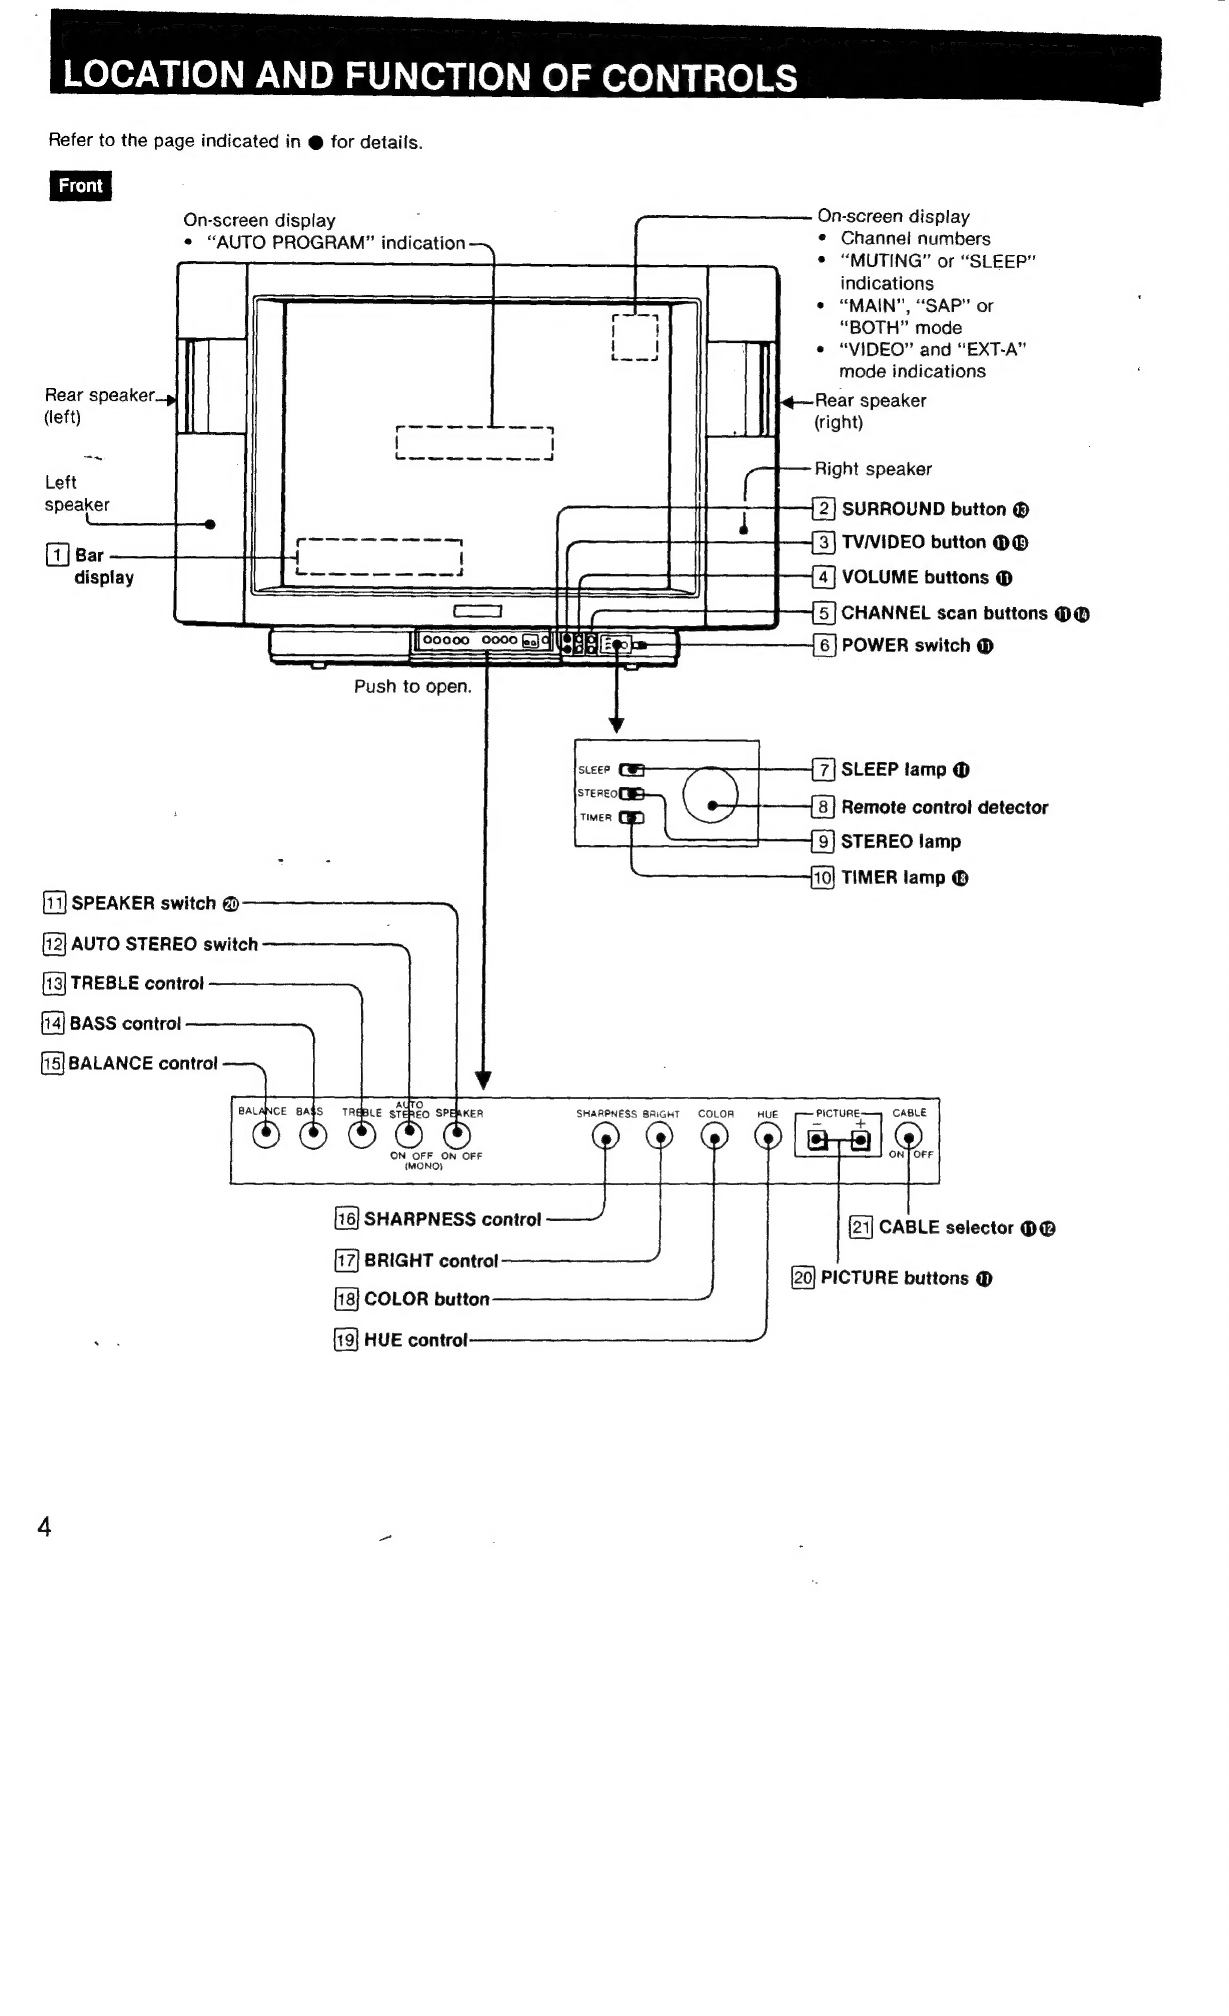
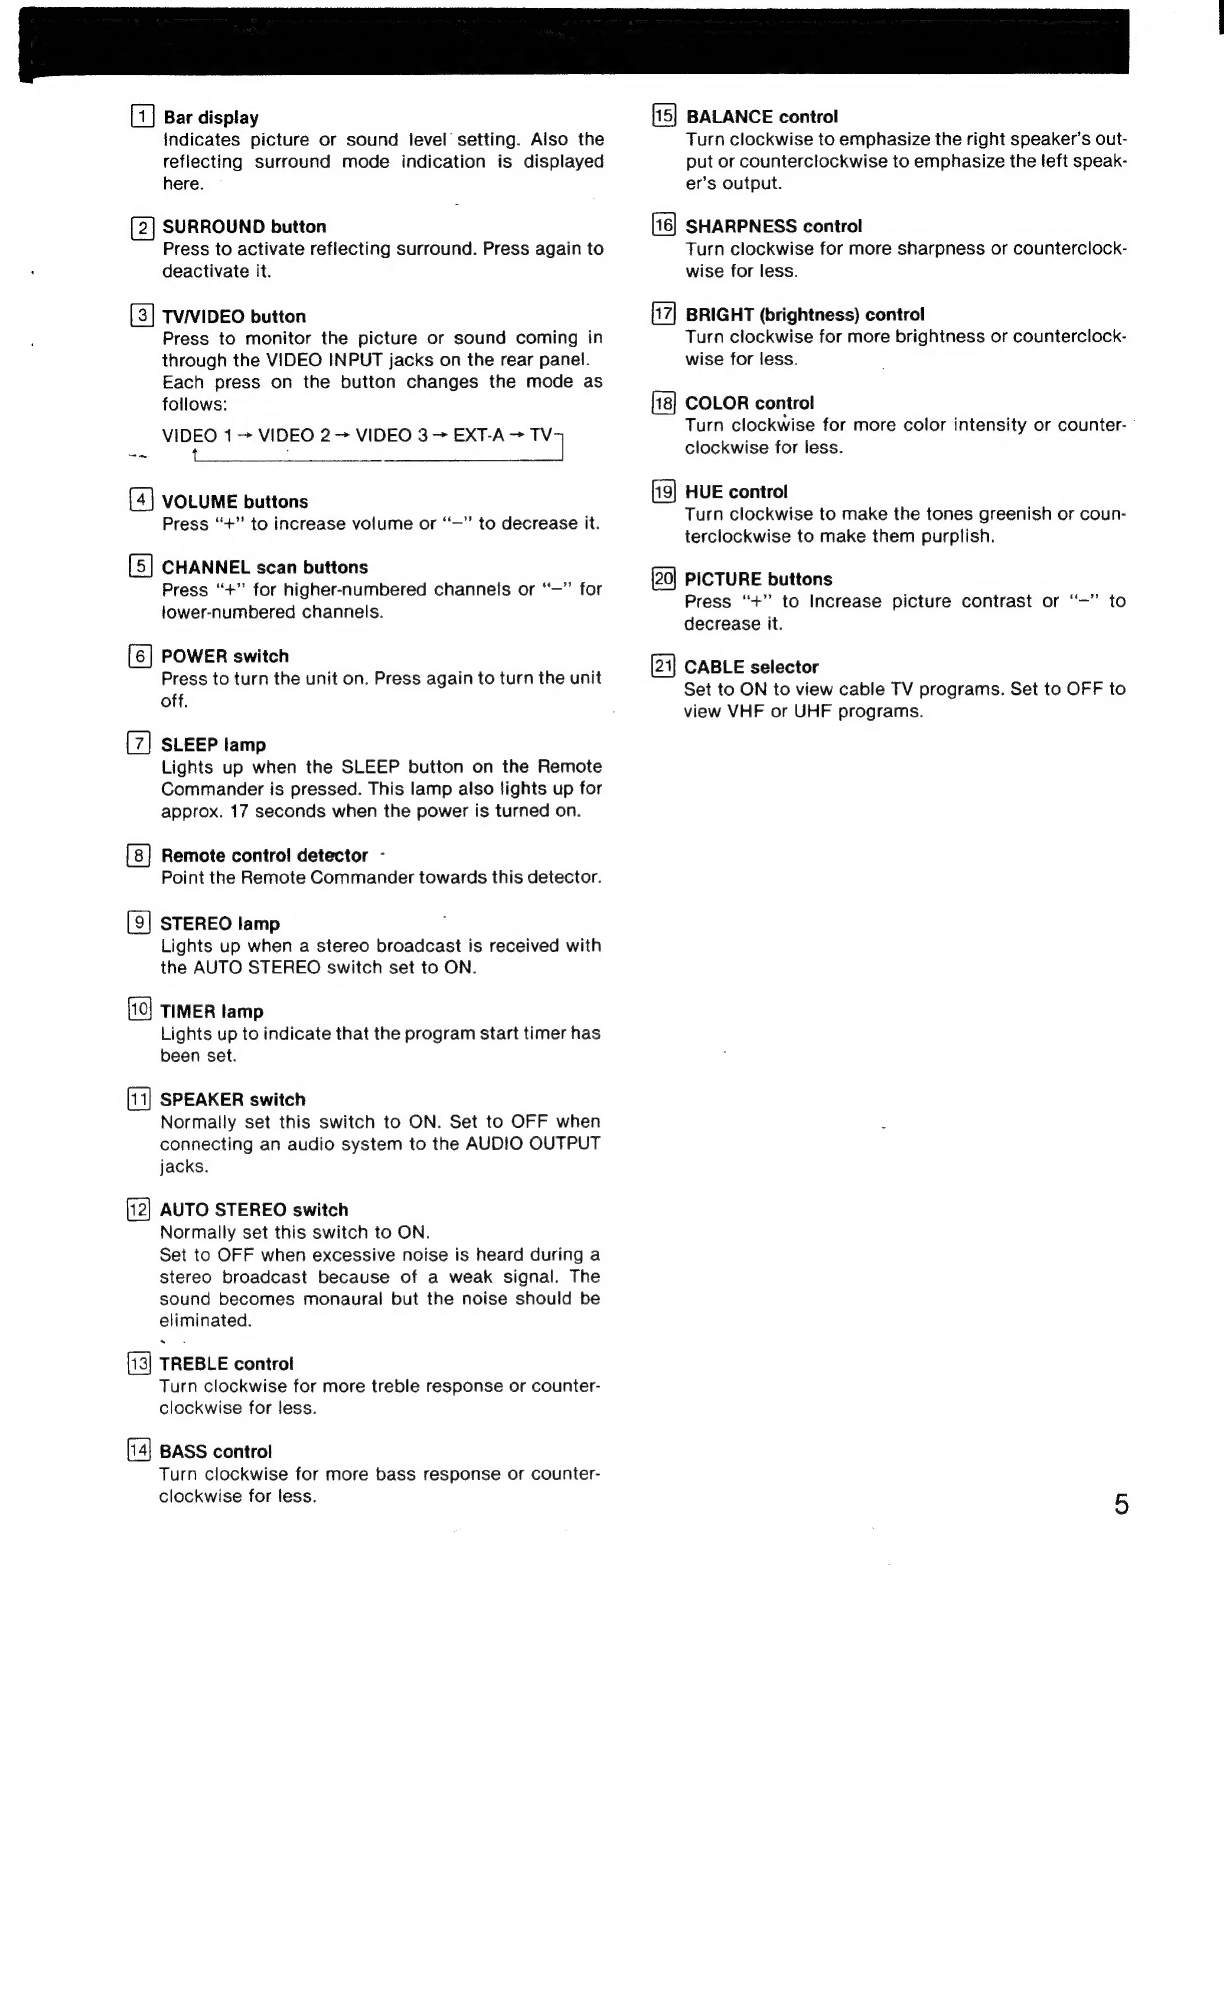
Location
and
function
of
CONtIOIS
«0...
eeeeeeeeeeeeeeeees
4
OPelation
sinc.
A
tiered
cece
een
ener
eatnd
eee
11
Presetting
Channels
2000.0...
cece
ce
ecseseesssceseeeseseeessseeeaeeees
14
Titer
BlOCKseecivicscesel.
phievcstvelencdes
sibetetecurpeeieee
det
essteteaniteet
16
Applications
with
optional
equipment
..........
ee
19
Antenna/cable
CONNECTION...
eee
eeceeeeeeeeceeeseeteeeeenrees
20
SDSCIFICATIONS
ssdcsccsecerestias
ereatccneedetoaessecieds
erteeintdeesgs
22
TrOUDIESNOOTING
«0...
cece
ceeeeeeeteeeeeseneeeseseeeeteseceaeeeneeeseeess
22
To
prevent
fire
or
shock
hazard,
do
not
expose
the
unit
to
rain
or
moisture.
CAUTION
RISK
OF
ELECTRIC
SHOCK
DO
NOT
OPEN
CAUTION:
TO
REDUCE
THE
RISK
OF
ELECTRIC
SHOCK,
DO
NOT
REMOVE
COVE
(OR
BACK).
NO
USER-SERVICEABLE
PARTS
INSIDE.
REFER
SERVICING
TO
QUALIFIED
SERVICE
PERSONNEL.
This
symbol
is
intended
to
alert
the
user
to
the
presence
of
uninsulated
‘“dan-
gerous
voltage”
within
the
product's
enclosure
that
may
be
of
sufficient
magnitude
to
constitute
a
risk
of
elec-
tric
shock
to
persons.
This
symbol
is
intended
to
alert
the
user
to
the
presence
of
important
operating
and
maintenance
(servicing)
instruc-
tions
in
the
literature
accompanying
the
appliance.
CAUTION
TO
PREVENT
ELECTRIC
SHOCK,
DO
NOT
USE
THIS
POLARIZED
AC
PLUG
WITH
AN
EXTENSION
CORD,
RECEPTACLE
OR
OTHER
OUTLET
UNLESS
THE
BLADES
CAN
BE
FULLY
INSERTED
TO
PREVENT
BLADE
EXPOSURE.