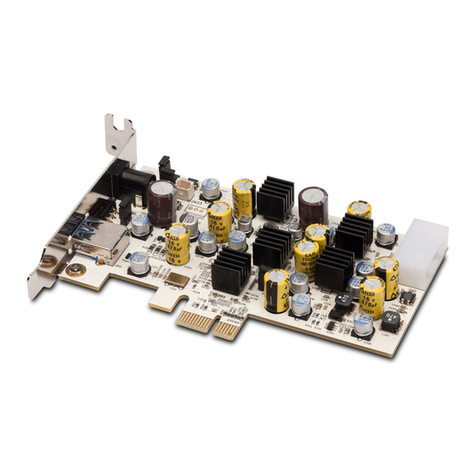
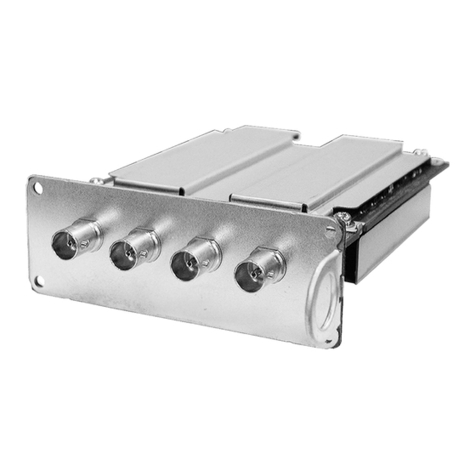
SOtM tX-USBx10G User manual

tX-USBx10G installation guide Rev1.0
Precaution
Please read these instructions carefully before use.
n Do not attempt to disassemble or modify the product.
n Keep the product away from external shocks or vibrations.
n Do not use damaged or peeled cables.
n Do not use the unit outdoors.
n Product specifications and features are subject to change without notice.
Warranty Information
n Free warranty service
l In the case that a defect is found which is caused by a design or the production flaw while using the device properly, the manufacturer is
responsible for the faulty product. There is free warranty service for 1 year from the date of purchase.
l Even during the warranty service period, malfunction or damage of products caused by inevitable incidents such as a natural disaster is not subject
to the free warranty service.
n Charged Warranty service
l The free warranty service period is expired.
l Malfunction of the product is caused by the user.
l Malfunction of the product is caused by incidents.
l Malfunction of the product is caused by a natural disaster such as an earthquake, flood, lightning, etc.
l In the case of a charged warranty service, the customer should cover the shipping costs.
n Examples of a user caused malfunction
l Attempts to disassemble or modify the device.
l Not following the instructions in this manual.
n Please read these operating instructions and the Q&A board on our website carefully before asking for the warranty service.
Supplied Components
n tX-USBx10G with slim size bracket
n Standard size bracket
n tX-USBx10G installation guide
Specifications
n PCI express USB interface chip set
- USB 3.2 Gen 2 x1 (Previously USB 3.1 Gen 2) host controller
- Support SS(Up to 10 Gbps), HS(480 Mbps), FS(12 Mbps), LS(1.5 Mbps)
- PCIe Gen 3 x2 interface
n User interface LED
Located underneath of USB type A connector
- Green LED : Internal power on indicator
- Red LED : USB type A port power on indicator
- Amber LED : External power input indicator
- Blue LED : Operating indicator
n Internal SATA power input
- Input voltage : +12.0V(+0.5V, -0.5V)
- Input current : 3A
- 15pin SATA power connector
n External power input
- Input voltage : +7V ~ +9Vdc
- Input current : 5A max
- 5.5mm OD, 2.1mm ID DC adaptor jack
n USB Type A port output power
- Output voltage : +5.0V(+0.5V, -0.25V)
- Over current protection : 3.0A(Tolerance 20%)
- Recommend output current : 2.0A >
- Power on/off switch : S401
n USB Type E port output power
- Output voltage : +5.0V(+0.5V, -0.25V)
- Over current protection : 2.0A(Tolerance 20%)
- Recommend output current : 1.5A >
- Power on/off jumper : J402(Jumper on : off)
n External clock jumper
- Internal clock setting
Install two jumpers on J107
Uninstall jumper on J106
- External clock setting
Uninstall two jumpers on J107
Install jumper on J106
n Operating environment
- Operating temperature : 0°C ~ 30°C
- Storage temperature : -10°C ~ 50°C
- Operating & storage humidity : 10% ~ 90%
n OS support
- Windows 10 or higher version
- Linux kernel 5.xx or higher version
This operating instruction is available through the tX-USBx10G
product page, www.sotm-audio.com.
www.sotm-audio.com

Product outline
① External power input jack: Connect to an external power supply.
② USB type A port power switch : To co nt ro l t h e USB type A port power,+5.0V, on and off.
③ USB type A port : Connect to an USB audio device.
Caution : The recommended output current of the USB type A port is less than 2.0A. Avoid
using the device that requires more current than 2A..
④ Auxiliary external power connector : It is connected to the external power input jack.
When connected external power to other devices inside of the PC or to power to the tX-
USBx10G from other power inside of the PC.
If you remove the jumper pins on J603 and J604, the connection with the external power
input jack will be disconnected.
⑤ Internal SATA power connector: Connect the SATA power cable to the ATX power supply.
⑥ USB type E port : Connect to the internal USB device of the PC or the USB port on the front
panel.
Use a USB type E Key A to USB type A cable that supports USB 3.2 Gen 2 x1 (Previously
USB 3.1 Gen 2) specifications.
Cautions : The recommended output current of USB type E port is less than 1.5A. Avoid
using the device that requires more current than 1.5A.
⑦ USB type E port power jumper(J402) : To c on tr ol t he U SB type E port power,+5.0V, on and
off.
Cautions : When set the jumper on, the power is off.
⑧ Clock setting jumper : To s e le c t t he u s ag e of in te r na l o r e xt er n al cl oc k b y j um p er s e tt i ng s .
Internal clock
External clock
J107 (Two Jumpers)
J106 (One Jumper)
When selected the external clock, the external clock to the RF connector (J104) on the
underneath of the product should be connected by an RF cable.
⑨ Control power jumper : Set this jumper pin to ensure that control power to the tX-USBx10G
is supplied even when the PC is turned off.
When removed this jumper pin, the tX-USBx10G control power will automatically turn on
once the PC is turned on.
Installation
- Precautions when installing the tX-USBx10G
n Please read this instruction carefully before you install the product.
n PC power must be turned off and disconnect the AC power cable from the PC before installing the tX-USBx10G into the PC.
n If connected external power to the tX-USBx10G, the external power supply must be turned on before the PC turns on. Also, make sure that external power should not be
disconnected while the PC is turned on. If the external power is cut off even momentarily, the tX-USBx10G or PC’s internal components could be damaged.
n To prevent the damages, must connect the SATA power cable from the ATX power supply inside of the PC to the internal SATA power connector of the tX-USBx10G at all the
times even when the tX-USBx10G is powered externally.
n The tX-USBx10G requires PCIe Gen 3 x2 signals, it can’t be used for PCIe x1 connector.
n For the USB type E connector, must use a USB type E Key A to USB type A cable that supports USB 3.2 Gen 2 x1 (Previously USB 3.1 Gen 2) specifications.
n OS and PC specifications affect the audio performance of tX-USBx10G.
- How to install the tX-USBx10G
n Turn off the PC power.
n Disconnect the AC power cord from the PC and open the PC case cover.
n If the PC case fits to a standard size bracket, use a small + shaped screwdriver
to take off the slim size bracket from the tX-USBx10G and assemble the
standard size bracket.
n When using the USB type E port, connect the necessary cable to the USB type
E port and connect the cable on the other side as necessary.
Since the USB type E port requires +5.0V power in most cases, remove the
jumper on J402.
If you don’t use the USB type E port, set the jumper on J402 to turn off the
USB type E port.
n When using an external clock such as sCLK-EX, refer to the product
outline( item no.8) and set the necessary jumpers and RF cables.
n Unscrew and remove the PCIe slot cover installed on the empty PCIe x4, x8,
or x16 slot of the motherboard.
n Install the tX-USBx10G into the PCIe slot, then use the screw to fix the bracket
to the PC case.
n To use SATA power, connect the SATA power cable from the ATX power supply
to the internal SATA power connector of the tX-USBx10G.
n To use an external power supply, connect the external power supply to the
external power input jack of the tX-USBx10G.
n When using an external power supply for the tX-USBx10G, turn on the
external power supply first after closing the PC case cover.
n Connect the AC power cord, then turn on the PC.
n When using Linux OS, the Kernel version number must be updated to the 5.xx
or higher.
n If necessary, install the USB audio device driver.
n Make sure the audio device settings are correct in the music player program
you want to use and then play music.
- Cautions
n The tX-USBx10G cannot be used in the PCIe x1 slot of the motherboard.
n When using an external power supply for the tX-USBx10G, the external
power supply must be turned on first before turning on the PC.
⑧
①
②
③
④
⑤
⑥
⑨
⑦
Other SOtM Computer Hardware manuals
Popular Computer Hardware manuals by other brands
Glyn
Glyn EVB-MPCI-GFF quick start guide
ManiWay Electronics
ManiWay Electronics MW-1585 owner's manual

KautenjaDSP
KautenjaDSP Step Saw quick start guide

RME Audio
RME Audio AEB4/8-0 user guide
Alphacool
Alphacool Apex Backplate XPX/Eisbaer manual

VIA Technologies
VIA Technologies Mobile360 FSS quick start guide
