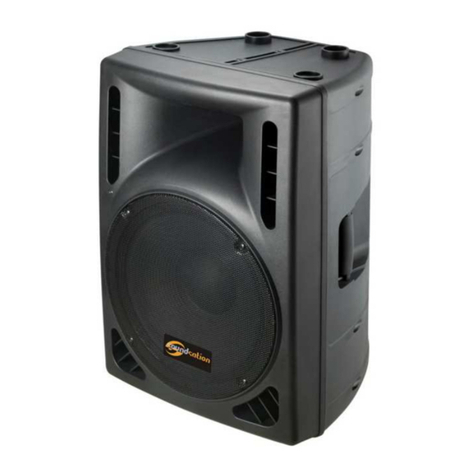
Sound Sation HYPER 8 STREET User manual

Battery Active Portable PA Speaker
with BT connection
Please read this manual carefully and properly take care of it
User Manual
Leggete questo manuale e conservatelo per future consultazioni
Manuale Utente

Dear customer,
First of all thanks far purchasing a Soundsation® product. Our mission is to satisfy
all possible needs of musical instrument and professional audio users oering a wide
range of products using the latest technologies.
We hope you will be satised with this item and, if you want to collaborate, we are
looking for a feedback from you about the operation of the product and possible
improvements to introduce in the next future. Go to our website www.soundsation-
music.com and send an e-mail with your opinion, this will help us to build instruments
ever closer to customer’s real requirements.
One last thing: read this manual before using the instrument, an incorrect operation
can cause damages to you and to the unit. Take care!
The Soundsation Team
Gentile Cliente,
Grazie per aver scelto un prodotto Soundsation®. La nostra missione è quella di orire
ai nostri utenti una vasta gamma di strumenti musicali ed apparecchiature audio e
lighting con tecnologie di ultima generazione.
Speriamo di aver soddisfatto le vostre aspettative e, se voleste collaborare, saremmo
lieti di ricevere un vostro feedback sulla qualità del prodotto al ne di migliorare co-
stantemente la nostra produzione. Visitate il nostro sito www.soundsationmusic.com ed
inviateci una mail con la vostra opinione, questo ci aiuterà a sviluppare nuovi prodotti
quanto più vicini alle vostre esigenze.
Un’ultima cosa, leggete il presente manuale al ne di evitare danni alla persona ed al
prodotto, derivanti da un utilizzo non corretto.
Il Team Soundsation

3
ENGLISH
TABLE OF CONTENTS
1.1. Taking Care of your Product..............................................................................................................................4
1) Water / Moisture......................................................................................................................................................... 4
2) Heat ............................................................................................................................................................................... 4
3) Ventilation..................................................................................................................................................................... 4
4) Object and Liquid Entry............................................................................................................................................ 5
5) Power Cord and Plug ................................................................................................................................................ 5
6) Electrical Connection................................................................................................................................................. 5
7) Cleaning........................................................................................................................................................................ 5
8) Servicing ....................................................................................................................................................................... 5
9) Warning ........................................................................................................................................................................ 5
1. UNBOXING.................................................................................................................5
1.1. Accessories...............................................................................................................................................................6
2. OVERVIEW..................................................................................................................6
2.1. Main Features..........................................................................................................................................................6
2.2. Rear Panel Description.........................................................................................................................................7
1) Mic/Line Inputs and Controls .................................................................................................................................. 7
2) Limiter ........................................................................................................................................................................... 8
3) Line Level...................................................................................................................................................................... 8
4) Mini-jack Stereo Input ............................................................................................................................................... 8
5) RCA Stereo Input........................................................................................................................................................ 8
6) Bluetooth Pair Button AND LEVEL ......................................................................................................................... 8
7) DSP Presets.................................................................................................................................................................. 8
8) Mix Out ......................................................................................................................................................................... 9
9) Master LEVEL............................................................................................................................................................... 9
10) Battery Status .............................................................................................................................................................. 9
11) AC Adapter Connection ........................................................................................................................................... 9
12) Power Switch ............................................................................................................................................................... 9
3. AUDIO CONNECTIONS..............................................................................................9
4. SPECIFICATIONS ......................................................................................................10
5. WARRANTY AND SERVICE .....................................................................................12
6. WARNING ................................................................................................................12

4
ENGLISH
Hyper 8 Street User manual
IMPORTANT SAFETY SYMBOLSIMPORTANT SAFETY SYMBOLS
The symbol is used to indicate that some hazardous live terminals are
involved within this apparatus, even under the normal operating con-
ditions, which may be sucient to constitute the risk of electric shock
or death.
The symbol is used in the service documentation to indicate that spe-
cic component shall be replaced only by the component specied in
that documentation for safety reasons.
Protective grounding terminal
Alternating current/voltage
Hazardous live terminal
Denotes the apparatus is turned on
Denotes the apparatus is turned o
WARNING: Describes precautions that should be observed to prevent the danger
of injury or death to the operator.
CAUTION: Describes precautions that should be observed to prevent danger of
the apparatus.
1.1. Taking Care of your Product
fRead these instructions
fKeep these instructions
fHeed all warning
fFollow all instructions
1) Water / Moisture
The apparatus should be protected from moisture and rain and can not be used near
water; for example near a bathtub, a kitchen sink, a swimming pool, etc.
2) Heat
The apparatus should be located away from heat sources such as radiators, stoves or
other appliances that produce heat.
3) Ventilation
Do not block areas of ventilation opening. Failure to do could result in re. Always

5
ENGLISH
Hyper 8 Street User manual
install according to the manufacturer’s instructions.
4) Object and Liquid Entry
Objects do not fall into and liquids are not spilled into the inside of the apparatus for
safety.
5) Power Cord and Plug
Protect the power cord from being walked on or pinched particularly at plugs, conve-
nience receptacles, and the point where they exit from the apparatus. Do not defeat
the safety purpose of the polarized or grounding-type plug. A polarized plug has two
poles; a grounding-type plug has two poles and a third grounding terminal. The third
prong is provided for your safety. If the provided plug does not t into your outlet,
refer to an electrician for replacement.
6) Electrical Connection
Improper electrical wiring may invalidate the product warranty.
7) Cleaning
Clean only with a dry cloth. Do not use any solvents such as benzene or alcohol.
8) Servicing
Do not implement any servicing other than those means described in the manual. Refer
all servicing to qualied service personnel only. Only use accessories/attachments or
parts recommended by the manufacturer.
9) Warning
Please remember the high sound pressure do not only temporarily damage your sense
of hearing, but can also cause permanent damage. Be careful to select a suitable vol-
ume.
1. UNBOXING
Thank you for purchasing Hyper 8 Street portable speaker. Each unit has been well test-
ed and shipped in perfect operating conditions. Carefully unpack the carton and check
the contents to ensure that all parts are present and in good conditions:
f1 Hyper 8 Street loudspeaker
f1 Power adapter
f1 User manual
If anything damaged during transport, notify the shipper immediately and keep pack-
ing material for inspection. Again, please save the carton and all the packing mate-

6
ENGLISH
Hyper 8 Street User manual
rials. If the unit must be returned to the manufacturer, it is important that the unit is
returned in the original manufacturer’s packing. Please do not take any action without
rst contacting us.
WARNING: Packaging box is not a toy! Keep out of reach of children!!! Keep
in a safe place the original packaging material for future use.
1.1. Accessories
Soundsation can supply a wide range of quality accessories that you can use with
Hyper 8 Street speaker, like mixers, Cables, Microphones, stands, etc. All products in
our catalogue have been long tested with this device so we recommend to use Genuine
Soundsation Accessories and Spare Parts. Ask your Soundsation dealer for any accesso-
ries you could need to ensure best performance of the product.
2. OVERVIEW
The starting point from which Soundsation drew inspiration for the new Hyper 8 Street
portable PA is the desire to make music everywhere you go. You don’t want and you
don’t have to carry large equipment, but you also don’t want the sound quality to be
compromised.
Hyper 8 Street is an all-in-one solution that integrates an active 2-way coaxial speak-
er, a 200W class-D amplier and DSP with 4 presets, a mixer with 2 Mic/Line inputs, 1
Line Stereo input and 1 channel with BT connection. Everything is packed in a sturdy,
lightweight cabinet ready for any use (in vertical position on the ground or on a 35mm
support, inclined upwards or horizontally like a stage monitor). The 5,400mAh lithium
battery ensures a running time of 4 hours. In short, Hyper 8 Street is the answer to
the maximum freedom of expression, the desire to be together and to make music
outdoors.
2.1. Main Features
fHigh versatility (Multipurpose and Compact)
fAll-in-One System with Mixer, 240W Class-D Power Amplier, Multiple BT Streaming
(TWS - True Wireless Stereo)
fSuperior Audio Quality thanks to Coaxial Transducers and Vented Design
fDSP with 4 Presets to adapt the speaker to the most frequent uses
fBT Master/Slave connection with another Hyper 8 Street units for Stereo Systems
fLithium Battery with 4h Capacity

7
ENGLISH
Hyper 8 Street User manual
2.2. Rear Panel Description
Imported in the EU by FRENEXPORT SPA
Via E. Ferrari, 10 - 62017 Porto Recanati (Italy)
www.frenexport.com
6
7
8
9
12
11
10
1
3
4
5
2
Hyper 8 Street active loudspeakers have several connectors, controls, and indicators the
use of which you should understand.
1) Mic/Line Inputs and Controls
There are 2 Mic/Line Inputs, and in this panel section it is possible to control their level
using the appropriate knobs and select the input type. Inputs accept balanced XLR or
balanced/unbalanced 1/4” (6.3mm) Jack plugs with Mic or Line level signals.
There is no Phantom Power so, in case of microphones, please be advised the you can
use all kind of dynamic microphones, or use condenser microphones with their own
battery power or external Phantom Power source.
Note: Set the LEVEL control to minimum before connecting an audio signal.
Once the system is powered up, we recommend that the LEVEL set to midway
is a good starting point.

8
ENGLISH
Hyper 8 Street User manual
2) Limiter
This LED indicates that the limiter is on when the output voltage of the amplier ex-
ceeds the maximum level, or when power overload is detected. Some ashing of this
LED may be normal, but if it stays on for a long time, lower the input level.
3) Line Level
This knob controls the overall signal level of stereo mini-jack (3) or stereo RCA (4).
4) Mini-jack Stereo Input
This stereo mini-jack plug can be used to connect mobile phones, tablets, computers,
etc. Please use knob number 2 to adjust its level.
5) RCA Stereo Input
These are unbalanced RCA pin jacks that can be used to connect any external stereo
device such as MP3 Players, CD players, Mixers, etc. Please use knob number 2 to adjust
its level.
6) Bluetooth Pair Button AND LEVEL
Soundsation HYPER 8 Street features True Wireless Stereo (TWS) BT linking. This means
that you can link 2 units together to play in true stereo wirelessly.
BT-HOLD TWS button is used to pair with Bluetooth-capable devices, such as mobile
phones, tablets, and laptops; while Level knob adjusts the volume. Below a quick de-
scription of the setup procedure.
fSwitch ON the HYPER 8 Street speaker; the LED above BT-HOLD TWS button ashes
while power is on.
fPress and hold the BT/TWS button on one of the units for 2 seconds. The BT indicator
Led will ash intermittently.
fOn your device (mobile phone, tablet, etc.), access your system setting page, search
for “Hyper-8” device (no password required) and follow the BT pairing procedure.
fOnce the primary unit is paired to your BT device, press the BT/TWS button for 1
second. The BT indicator Led will continue ashing and the primary device will au-
tomatically pair with the secondary device unit. Once paired, the Led will remain lit.
fAll playback functions are controlled by your BT device. You can set the volume on
the units independently by turning the LEVEL knob below each BT/TWS button.
7) DSP Presets
Four presets are included to optimize the response of the cabinet and suit your needs.
Cycle through them using the MODE button. The corresponding Led beside the button
will lit when selected.
fMusic: A bass lift with a at mid to high response.
fMonitor: A LF and HF roll-o with a slight mid band cut for clarity.

9
ENGLISH
Hyper 8 Street User manual
fLIVE: Similar to the Music preset with the LF lift frequency shifted.
fSpeech: A bass roll-o with at mid and upper frequencies.
Note: The EQ setting is stored and recalled following a power cycle.
8) Mix Out
It is a MONO Output with unbalanced Line-Level signal. It contains the mix of all inputs
and all controls.
9) Master LEVEL
This controls the overall level of the speaker. Set this knob to minimum before connect-
ing an audio signal. Once the system is powered up, we recommend that the MASTER
is set to midway as a good starting point. Then you can adjust according to your needs.
10) Battery Status
When you connect the power cable, you can check battery charge (even without
switching the unit on) basing on how many of the four LEDs are on. When charge level
is below 25%, the red LED ashes and indicates that you need to re charge the battery
as soon as possible.
11) AC Adapter Connection
Connect the device to the supplied power adapter, and then to a mains outlet. Be sure
that mains voltage corresponds to the adapter input voltage (within 110-240VAC).
12) Power Switch
Switch up to turn the speaker on, and switch down to turn it o. Make sure the level
control is down before you turn it on.
3. AUDIO CONNECTIONS
You will need several cables for the various connections to and from the speaker. See
the pictures below that show the internal wiring of these cables. Be sure to use only
high quality cables.
You can, of course, also connect unbalanced equipment to balanced inputs. Use either
mono and stereo jack, making sure ring and collar are connected together (or pins 1 &
3 in the case of XLR connectors).

10
ENGLISH
Hyper 8 Street User manual
Balanced use of XLR connectors
1= Ground/Shield
2= Hot (+)
3= Cold (-)
INPUT
In case of unbalanced use Pins 1 and 3 will be jumped
Unbalanced use of 1/4” jack TS connector
Strain relief
clamp
Sleeve
Tip
Sleeve
Ground shield
Tip
Signal
Balanced use of 1/4” jack TRS connector
Headphones connection with 1/4” TRS connector
Strain relief
clamp
Sleeve
Tip
Sleeve
Ground shield
Ring Ring
Cold (- Ve)
Tip
Hot (+ Ve)
4. SPECIFICATIONS
Product type Portable PA Speaker
Type Active
Low driver dimensions 8”
Woofer magnet Ferrite
Vertical array system 1” Compression Driver
Amplier Class D
RMS/Program Power 120W/240W
Frequency response 50Hz-20kHz
SPL(1W/1m) 95dB
Max. SPL 120dB
Protection circuits Short circuit over-current
Controls Master, Line Gain, Bass/Treble, Power, Mic Gain
Indicators Charge/Battery Status, Power
Supported media 2x XLR-6.3mm Jack Combo, RCA, 3.5mm Mini-Jack, BT Audio
Streaming
Line inputs 3
Line input connectors RCA, 6.3mm Jack/XLR, 3.5mm Mini-Jack
Mic inputs XLR/6.3mm Jack
Mix outputs 6.3mm Jack

11
ENGLISH
Hyper 8 Street User manual
Operating Voltage DC 19V
Power Adapter Input: 100-240Vac / Output: DC 19V 2.5A
Battery Capacity 4-hour 100% Power / 7-hour 50% Power / 14.8V-5,400mAh
Cabinet material Polypropylene
Cabinet construction Vented
Other features 36mm Pole-Mount Hole, Transport Handle
Dimensions 284 x 338 x 398mm
Weight 9.5kg
NOTE: Our products are subject to a process of continual further development. Therefore modications to the tech-
nical features remain subject to change without further notice.

12
ENGLISH
Hyper 8 Street User manual
5. WARRANTY AND SERVICE
All Soundsation products feature a limited two-year warranty. This two-year warranty is specic to
the date of purchase as shown on your purchase receipt.
The following cases/components are not covered from the above warranty:
• Any accessories supplied with the product
• Improper use
• Fault due to wear and tear
• Any modication of the product eected by the user or a third party
Soundsation shall satisfy the warranty obligations by remedying any material or manufacturing
faults free of charge at Soundsation’s discretion either by repair or by exchanging individual parts
or the entire appliance. Any defective parts removed from a product during the course of a war-
ranty claim shall become the property of Soundsation.
While under warranty period, defective products may be returned to your local Soundsation dealer
together with original proof of purchase. To avoid any damages in transit, please use the original
packaging if available. Alternatively you can send the product to Soundsation SERVICE CENTER
– Via Enzo Ferrari , 10 – 62017 Porto Recanati - Italy . In order to send a product to service center
you need an RMA number. Shipping charges have to be covered by the owner of the product.
For further information please visit www.soundsationmusic.com
6. WARNING
PLEASE READ CAREFULLY – EU and EEA (Norway, Iceland and Liechtenstein) only
This symbol indicates that this product is not to be disposed of with your household waste, ac-
cording to the WEEE Directive (2202/96/EC) and your national law.
This product should be handed over to a designated collection point, e.g., on an authorized one-
for-one basis when you buy a new similar product or to an authorized collection site for recycling
waste electrical and electronic equipment (WEEE).
Improper handling of this type of waste could have a possible negative impact on the environ-
ment and human health due to potentially hazardous substances that are generally associated
with EEE. At the same time, your cooperation in the correct disposal of this product will contribute
to the eective usage of natural resources.
For more information about where you can drop o your waste equipment for recycling, please
contact your local city oce, waste authority, approved WEEE scheme or your household waste
disposal service.

15
SOMMARIO
1) Acqua / Umidità...........................................................................................................................................................16
2) Calore.............................................................................................................................................................................16
3) Ventilazione ..................................................................................................................................................................17
4) Introduzione di oggetti e liquidi..............................................................................................................................17
5) Cavo di alimentazione e spina ................................................................................................................................17
6) Collegamento alla rete elettrica ..............................................................................................................................17
7) Pulizia.............................................................................................................................................................................17
8) Manutenzione..............................................................................................................................................................17
9) Avviso.............................................................................................................................................................................17
1. CONTENUTO DELL’IMBALLO..................................................................................17
2. ACCESSORI ...............................................................................................................18
3. DESCRIZIONE GENERALE........................................................................................18
3.1. Caratteristiche Principali....................................................................................................................................18
4. DESCRIZIONE DEL PANNELLO POSTERIORE ........................................................19
1) Ingressi Mic/Line e Controlli......................................................................................................................................19
2) Limitatore..................................................................................................................................................................... 20
3) Livello Line ................................................................................................................................................................... 20
4) Ingresso Mini-Jack Stereo ........................................................................................................................................ 20
5) Ingresso RCA Stereo ................................................................................................................................................. 20
6) Pulsante per connessione Bluetooth e Livello .................................................................................................... 20
7) Preset DSP ................................................................................................................................................................... 20
8) Mix Out..........................................................................................................................................................................21
9) Master LEVEL ...............................................................................................................................................................21
10) Stato della Batteria....................................................................................................................................................21
11) Collegamento Adattatore AC .................................................................................................................................21
12) Interruttore di Alimentazione.................................................................................................................................21
5. CONNESSIONI AUDIO.............................................................................................21
6. SPECIFICHE...............................................................................................................22
7. GARANZIA E ASSISTENZA......................................................................................24
8. AVVISO .....................................................................................................................24

16
ITALIANO
Manuale Utente Hyper 8 Street
IMPORTANTI SIMBOLI DI SICUREZZAIMPORTANTI SIMBOLI DI SICUREZZA
Il simbolo è usato per indicare che in questa apparecchiatura sono
presenti alcuni terminali sotto tensione pericolosi, anche in condizioni
di normale funzionamento, che possono costituire rischio di scosse
elettriche o di morte
Il simbolo viene utilizzato nella documentazione di servizio per indi-
care che uno specico componente può essere sostituito esclusiva-
mente dal componente specicato nella documentazione per motivi di
sicurezza.
Terminale di Terra
Corrente/Tensione alternata
Terminale in tensione pericoloso
Indica che l’apparato è acceso
Indica che l’apparato è spento
WARNING: Precauzioni da osservare per evitare il pericolo di ferimento o di morte
per l’utilizzatore.
CAUTION: Precauzioni da osservare per evitare danni all’apparecchio.
CURA DEL PRODOTTO
fLeggete queste istruzioni
fConservate queste istruzioni
fRispettate tutte le avvertenze
fSeguite tutte le istruzioni
1) Acqua / Umidità
L’apparecchio deve essere protetto dall’umidità e dalla pioggia, non può essere usato
in prossimità di acqua; ad esempio nei pressi di una vasca da bagno, di un lavandino, di
una piscina, etc.
2) Calore
L’apparecchio deve essere posto lontano da fonti di calore come radiatori, stufe o altri

17
ITALIANO
Manuale Utente Hyper 8 Street
apparecchi che producono calore.
3) Ventilazione
Non ostruite le prese d’aria per la ventilazione: ciò potrebbe provocare incendi. Instal-
late sempre l’unità secondo le istruzioni del produttore.
4) Introduzione di oggetti e liquidi
Non introdurre oggetti o versare liquidi all’interno dell’apparato per ragioni di sicurezza
5) Cavo di alimentazione e spina
Evitate che il cavo di alimentazione venga calpestato o schiacciato, in particolare in
prossimità delle spine, delle prese e del punto in cui fuoriesce dall’apparecchio. Non
vanicate la nalità di sicurezza della spina con messa a terra. Una spina normale o
“polarizzata” ha due soli terminali; una spina con messa a terra ha un terzo polo di
terra. Questo ulteriore terminale serve per la vostra sicurezza. Se la spina fornita non si
inserisce nella presa, consultate un elettricista per l’eventuale sostituzione.
6) Collegamento alla rete elettrica
Il collegamento elettrico improprio può invalidare la garanzia del prodotto.
7) Pulizia
Pulite solo con un panno asciutto. Non utilizzate solventi come benzolo o alcol.
8) Manutenzione
Non eettuate qualsiasi altro intervento al di fuori di quelli descritti nel manuale. Per
eventuale assistenza rivolgetevi solo a personale qualicato. Utilizzate solo accessori /
componenti suggeriti dal produttore.
9) Avviso
Vogliamo ricordare che un’alta pressione sonora non solo può danneggiare tempora-
neamente il senso dell’udito, ma può anche causare danni permanenti. Prestate atten-
zione anché il volume sia sempre adeguato.
1. CONTENUTO DELL’IMBALLO
Grazie per aver acquistato il diusore Hyper 8 Street. Ogni unità è stata testata e
spedita in perfette condizioni operative. Disimballare con cura il cartone e controllare il
contenuto per assicurarsi che tutte le parti siano presenti e in buone condizioni
f1 Sistema PA portatile Hyper 8 Street
f1 Alimentatore esterno

18
ITALIANO
Manuale Utente Hyper 8 Street
f1 Manuale utente
In caso di danni durante il trasporto, informare immediatamente lo spedizioniere e
conservare il materiale di imballaggio per l’ispezione. Si prega di conservare il cartone
originale e tutti i materiali di imballaggio. Se l’unità deve essere restituita al produttore,
è importante che l’unità venga restituita nella confezione originale del produttore. Si
prega di non intraprendere alcuna azione senza prima contattarci.
AVVISO: L’imballo non è un giocattolo! Tenere fuori dalla portata dei bambi-
ni!!! Conservare in un luogo sicuro questo materiale originale per uso futuro.
2. ACCESSORI
Soundsation può fornire una vasta gamma di accessori di qualità che è possibile utiliz-
zare con gli altoparlanti Hyper 8 Street, come mixer, cavi, microfoni, supporti ecc. Tutti i
prodotti nel nostro catalogo sono stati lungamente testati, quindi consigliamo di utiliz-
zare accessori e ricambi originali Soundsation. Chiedete al vostro rivenditore Soundsa-
tion tutti gli accessori necessari per garantire le migliori prestazioni del prodotto.
3. DESCRIZIONE GENERALE
Il punto di partenza da cui Soundsation ha tratto ispirazione per il nuovo PA portatile
Hyper 8 Street è il desiderio di fare musica ovunque si vada. Nessuno vuole spostarsi
con un’attrezzatura ingombrante e scomoda, ma al contempo nessuno vuole rinunciare
ad un’ottima qualità sonora.
Hyper 8 Street è una soluzione all-in-one che integra un diusore coassiale attivo a 2
vie, un amplicatore di classe D da 200W e DSP con 4 preset, un mixer con 2 ingressi
Mic/Line, 1 ingresso Line Stereo e 1 canale con connessione BT. Il tutto è racchiuso in
un cabinet robusto e leggero, pronto per qualsiasi utilizzo (in posizione verticale a terra
o su un supporto da 35 mm, inclinato verso l’alto o in orizzontale come un monitor
da palco). La batteria al litio da 5.400 mAh garantisce un’autonomia di 4 ore. Hyper 8
Street è la risposta alla massima libertà di espressione, alla voglia di stare insieme e di
fare musica all’aperto.
3.1. CaratteristichePrincipali
fElevata versatilità (multiuso e compatto)
fSistema all-in-one con Mixer, Amplicatore di Potenza in classe D da 240 W, Strea-
ming BT Stereo (TWS - True Wireless Stereo)
fQualità Audio Superiore grazie ai Trasduttori Coassiali e al Design Ventilato
fDSP con 4 preset per adattare lo speaker agli usi più frequenti
fConnessione BT Master/Slave con altre unità Hyper 8 Street per Sistemi Stereo
fBatteria al litio per una Durata di 4 ore

19
ITALIANO
Manuale Utente Hyper 8 Street
4. DESCRIZIONE DEL PANNELLO POSTERIORE
Imported in the EU by FRENEXPORT SPA
Via E. Ferrari, 10 - 62017 Porto Recanati (Italy)
www.frenexport.com
6
7
8
9
12
11
10
1
3
4
5
2
I diusori attivi della serie Hyper 8 Street sono dotati di diversi connettori, comandi e
indicatori il cui utilizzo è di fondamentale importanza.
1) Ingressi Mic/Line e Controlli
Sono presenti 2 ingressi Mic/Line e in questa sezione del pannello è possibile con-
trollarne il livello mediante le apposite manopole e selezionare il tipo di ingresso. Gli
ingressi permettono di inserire connettori XLR bilanciati o Jack da 1/4” (6,3mm) bilan-
cia-ti/sbilanciati con segnali di livello Mic o Line.
Non è prevista l’alimentazione Phantom, pertanto, in caso di microfoni, si consiglia di
utilizzare tutti i tipi di microfoni dinamici o di utilizzare microfoni a condensatore con
alimentazione a batteria o sorgente Phantom esterna.
Nota: Impostare il controllo LEVEL al minimo prima di collegare un segnale
audio. Una volta acceso il sistema, si consiglia di impostare il LEVEL a metà,
poiché è un buon punto di partenza.

20
ITALIANO
Manuale Utente Hyper 8 Street
2) Limitatore
Questo LED indica che il limitatore è attivo quando l’uscita dell’amplicatore supera il
livello massimo o quando viene rilevato un sovraccarico di potenza. Vederlo lampeg-
giare può essere normale, ma se rimane acceso in maniera prolungata, abbassare il
livello di ingresso.
3) Livello Line
Controlla il livello del segnale generale dello mini-jack stereo (3) o degli RCA (4).
4) Ingresso Mini-Jack Stereo
Questa presa mini-jack stereo può essere utilizzata per collegare telefoni cellulari,
tablet, computer, ecc. Utilizzare la manopola numero 2 per regolare il livello.
5) Ingresso RCA Stereo
Si tratta di connettori sbilanciati per collegare qualsiasi dispositivo stereo esterno, come
lettori MP3, lettori CD, mixer, ecc. Usare la manopola numero 2 per regolare il livello.
6) Pulsante per connessione Bluetooth e Livello
Soundsation Hyper 8 Street è dotato di collegamento BT True Wireless Stereo (TWS).
Ciò signica che è possibile collegare 2 unità per suonare in stereofonia senza li.
Il pulsante BT-HOLD TWS viene usato accoppiare dispositivi Bluetooth, quali telefoni
cellulari, tablet e computer portatili, mentre la manopola Level regola il volume. Di
seguito una rapida descrizione della procedura di congurazione.
Accendete il diusore HYPER 8 Street; il LED sopra il pulsante BT-HOLD TWS lampeggia
quando è acceso.
fTenere premuto il pulsante BT/TWS su una delle unità per 2 secondi. Il Led indica-
tore BT lampeggia a intermittenza.
fSul tuo dispositivo (telefono cellulare, tablet, ecc.), accedi alla pagina delle impo-
stazioni di sistema, cerca il dispositivo “Hyper-8” e segui la procedura di accoppia-
mento BT.
fUna volta accoppiata l’unità principale al dispositivo BT, premere il pulsante BT/
TWS per 1 secondo. Il led dell’indicatore BT continuerà a lampeggiare e il disposi-
tivo primario si accoppierà automaticamente con l’unità Hyper 8 Street secondaria.
Una volta connessi, il Led rimarrà acceso.
fTutte le funzioni di riproduzione sono controllate dal dispositivo BT. È possibile
impostare il volume delle unità in modo indipendente ruotando la manopola LEVEL
sotto ciascun tasto BT/TWS.
7) Preset DSP
Sono inclusi quattro preset per ottimizzare la risposta del sistema in base alle proprie
esigenze. Per scorrere tra i preset, premere il pulsante MODE. Il led corrispondente al
preset selezionato si illumina.
fMusic: Curva di EQ con bassi enfatizzati e medio-alti piatti

21
ITALIANO
Manuale Utente Hyper 8 Street
fMonitor: Curva di EQ con attenuazione di bassi e alti con leggero taglio sui medi
per aumentare l’intelligibilità del parlato.
fLIVE: Curva di EQ simile a quella MUSIC, ma con diversa enfatizzazione dei bassi
fSpeech: Curva con taglio dei bassi e risposta piatta sui medi e alti.
Nota: L’impostazione dell’equalizzatore viene memorizzata e ripristinata
dopo un ciclo di alimentazione.
8) Mix Out
È un’uscita MONO con segnale sbilanciato a livello di Linea. Contiene il mix di tutti gli
ingressi e di tutti i controlli.
9) Master LEVEL
Regola il livello generale del diusore. Impostare al minimo prima di collegare un
segnale audio. Una volta acceso il sistema, si consiglia di impostare il MASTER a metà
come buon punto di partenza. Poi regolare il livello in base alle proprie esigenze.
10) Stato della Batteria
Quando si collega il cavo di alimentazione, è possibile controllare la carica della batteria
(anche senza accendere l’unità) in base a quanti dei quattro LED sono accesi. Quando
il livello di carica è inferiore al 25%, il LED rosso lampeggia e indica che è necessario
ricaricare la batteria il prima possibile.
11) Collegamento Adattatore AC
Collegare il dispositivo all’adattatore di corrente in dotazione e quindi alla presa di cor-
rente. Assicurarsi che la tensione di rete corrisponda alla tensione di ingresso dell’adat-
tatore (entro i 110-240VAC).
12) Interruttore di Alimentazione
Portare l’interruttore verso l’alto per accendere lo speaker e abbassarlo per spegnerlo.
Accertarsi che il controllo del livello sia abbassato prima di accendere l’unità.
5. CONNESSIONI AUDIO
Sono necessari diversi cavi per i vari collegamenti da e verso il diusore. Le immagini
seguenti mostrano il cablaggio interno di questi cavi. Assicuratevi di utilizzare solo cavi
di alta qualità.
Naturalmente, è possibile collegare apparecchiature sbilanciate a ingressi bilanciati. Uti-
lizzare jack mono e stereo, assicurandosi che l’anello e il collare siano collegati insieme
(o i pin 1 e 3 nel caso dei connettori XLR).

22
ITALIANO
Manuale Utente Hyper 8 Street
Uso bilanciato dei connettori XLR
1=Massa
2=Segnale (Caldo +)
3=Polo Freddo (Freddo -)
INPUT
In caso di utilizzo sbilanciato, i piedini 1 e 3 verranno saldati
Uso bilanciato del connettore jack TRS 1/4“
/ presa cua con connettore TRS 1/4”
Ferma-cavo
Calza
Centrale
Massa
Anello
Polo freddo (- Ve)
Segnale
Caldo (+ Ve)
Uso sbilanciato del connettore jack TS 1/4“
Ferma-cavo
Calza
Centrale
Massa Segnale
6. SPECIFICHE
Tipo di Prodotto Speaker Portatile PA
Tipo Attivo
Dimensioni Woofer 8”
Magnete del Woofer Ferrite
Sistema Array verticale Driver a compressione da 1”
Amplicatore Classe D
Potenza RMS/Programma 120W/240W
Risposta in frequenza 50Hz-20kHz
SPL (1W/1m) 95dB
Max. SPL 120dB
Protezione dei circuiti Sovracorrente di corto circuito
Controlli Master, Line Gain, Bass/Treble, Power, Mic Gain
Indicatori Carica della Batteria, Accensione
Media supportati 2x XLR-6.3mm Jack Combo, RCA, 3.5mm Mini-Jack, BT Audio
Streaming
Ingressi Line 3
Connettori ingresso Line RCA, Jack/XLR da 6,3mm , Mini-Jack da 3,5mm
Ingressi Microfono XLR/6,3mm Jack
Table of contents
Languages:
Other Sound Sation Speakers System manuals
