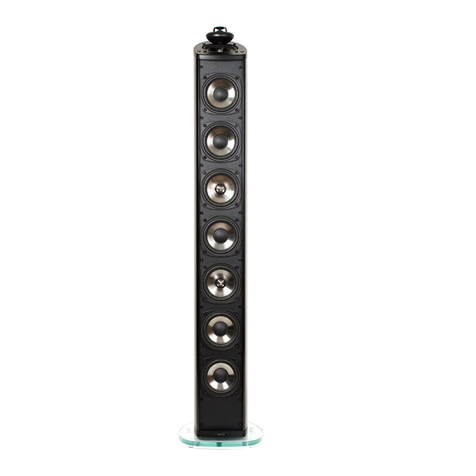
Sound Town ZETHUS-112BPW User manual

ZETHUS-112BPW
PROFESSIONAL FULL RANGE LINE ARRAY
(Built in Class D amplifier with DSP)
Sound Town Inc. Accepts no liability for any loss which may be
suffered by any person who relies either wholly or in part upon
any description, photograph, or statement contained herein.
Technical specifications, appearances and other information are
subject to change without notice. .
For the applicable warranty terms and conditions, including addi-
tional information regarding Sound Town's limited warranty, please
find details online at: .
Https://www.soundtown.com/pages/return-warranty .
IMPORTANT SAFETY INSTRUCTIONS
1. Read all safety and operating instructions before using this product.
2. All safety and operating instructions should be kept for future reference.
3. Read and understand all warnings listed on the operating instructions.
4. Follow all operating instructions to operate this product.
. Do not block any ventilation openings, it should not be placed flat against a wall or placed in a built-in5
enclosure that will impede the flow of cooling air.
.Do not install this product near any heat sources, such as, radiators, heat registers, stove or other apparatus6
(including heat producing amplifiers) that produce heat.
.Do not defeat the safety purpose of the polarized or grounding-type plug. A polarized plug has two blades7
with one wider than the other. A grounding-type plug has two blades and a third grounding prong. The side
blade or the third prong are provided for your safety if the provided plug does not fit into your outlet, consult
an electrician for replacement of the obsolete outlet.
.Protect the power cord being walked on or pinched particularly at Plugs, convenience receptacles and the8
point where they exit from the apparatus. Do not break the ground pin of the power supply cord.
.Only use attachments specified by the manufacturer.9
1 . Use only the cart, stand, tripod, bracket, or table specified by the manufacturer or sold with the apparatus.0
When a cart is used use caution when moving cart/apparatus combination to avoid injury from tip-over.
1 . Unplug this apparatus during lightning storms or when unused for long periods of time.1
1 Refer all servicing to qualified service personnel. Servicing is required when the apparatus has been damaged2
in any way; such as, power-supply cord or plug is damaged, liquid has been spilled or objects have fallen into
the apparatus, the apparatus has been exposed to rain or moisture, does not operate normally or has been
dropped.
1 . WARNING: To reduce the risk of fire or electric shock, do not expose this apparatus to rain or moisture.3
1 . When the MAINS plug, or an appliance coupler is used as the disconnect device, the disconnect device should4
remain readily operable.
1 . Protective Ground Terminal: The apparatus shall be connected to an AC main socket with a protective earth5
ground connection.
PRODUCT MANUAL EN

ZETHUS SERIES
Rear Panel Instruction
A
A. Combo Input: Two balanced 1/4"/XLR combo jack (CH1/2) are provided. This allows for stereo input
from two separate feeds. The speaker will work with only one input connected.
Two XLR (CH1/2) provides full-range passthrough signal output.
B. Line Output:
These controls the gain of the input signal. It will raise and lower the volume of theC/D. Volume Control:
speaker.
These indicators lights up when the amplifier is near clipping. An occasional flickering is
E. Clip LED:
acceptable. If LED lit continuously, adjust the level control and reduce the output level of connected sources.
Failure to do so may lead to premature failure of your speaker.
F. SET:
1. DSP setting knob, by pressing or rotating this knob to adjust the DSP setting. * Referring the ‘DSP Setting
Guide’ for detail operation.
2. In the initial LCD interface, the ‘SET’ knob can also be used as the main volume adjustment. Rotating to
adjust from -50dB~10dB. But it’s only recommended to use when you have a very high or low signal output
device. For normal level signal devices, it’s recommended to stay at 0dB default setting and only adjust the
volume by the ‘C&D’ channel volume control knob.
The DSP interface display.
G. LCD:
Neutrik powerCON (A) for power input
H. AC I :nput receptacle . It is important to supply the proper AC line
voltage to the unit. Do not connect to intermittent or faulty power.
Neutrik powerCON (B) connector for power output.
I. AC Output: It is important to supply the proper AC line
othervoltage to the unit.
J. :Voltage selection This switch is supplied for moving the unit from 115 voltage (US Standard) to 230
voltage (European Standard). The switch needs to be set on the proper voltage for your area.
To turn/off the speaker.
K. Power Switch:
B
C
D
E
F
G
H
I
J
DSP Setting Guide
* The SOUNDTOWN ZETHUS-112BPW active full range line array has a Class D amplifier built inside. The
professional DSP built in the amplifier module allows user to design the sound curve according to different
venue.
* Operating the ‘SET’ knob ( ) to set the DSP andby rotating to select and by pressing to confirm setting
the LCD display provide the interface for the DSP setting.
* When the LCD display at the initial interface indicating the volume, press the SET knob once to enter the
main interface of the DSP setting. Your will see 6 icons at the main DSP interface. Rotate the SET knob to
select from any of the ‘ ’, ‘ ’, ‘ ’, ‘ ’, ‘ ’ icons then press SET again to enter theMODE EQ CROSS LIMIT SAVE
corresponding sub-interface, or select ‘ ’ to go back to initial interface indicating the volume.EXIT
1. MODE: In this sub-interface, there are 5 pre-setting mode (curve) for you to choose: ‘MUSIC’, ‘LIVE’,
‘SPEECH’, ‘CLUB’ and ‘BY PASS’. (Default setting is BY PASS).
2. EQ: In this sub-interface, you can adjust the Bass or Treble from -15dB~+15dB. (Default setting is 0dB).
3. COSS: Crossover setting, the speaker is Bi-amped design and in this sub-interface, you can adjust the
crossover point for the LF (low frequency driver ) and HF (high frequency driver) separately. The ‘LF-HPF’
is the high pass filter for the LF, adjustable from 20Hz~200Hz, default setting 40Hz (means to cut the
frequency under 40Hz for the LF); The ‘’LF-LPF’ is the low pass filter for the LF, adjustable from 1500Hz~
3000Hz, default setting 1800Hz (means to cut the frequency above 1800Hz for the LF) ; The ‘HF-HPF’ is the
high pass filter for the HF, adjustable from 1500Hz~3000Hz, default setting 1800Hz (means to cut the
frequency under 1800Hz for the HF).
4. LIMIT: In this sub-interface, you can adjust the GAIN or LIMIT setting for the HF and LF. ‘LF-Gain’
adjustable from -10dB~+10dB, (default setting +10dB); ‘LF-Lmt’ adjustable from -10~+5dB, (default setting
+5dB); ‘HF-Gain’ adjustable from -10dB~+10dB, (default setting +8dB); ‘HF-Lmt’ adjustable from -10~+5dB,
(default setting +5dB).
5. SAVE: In this sub-interface, there are following saving choice:
a. Select ‘SAVE’ to save current setting, when the speaker powered off and then powered on again, system
will load the current setting.
b. Select ‘Reset to Dft’ to load the default setting.
c. Select ‘Save as Dft’ is to save current setting as default. This operation will request to enter a password
‘2105'. This operation will remove all the original default setting, do not give the password to any*Caution!:
person who lacks sound knowledge. Improper setting will lead to faulty sound.
How can we help you?
CONTACT OUR US-BASED SUPPORT TEAM
Simple or complex, your questions are important to us. For service, support
or more information, please contact the Sound Town support team:
Email: [email protected]
Other Sound Town Speakers System manuals

