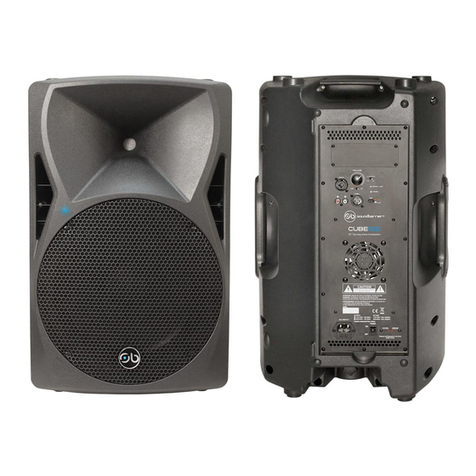
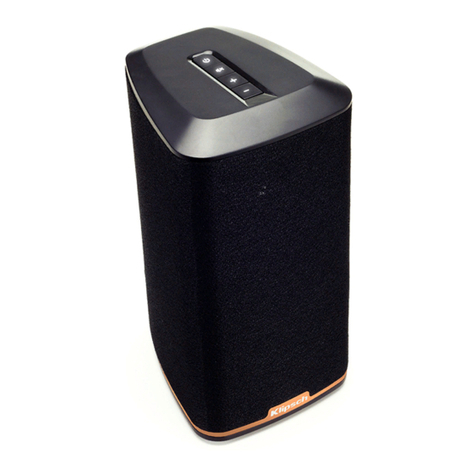
Soundbarrier ECL10.2 User manual

1
User Manual
Manual de usuario
VERSION 1.0
ECL10.2 ECL12.2 ECL15.2 ECL118S

2
Explanation of Graphical Symbols
The lightning flash with arrowhead symbol within an equilateral
triangle is intended to alert the user to the presence of uninsulated
‘dangerous voltage’ within the product’s enclosure that may be of
sufficient magnitude to constitute a risk of electric shock to persons.
The exclamation point within an equilateral triangle is intended to alert
the user to the presence of important operating and maintenance
(servicing) instructions in the literature accompanying the product.
IMPORTANT SAFETY INSTRUCTIONS
1
2
3
4
5
6
7
8
9
Read these instructions.
Keep these instructions.
Heed all warnings.
Follow all instructions.
Do not use this apparatus near water.
Clean only with dry cloth.
Do not block any ventilation openings. Install in accordance with the
manufacturer’s instructions.
Do not install near any heat sources such as radiators, heat registers,
stoves, or other apparatus (including amplifiers) that produce heat.
Do not defeat the safety purpose of the polarized or grounding-type
plug. A polarized plug has two blades with one wider than the other.
A grounding type plug has two blades and a third grounding prong.
The wide blade or the third prong are provided for safety. If the
provided plug does not fit into your outlet, consult an electrician for
replacement of the obsolete outlet.
10
11
12
13
14
Protect the power cord from being walked on or pinched particularly at
plugs, convenience receptacles, and the point where they exit from the
apparatus.
Only use attachments/accessories specified by the
manufacturer.
Use only with the cart, stand, tripod, bracket, or table
specified by the manufacturer, or sold with the
apparatus. When a cart is used, use caution when
moving the cart/apparatus combination to avoid
injury from tip-over.
Unplug this apparatus during lightning storms or when unused for long
periods of time.
Refer all servicing to qualified service personnel. Servicing is required
when the apparatus has been damaged in any way, such as power-supply
cord or plug is damaged, liquid has been spilled or objects have fallen into
the apparatus, the apparatus has been exposed to rain or moisture, does not
operate normally, or has been dropped.
WARNING
TO REDUCE THE RISK OF FIRE OR ELECTRIC SHOCK, DO NOT EXPOSE THIS APPARATUS TO RAIN OR MOISTURE.
PLEASE READ CAREFULLY BEFORE PROCEEDING
Please keep this manual in a safe place for future reference.
WARNING
Always follow the basic precautions listed below to avoid the possibility of serious injury or even death from electrical shock, short-circuiting, damages,
fire or other hazards. These precautions include, but are not limited to, the following:
Power supply/Power cord
Water warning
•Only use the voltage specified as correct for the device. The required
voltage is printed on the name plate of the device.
•Do not expose the device to rain, use it near water or in damp or wet
conditions, or place containers on it containing liquids which might
spill into any openings.
•Use only the included power cord.
•Never insert or remove an electric plug with wet hands.
•Do not place the power cord near heat sources such as heaters or radiators,
do not excessively bend or otherwise damage the cord, place heavy objects
on it, or place it in a position where anyone could walk on, trip over, or roll
anything over it.
If you notice any abnormality
•If the power cord or plug becomes frayed or damaged, there is a
sudden loss of sound during use of the device, or any unusual smells
or smoke should appear, turn off the power switch, disconnect the
electric plug from the outlet immediately, and have the device
inspected by qualified service personnel.
Do not open
•Do not open the device or attempt to disassemble the internal parts or
modify them in any way. The device contains no user-serviceable parts. If
it should appear to be malfunctioning, discontinue use immediately and
have it inspected by qualified service personnel.
•If this device is dropped or damaged, immediately turn off the power
switch, disconnect the electric plug from the outlet, and have the
device inspected by qualified service personnel.
•Do not open the device or attempt to disassemble the internal parts or
modify them in any way. The device contains no user-serviceable parts. If
it should appear to be malfunctioning, discontinue use immediately and
have it inspected by qualified service personnel.
PRECAUTIONS
CAUTION
BEFORE OPENING PULL MAIN PLUG
CAUTION:TO REDUCE THE RISK OF FIRE REPLACE WITH
ONLY SAME TYPE AND RATING OF FUSE
WARNING:

3
WARNING
Always follow the basic precautions listed below to avoid the possibility of physical injury to you or others, or damage to the device or other property. These
precautions include, but are not limited to, the following:
Power supply/Power cord
Connections
Remove the electric plug from the outlet when the devices is not
to be used for extend periods of time, or during electrical storms.
Before connecting the device to other devices, turn off the power for all
devices. Before turning the power on or off for all devices, set all
volume levels to minimum.
When removing the electric plug from the device or an outlet,
always hold the plug itself and not the cord. Pulling by the cord
can damage it.
Use only the included speakers and speaker’s cables. Use of other types
of speakers and cables may result in damage to the device(s), or even
fire.
Location
Handling Precautions
When transporting or moving the device, always use two or more
people. Attempting to lift the device by yourself may damage your
back, result in other injury, or cause damage to the device itself.
Before moving the device, remove all connected cables.
When setting up the device, make sure that the AC outlet you are
using is easily accessible. If some trouble or malfunction occurs,
immediately turn off the power switch and disconnect the plug
from the outlet.
Do not use the device in a confined, poorly ventilated location.
Make sure that there is adequate space between the mixer and
surrounding walls or other devices: at least 1’ ft. at the side, 1’ ft.
behind and 1’ ft. above. If the mixer is to be used installed into the
speaker cabinet, make sure to allow adequate space between the
speaker and the surrounding walls or other devices: at least 1’ ft.
at the sides, 1’ ft. behind and 1’ ft. above. Inadequate ventilation
can result in overheating, possibly causing damage to the
device(s), or even fire.
Do not use the speaker’s handles for suspended installation.
Doing so could result in damage or personal injury.
Avoid setting all equalizer controls and faders to their maximum.
Depending on the condition of the connected devices, doing so
may cause feedback and may damage the speakers.
Do not expose the device to excessive dust or vibrations, or
extreme cold or heat (such as in direct sunlight, near a heater, or
in a car during the day) to prevent the possibility of panel
disfiguration or damage to the internal components.
Do not place the device in an unstable position where it might
accidentally fall over.
Do not block the vents. This mixer has ventilation holes at the top
to prevent the internal temperature from becoming too high. In
particular, do not place the device on its side or upside down.
Inadequate ventilation can result in overheating, possibly causing
damage to the device(s), or even fire.
Do not use the device in the vicinity of a TV, radio, stereo
equipment, mobile phone, or other electric devices. Doing so may
result in noise, both in the device itself and in the TV or radio next
to it.
When turning on the AC power in your audio system, always turn on
the device LAST, to avoid speaker damage. When turning the power off,
the device should be turned off FIRST for the same reason.
Do not insert your fingers or hands in any gaps or openings on the device
(vents, ports, etc.).
Avoid inserting or dropping foreign objects (paper, plastic, metal, etc.)
into any gaps or openings on the device (vents, ports, etc.). If this
happens, turn off the power immediately and unplug the power cord
from the AC outlet. Then have the device inspected by qualified service
personnel.
Do not use the device for a long period of time at a high or
uncomfortable volume level, since this can cause permanent hearing
loss. If you experience any hearing loss or ringing in the ears, consult a
physician immediately.
Do not operate the device if the sound is distorting. Prolonged use in
this condition could cause overheating and result in fire.
Do not rest your weight on the device or place heavy objects on it, and
avoid use excessive force on the buttons, switches or connectors.
Interference From Cell Phone
Using a cell phone near the speaker system can induce noise. If this
occurs, move the cell phone further away from the speaker system. Air
blowing out of the bass reflex ports is normal, and often occurs when
the speaker is handing program material with heavy bass content.
Always turn the power off when the device is not in use. The
performance of components with moving contacts, such as switches,
volume controls, and connectors, deteriorates over time. Consult
qualified service personnel about replacing defective parts.
The manufacturer will not be responsible for damage caused by
improper use or modification to the device.

4
Explicación de los símbolos gráficos
El símbolo del rayo con punta de flecha dentro de un triángulo equilátero pretende alertar al usuario de la presencia de "voltaje peligroso" no
aislado dentro del envolvente del producto que puede ser de una magnitud suficiente para constituir un riesgo de descarga eléctrica para las
personas.
El signo de exclamación dentro de un triángulo equilátero pretende alertar al usuario de la presencia de instrucciones importantes de operación y
mantenimiento (servicio) en la documentación que acompaña al producto.
INSTRUCCIONES DE SEGURIDAD IMPORTANTES
1 Lea estas instrucciones.
2 Guarde estas instrucciones.
3 Preste atención a todas las advertencias.
4 Siga todas las instrucciones.
5 No utilice este aparato cerca del agua.
6 Limpiar solamente con un paño seco.
7 No bloquee las aberturas de ventilación. Haga la instalación
conforme a las instrucciones del fabricante.
8 No instale cerca de fuentes de calor como radiadores, registros de
calor, estufas u otros aparatos (incluidos amplificadores) que
produzcan calor.
9 No anule el propósito de seguridad del enchufe polarizado o con
conexión a tierra. Un enchufe polarizado tiene dos cuchillas, una más
ancha que la otra. Un enchufe con conexión a tierra tiene dos patas y
una tercera clavija de conexión a tierra. La cuchilla ancha o la tercera
clavija se proporcionan por seguridad. Si el enchufe provisto no
encaja en su toma de corriente, consulte a un electricista para
reemplazar la toma de corriente obsoleta.
10 Evite que el cable de alimentación se pise o se pellizque,
especialmente en los enchufes, receptáculos de conveniencia y el punto en
el que salen del aparato.
11 Utilice únicamente los accesorios especificados
por el fabricante..
12 Utilícelo solo con un carrito, soporte, trípode,
soporte o mesa especificado por el fabricante o
vendido con el aparato. Cuando se usa un carrito,
tenga cuidado al mover la combinación de carrito /
aparato para evitar lesiones por vuelco.
13 Desenchufe este aparato durante las tormentas eléctricas o cuando no
se utilice durante largos períodos de tiempo.
14 Remita todo el servicio a personal de servicio calificado. El servicio
se requiere cuando el aparato se ha dañado de alguna forma, como si el
cable de alimentación o el enchufe estuvieran dañados, si se hubiera
derramado líquido o si hubiera caído algún objeto dentro del aparato, el
aparato haya estado expuesto a la lluvia o la humedad, no funciona
normalmente, o se ha caído.
POR FAVOR LEA CUIDADOSAMENTE ANTES DE CONTINUAR
Guarde este manual en un lugar seguro para futuras consultas.
AVISO
Siga siempre las precauciones básicas enumeradas a continuación para evitar la posibilidad de lesiones graves o incluso la muerte por descarga eléctrica,
cortocircuito, daños, incendios u otros peligros. Estas precauciones incluyen, entre otras, las siguientes:
Fuente de alimentación / cable de alimentación
Advertencia de agua
• Utilice únicamente el voltaje especificado como correcto para el
dispositivo. El voltaje requerido está impreso en la placa de identificación
del dispositivo.
• No exponga el dispositivo a la lluvia, utilícelo cerca del agua o en
condiciones húmedas o mojadas, ni coloque recipientes sobre él que
contengan líquidos que puedan derramarse en las aberturas.
• Utilice únicamente el cable de alimentación incluido.
• Nunca inserte o quite un enchufe eléctrico con las manos mojadas.
• No coloque el cable de alimentación cerca de fuentes de calor, como
calentadores o radiadores, no doble excesivamente ni dañe el cable, coloque
objetos pesados sobre él o colóquelo en una posición en la que alguien
pueda caminar, tropezar o hacer rodar algo encima de eso.
Si nota alguna anomalía.
• Si el cable de alimentación o el enchufe se deshilachan o se dañan,
se produce una pérdida repentina de sonido durante el uso del
dispositivo, o si aparecen olores o humos inusuales, apague el
interruptor de alimentación, desconecte el enchufe eléctrico de la toma
de corriente inmediatamente, y haga inspeccionar el dispositivo por
personal de servicio calificado.
No abrir
• No abra el dispositivo ni intente desmontar las partes internas ni
modificarlas de ninguna manera. El dispositivo no contiene partes
reparables por el usuario. Si parece que no funciona correctamente, deje de
usarlo inmediatamente y haga que lo revise personal de servicio calificado.
• Si este dispositivo se cae o se daña, apague inmediatamente el
interruptor de alimentación, desconecte el enchufe del tomacorriente
e inspeccione el dispositivo por personal de servicio calificado.
• No abra el dispositivo ni intente desmontar las partes internas ni
modificarlas de ninguna manera. El dispositivo no contiene partes
reparables por el usuario. Si parece que no funciona correctamente, deje de
usarlo inmediatamente y haga que lo revise personal de servicio calificado.
PRECAUCIONES

5
AVISO
Siga siempre las precauciones básicas que se enumeran a continuación para evitar la posibilidad de lesiones físicas a usted u otras personas o daños al
dispositivo u otros bienes. Estas precauciones incluyen, entre otras, las siguientes:
Fuente de alimentación / cable de alimentación
Conexiones
• Retire el enchufe eléctrico de la toma de corriente cuando no
vaya a utilizar los dispositivos durante períodos prolongados de
tiempo o durante tormentas eléctricas.
• Antes de conectar el dispositivo a otros dispositivos, apague la
alimentación de todos los dispositivos. Antes de encender o apagar la
alimentación de todos los dispositivos, configure todos los niveles de
volumen al mínimo.
Cuando retire el enchufe eléctrico del dispositivo o de una toma
de corriente, siempre sostenga el enchufe y no el cable. Tirar del
cable puede dañarlo.
Para las tomas, use solo los altavoces y los cables incluidos. El uso de
otros tipos de altavoces y cables puede dañar el dispositivo o incluso el
fuego.
Ubicación
Precauciones de Manejo
Cuando transporte o mueva el dispositivo, utilice siempre dos o más
personas. Intentar levantar el dispositivo por sí mismo puede dañar su
espalda, provocar otras lesiones o dañar el propio dispositivo.
Antes de mover el dispositivo, retire todos los cables conectados.
Al configurar el dispositivo, asegúrese de que se pueda acceder
fácilmente a la toma de CA que está utilizando. Si ocurre algún
problema o falla, apague inmediatamente el interruptor de
alimentación y desconecte el enchufe de la toma de corriente.
No utilice el dispositivo en lugares confinados y con poca ventilación.
Asegúrese de que haya espacio suficiente entre el mezclador y las
paredes circundantes u otros dispositivos: al menos 1 pie por lado, 1
pie por detrás y 1 pie por encima. Si la mezcladora se va a usar
instalada en el gabinete del altavoz, asegúrese de dejar un espacio
adecuado entre el altavoz y las paredes circundantes u otros
dispositivos: al menos 1 'pies a los lados, 1' pies por detrás y 1 'pies.
encima. La ventilación inadecuada puede provocar un
sobrecalentamiento, lo que podría causar daños al dispositivo (o
dispositivos) o incluso un incendio.
No utilice las asas del altavoz para la instalación suspendida. Si lo
hace, podría provocar daños o lesiones personales.
Evite configurar todos los controles de ecualizador y faders a su
máximo. Dependiendo de la condición de los dispositivos conectados,
hacerlo puede causar retroalimentación y dañar los altavoces.
No exponga el dispositivo a polvo o vibraciones excesivas, ni a frío o
calor extremos (como a la luz solar directa, cerca de un calefactor o en
un automóvil durante el día) para evitar la posibilidad de desfiguración
del panel o daños a los componentes internos.
No coloque el dispositivo en una posición inestable en la que pueda
caerse accidentalmente.
No bloquee las rejillas de ventilación. Esta mezcladora tiene orificios
de ventilación en la parte superior para evitar que la temperatura
interna sea demasiado alta. En particular, no coloque el dispositivo de
lado ni boca abajo. La ventilación inadecuada puede provocar un
sobrecalentamiento, lo que podría causar daños al dispositivo (o
dispositivos) o incluso un incendio.
No utilice el dispositivo cerca de un televisor, una radio, un equipo de
sonido, un teléfono móvil u otros dispositivos eléctricos. Si lo hace,
puede producir ruido, tanto en el propio dispositivo como en el
televisor o la radio que se encuentra junto a él.
Cuando encienda la alimentación de CA en su sistema de audio, siempre
encienda el dispositivo ÚLTIMO, para evitar daños al altavoz. Al apagar la
unidad, el dispositivo debe apagarse PRIMERO por la misma razón.
No inserte los dedos ni las manos en los huecos o aberturas del dispositivo
(ventilaciones, puertos, etc.).
Evite insertar o dejar caer objetos extraños (papel, plástico, metal, etc.) en
los huecos o aberturas del dispositivo (respiraderos, puertos, etc.). Si esto
sucede, apague la unidad inmediatamente y desenchufe el cable de
alimentación de la toma de CA. Luego haga inspeccionar el dispositivo por
personal de servicio calificado.
No utilice el dispositivo durante un largo período de tiempo a un nivel de
volumen alto o incómodo, ya que esto puede causar una pérdida permanente
de la audición. Si experimenta alguna pérdida de audición o zumbidos en los
oídos, consulte a un médico inmediatamente.
No opere el dispositivo si el sonido está distorsionado. El uso prolongado en
esta condición podría causar un sobrecalentamiento y provocar un incendio.
No apoye su peso sobre el dispositivo ni coloque objetos pesados sobre él, y
evite ejercer una fuerza excesiva sobre los botones, interruptores o
conectores.
Circuito de protección
Todos los altavoces de rango completo están equipados con un interruptor de
polietileno de auto-restablecimiento que protege al conductor de alta
frecuencia de los daños causados por un exceso de energía. Si el gabinete de
un altavoz pierde la salida de alta frecuencia, quite inmediatamente la
alimentación de la unidad y espere de dos a tres minutos. Esto debería ser lo
suficientemente largo para permitir que el interruptor de polietileno se
reinicie. Vuelva a aplicar la energía y verifique el rendimiento del
controlador de alta frecuencia antes de continuar, con la energía reducida a
un nivel que no haga que el interruptor de polietileno interrumpa la señal.
Interferencia del teléfono celular
El uso de un teléfono celular cerca del sistema de altavoces puede provocar
ruido. Si esto ocurre, aleje el teléfono celular del sistema de altavoces. El aire
que sale de los puertos de reflejo de bajos es normal y ocurre a menudo
cuando el orador entrega material de programa con contenido de graves
pesados.
Siempre apague la unidad cuando el dispositivo no esté en uso. El
rendimiento de los componentes con contactos móviles, como interruptores,
controles de volumen y conectores, se deteriora con el tiempo. Consulte al
personal de servicio calificado sobre la sustitución de piezas defectuosas.
El fabricante no será responsable de los daños causados por el
uso indebido o la modificación del dispositivo.

6
Amplifier Functions Funciones del amplificador
ECL10.2 / ECL12.2 / ECL15.2

7
Amplifier Functions Funciones del amplificador
1. MIC / LINE INPUT (XLR and ¼”)
This input is used to connect to an external audio device such
as an audio mixer, CD player, Laptop, etc. to get audio signal
or to plug in microphone cable to get signal from a dynamic
microphone.
2. MIC / LINE Switch
Switch to MIC to set input sensitivity to accept the low signal
levels of a microphone or switch to LINE to set input
sensitivity to the higher levels of a line signal (mixers,
instruments, audio interfaces etc.)
3. Line Out / THRU (XLR)
This connector is used to send an audio signal to another
active speaker or amplifier.
4. Channel Volume
Adjusts the output volume of Channel 1 or Chanel 2
5. Bluetooth Volume
Adjusts the output volume of the Bluetooth function
6. Master Equalizer (Hi and Lo)
Used to adjust the total the high frequency and low frequency
(Bass) of the loudspeaker
7. Pair (Bluetooth):
Press this button to pair a Bluetooth enables device
8. TWS (Bluetooth):
Use this button to use TWS Bluetooth mode (See description
and instructions on page 8)
9. AUX:
Use to connect 3.5mm mini jack able from an audio device
10. Limit / Signal indicator
The signal LED will illuminate when the system is receiving
an audio signal. The Limit LED will illuminate when the
system is overloading, running your loudspeaker at Clip level
is not recommended and will cause the internal amplifier to
fail and or the main power fuse to blow
11. DSP Presets:
Use to select between preset DSP parameters.
12. Voltage Switch (AC 120V-60Hz / 240V-50Hz)
Ensure Switch is set to the correct AC voltage before
connecting or powering 120V-60Hz / 240V-50Hz.
13. Power Switch
Turn ON / OFF the loudspeaker
14. AC Power Socket
Used to connect the power supply included with the
loudspeaker.
15. Fuse Holder
The fuse holder holds the fuse, which is a safety device that
protects the AC supply circuit of the unit. WARNING: if the
fuse fails, it should be replaced with one of similar size and
specifications. If the fuse continues to fail, please discontinue
use of this product and refer servicing to qualified personnel.
1. ENTRADA DE MIC/LÍNEA (XLR y ¼”)
Esta entrada se utiliza para conectarse a un dispositivo
de audio externo, como un mezclador de audio, un
reproductor de CD, una computadora portátil, etc. para
obtener una señal de audio o para conectar un cable de
micrófono para obtener una señal de un micrófono
dinámico.
2. Interruptor MIC/LINE
Cambie a MIC para configurar la sensibilidad de
entrada para aceptar los niveles de señal bajos de un
micrófono o cambie a LINE para configurar la
sensibilidad de entrada a los niveles más altos de una
señal de línea (mezcladores, instrumentos, interfaces de
audio, etc.)
3. Salida de línea / A TRAVÉS (XLR)
Este conector se utiliza para enviar una señal de audio a
otro altavoz o amplificador activo.
4. Volumen del canal
Ajusta el volumen de salida del Canal 1 o el Canal 2
5. Volumen Bluetooth
Ajusta el volumen de salida de la función Bluetooth
6. Ecualizador principal (alto y bajo)
Se utiliza para ajustar la frecuencia alta y baja (graves)
del altavoz
7. Pair (Bluetooth):
Presione este botón para emparejar un dispositivo
habilitado para Bluetooth
8. TWS (Bluetooth):
Use este botón para usar el modo Bluetooth TWS
(consulte la descripción y las instrucciones en la página
8)
9. AUX:
Úselo para conectar un miniconector de 3,5 mm desde
un dispositivo de audio
10. Indicador de límite/señal
El LED de señal se iluminará cuando el sistema esté
recibiendo una señal de audio. El LED de límite se
iluminará cuando el sistema se esté sobrecargando, no
se recomienda utilizar el altavoz en el nivel de clip y
provocará que el amplificador interno falle o que se
funda el fusible de alimentación principal.
11. Ajustes preestablecidos de DSP:
Úselo para seleccionar entre los parámetros DSP
preestablecidos.
12. Interruptor de voltaje (CA 120V-60Hz / 240V-50Hz)
Asegúrese de que el interruptor esté configurado en el
voltaje de CA correcto antes de conectar o alimentar
120V-60Hz / 240V-50Hz.
13. Interruptor de encendido
Encender / apagar el altavoz
14. Toma de corriente
Se utiliza para conectar la fuente de alimentación
incluida con el altavoz.
15. Portafusibles
El portafusibles sostiene el fusible, que es un
dispositivo de seguridad que protege el circuito de
alimentación de la unidad. ADVERTENCIA: si el
fusible falla, debe ser reemplazado por uno de tamaño y
características similares. Si el fusible continúa fallando,
suspenda el uso de este producto y solicite el servicio a
personal calificado.

8
Bluetooth Functions Función Bluetooth
Connecting via Bluetooth:
1. Ensure that the Bluetooth on your chosen host device is
turned on.
2. On your ECL loudspeaker, long press the Pair button for 2
seconds. The Pair blue LED should begin to flash rapidly.
3. Refresh the Bluetooth of your host device and look for “ECL
10.2, ECL 12.2, ECL 15.2 relevant to your ECL model, then
pair and connect with it.
4. Once the connection has been established, the Pair blue LED
of the Loudspeaker will remain lit continuously to indicate a
successful connection.
5. Ensure that your host device is playing music and that its
volume is not set to minimum.
6. When slowly increasing the level of the BT/AUX control of
the Loudspeaker you should hear your source music.
TWS (True Wireless Stereo) Connectivity
When connecting your host device to a single ECL loudspeaker
using Bluetooth, both the left and right channels of a stereo signal
will be combined and played through the single Loudspeaker.
However, using two ECL Loudspeakers, the TWS function allows
them both to be connected wirelessly as a stereo pair to the same
host Bluetooth device as described below. This assumes that both
Loudspeakers have been connected to AC power and are switched
on.
Note: The ECL Loudspeaker first paired to your host device will
become the Left stereo speaker.
1. Pair and connect the first ECL Loudspeaker to your host
device as described in the previous paragraph (connecting via
Bluetooth). This will become the Left speaker.
2. Switch on the second ECL Loudspeaker and set the BT/AUX
level to minimum.
3. Long press the Pair button on the second Loudspeaker for 2
seconds, the Pair blue LED should begin to flash rapidly.
4. On both loudspeakers, press the TWS button once. Their
TWS green LEDs should begin to flash rapidly.
5. On the first speaker, press the TWS button once more. the
TWS green LEDs on both loudspeakers should remain lit
constantly to indicate a successful TWS connection. The Pair
blue LED of the second speaker should no longer be lit.
6. Ensure that your host Bluetooth device is playing music and
that its volume is not set to minimum.
7. When slowly increasing the level of the BT/AUX control of
the Loudspeakers you should hear music from them both.
The volume of both speakers can be controlled by your host
device.
Conexión a través de Bluetooth:
1. Asegúrese de que el Bluetooth en su dispositivo host elegido
esté encendido.
2. En su altavoz ECL, mantenga presionado el botón “Pair”
durante 2 segundos. El LED azul Emparejar debería
comenzar a parpadear rápidamente.
3. Actualice el Bluetooth de su dispositivo anfitrión y busque
ECL 10.2, ECL 12.2, ECL 15.2 relevante para su modelo de
ECL, luego empareje y conéctese con él.
4. Una vez que se haya establecido la conexión, el LED azul
“Pair” del altavoz permanecerá encendido de forma continua
para indicar una conexión exitosa.
5. Asegúrese de que su dispositivo host esté reproduciendo
música y que su volumen no esté al mínimo.
6. Al aumentar lentamente el nivel del control BT/AUX del
altavoz, debe escuchar su música de origen.
Conectividad TWS (estéreo inalámbrico verdadero)
Al conectar su dispositivo host a un único altavoz ECL mediante
Bluetooth, los canales izquierdo y derecho de una señal estéreo se
combinarán y reproducirán a través del único altavoz.
Sin embargo, al utilizar dos altavoces ECL, la función TWS
permite que ambos se conecten de forma inalámbrica como un par
estéreo al mismo dispositivo Bluetooth anfitrión, como se describe
a continuación. Esto supone que ambos altavoces se han conectado
a la alimentación de CA y están encendidos.
Nota: El altavoz ECL emparejado primero con su dispositivo host
se convertirá en el altavoz estéreo izquierdo.
1. Empareje y conecte el primer altavoz ECL a su dispositivo
host como se describe en el párrafo anterior (conexión a
través de Bluetooth). Este se convertirá en el altavoz
izquierdo.
2. Encienda el segundo altavoz ECL y ajuste el nivel BT/AUX
al mínimo.
3. Mantenga presionado el botón “Pair” en el segundo altavoz
durante 2 segundos, el LED azul “Pair” debería comenzar a
parpadear rápidamente.
4. En ambos altavoces, presione el botón TWS una vez. Sus
LED verdes TWS deberían comenzar a parpadear
rápidamente. Una vez que se haya establecido la conexión, el
LED azul “Pair” del altavoz permanecerá encendido de
forma continua para indicar una conexión exitosa.
5. En el primer altavoz, presione el botón TWS una vez más. los
LED verdes de TWS en ambos altavoces deben permanecer
encendidos constantemente para indicar una conexión TWS
exitosa. El LED azul “Pair” del segundo altavoz ya no
debería estar encendido.
6. Asegúrese de que su dispositivo Bluetooth host esté
reproduciendo música y que su volumen no esté al mínimo
7. Al aumentar lentamente el nivel del control BT/AUX de los
altavoces, debe escuchar música de ambos. El volumen de
ambos altavoces puede ser controlado por su dispositivo.

9
Amplifier Functions Funciones del amplificador
ECL118S

10
Amplifier Functions Funciones del amplificador
1. OUTPUTS 1 & 2
When set to CROSSOVER, the XLR jacks will send the
signal coming from the input through the built-in crossover.
You can also select the crossover frequency. The output
signal should then be used to play the filtered frequencies
with your standard full-range speakers. When set to LINK,
the crossover function is disabled.
2. INPUTS 1 & 2
Combination inputs are designed for either TRS and XLR
balanced plugs at line level either from a mixer or another
speaker. The source can either be stereo or mono.
3. Crossover Link Selection Switch
Switches between the internal CROSSOVER or the LINK
mode to send the inputs directly to the outputs.
4. Crossover Switch Selector
This switch will determine the crossover point where the high
pass filter will be set to output high-frequency content to the
outputs. The lower frequencies under the crossover point will
be played by the internal speaker in the subwoofer.
5. LED Defeat Switch:
The front-mounted LED has two functions. This switch
toggles between those functions.
ON position: Front-mounted LED indicates when power is
on.
S/L position: Front-mounted LED indicates when the limiter
is engaged. (If the LED turns red in this position, the speaker
is distorting.)
6. Phase Selection Switch:
The Phase switch lets you alter the polarity of the input signal.
When the Phase switch is in its default "O" setting, phase is
unaffected.
7. Level:
This knob affects the volume of the internal speaker.
8. Signal Indicator:
The SIG/CLIP LED will light up BLUE when the speaker is
receiving a signal. If it is distorting, the LED will turn RED,
and the MASTER VOLUME should be turned down.
9. Power LED:
The Power LED indicates that the speaker's AC power cord is
connected to an electrical outlet, and the Power Switch is turned
down.
10. IEC Power Input:
Plug in the IEC AC cable here.
11. Fuse Carrier
Main fuse Housing.
12. Power Switch
Turns the speaker off.
13. Voltage Selector
Ensure the Switch is set to the correct AC voltage before
connecting or powering 120V-60Hz / 240V-50Hz.
1. SALIDAS 1 Y 2
Cuando seestablece en CROSSOVER, los jacks XLR enviarán
la señal proveniente de la entrada a través del crossover
incorporado. También puede seleccionar la frecuencia de
cruce. La señal de salida debe usarse para reproducir las
frecuencias filtradas con sus altavoces estándar de rango
completo. Cuando se establece en LINK, la función de cruce
está desactivada.
2. ENTRADAS 1 y 2
Las entradas combinadas están diseñadas para conectores
balanceados TRS y XLR a nivel de línea, ya sea desde un
mezclador u otro altavoz. La fuente puede ser estéreo o mono
3. Interruptor de selección de enlace Crossover
Cambia entre el modo CROSSOVER o LINK interno para
enviar las entradas directamente a las salidas
4. Selector de interruptor de Crossover
Este interruptor determinará el punto de cruce donde se
establecerá el filtro de paso alto para enviar contenido de alta
frecuencia a las salidas. Las frecuencias más bajas debajo del
punto de cruce serán reproducidas por el altavoz interno del
subwoofer.
5. Interruptor de desactivación de LED:
El LED montado en la parte delantera tiene dos funciones.
Este interruptor alterna entre esas funciones.
Posición ON: El LED montado en la parte delantera indica
cuando está encendido.
Posición S/L: El LED montado en la parte delantera indica
cuando el limitador está activado. (Si el LED se vuelve rojo
en esta posición, el altavoz está distorsionando)
6. Interruptor de selección de fase:
El interruptor de fase le permite alterar la polaridad de la señal
de entrada. Cuando el interruptor de fase está en su
configuración predeterminada "O", la fase no se ve afectada.
7. Nivel:
Esta perilla afecta el volumen del altavoz interno.
8. Indicador de señal:
LED SIG/CLIP se iluminará en AZUL cuando el altavoz esté
recibiendo una señal. Si se está distorsionando, el LED se
volverá ROJO y el VOLUMEN MAESTRO se debe bajar
9. LED de encendido:
El LED de encendido indica que el cable de alimentación de
CA del altavoz está conectado a un tomacorriente y el
interruptor de encendido está apagado.
10. Entrada de alimentación IEC:
Enchufe el cable de CA IEC aquí
11. Portafusibles
Caja del fusible principal.
12. Interruptor de encendido
Apaga el altavoz.
13. Selector de voltaje
Asegúrese de que el interruptor esté configurado en el voltaje
de CA correcto antes de conectar o alimentar 120V-60 Hz /
240V-50 Hz.

11
Troubleshooting Solución de problemas
No sound from the loudspeaker
a) Check that the AC power cord is securely connected to
a known live outlet which is switched ON.
b) Make that all input cables are connected, and that
source device is playing and its volume is not set to
minimum.
c) Make sure the relevant input control of the loudspeaker
volume is not set to minimum.
Loudspeaker has hum or buzz
a) Check the input source device is playing, correctly
connected and that its volume is not set to minimum.
b) If a microphone is connected, turn down the speaker
input level and try disconnecting then reconnecting the
microphone.
c) Is there a faulty cable or connector? Try gently moving
each one in turn and check if the hum or buzz changes.
No sound or low volume from the Microphone
a) Make sure the Microphone or microphone system is
switched on.
b) Check that the relevant Mic/ Line input of the
loudspeaker is switched to Mic
c) Try adjusting the MIC/LINE level of the loudspeaker or
external volume level of the microphone or microphone
system.
Squealing, howling, or distorted sound from the Microphone
a) Try reducing the MIC/LINE level of the loudspeaker or
external volume level of the microphone or microphone
system.
b) Move the microphone away from, or out of direct line
of the loudspeaker.
c) Try reducing the Master EQ Treble control of the
loudspeaker.
Sound breaks up intermittently or is distorted
a) The input level may be too high causing the SIG/LIMIT
LED to light RED - Try reducing all level controls
b) Is there a faulty cable or connector? Try gently moving
each one in turn and check if the hum or buzz changes.
No hay sonido del altavoz
a) Verifique que el cable de alimentación esté firmemente
conectado a un tomacorriente conocido que esté
encendido.
b) Asegúrese de que todos los cables de entrada estén
conectados, que el dispositivo fuente esté
reproduciendo y que su volumen no esté al mínimo.
c) Asegúrese de que el control de entrada correspondiente
del volumen del altavoz no esté ajustado al mínimo.
El altavoz tiene un zumbido
a) Verifique que el dispositivo fuente de entrada esté
reproduciendo correctamente
b) conectado y que su volumen no está al mínimo.
c) Si hay un micrófono conectado, baje el nivel de entrada
del altavoz e intente desconectar y volver a conectar el
micrófono.
d) ¿Hay algún cable o conector defectuoso? Intente mover
suavemente cada uno por turno y verifique si el
zumbido cambia.
No hay sonido o el volumen es bajo desde el micrófono
a) Asegúrese de que el micrófono o el sistema de
micrófono esté encendido.
b) Verifique que la entrada de Micrófono/Línea relevante
del altavoz esté cambiada a Micrófono
c) Intente ajustar el nivel MIC/LINE del altavoz o el nivel
de volumen externo del micrófono o sistema de
micrófono.
Chirrido, aullido o sonido distorsionado del micrófono
a) Intente reducir el nivel MIC/LINE del altavoz o el nivel
de volumen externo del micrófono o sistema de
micrófono.
b) Mueva el micrófono lejos o fuera de la línea directa del
altavoz.
c) Intente reducir el control Master EQ Treble del altavoz.
El sonido se interrumpe de forma intermitente o está
distorsionado
a) El nivel de entrada puede ser demasiado alto, lo que
hace que el LED SIG/LIMIT se ilumine en ROJO.
Intente reducir todos los controles de nivel.
b) ¿Hay algún cable o conector defectuoso? Intente mover
suavemente cada uno por turno y verifique si el
zumbido cambia.

12
Specifications Especificaciones
Model
ECL10.2
ECL12.2
ECL15.2
ECL118S
Inputs
Bal XLR/TRS 6.35/
AUX/ Bluetooth
Bal XLR/TRS 6.35/
AUX/ Bluetooth
Bal XLR/TRS 6.35/
AUX/ Bluetooth
2 XLR / TRS LINE input
Outputs
Balanced XLR / TWS
Balanced XLR / TWS
Balanced XLR / TWS
2 XLR line output
Power output
225W (LF) + 75W (HF) RMS
675W (LF) + 225W (HF) Peak
300W(LF) + 100W(HF) RMS
900W (LF) + 300W (HF) Peak
300W(LF) + 100W(HF) RMS
900W (LF) + 300W (HF) Peak
600W RMS
1800W PEAK
Bluetooth version
5.0 –True Wireless Stereo
5.0 –True Wireless Stereo
5.0 –True Wireless Stereo
N/A
Power input
100V/240V ~50/60Hz
switchable
100V/240V ~50/60Hz
switchable
100V/240V ~50/60Hz
switchable
100V/240V ~50/60Hz
switchable
Features
LF:CLASS-D HF:CLASS-AB
LF:CLASS-D HF:CLASS-AB
LF:CLASS-D HF:CLASS-AB
Class D+ switching power design,
Phase switchable (0/180°), LED
power/signal/clip indicator, Crossover
design for satellite (90Hz or120Hz)
Signal processing
DSP
DSP
DSP
N/A
DSP Parameter
Standard/VocalBoost/
Live/Stage monitor
Standard/VocalBoost/
Live/Stage monitor
Standard/VocalBoost/
Live/Stage monitor
N/A
EQ
Bass/Treble
Bass/Treble
Bass/Treble
N/A
Frequency Range
60-20K Hz
55-20K Hz
45-20K Hz
35-150Hz
Maxoutput SPL
123dB
125dB
126dB
125dB
Impedance
LF 4
/HF 8
LF 4
/HF 8
LF 4
/HF 8
8
Driver
1” Exit – 1” VC Compression
driver
1” Exit – 1.35” VC
Compression driver
1” Exit – 1.35” VC Compression
driver
N/A
Woofer
10'' (1.5” VC) Woofer
12'' (2” VC) Woofer
15” (2.5” VC) Woofer
18”(3”VC) Woofer
Cabinet
HPP molded cabinet
HPP molded cabinet
HPP molded cabinet
Plywood with black painted finish
Pole mount
35mm stand pole
35mm stand pole
35mm stand pole
35mm stand pole
Dims / Weight
15.6” x 14.4” x 22.2” / 26.5 lbs.
395x365x565mm/ 12 kg
18.1” x 16.9” x 26” / 38.6 lbs.
460x430x660mm/ 17.5 kg
21.9” x 19.7” x 30.1” / 49 lbs.
530x500x765mm/ 22.2 kg
291”x 25”x 30.1”/ 97 lbs.
740mm x 635mm x 765mm / 44 kg
This manual suits for next models
3
Table of contents
Languages:
Other Soundbarrier Speakers manuals
Popular Speakers manuals by other brands
Sigberg Audio
Sigberg Audio SBS.1 user manual
PRESONUS
PRESONUS Eris E5 BT owner's manual
Cambridge Audio
Cambridge Audio incognito ES10 installation guide
System Sensor
System Sensor SpectrAlert SP300 Series Installation and maintenance instructions

Muse
Muse M-1650 SBT user manual
DS18
DS18 NXL-X8TPNEO owner's manual

