Soundstage STAGE SUB 15 User manual

STAGE SUB 8 STAGE SUB 10 STAGE SUB 12 STAGE SUB 15
PoweredSubwooferInstructionManual
CaissonSous-GraveAmplifiéManueldeInstruction
Félicitations…
…pour avoir choisi le caisson sous-graves amplifié
STAGE SUB 8, STAGE SUB 10c, STAGE SUB 12 ou STAGE
SUB15deSoundstage.
Quand utilisé avec votre système audio ou cinéma-
maison, le STAGE SUB 8, STAGE SUB 10, STAGE SUB 12
ouSTAGE SUB 15 vous livrera tout le réalisme et la
passionprésentedanslamusiqueetlesbandessonores
numériques des films et disques compacts
d’aujourd’hui.
Votre sous-grave Soundstage a été conçue pour être
facile à installer et vous donner des années de plaisir
d'écoute sans panne. Cependant, nous recommandons
que vous lisez soigneusement ce manuel d'instruction
avant l’installation, et de sauvegarder votre facture
d’achat dans l'événement peu probable que votre
enceinte exige de l'entretien. Les enceintes Soundstage
sontcouvertparuneguarantiede5anssurlespièceset
la main-d’oeuvre, les amplificateurs dans les sous-
graves et colonnes Soundstage sont couverts par une
garantiedeunan.
Congratulations…
…for purchasing the STAGE SUB 8, STAGE SUB 10,
STAGESUB12or STAGESUB15
When used with your current Audio/Home-Theatre
system, the STAGE SUB 8, STAGE SUB 10, STAGE SUB 12
or STAGE SUB 15 subwoofers will deliver all the realism
andexcitementpresentintoday’smusicandfilmdigital
soundtracks.
Thesesubwoofershavebeendesignedtogiveyoumany
years of trouble-free listening enjoyment. Though easy
to install, we recommend that you read carefully
throughthisinstructionmanual,andtosaveyourbillof
sale in the unlikely event that your subwoofer requires
servicing. Soundstage provides a 5 year parts and
labour warranty on all drivers, 1 year on speaker and
subwooferamplifiers.
1. Read Instructions - All the safety and operation instructions should be read before the subwoofer is operated.
2. Retain Instructions - The safety and operating instructions should be kept for future reference.
3. Heed Warnings - All warnings on the subwoofer and in these operating instructions should be followed.
4. Follow Instructions - All operating and other instructions should be followed.
5. Water and Moisture - The subwoofer should not be used near water. For example, near a bathtub, washbowl, kitchen sink, laundry tub, in a
wet basement or near a swimming pool.
6. Ventilation - The subwoofer should be situated so that its location or position does not interfere with its proper ventilation. For example, the
system should not be situated on a bed, sofa, rug or similar surface that may block airflow past the rear heatsinks; or placed in a built-in
installation such as a bookcase or cabinet that may impede the flow of air past the heatsinks.
7. Heat - The subwoofer should be situated away from heat sources such as radiators, heaters, furnace outflow vents or other devices which
produce heat.
8. Power Sources - The subwoofer should be connected to a power supply only of the type described in these operation instructions or as
marked on the Component.
9. Grounding or Polarization - The subwoofer is equipped with a polarized alternating-current line plug (a plug having one blade wider than
the other). This plug will fit into the power outlet only one way. This is an intentional safety feature. If you are unable to insert the plug fully into
the outlet, try reversing the plug. If the plug should still fail to fit, contact an electrician to replace the obsolete (unpolarized) outlet. Do not defeat
the safety purpose of the polarized plug.
10. Power Cord Protection - Power supply cords should be routed so that they are not likely to be walked upon or pinched by items placed
upon or against them. Pay particular attention to cords at plugs, convenience receptacles, and the point where they exit the subwoofer.
To prevent electric shock, do not use the subwoofer polarized plug with an extension cord, receptacle or other outlet unless the blades can be
fully inserted to prevent blade exposure.
11. Nonuse Periods - The power cord of the subwoofer should be unplugged from the outlet when left unused for a long period of time.
12. Damage Requiring Service - The subwoofer should be serviced only by qualified service personnel when:
A. subwoofer power supply cord or the plug has been damaged; or
B. Objects have fallen or liquid has spilled into the subwoofer; or
C. The subwoofer has been exposed to rain; or
D. The subwoofer does not appear to operate or exhibits a marked change in performance; or
E. The subwoofer has been dropped or damaged.
13. Servicing - The user should not attempt to service the subwoofer beyond those means described in this operating manual. All other
servicing should be referred to an authorized Service Center.
14. Cleaning - Unplug the subwoofer from the wall outletbefore cleaning. Do not use liquid cleaners or aerosol cleaners. Use a damp cloth for
cleaning.
15. Attachments - Do not use attachments not recommended as they may cause hazards.
16. Accessories - Do not place the subwoofer on an unstable cart, stand, tripod, bracket, or table. The subwoofer may fall, causing serious
injury to a child or adult, and serious damage to the product. Use only with a cart, stand, tripod, bracket or table recommended by manufacturer,
or sold with the product. Any mounting of the subwoofer should follow manufacturer's instructions, and should use a mounting accessory
recommended by manufacturer.
An subwoofer and cart combination should be moved with care. Quick stops, excessive force, and uneven surfaces may cause the product and
cart combination to overturn.
17. Lightning - For added protection for the subwoofer during a lightning storm, or when it is left unattended and unused for long periods of
time, unplug it from the wall outlet.
18. Overloading - Do not overload wall outlets, extension cords, or integral convenience receptacles as this can result in a risk of fire or electric
shock.
19. Safety Check - Upon completion of any service or repairs to this product, ask the service technician to perform safety checks to determine
that the product is in proper operating condition.
20. Servicing - Do not attempt to service the subwoofer yourself as opening or removing covers may expose you to dangerous voltages or other
hazards. Refer all servicing to qualified service personnel.
21. Replacement Parts - When replacement parts are required, be sure the service technician has used replacement parts specified by
manufacturer or have the same characteristics as the original part. Unauthorized substitutions may result in fire, electric shock, or other hazards.
22. Wall or Ceiling Mounting - The product should be mounted to a wall or ceiling only as recommended by manufacturer.
23. Object and Liquid Entry - Never push objects of any kind into this product through openings, as they may touch dangerous voltage points or
short-out parts that could result in a fire or electric shock. Never spill liquid of any kind on the product.
WARNING - To reduce the risk of fire or electric shock, do not expose this appliance to rain or moisture.
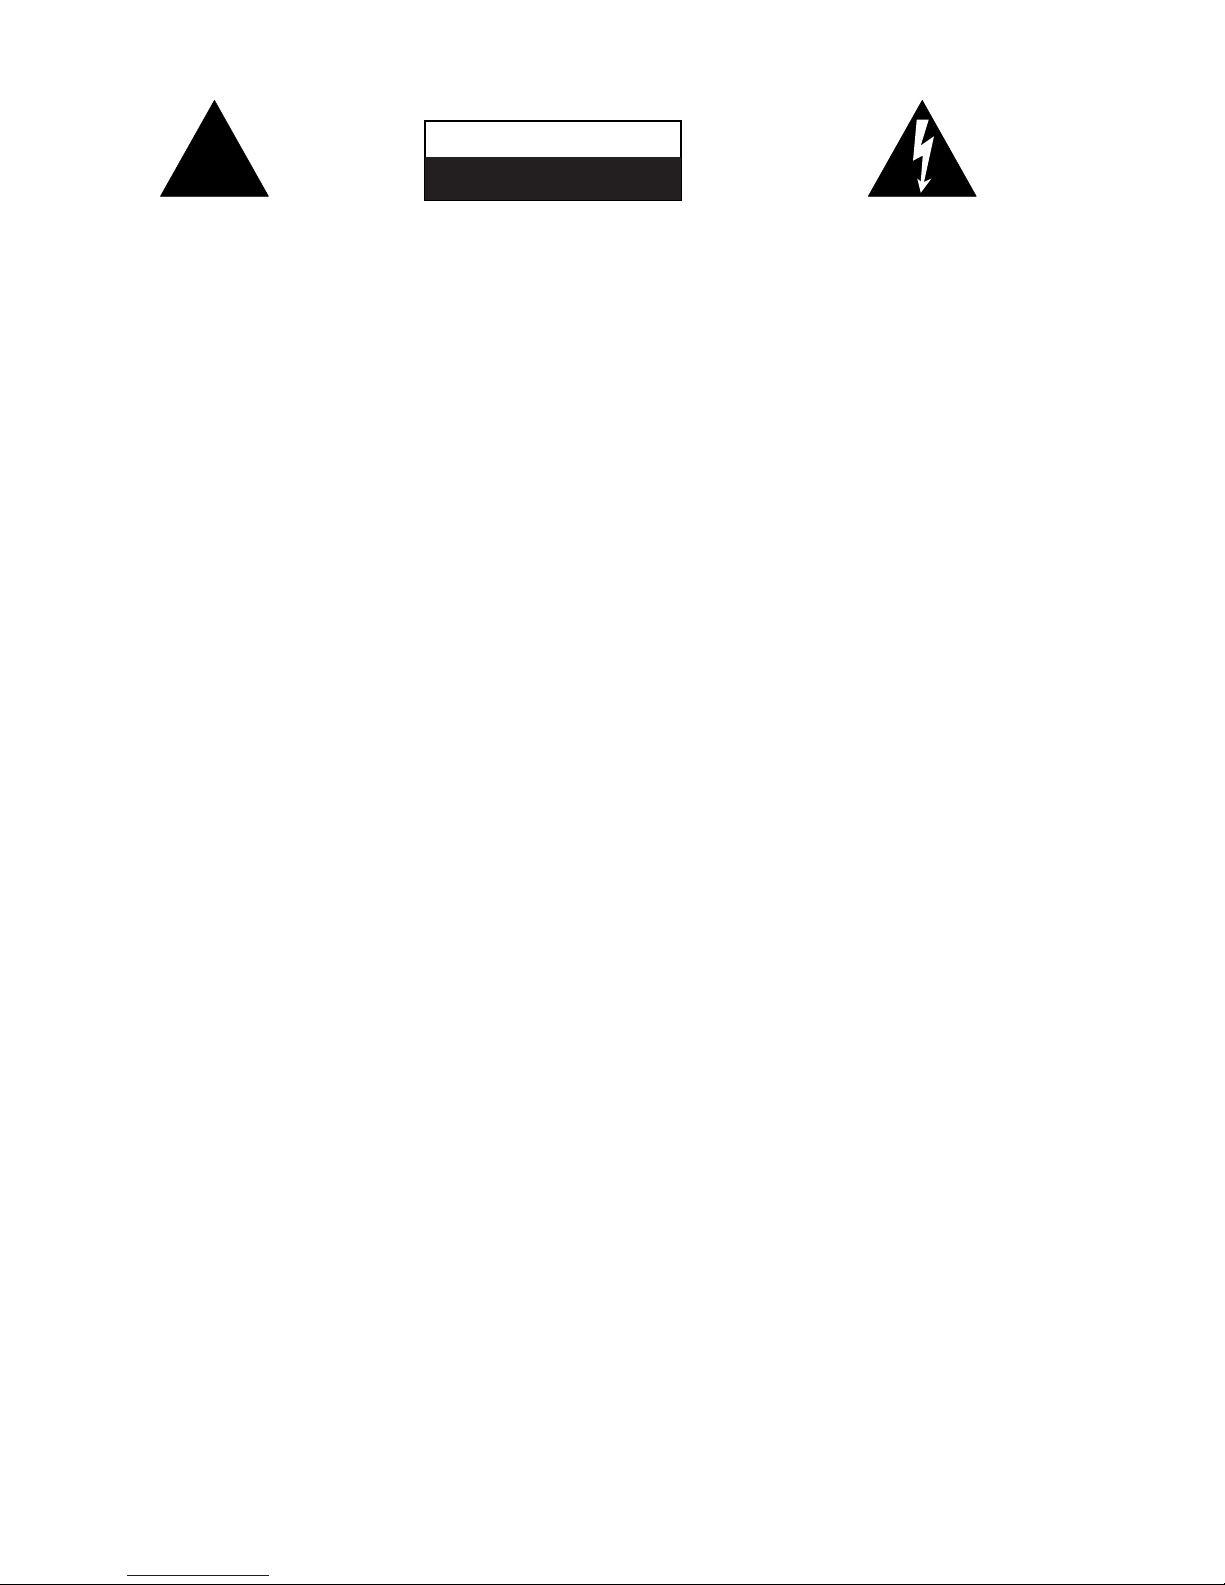
The exclamation point within an
equilateral triangle is intended to alert
the user of the presence of important
operating and maintenance (servicing)
instructions in the literature
acompanying the appliance.
CAUTION:
TO PREVENT THE RISK OF ELECTRIC
SHOCK, DO NOT REMOVE COVER (OR
BACK). NO USER SERVICABLE PARTS
INSIDE. REFER SERVICING TO
QUALIFIED SERVICE PERSONNEL.
The lightning flash with arrowhead, within an
equilateral triangle, is intended to alert the user of
the presence of uninsulated "dangerous voltage"
within the product's enclosure that may be of
sufficient magnitude to constitute a risk of electric
shock to persons.
IMPORTANT SAFETY PRECAUTIONS
CAUTION
RISK OF ELECTRIC SHOCK
DO NOT OPEN
!

1. Read Instructions - All the safety and operation instructions should be read before the subwoofer is operated.
2. Retain Instructions - The safety and operating instructions should be kept for future reference.
3. Heed Warnings - All warnings on the subwoofer and in these operating instructions should be followed.
4. Follow Instructions - All operating and other instructions should be followed.
5. Water and Moisture - The subwoofer should not be used near water. For example, near a bathtub, washbowl, kitchen sink, laundry tub, in a
wet basement or near a swimming pool.
6. Ventilation - The subwoofer should be situated so that its location or position does not interfere with its proper ventilation. For example, the
system should not be situated on a bed, sofa, rug or similar surface that may block airflow past the rear heatsinks; or placed in a built-in
installation such as a bookcase or cabinet that may impede the flow of air past the heatsinks.
7. Heat - The subwoofer should be situated away from heat sources such as radiators, heaters, furnace outflow vents or other devices which
produce heat.
8. Power Sources - The subwoofer should be connected to a power supply only of the type described in these operation instructions or as
marked on the Component.
9. Grounding or Polarization - The subwoofer is equipped with a polarized alternating-current line plug (a plug having one blade wider than
the other). This plug will fit into the power outlet only one way. This is an intentional safety feature. If you are unable to insert the plug fully into
the outlet, try reversing the plug. If the plug should still fail to fit, contact an electrician to replace the obsolete (unpolarized) outlet. Do not defeat
the safety purpose of the polarized plug.
10. Power Cord Protection - Power supply cords should be routed so that they are not likely to be walked upon or pinched by items placed
upon or against them. Pay particular attention to cords at plugs, convenience receptacles, and the point where they exit the subwoofer.
To prevent electric shock, do not use the subwoofer polarized plug with an extension cord, receptacle or other outlet unless the blades can be
fully inserted to prevent blade exposure.
11. Nonuse Periods - The power cord of the subwoofer should be unplugged from the outlet when left unused for a long period of time.
12. Damage Requiring Service - The subwoofer should be serviced only by qualified service personnel when:
A. subwoofer power supply cord or the plug has been damaged; or
B. Objects have fallen or liquid has spilled into the subwoofer; or
C. The subwoofer has been exposed to rain; or
D. The subwoofer does not appear to operate or exhibits a marked change in performance; or
E. The subwoofer has been dropped or damaged.
13. Servicing - The user should not attempt to service the subwoofer beyond those means described in this operating manual. All other
servicing should be referred to an authorized Service Center.
14. Cleaning - Unplug the subwoofer from the wall outletbefore cleaning. Do not use liquid cleaners or aerosol cleaners. Use a damp cloth for
cleaning.
15. Attachments - Do not use attachments not recommended as they may cause hazards.
16. Accessories - Do not place the subwoofer on an unstable cart, stand, tripod, bracket, or table. The subwoofer may fall, causing serious
injury to a child or adult, and serious damage to the product. Use only with a cart, stand, tripod, bracket or table recommended by manufacturer,
or sold with the product. Any mounting of the subwoofer should follow manufacturer's instructions, and should use a mounting accessory
recommended by manufacturer.
An subwoofer and cart combination should be moved with care. Quick stops, excessive force, and uneven surfaces may cause the product and
cart combination to overturn.
17. Lightning - For added protection for the subwoofer during a lightning storm, or when it is left unattended and unused for long periods of
time, unplug it from the wall outlet.
18. Overloading - Do not overload wall outlets, extension cords, or integral convenience receptacles as this can result in a risk of fire or electric
shock.
19. Safety Check - Upon completion of any service or repairs to this product, ask the service technician to perform safety checks to determine
that the product is in proper operating condition.
20. Servicing - Do not attempt to service the subwoofer yourself as opening or removing covers may expose you to dangerous voltages or other
hazards. Refer all servicing to qualified service personnel.
21. Replacement Parts - When replacement parts are required, be sure the service technician has used replacement parts specified by
manufacturer or have the same characteristics as the original part. Unauthorized substitutions may result in fire, electric shock, or other hazards.
22. Wall or Ceiling Mounting - The product should be mounted to a wall or ceiling only as recommended by manufacturer.
23. Object and Liquid Entry - Never push objects of any kind into this product through openings, as they may touch dangerous voltage points or
short-out parts that could result in a fire or electric shock. Never spill liquid of any kind on the product.
WARNING - To reduce the risk of fire or electric shock, do not expose this appliance to rain or moisture.
The exclamation point within an
equilateral triangle is intended to alert
the user of the presence of important
operating and maintenance (servicing)
instructions in the literature
acompanying the appliance.
CAUTION:
TO PREVENT THE RISK OF ELECTRIC
SHOCK, DO NOT REMOVE COVER (OR
BACK). NO USER SERVICABLE PARTS
INSIDE. REFER SERVICING TO
QUALIFIED SERVICE PERSONNEL.
The lightning flash with arrowhead, within an
equilateral triangle, is intended to alert the user of
the presence of uninsulated "dangerous voltage"
within the product's enclosure that may be of
sufficient magnitude to constitute a risk of electric
shock to persons.
IMPORTANT SAFETY PRECAUTIONS
CAUTION
RISK OF ELECTRIC SHOCK
DO NOT OPEN
!
Ce symbole de sécurité vise à avertir
l’utilisateur que la notice jointe à l’ap-
pareil contient des instructions impor-
tantes au sujet du fonctionnement et de
l’entretien (réparation).
Ce symbole de sécurité vise à avertir l’utilisateur
que le boîtier contient un voltage dangereux non
isolé, suffisamment puissant pour constituer un
risque d’électrocution.
IMPORTANTES MESURES DE SÉCURITÉ
ATTENTION :
Pour prévenir les risques d’électrocution, ne
pas ouvrir le boîtier. Aucune pièce ne peut
être réparée par l’utilisateur. Ne confier l’en-
tretien qu’à un personnel qualifié.
1. Lisez les instructions - Vous devez lire toutes les instructions relatives à la sécurité et au fonctionnement avant de faire fonctionner le haut-parleur d’extrêmes
graves.
2. Conservez les instructions - Vous devez conserver les instructions relatives à la sécurité et au fonctionnement pour des consultations ultérieures.
3. Avertissement - Vous devez suivre tous les avertissements apposés sur le haut-parleur d’extrêmes graves et dans les instructions relatives à son fonctionnement.
4. Suivez les instructions - Vous devez suivre toutes les instructions relatives au fonctionnement du haut-parleur.
5. Eau et humidité - Vous ne devez pas utiliser le haut-parleur d’extrêmes graves près d’une source d’eau. Par exemple, ne le placez pas à côté d’un bain, d’un évier,
d’un lavabo ou d’une cuvette, dans un sous-sol humide ou près d’une piscine.
6. Ventilation - Vous devez placer le haut-parleur d’extrêmes graves de manière à ce que sa position ne gêne pas son système d’aération. Par exemple, ne le placez
pas sur un lit, un fauteuil, un tapis ou une surface semblable qui pourrait bloquer l’écoulement d’air provenant du dissipateur thermique arrière, ou dans un meuble
tel une bibliothèque ou un module.
7. Chaleur - Vous devez éviter de placer le haut-parleur d’extrêmes graves près d’une source de chaleur tel un radiateur, une chaufferette, des ouvertures d’aération
ou tout autre appareil qui produit de la chaleur.
8. Sources d’alimentation - Vous devez raccorder le haut-parleur d’extrêmes graves à une source d’alimentation du type décrit dans ce manuel d’instructions ou tel
qu’indiqué sur le produit.
9. Mise à la terre ou polarisation - Ce haut-parleur d’extrêmes graves est muni d’une fiche de courant alternatif polarisée (une prise possédant une lame plus large
que l’autre). Cette fiche s’insère d’une seule façon dans la prise de courant. Il s’agit d’une mesure de sécurité volontaire. Si vous êtes incapable d’insérer complète
ment la fiche dans la prise de courant, inversez la fiche. S’il est toujours impossible de l’insérer dans la prise, appelez un électricien pour faire remplacer la prise
obsolète(non polarisée). Ne retirez pas l’élément de sécurité de la prise polarisée.
10. Protection du cordon d’alimentation - Vous devez placer le cordon d’alimentation de manière à ce qu’il ne soit pas écrasé ou coincé par d’autres éléments.
Portez une attention particulière aux cordons raccordés à une prise, à une prise de courant de service ainsi qu’à son point de sortie du haut-parleur d’extrêmes
graves. Pour prévenir les électrocutions, n’utilisez pas la prise polarisée du haut-parleur avec une rallonge, une prise ou toute autre sortie de courant, sauf si les
lames peuvent être entièrement insérées sans laisser aucune partie à découvert.
11. Période de non utilisation - Vous devez débrancher de la prise le cordon d’alimentation du haut-parleur si vous ne l’utilisez pas pendant une longue période.
12. Dommages nécessitant une réparation - Vous devez faire réparer le haut-parleur par un professionnel lorsque :
A. le cordon d’alimentation ou la prise du haut-parleur a été endommagé;
B. un objet ou un liquide est tombé sur le haut-parleur;
C. le haut-parleur a été exposé à la pluie;
D. le haut-parleur ne semble pas fonctionner ou que son rendement est altéré;
E. le haut-parleur a été échappé ou endommagé.
13. Réparation - L’utilisateur ne devrait pas essayer de réparer le haut-parleur lui-même, sauf dans les situations décrites dans ce manuel d’utilisation.Toute autre
réparation devrait être confiée à un centre de réparation autorisé.
14. Nettoyage - Débranchez le haut-parleur de la prise de courant murale avant de le nettoyer. N’utilisez pas de nettoyants liquides ou de nettoyants en aérosol.
Nettoyez-le avec un chiffon humide.
15. Accessoires - N’utilisez pas des accessoires qui ne sont pas recommandés pour ce produit, car il pourraient devenir une source de danger.
16. Support - Ne placez pas le haut-parleur sur un chariot, un support, un trépied, une tablette ou une table instable. Le haut-parleur pourrait tomber et causer des
blessures graves à un enfant ou à un adulte, et endommager considérablement le produit. N’utilisez qu’un chariot, un support, un trépied, une tablette ou une table
recommandé par le fabricant ou vendu avec le produit. Toute installation du haut-parleur devrait se faire conformément aux directives du fabricant, et avec un
support recommandé par le fabricant. Si vous placez le haut-parleur sur un chariot, déplacez-le avec soin. Des arrêts brusques, une force excessive et des surfaces iné
gales pourraient faire basculer le chariot et le haut-parleur.
17. Orage - Pour une protection additionnelle du haut-parleur durant un orage ou lorsque vous ne l’utilisez pendant une longue période, débranchez-le de la prise de
courant murale.
18. Surcharge - Ne surchargez pas les prises murales, les cordons d’alimentation ou les prises de courant de service intégrales, car ceci pourrait entraîner des risques d’in
cendie ou d’électrocution.
19. Vérification de sécurité - Après avoir fait réparer ce produit, demandez à un technicien d’effectuer des vérifications de sécurité pour déterminer si le produit est
en bonne condition de fonctionnement.
20. Réparation - N’essayez pas de réparer vous-même le haut-parleur, car le fait d’ouvrir ou de retirer le couvercle pourrait vous exposer à un voltage dangereux ou à
d’autres dangers. Confiez toute réparation du produit à un professionnel.
21. Pièces de rechange - Si vous devez remplacer une pièce, assurez-vous que le technicien utilise une pièce de rechange précisée par le fabricant ou que cette pièce
comporte les mêmes caractéristiques que la pièce originale. Des pièces de rechange non autorisées peuvent entraîner un incendie, une électrocution ou d’autres
dangers.
22. Installation sur un mur ou au plafond - Ce produit peut-être installé sur un mur ou sur un plafond en suivant les recommandations du fabricant seulement.
23. Infiltration d’un objet ou d’un liquide - N’insérez jamais un objet par les ouvertures de ce produit, car il pourrait toucher des points de voltage dangereux ou provo-
quer un court-circuit et ainsi entraîner un incendie ou une électrocution. Ne renversez jamais un liquide sur ce haut-parleur.
AVERTISSEMENT -Pour réduire les risques d’incendie ou d’électrocution, n’exposez pas cet appareil à la pluie ou à l’humidité.

SafetyInstructions
•Werecommendthat thesubwooferbeunplugged fromthe wall
duringlightning storms,andwhennot usedfor anextended
periodof time.
•Donotusewhereverthere isa riskthat thesubwoofermaycome
intocontactwithwateror excessive moisturesuch asnear pools,
bathtubsand wetbasements.
•Inthe eventof amalfunction, donot attempttoservicetheproduct
yourself. Pleasecontactyour Soundstagedealer.
Before making connections to your receiver/processor, please make
sure the subwoofer is unplugged from the wall and that your
audio/video receiver or surround processor is in the off position.
Informationdesécurité
•Nousrecommandonsque lecaissonsoit débranchédumur
pendantles oragesdefoudre,et quandnon utilisépendant une
périodeétendue.
•N'utilisezpas oùil ya risque quele caissonpuisseveniren
contactavecl'eau oudans desemplacements excessivement
humides,tellequeprochedes piscines,des baignoiresoudans
dessous-solstrèshumides.
•Encasd'une pannede fonctionnement,n'essayezpasd'entretenir
leproduitvous-même. Veuillezcontactervotremarchandautorisé
Soundstage.
Avant d'établir les raccords à votre récepteur/processeur, assurez-vous
que le caisson est débranché du mur et que votre récepteur audio/
vidéo ou votre processeur est dans la position ‘Off’.
Étape1
Placementducaisson
Les sonsde bassesfréquencessonts non-directionnels.Cecidonneaucaisson
sous-graveunegrandeflexibilitédans sonemplacement, carilest difficilepour
l'oreillehumainedediscernéoù lessons debassesfréquencesorigine.Cependant,
dansle casidéal,lecaissonsous-graveseraplacéaumêmeplanqueles haut-
parleursprincipaux dedroite/gauche.
Conseil pratique pour le placement:
Laprésencedebasses fréquencesvarieselon l’emplacementducaisson.Pourune
plusgrandeprésencede basses,placezle caissonprèsd’un mur. Leplacement du
caissonsous-gravedansuncoinde lasalle augmenteraconsidérablementlasor-
tiedes bassesfréquences.
Ne bloquez pas l’évent accordé.
Step1
SubwooferPlacement
Low frequencysound isgenerallynon-directional.Thisallows forgreatflexibility
whenplacing thesubwoofer,as itisdifficultforthe earto discernwherethe low
frequencysoundoriginates.Ideally,however,thesubwooferwillbeplacedonthe
sameplane asthe mainleft/right speakers.
Do notblock thetuned port.
Placement Tip:
Bassoutput varieswithposition. Formorebass output,placethesubwoofernear
awallboundary. Placingthe subwoofercloserto acorner ofthe roomwill
increasethebassoutputconsiderably.

Step2
ConnectingTheSubwoofer
A)LineLevelConnection(known as"Low-Level"):Connectthe audio/videoreceiv-
eror processor’ssubwooferoutput,to theSoundstageSubwoofer’s L/Ror LFELine
Levelinput.
B) Speaker Level Connection (known as "High-Level"). Connect the audio/video
receiver’s Left/Right main channel outputs to the Soundstage L/R Speaker Level
Inputs. Make sure to connect "+" (Red) to "+" ( Red), and "-" ( Black) to "-" (Black).
(Optionally, youmay connectyourLeft/Rightspeakersasshownbelow).
High-Level connection Tip:
When using small satellite speakers, connecting the Soundstage subwoofer with
theSpeakerLevelinputsandthenconnectingL/Rsatellitestothe"Speakerout"will
automaticallylimitthelowfrequencysenttothesmallspeakerswiththehigh-pass
filterbuiltinto the Soundstage subwoofer.Thisishelpful to small speakers,in that
theywill then not be required to reproduce frequencies that may be beyond their
operatingrange.
You may now plug your subwoofer’s power cord to the A/C wall outlet.
Youarenowreadyto useyour newSoundstagesubwoofer.
Étape2
Reliezlecaissonsous-grave
A)Raccordementavec l’entrée debas niveau(RCA) ("Low levelin"):Reliezla sortie
RCAcaissonsous-gravedurécepteurou leprocesseuraudio/vidéo,à l'entréede
basniveauducaisson.
B) Raccordement avec l’entrée de niveau haut-parleur (Spkr-in): Reliez les sorties
principales droite/gauche du récepteur audio/vidéo aux entrées de niveau haut-
parleur(Spkr-in)droit/gauche.Assurez-vousde bienrelierla borne "+" (rouge) à "
+"(rouge),etlaborne"-" (noir) à" -" (noir).
Conseil pratique pour le raccordement avec niveau haut-parleur:
Sivousutilisezdeshaut-parleurssatellitesdepetitetaille,vouspouvezrelierlesous
grave avec l’entrée de niveau haut-parleur, et puis relier les satellites de
gauche/droit à la sortie de niveau haut-parleur. Ceçi à pour effet de limiter
automatiquementlesbassesfréquencesenvoyéesauxsatellitesaveclefiltrepasse-
haut intégrédu caisson. Dans ce cas, les haut-parleurs ne seront pas exigés de
reproduire des fréquences qui peuvent être au-delà de leur plage de fonction-
nement.
Vous pouvez maintenant brancher le cordon AC du caisson à la prise
murale.
Vousêtes maintenantprêtàutiliser votrenouveaucaissonsous-grave.
SubwooferLine-Level/Low-LevelInput Entrée sous-gravedebas niveau
Étape3
Utilisation
A)Commutateur‘On/Off’:
Votrecaissonsous-graveauncommutateurdemiseenfonction(On/Off).Unefois
reliéàvotrerécepteuretbranchéàlaprisemurale,lecaissonsemettraenfonction
automatiquementaussitôt qu’il détecteunsignal devotrerécepteur. Le caissonse
mettrahorscircuitaprèsundélais d’environ5minutes sanssignal.
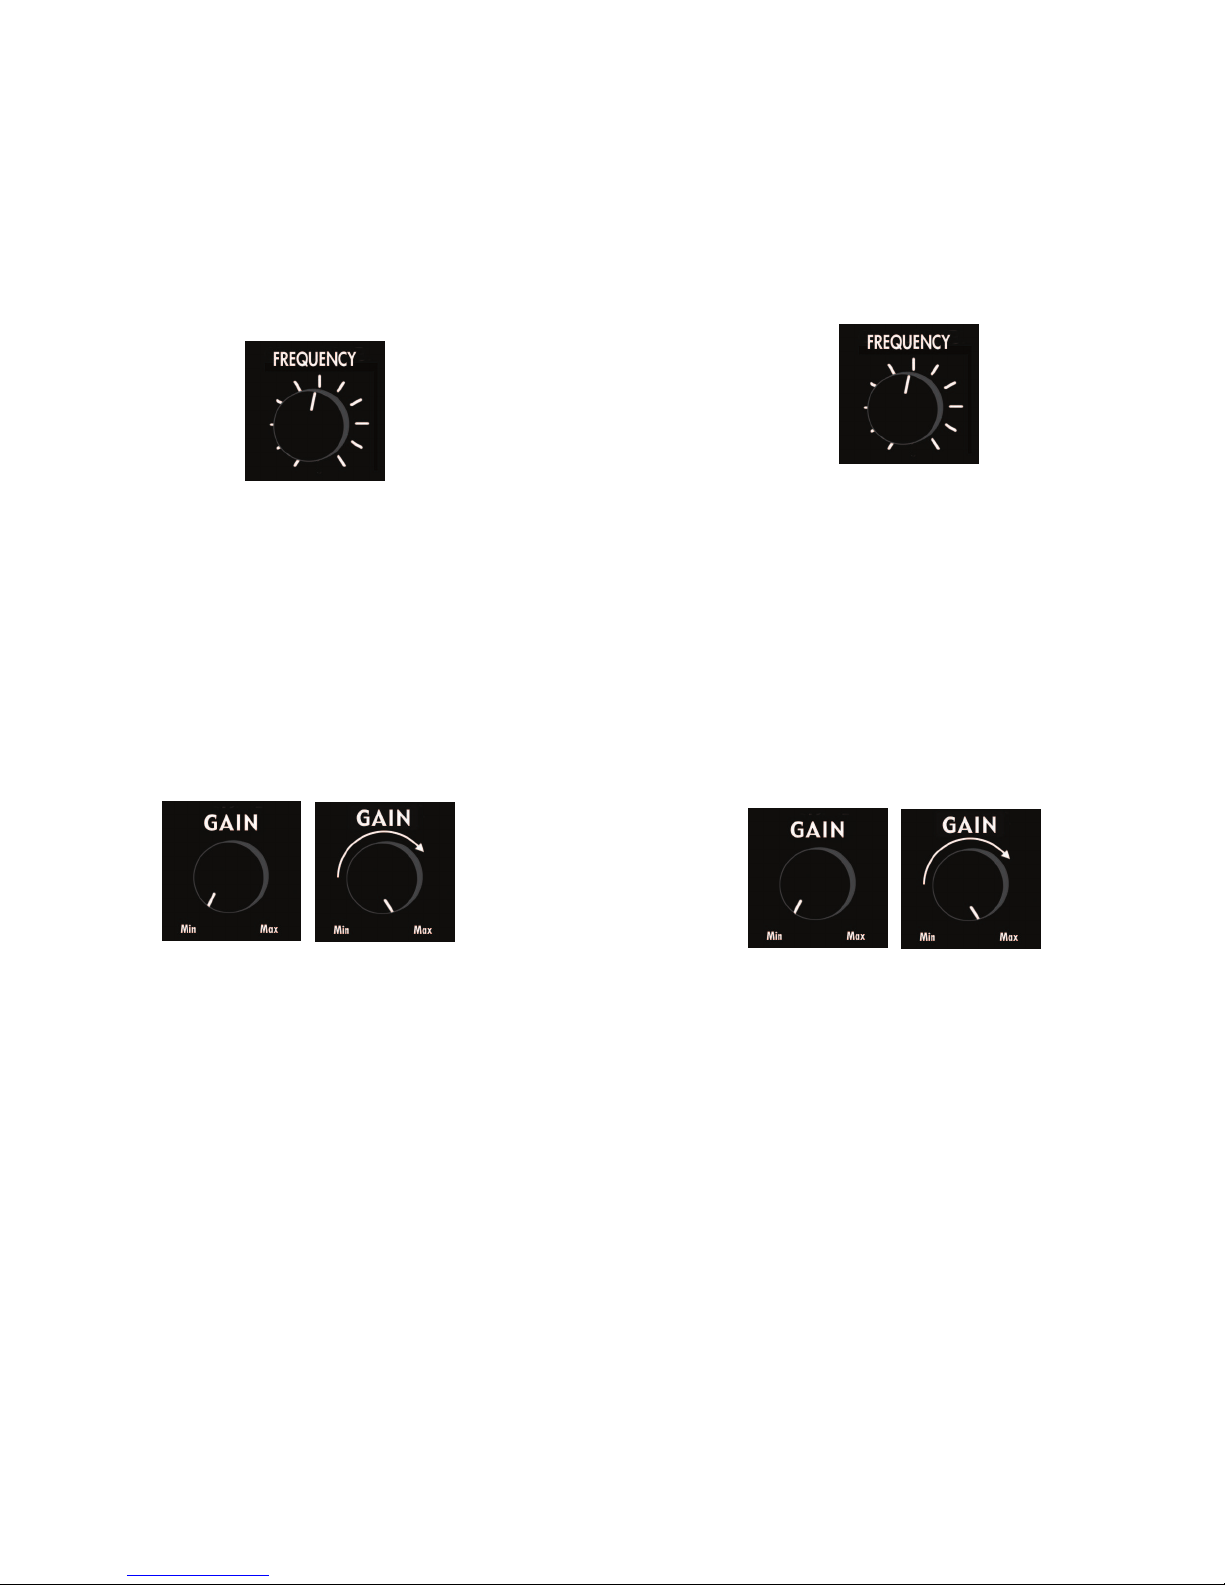
B)Réglage dela fréquencedecroisement (Frequency)et duvolume:
FréquencedeCroisement:
La fréquence de croisement détermine quelles fréquences seront amplifiés par le
caissonsous-grave.Cettefréquencedecoupurepeutêtrecontrôléemanuellement
etest continuellementvariableentre50-150Hz. Vouspouvezexpérimenter avecla
position de cette commande jusqu'à ce que les basses fréquence produites par le
caissonsoientbien intégréesaveclesondevosenceintes principales.
Conseilpratiquesurleréglagede lafréquencedecroisement:
Si des haut-parleurs de petite taille sont utilisés (enceintes avec des haut-parleurs
principaux de 15cm ou moins) placez cette commande vers la position " 150 ".Si
vous utilisez de plus gros haut-parleurs (enceintes avec des haut-parleurs
principauxde 20cmou plus)placezlacommandeplus prèsde laposition "50”.
Gain:
Pour régler le Gain du caisson, commencez par faire jouer vos haut-parleurs
principaux àunniveaunormald'écouteetaveclacommandedeGainaucaisson
complètement à la position off (tourner le contrôle dans le sens contraire des
aiguilles d'une montre). Puis, commencez à augmenter le Gain du caisson
lentement (dans le sens des aiguilles d'une montre) jusqu'à ce que la réponse de
basses fréquences désirée soit réalisée. Le Gain du caisson sera ensuite réglé par
votrecommandede Gainau récepteur.
Conseilpratiquepourleréglagedu Gain:
Le réglage du Gain se fait plus facilement avec l’aide dune deuxième personne.
Faites qu’une personne soit assise à la position régulière d'écoute, et que la
deuxièmepersonneaugmente leGainaucaissonjusqu’àceque leniveaudeGain
désirée soit réalisé à la position d'écoute. Rappelez-vous que les résultats les plus
satisfaisant sont réalisé quand la reproduction basses fréquences est équilibrée
avecleshaut-parleursprincipaux.
Phase
Vous pouvez expérimenter le contrôle des phases en alternant entre « Normal » et
«Reverse », pour déterminer quelle position offre un meilleur rendement.
Cependant dans la plupart des cas en laissant le commutateur dans la position «
Normal» l’appareil produirases meilleursrésultats.
Step3
PoweringUp
A)On/Off Switch:
Your subwoofer has an On/Off switch. Once connected to your receiver and
pluggedintothe walloutlet, the Soundstage subwooferwillneed to be turnedon
and can be left in the “auto” position so that once it senses a signal coming from
yourreceiver,itwillautomaticallyturnonandwillturnoffintoStandbymodeafter
itdoes notsense a signalfor 5minutes.
B)SettingtheVolumeandCrossoverFrequency.
Crossover:
The Frequency control determines the frequency below which the subwoofer will
play. This frequency is manually controlled and is continuously variable between
50-150Hz. You can experiment with which position works best with your main
speakersbyturning thiscontroluntil thesound ofthe lowfrequency comingfrom
thesubwooferis nicelyblended withthe soundof yourmain speakers.
Frequencysettingtip:
Whenusingsmallspeakers(speakerswitha6"orlessmainwoofer)setthiscontrol
towardthe"150"position.Whenusinglargerspeakers(speakerswithan8"ormore
mainwoofer)setthe controlcloserto the"50" position.
Gain:
When setting the Gain control at the subwoofer, begin with your main speakers
playing at a normal listening level and the Gain control at the subwoofer
completely in the off position (counterclockwise position). Then, begin to turn up
the Gain at the subwoofer slowly (clockwise) until the desired bass response is
achieved.Bass outputwill thenberegulatedbyyourA/V receiver’svolumecontrol.
Gainsetting tip:
Haveone person sitatthe regularlisteningposition, and a secondperson turn up
theGainatthesubwooferuntilthedesiredbassoutputisachievedatthelistening
position.Remembermostnaturalsoundingbassresultswhenbassreproductionis
balancedwiththemainspeakers.
Phase
The phase control will fine tune the bass performance. Have one person sit in the
listening position and a second person toggle the switch between Normal and
Reverseto achievethedesiredbassoutput.

Amplifier Power:
Woofer:
Frequency Response:
Dimensions (HWD):
100Watts
8”ReinforcedCone
40Hz- 150Hz
141/2”x123/4”x143/8”
STAGE SUB 8
Specifications
21000TransCanada
Baie D’Urfé • Qc • Canada • H9X 4B7
Tel.: (514) 457-2555 • Fax: (514) 457-5507
©2006 Jam Industries Ltd.
150Watts
10”ReinforcedCone
36Hz- 150Hz
153/4”x123/4”x143/8”
STAGE SUB 10
200Watts
12”ReinforcedCone
32Hz- 150Hz
1715/16”x123/4”x143/8”
STAGE SUB 12
Amplificateur:
Sous grave:
Réponse en fréquence:
Dimensions (HLP):
100Watts
Cônede205mmrenforcé
40Hz- 150Hz
370x320 x 360mm
STAGE SUB 8
Spécifications
150Watts
Cônede254mmrenforcé
36Hz- 150Hz
400x320 x 360mm
STAGE SUB 10
200Watts
Cônede305mmrenforcé
32Hz-150Hz
430x320 x 360mm
STAGE SUB 12
300Watts
15”ReinforcedCone
24Hz- 150Hz
20”x20.5” x 20”
STAGE SUB 15
300Watts
Cônede381mmrenforcé
24Hz-150Hz
510x520 x 510mm
STAGE SUB 15
This manual suits for next models
1
Table of contents
Other Soundstage Subwoofer manuals


