Sovereign SLM 1500 User manual

SLM 1500; UK; Ex; Homebase
Elektro-Rasenmäher Artikel-Nr.: 3400351
Ident-Nr.: 01014

Komponenten / Ersatzteile
Position Artikel-Nr. Beschreibung
12 340035001006 ADJUSTING HANDLE
17 340035001216 LONG SHAFT PLATE
20 340035001219 BLADE PLATE
22 340035001012 BLADE SCREW
45 340035001905 carbon brush cpl. (pair)
57 340035001007 FRONT WHEEL ASSEM.
58 340035001009 REAR WHEEL ASSEM.
60 340035001259 LONG ROTATING SHAFT
63 340035001011 GRASS CATCHER
65 340035001002 CORD PLATE
69 340035001004 DOWN PIPE
0 340035101907 cable wiht VDE socket/BS plug
0 3405535 Spare blade
0 340035001078 v-belt 6PJ 395
Operating instructions for
Electric Lawn Mower
SLM 1500
34.003.51
Art.-No.: 928040 I.-No.: 01014
Anleitung SLM 1500 GB 13.12.2004 14:48 Uhr Seite 1
2
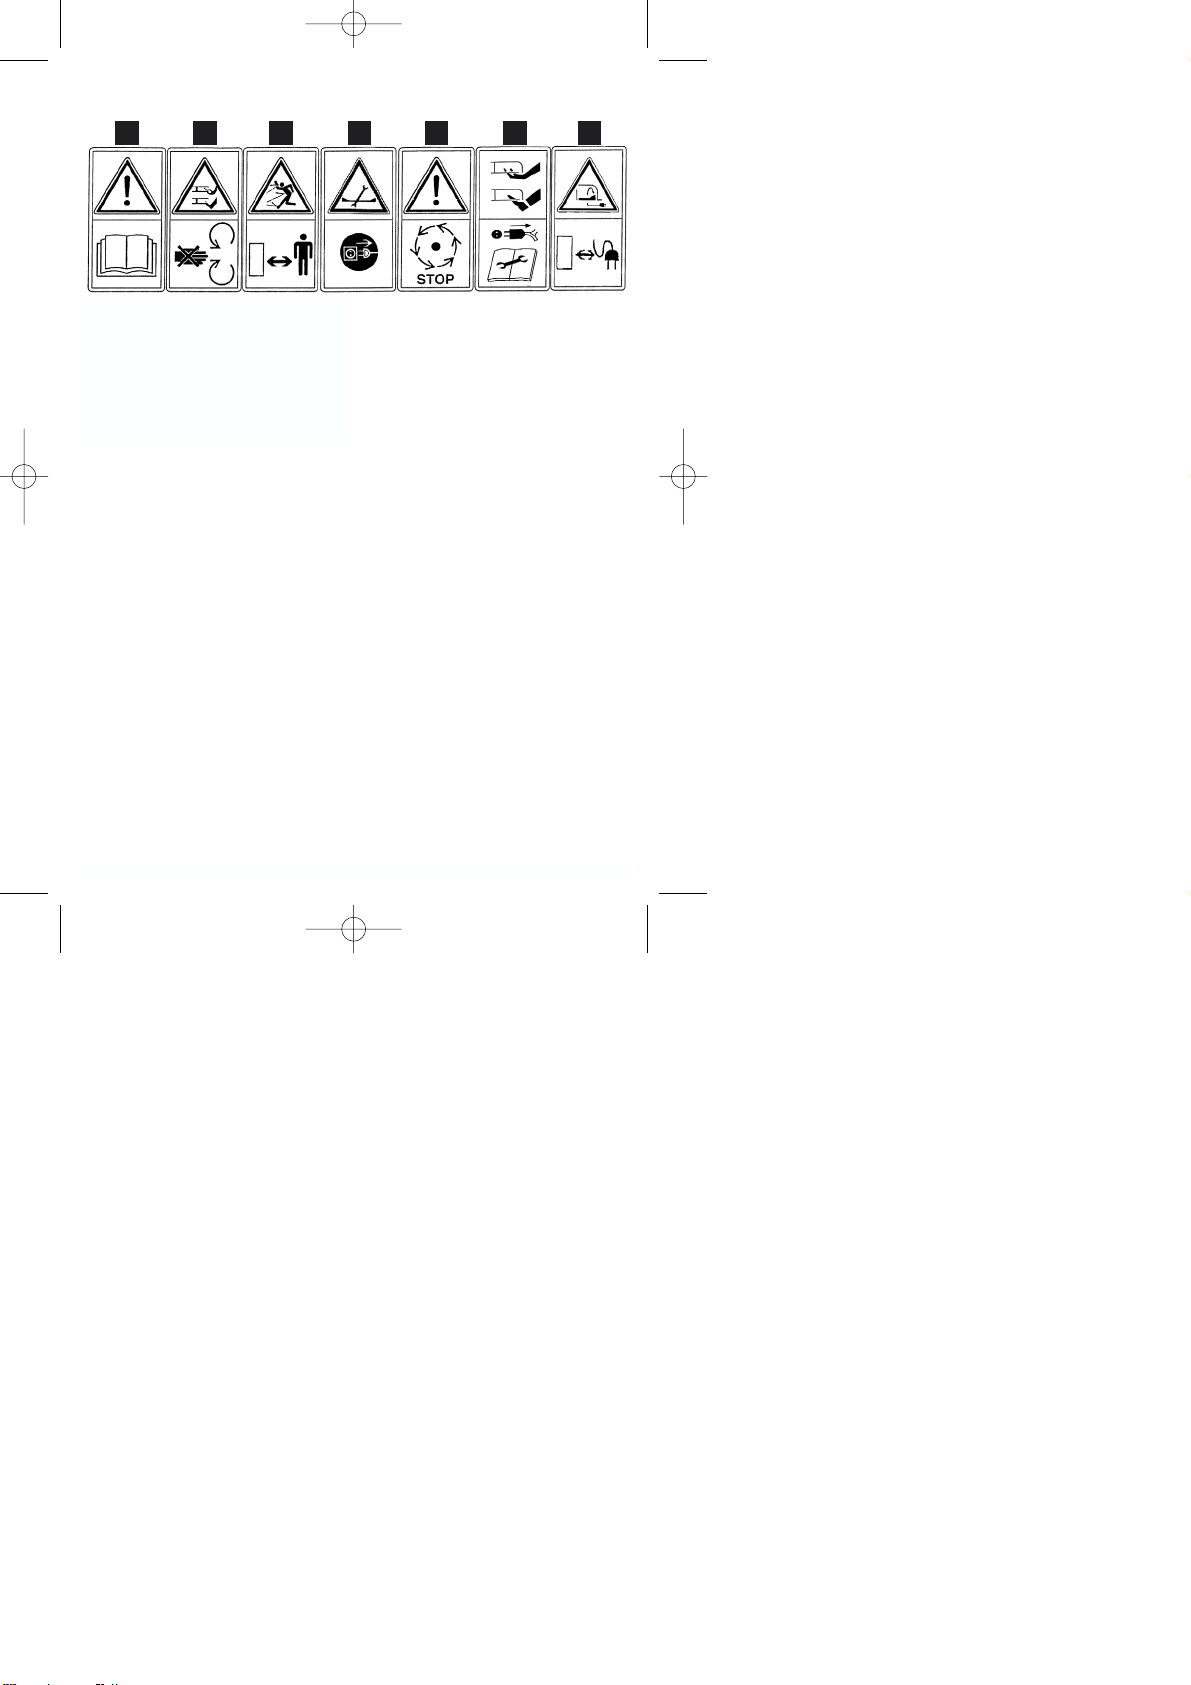
12 3 4 5 6 7
1= Read the directions for use before operating the tool.
2= Caution: rotating cutters.
3= Keep all other persons away from the danger zone.
4= Always pull the power plug before doing any work on the cutting
unit.
5= Important! The blade will continue to rotate for a while after the motor
has been switched off.
6= Always switch off the motor and pull the plug before performing any
adjustment or cleaning work on the lawn mower, or if the power
cable gets caught or damaged.
7= Caution! Keep the power cable well clear of the blades!
Anleitung SLM 1500 GB 13.12.2004 14:48 Uhr Seite 2

3
1
2 3
Anleitung SLM 1500 GB 13.12.2004 14:48 Uhr Seite 3
Table of contents
Other Sovereign Lawn Mower manuals

Sovereign
Sovereign CX 7305351 User manual

Sovereign
Sovereign MEH929 User manual

Sovereign
Sovereign XSS40H2 User manual

Sovereign
Sovereign LM 32H User manual

Sovereign
Sovereign SOVEREIGN TP 400-2218-00-SV-SMA User manual

Sovereign
Sovereign LM 32H User guide

Sovereign
Sovereign XSZ40 User manual

Sovereign
Sovereign XSS40B User guide

Sovereign
Sovereign SGT 30 User manual

Sovereign
Sovereign 2907857 User manual


