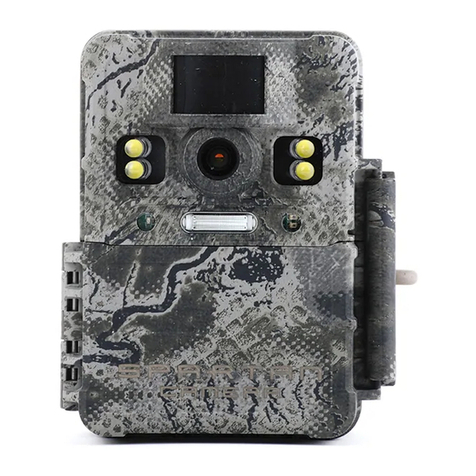
Spartan GOCAM User manual

1
Spartan GoCam™ Cellular Camera
Quick Start Guide
(AT&T™ Version)
Customer Service Contact
E-mail: support@spartancamera.com
Website: www.spartancamera.com
Phone: 1-770-582-0004
6665 Corners Industrial Ct. Suite D
Norcross, GA30092
U.S.A.
Note: You will find much more detailed and complete information in the User Manual.

2
Step 1: Activate cellular service
Cellular service is required if you want to have photos delivered, regardless of whether you use GoWireless Premium
or GoWirelessAuto. Cellular service enables the camera to send photos.
1. Find the IMEI numberon the inside of the camera or in the camera menu under SYS > Information.
2. Find the ICCID number on the SIM card.
3. Using a web browser, go to www.att.com/buyasession.
4. If you want to explore the rate plans, click on Compare Rate Plans >Tablets and Other Mobile Devices.The
most popular plans for GoCams are $25.00/90 days/1 GB data; $45.00/6 months/2 GB data; $75.00/12
months/4 GB data; or $14.99/30 days/250 MB data. (Disclaimer:All plans and rates described above are
subject to change without notice.All plans mentioned are available in November2016.There is no guarantee
that these plans or rates will be available in the future. You may not see the longer-duration plans until you add
your device.)
5. From the main page, either Get Your Pass (Establish New PrepaidAccount) or log in to your existingAT&T
DataConnect account. Note: Your account password must be 6 to 32 characters long with at least one number,
one letter, and one special character (@#$%!^&).
6. Proceed through the activation process.You will have several opportunities to review and verify your
information and choices before you actually pay forand activate your service.
7. Record your camera’s telephone number: _________________________
Step 2: Set up the camera
1. With the power switch OFF, insert batteries into the battery compartment. Use 12 (recommended),8, or 4
(emergency, left 2 columns) 1.2-1.5vAAbatteries.
The following types of batteries can be used:
•High-performance alkaline
•Lithium
•Rechargeable Ni-MH
2. For additionalbattery life, you can connectthe camera to a 6V external battery (optional, with or without solar
panel) that is designed to be used with trailcameras.
3. Insert an unlocked SD card (up to 32 G) into the SD card slot. Referto the card symbol on the case for proper
orientation.
4. With the rubber gasketbetween the base of the antenna and the antenna jack on the top of the camera,screw
the antenna onto the antenna jack. The rubber gasket mustbe in place to prevent leaks. Make sure the
antenna is screwed in all the way but be careful not to over-tighten it.
Step 3: Connect the camera to the AT&T™Cellular network
1. Slide the power switch to the SETUP position. The camera will enter Preview mode.
2. The screen will display Searching network…, then AT&T will appear at center top of the screen and the signal
strength bars will show in the top right corner.
3. If you will be using GoWireless Premium (recommended, free to try for the first month), continue to the next
section. If you will be using GoWirelessAuto, go to GoWirelessAuto SetupError! No bookmark name given.
GoWireless Premium or GoWireless Auto?
Refer to the information in the User Manual to understand the differences. We recommend using GoWireless
Premium and your first month of service is free so you can try before you buy.
GoWireless Premium Setup
Step 1: Set up the camera on the web portal
1. With the camera in SETUPmode and logged into the network, press the Menu button, navigate to the
Wireless tab and verify that Send Mode is Instant and Send Via is GoWireless Prem (default).
2. Scroll down to Register Camera then press the OK button.Apop up box will show.
Camera registering…

3
Then you will see:
Module ID/IMEI:Axxxxxxxxxxxxx
Registration Code: xxxxx
3. Record the Registration Code in the space below. The IMEI should be the same one that’s on the camera body.
Registration Code: ____________
4. Go to www.spartancamera.com and click SIGN IN on the top menu. If you don’t have an account, follow the
steps to register an account.
5. Go to MY CAMERAS > Management>Add New Camera.
6. Fill in the Camera Description, Module ID and Registration Code, agree to the Privacy Policy / Terms of Use.
7. Click Add this Camera. Email addresses are optional.
8. Go to MY CAMERAS > Camera Settings, select the camera you just added (if you only have one camera, it
will be selected automatically).
9. Change the camera settings based on your preference.Make sure you set Camera Time Zone. You can leave
all the rest of the settings default.
10. Click Schedule a Setting Updateand confirm.
11. Go to MYCAMERAS > Management, select the camera you just added, then click Go (left side of Add New
Camera button).
Step 2: Send a test photo
1. With the camera in SETUPmode and logged into the network, while in the preview window, press the OK
button to take a photo.
The camera will ask you
Send this photo?
2. With Yes selected, press the OK button to send.
The camera will show:
Setting…
Sending…
Sent!
3. Check your web account under MY CAMERAS > Manage Photos for the picture. You may need to refresh your
browser.
Step 3: Set up the mobile app
1. On the web portal, set up both admin and guest access codes:
a. Select MY CAMERAS > MobileAccess.
b. Enter an AdminAccess Code and (optionally, if you want to share pictures but not camera controlwith
guests) a GuestAccess Code.You can use different admin and guest access codes for different cameras or
groups of cameras if you wantto share access with different groups of people.
c. Click the Update button.
d. Make a note of yourAccount ID, theAdminAccess Code and the GuestAccess Code.
Account ID ______________________
AdminAccess Code ______________________
GuestAccess Code: ______________________
2. On your mobile device, go to the appropriate app store and search for the “gowireless” app.There are several;
you want the one with an orange “go” on a white background, from Frontier Pursuits Technology.
3. Download and installthe app.
4. Launch the GoWireless Mobile app. Read the quick tip, then close it.
5. To connect the app to your account:
a. From the menu, tap Camera Management.
b. Tap +to open the authentication dialog.
c. Enter theAccount ID and theAccess Code (the admin code for your phone, guest code for people who you
don’t want controlling the camera)
d. Tap Add.

4
6. Return to the main screen.If your phone is connected to WiFi, your pictures should appear.
7. Check the following settings and change if appropriate:
a. Tap the Menu button.
b. Tap Mobile Settings.
c. Under When New Photo isAvailable, you will probably want Automatically Download set to ON and
Download Only When WiFiisAvailable set to OFF. If the WiFi setting is OFF, photos will download
regardless of whether you are on WiFi or not, but be aware that photo downloads will use your device’s
data allowance.Thumbnails are typically small, but if you download a lot of them and/or a lot of hi-res
photos, this may be a consideration for you.
d. Set Photos –Auto Purge Days to your desired value.This is how many days each photo stays on your
device unless you save it.
GoWireless Auto
Step 1: Set up the camera
1. With the camera in SETUPmode and logged into the network, press the Menu button, navigate to the
Wireless tab and then to Send Via.
2. Choose GoWirelessAuto.
3. Scroll down to Recipients then press the OK button.
4. With Email selected, navigate to any entry box, then press the OK button.
5. Use the keypad to enter up to four destination email address(es).This refers to both regular email addresses
and device email addresses in the carrier’s email format (e.g., 5555551212@ vzwpix.com or
5555551212@mms.att.net). Note: While you can use yourphone number email address, that is no longer
recommended because some carriers have begun blockingsomeMMSmessagesandsenders,whichcanresult
inyournot receiving pictures from your camera.
•Press Del to backspace.
•Use the arrow keys to navigate to the button containing the letteryou want.
•With the cursor on the button containing the letter, press the OK button multiple times to get the letter you
want. For example, to enter C, with theABC button highlighted, quickly press the OK button 3 times.
6. Highlight Save then press the OK button to exit.
7. Image From: enter the name for your camera thatwill appear in the From field on the picture email.This will
not appear on the info strip at the bottom of the photo.
8. Press OK to save your changes.
9. Press Menu to return to the main menu.
10. Set the other parameters (Camera,Trigger, System) using the information in the tables in the User Guide. It is
probably best to setthe clock last.
11. Once you have set allthe parameters, press Menu to return to the Preview screen.
Step 2: Send a test photo
1. With the camera in SETUPmode and logged into the network, while in the preview window, press the OK
button to take a photo.
The camera will ask you
Send this photo?
2. With Yes selected, press the OK button to send.
The camera will show:
Setting…
Sending…
Sent!
3. Check your phone or email.
For more videos and demonstrations, visit our website www.spartancamera.comor call 770-582-0004 Monday through
Friday 9 AM – 6 PM Eastern time. For immediate assistance, you may also emailus at support@spartancamera.com.
Other manuals for GOCAM
2
Table of contents
Other Spartan Digital Camera manuals
