Spartan SR3-CX Lumen User manual

Spartan SR3-CX Lumen
Dual Flash (Strobe + White LED flash)
Digital Camera Trap
USER MANUAL
PLEASE READ CAREFULLY BEFORE USING YOUR CAMERA.
Product specifications and data aresubject to change without notice
to improve reliability, function, or design.

Package Contents
Trail Camera
1
Mounting Strap
1
User’s Manual
1
Tri-Fold
1
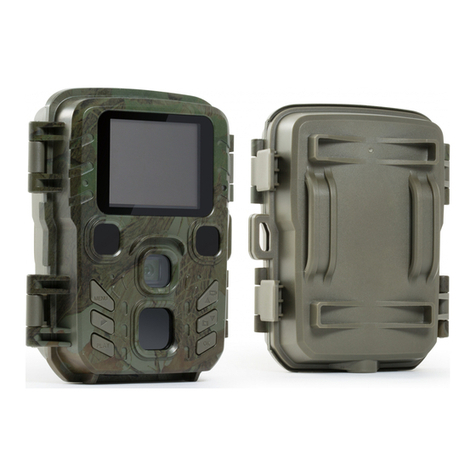
Camera Body and Ports
1

2

3
Buttons and Switch
: Menu: Enterthe program menu in preview mode, exit from settings
:Up / Down: Move among the menu items
OK: Confirm a selection
On/Off switch
Battery tray eject button
Display
WhatYou Need to Get Started
•MicroSD card, up to 64 GB (not included)
•6AAbatteries (not included)
Lithium (recommended)
Alkaline
Rechargeable Ni-MH

4
Quick Setup
1. Loadbatteries.
a. Press the Battery Tray Eject button to release the battery tray thenpull itout so you
can load the batteries.
b. Insert eachbattery and make sure itspolarity matches the indicators on the bottom of
the battery tray.
c. Insert the battery tray back into the camera.
2. Insert the microSD card.
a. Insert the microSD card in the sloton the bottom of the camera until it clicks into place.
(The camera uses a microSD card to save your photos and videos.)
3. Set up the camera
a. Slide the power switch to the ON position, setthe date and time, then press the Menu
button to exit.
b. Set the Camera, Trigger, and System options as desired.
c. Formatthe microSD card (System menu).
d. SelectMotion Test, press the OK button, adjust the camera position, then press the
Menu button toexit.You can adjustthe position by pulling the camera away from the
mounting bracket.
e. SelectArm Camera then press the OK button.(If you do not arm thecamera, it will
arm itself after 4 minutes.)
Menu Settings
1. Switch the cameraon.
2. Navigate the mainmenu orsetting choices using the (up and down) buttons.
3. Press the OK button to select asetting or the (Menu) button to exit and return tothe
previous level.
Setting Items Description
Arm Camera Yes, *No Camera will arm itself after 4 minutes if you do not
arm it manually.
Motion Test Used to view / test the correct mounting positionof
thecamera through the built-in viewing screen.
Playback
Viewphotos and videoson theSD card
* Default Settings

5
Camera
Mode
Choose *Photo or Video.
Photo Size
Photo mode: choose the image size,
*3M(original), 8M, or 24M
Video
Video Size: 720P, *1080P
Video Length: 5, *10, 15, 30 sec, 1 min
Sound Rec: *On, Off
Trigger
Sensitivity
Select High, *Normal, Low, or Off.
Trigger Interval
The sleep time after each trigger. *0 sec,5-55 sec
in 5 sec intervals, 1-60 min in 1 min intervals
Motion Plan
*All Day / User. When User isselected, the
camera can be set to operateduring one or two
specific time periods instead of allday. Enter the
hour and minutes for oneor both Start-Stop times.
Time Lapse
*Off; 30, 35, 40, 45, 50, 55secs.
1, 5, 10, 15,20, 30 min;
1, 2, 3, 4, 5,6, 7, 8, 12, 24 hr
The camerawill take pictures at the specified time
interval. Note that in Time Lapse mode, the
camera will also take motion-triggered photos
unless Sensitivity isset toOFF.
Timelapseplan:setoneStart-Stop timefortimelapse
Start-Stop
1 & 2
The cameracan be setto operateduringone or
two specific time periods. Toenable this function
select ON and press OK to display the start-stop
menu. This menu contains the settings fortimes to
startand stop as well as the trigger intervaland
time lapse interval. The start-stop setting
overrides all other general camera settings. Since
thereare two periods available, make sure that
you do not program times that overlap.
* Default Settings

6
System
Clock
Set the Hour, Minute, Month, Day, Year
Time Stamp
*On, Off.. SelectON to print an info strip at the
bottom of each photo, OFF for no info strip.
Password
Set a6-digit password using this option. (Note: keep
a record of this password. If you forget it, you will
have to return the camera to Spartan Camerawith
proofof ownership to have the password removed.)
Format
Format the microSD card.This will erase all data on
the microSD card and cannot be undone.You should
formatthe card in the camera each time you putit
into the camera.
Beep
Toggle the keypress beep sound on/off.
Overwrite
Toggle overwrite on/off. If ON, once the SD card is
full,the camera will overwrite the oldest image / video
with the newest image / video.
Export Setting
Saves this camera’s settings to the microSD card so
the settingscan be transferred to anothercamera.
(For more information onusing this feature, see
Export Settings on the next page.)
FW Update
Update the firmware using a file downloaded fromthe
web site and copied to the microSD card.
Default
Restore all settings to factory default values.
Information
Display the version of firmware on thecamera.
Viewing and Deleting Photos and Videos
Viewing Photos
1. HighlightPlayback thenpress the OK button.
2. Press the (up and down)buttons to navigate through thepictures.
3. Toreturntothe Homescreenwithoutdeletinganyphotos,pressthe(Menu) buttontwice.
Deleting Photos
1. To delete one or all pictures, while viewing a photo press the (Menu) button.
2. Choose either Delete One or Delete ALL.
3. Press the OK button.
* Default Settings

7
4. Press the (Menu) button to return to the next photo (if you deleted one)or the Home
screen (if you deleted all).
Note:You canalso delete everythingon the microSDcard by formatting it (System menu).
Viewing Videos
1. HighlightPlayback thenpress the OK button.
2. Press the (up and down)buttons to navigate through thepictures.
3. Press the OK button to play/pause the video or press theMenu button to return to the
preview screen.
4. ToreturntotheHomescreenwithoutdeletinganyphotos,pressthe(Menu) buttontwice.
Deleting Videos
1. To delete one or all videos, while looking atthe first frame of a video on the preview
screen, press the (Menu) button.
2. Choose either Delete One or Delete ALL.
3. Press the OK button.
4. Press the (Menu) button to return to the next photo (ifyou deleted one) or the Home
screen (if you deleted all).
Note:You canalso delete everythingon the microSDcard by formatting it (System menu).
Export Settings
Exporting the settings
1. In theSystem menu,highlight ExportSettings then press the OK button to save a file
called settings.ini to the microSD card.
Using the exported settings in a new camera
1. Onceyou have saved the settings fromone camera onto a microSD card, insert the
microSD card into the new camera.
2. Turn the switch to ON and the camera willask you Update Setting,Yes or No.
3. Choose Yes tocopy the settings to this camera or No to set up the camera manually.

8
Technical Specifications
FOV (Field of View) 78° wide angle
FlashType Strobe / Xenon (photo) +White LED(video) - auto-adjustable
Display 2'' IPS Colour LCD (480x360mm) - Front-facing display
Memory Card MicroSD,up to64Gb
Night-time Image flash Strobe / Xenonflash, full colour
(with auto-adjustable flash power feature)*
Night-time Video flash White LED flash, full colour
(with auto-adjustable flash power feature)*
Image Resolution 3MP/8MP/ 24MP
Video Resolution 1080p (1920×1080) /720p (1280 x 720)
VideoLength 5s / 10s/ 15s / 30s / 60s
AudioSupport Yes
TriggerType Motion (PIR) / Timer (Time Lapse) / Work Day
PIRType Multi-zone
PIR Sensitivity Adjustable (High / Normal /Low /Off )
Trigger Speed 0.3s
TriggerIntervals 0s - 60min
Time-lapse Intervals 5m /10m / 30m / 1h / 4h / 12h / 24h
RecoveryTime 0.5s**
- Unlimited Multi-shot / Burst Mode (see below)
Battery 6x AA(lithium, alkaline,orrechargeable NiMH;1.2v-1.5v/ea)
External Power Input 12v DC
Mounting Tripod socket /Mountingstrap / Security cable lock
Padlock lockable Yes
OperationTemp -20 to +60(°C)
Operation Humidity 5% - 90%
Weight 311g w/o batteries
Dimensions 11.4 x 10.1 x 7(cm)
IP Rating IP65
* The auto-adjustable flash power feature minimizes over exposed images and video clips by automatically detecting the
distance the target is from the camera during each trigger and adjusting the flash power / strength accordingly.
** The very fast recovery time allows for unlimited multi-shot / burst mode using the Strobe / Xenon flash - as long as the target
is triggering the camera's PIR. This ground-breaking feature now offers unlimited, Strobe / Xenon flash quality images (no
motion blur) in quick succession. Preliminary testing has produced 8 x Burst-mode Strobe / Xenon flash quality images in
10 seconds - something previously impossible to achieve from any previous camera trap model.

9
Warranty Information
The Camerapurchased from our authorizeddealers is warranted to be free from
defects in materialand workmanship for 2years from the original date of purchase under
normal use. Spartan Camera will, at its option, repair or replace your camera with the same
or comparable model, free of charge (exceptyou must pay for shipping charges setforth
below), for a period of (2) two years from the original date ofpurchase in the eventof a
defectin materials or workmanshipoccurring with normaluse.This warranty only extends to
the originalretailpurchaser. Purchase receiptor otherproof of date of originalpurchase is
required before warranty performance.The warranty on any replacement product provided
under this warranty shall be for the unexpired portion of the warranty period applicable to the
original product.
To registeryour camera,go to spartancamera.com and click on the link labeled
Product Registration at the bottom of the page. Fill in all the fields in the form and upload
eithera picture (JPG) of your paper/printed invoice/receipt or a PDF of your electronic (e.g.,
email) receipt. (Windowsusers can create a PDF by printing the invoice but choosing
Microsoft Print to PDF instead of their printer.)
Our warranty applies ONLY to thecameras purchased from our authorized dealers.
This warranty extendssolely to failures due to defects in materials or workmanship
occurring during normal use. It does not cover normal wear of the product. This warranty is
void if: the product housing has been removed, if the product's label, logo or serial number
have been removed or if the product fails to function properlyas a result of accident, misuse,
abuse, neglect, mishandling, misapplication, non-compatible batteries, faulty installation,
setup, adjustments, improper maintenance, alteration, maladjustment of controls,
modification, power surges, service by anyone other than Spartan Camera or Spartan
Camera authorized service center or acts beyond the manufacturer's or distributor's control.
Note:Thecameraisnotwaterproof;pleaseprotectyourcameraproperlyforoutdooruse.
Should yourproduct prove defective during thiswarranty period, please contactus to
obtain an RMAnumber prior to returning thedefectiveunit.
An RMAnumber is required for all returns. Please contact Technical Support
support@spartancamera.com to submit your request for an RMA. Shipping costs may apply.
If the product is beyond the warrantyperiod, theprice for repairing or replacing may
vary. Please allow 6-8weeks for delivery.
International customers paya different amount for shipping & insurance. Wewill send

10
detailed information along with theRMAnumber.
Include withyour camera the RMAformand a copy of your dated invoice or receipt.
The warranty workwill notautomatically extend the original warranty period.You have 2
weeks to report any DOA(Dead onArrival)products so please testproduct upon receipt.
If youhave any questions regarding the warranty of Spartan Camera, please email us
at support@spartancamera.com.
Please consult your dealer or Tech Support if you have any question or problem while
you use thecamera before you request an RMAnumber and send the cameraback for
repair. Some problems may be solvedeasily with help from our dealers or us.
Camera Repair
Repairs fordamages notcovered by thewarranty will be subjectto a charge. Please
contact Spartan Camera to determine more information and to discuss repairoptions not
covered under warranty.
CUSTOMER SERVICE CONTACT:
E-mail: [email protected]
Website:www.spartancamera.com
Phone: 1-770-582-0004
9AM-6 PM Eastern M-F
CAMERA TRAPS cc
E-mail: info@cameratraps.co.za
Website:www.cameratraps.co.za
Phone: +27 (0) 83 560 0555 / +27 (0) 82 422 0356
Table of contents
Other Spartan Digital Camera manuals

