Speedway 07215 User manual

This product contains or, when used, produces a chemical
known to the State of California to cause cancer and birth
defects or other reproductive harm.
(California Health & Safety Code § 25249.5, et seq.)
WARNING
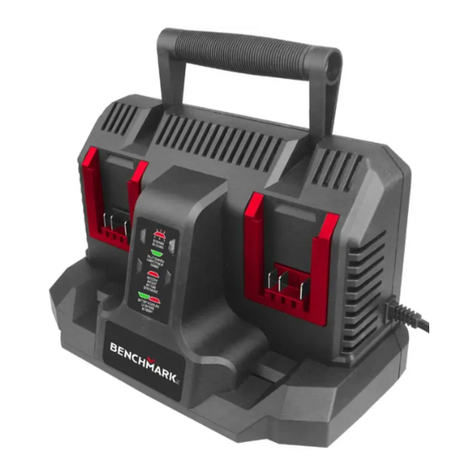
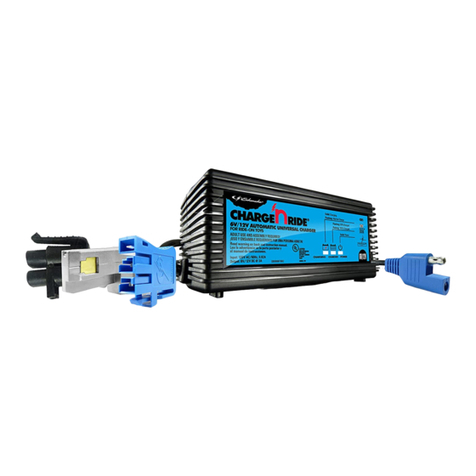
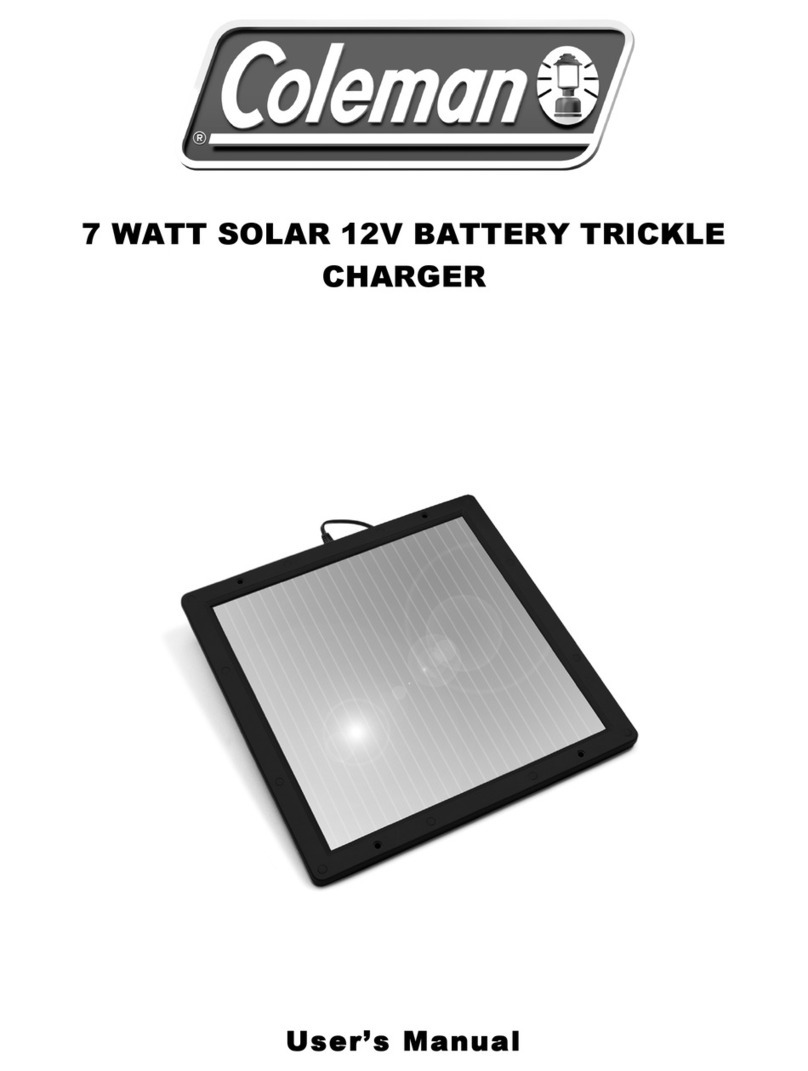
*Actual product may vary slightly
Please carefully read and save these instructions before appempting to assemble, maintain, install, or operate this product.
Observe all safety information to protect yourself and others. Failure to observe the instructions may result in property
damage and/or personal injury. Please keep instructions for future reference.
For warranty purchases, please keep your dated proof of purchase. File or attach to the manual for safe keeping.
For Customer Service, Call 1-800-348-5004
2/10/50 AMP 12 VOLT
BATTERY CHARGER/
ENGINE STARTER
3161691

Important Safety Instructions
1. Save these instructions. This manual contains important safety and operating
instructions for battery charger.
2. Do not expose charger to rain or snow.
3. Use of an attachment not recommended or sold by the battery charger
r injury to persons.
4. To reduce risk of damage to electric plug and cord, pull by plug rather than cord
when disconnecting charger.
5. An extension cord should not be used unless absolutely necessary. Use of
lectric shock. If extension
cord must be used. Make sure:
a. That pins on plug of extension cord are the same number, size, and shape as
those of plug on charger.
b. That extension cord is properly wired and in good electrical condition.
c. That wire size is large enough for AC ampere rating of charger.
6. Do not operate this charger with a damaged cord or plug. Replace the cord or plug
immediately.
7. Do not operate charger if it has received a sharp blow, been dropped, or otherwise
when service or
repair is required. Incorrect reassembly may result in a ri
9. To reduce risk of electric shock, unplug charger from outlet before attempting any
maintenance or cleaning.
Recommended minimum AWG size
for extension cords for battery chargers
AC input rating, amperes* AWG size of cord
Length of cord, feet
Equal to or
greater than
But less
than 25 50 100 150
0 2 18 18 18 16
2 3 18 18 16 14
3 4 18 18 16 14
4 5 18 18 14 12
5 6 18 16 14 12
6 8 18 16 12 10
8 10 18 14 12 10
10 12 16 14 10 8
12 14 16 12 10 8
14 16 16 12 10 8
16 18 14 12 8 8
18 20 14 12 8 6
Note:
If the input rating of a charger is given in watts
rather than in amperes, the corresponding ampere
rating is to be determined by dividing the wattage
rating by the voltage rating – for example:
1250 watts/125 volts = 10 amperes

g. Remove personal metal items such as rings, bracelets, necklaces, and
watches when working near a lead-acid battery. A lead-acid battery can
produce a short-circuit current high enough to weld a ring or the like to metal,
causing a severe burn.
h. Use this charger for charging LEAD-ACID batteries only. It is not intended to
supply power to a low voltage electrical system other than in an automotive
application. Do not use battery charger for charging dry-cell batteries that are
commonly used with home appliances. These batteries may burst and cause
injury to persons and damage to property.
I. Never charge a frozen battery.
10. WARNING - RISK OF EXPLOSIVE GASES.
a. WORKING IN THE VICINITY OF A LEAD-ACID BATTERY IS DANGEROUS.
BATTERIES GENERATE EXPLOSIVE GASES DURING NORMAL BATTERY
OPERATION. FOR THIS REASON, IT IS OF UTMOST IMPORTANCE THAT
EACH TIME YOU USE THE CHARGER, YOU FOLLOW THE INSTRUCTIONS.
b. To reduce the risk of the battery explosion, follow these instructions and those
published by battery manufacturer and manufacturer of any equipment you
intend to use in vicinity of battery. Review cautionary markings on these
products and on engine.
11. Personal Precautions
a. Someone should be within range of your voice, or close enough to come to
your aid, when you work near a lead-acid battery.
b. Have plenty of fresh water and soap nearby in case battery acid contacts
skin, clothing, or eyes.
c. Wear complete eye protection and clothing protection. Avoid touching eyes
while working near battery.
d. If battery acid contacts skin or clothing, wash immediately with soap and
least 10 minutes and get medical attention immediately.
attery or engine.
f. Be extra cautious to reduce risk of dropping a metal tool onto battery. It might
spark or short-circuit battery or other electrical part that may cause explosion.
12. DC CONNECTION PRECAUTIONS
a. Connect and disconnect DC output clips only after removing AC cord from
electric outlet. Never allow clips to touch each other.
b. Attach clips to battery and chassis as indicated in this manual.
13. Always wear safety impact eye goggles and heavy-duty rubber work
gloves when using the Battery Charger. Use personal safety devices to
reduce the risk for injury.
14. Avoid unintentional starting. Make sure you are prepared to begin work before
turning on the Battery Charger.
15. Always unplug the Battery Charger from its electrical outlet before connecting
its cables to a battery, or performing any inspection, maintenance, or cleaning
procedures.

Note: Amperage is only present when the unit
is connected to a battery or in START mode.
Input 120V~. 60 Hz
Output
12 VDC - 10*A
12 VDC - 2*A
Engine Start - 50 A
16. Use this Battery Charger with flooded lead-acid or AGM batteries only. When
charging a maintenance-free battery, always monitor the progress of the charge
by viewing the ammeter. Do not over charge a maintenance-free battery.
17. Do not attempt to charge non-rechargeable or defective batteries.
18. Never simultaneously charge several batteries.
19. Do not discard used batteries in the trash. Properly recycle according to local
environmental codes.
20. WARNING: People with pacemakers should consult their physician(s) before
rekamecaptraehaotyti
could cause interference to or failure of the pacemaker.
21. Risk of Explosion!
a. lf you detect gas, do not adjust any switches. Do not disconnect the charging
clamps. Immediately ventilate the room by opening windows and doors. Do not
switch on an electrical fan. When the air has cleared of gas, unplug the unit
from the electrical outlet.
b. Charge the battery in a well-ventilated area.
c. To prevent sparking due to electrostatic discharge, never wear clothes made of
synthetic materials when charging the battery.
ignite the gasses caused by charging and cause an explosion.
d
Grounding and AC power cord connection instructions
Charger should be grounded to reduce risk of electric shock. Charger is equipped with
an electric cord having an equipment-grounding conductor and a grounding plug.
nidednuorgdnadellatsniylreporpsitahtteltuonaotnideggulpebtsumgulpehT
accordance with all local codes and ordinances.
Danger: Never alter AC cord or plug provided
oper connection can result in a
risk of an electric shock.
Caution: Risk of Fire or Electric Shock. Connect battery charger directly to grounding
receptacle (three-prong). An adapter should not be used with battery charger.

Operation Instructions
Read the ENTIRE IMPORTANT SAFETY INFORMATION section at the beginning of this manual including all
text under subheadings therein before set up or use of this product.
Controls
Figure A: Controls
Fault:
This indicates that the cables are connected improperly.
Immediately disconnect the cables and connect them
properly to prevent damage to the battery.
This will light up red when the power is connected.
This will light up green when the battery is fully charged.
The LED light can only light up either in red or green once
a time.
Setting Switch:
Use this to switch between charging and start modes
and change the output amperage.
Battery Type Switch:
Use this to set the battery type:
•Set to Regular for flooded and maintenance-free batteries.
•Set to AGM for Absorbed Glass Mat batteries.
WARNING! TO PREVENT EXPLOSION:
DO NOT USE WITH GEL BATTERIES.
Charge Meter (10 amp charge mode only):
Figure B: DISCHARGED BATTERY
Initial charge current to the battery is at the maximum.
FIGURE C: BATTERY ALMOST FULLY CHARGED
Charge current to the battery is reduced.
Figure D: FULLY CHARGED BATTERY
Charge current to the battery is minimal and the green
LED is on.
Charging:
Floating:
WARNING: TO PREVENT SERIOUS INJURY: DO NOT PLUG IN CHARGER UNTIL DIRECTED TO DO SO.
Sometimes conditions such as a cold battery, a sulfated battery, or a deeply discharged lead calcium
battery may cause Charge Meter to read near a full charge when charging process is only beginning.
Note: The Charge Meter shows the amount of current being drawn from the charger. It does not show what the
charger is capable of delivering. When the battery is fully charged and registering 100% on the Charge Meter,
a small charge will continue to move from the charger to the battery. If the charger is not disconnected from the
battery, eventually heat build up will cause the battery acid to boil and overcharge the battery causing damage to
the battery. Monitor battery charging progress constantly and if battery gets warm, stop charging it immediately.
Type Switch
FaultFloatingCharging
Setting Switch
Charge Meter
Clamp

Preparing to Charge
WARNING: Use this charger only on flooded lead-acid batteries. Other batteries may be damaged or may
overheat, leak, or catch fire.
WARNING: A SPARK NEAR BATTERY MAY CAUSE BATTERY EXPLOSION. TO REDUCE RISK OF A SPARK
NEAR BATTERY FOLLOW THESE INSTRUCTIONS EXACTLY.
TO PREVENT SERIOUS INJURY:
Wear ANSI-approved splash-resistant safety goggles and heavy-duty rubber work gloves
whenever connecting, disconnecting, or working near battery.
Battery acid can cause permanent blindness.
Charger Location
Charging Battery Installed in Vehicle
TO PREVENT SERIOUS INJURY:
Wear ANSI-approved splash-resistant safety goggles and heavy-duty rubber work gloves
whenever connecting, disconnecting, or working near battery.
Battery acid can cause permanent blindness.
1. If necessary to remove battery from vehicle to charge, always remove grounded terminal from battery first. Make
sure all accessories in the vehicle are off, so as not to cause an arc.
2. Make sure area around battery is well ventilated while battery is being charged.
3. Clean battery terminals. Be careful to keep corrosion from coming in contact with eyes.
4. Add distilled water in each cell until battery acid reaches level specified by battery manufacturer. Do not overfill.
For a battery without removable cell caps, such as valve regulated lead acid batteries, carefully follow manufacturer’s
recharging instructions.
5. Study all battery manufacturer’s specific precautions while charging and recommended rates of charge.
SHORTED BATTERIES - will read on Charge Meter as a high end peg at beginning of charging process. If after
5-10 minutes, needle does not move off high end, the battery probably has a short circuit. Unplug charger and
discontinue use. Have battery checked by a qualified technician.
COLD BATTERIES - begin charging at a low rate, increase as battery reaches a normal temperature, then rate will
decrease normally. DO NOT CHARGE A FROZEN BATTERY.
BATTERIES WITH HYDROMETER EYE: Do not depend on hydrometer eye to determine battery charge level.
1. Position AC and DC cables to reduce risk of damage by hood, door, or moving engine part.
2. Stay clear of fan blades, belts, pulleys, and other parts that can cause injury to persons.
3. Check polarity of battery posts. POSITIVE (POS, P, +) battery post usually has larger diameter than NEGATIVE
(NEG, N,–) post.
4. Determine which post of battery is grounded (connected) to the chassis. If negative post is grounded to chassis
(as in most vehicles), see 5. If positive post is grounded to the chassis, see 6.
1. Locate charger as far away from battery as DC cables permit.
2. Never place charger directly above battery being charged; gases from battery will corrode and damage charger.
3. Never allow battery acid to drip on charger when reading electrolyte specific gravity or filling battery.
4. Do not operate charger in a closed-in area or restrict ventilation in any way.
5. Do not set a battery on top of charger.
5. For negative-grounded vehicle, connect POSITIVE (RED) clip from battery charger to POSITIVE (POS, P, +)
ungrounded post of battery. Connect NEGATIVE (BLACK) clip to vehicle chassis or engine block away from battery.
Do not connect clip to carburetor, fuel lines, or sheet-metal body parts. Connect to a heavy gauge metal part of the
frame or engine block.
NOTICE: If the Reverse Connection indicator lights, the cables are connected improperly. Immediately
disconnect the cables and connect them properly to prevent damage to the battery.

6. For positive-grounded vehicle, connect NEGATIVE (BLACK) clip from battery charger to NEGATIVE (NEG, N, –)
ungrounded post of battery. Connect POSITIVE (RED) clip to vehicle chassis or engine block away from battery.
Do not connect clip to carburetor, fuel lines, or sheet-metal body parts. Connect to a heavy gauge metal part of the
frame or engine block.
7. Set Battery Type switch according to battery type:
• Set to Regular for flooded and maintenance-free batteries.
• Set to AGM for Absorbed Glass Mat batteries.
8. Set Setting switch to desired charge amperage.
9. After switches are set, plug in charger.
10. Monitor the charging process. The Charge Complete indicator will light up and blink when the battery is fully charged.
11. When disconnecting charger, disconnect AC cord, remove clip from vehicle chassis, and then remove clip from
battery terminal.
12. After use clean, then store the charger indoors out of children’s reach.
Note: If the charger cycles between maximum charge level and a lower charge level when first connected, then the
battery may be fully charged or nearly fully charged. Further charging may not be needed. If charging is attempted,
charge at a lower rate and carefully monitor charge level to avoid battery damage.
WARNING! TO PREVENT EXPLOSION: DO NOT USE WITH GEL BATTERIES.
Charging Battery Outside Vehicle
WARNING: A SPARK NEAR BATTERY MAY CAUSE BATTERY EXPLOSION. TO REDUCE RISK OF A SPARK
NEAR BATTERY FOLLOW THESE INSTRUCTIONS EXACTLY.
NOTICE: If the Reverse Connection indicator lights, the cables are connected improperly. Immediately
disconnect the cables and connect them properly to prevent damage to the battery.
WARNING! TO PREVENT EXPLOSION: DO NOT USE WITH GEL BATTERIES.
1. Check polarity of battery posts. POSITIVE (POS, P, +) battery post usually has a larger diameter than NEGATIVE
(NEG, N, –) post.
2. Attach at least a 24-inch-long 6-gauge (AWG) insulated battery cable to NEGATIVE (NEG, N, –) battery post.
3. Connect POSITIVE (RED) charger clip to POSITIVE (POS, P, +) post of battery.
4. Position yourself and free end of cable as far away from battery as possible – then connect NEGATIVE (BLACK)
charger clip to free end of cable.
5. Do not face battery when making final connection.
6. Set Battery Type switch according to battery type:
• Set to Regular for flooded and maintenance-free batteries.
• Set to AGM for Absorbed Glass Mat batteries.
7. Set Setting switch to desired charge amperage.
8. After switches are set, plug in charger.
9. Monitor the charging process. The Charge Complete indicator will light up and blink when the battery is fully charged.
10. When disconnecting charger, always do so in reverse sequence of connecting procedure and break first connection
while as far away from battery as practical.
11. After use clean, then store the charger indoors out of children’s reach.
12V Engine Starting
NOTICE: Some vehicles with onboard computers may be damaged from the high-current starting output.
Thoroughly read the vehicle service manual before using this procedure.
Note: During extremely cold weather or when battery is severely exhausted, charge the battery for about five minutes
before attempting to turn on engine.
1. Unplug the Charger AC power cord from the AC outlet.
2. For negative-grounded vehicle, connect POSITIVE (RED) clip from battery charger to POSITIVE (POS, P, +)
ungrounded post of battery. Connect NEGATIVE (BLACK) clip to vehicle chassis or engine block away from battery.
Do not connect clip to carburetor, fuel lines, or sheet-metal body parts. Connect to a heavy gauge metal part of the
frame or engine block.

NOTICE: If the Reverse Connection indicator lights, the cables are connected improperly.
Immediately disconnect the cables and connect them properly to prevent damage to the battery.
WARNING! TO PREVENT EXPLOSION: DO NOT USE WITH GEL BATTERIES.
3. Position AC and DC cables to reduce risk of damage by hood, door, or moving engine part.
4. Set Battery Type switch according to battery type:
• Set to Regular for flooded and maintenance-free batteries. • Set to AGM for Absorbed Glass Mat batteries.
5. Set Setting switch to 50A Emergency Engine Start.
6. After switches are set, plug in charger.
7. WARNING! TO PREVENT SERIOUS INJURY, FIRE, AND DAMAGE TO CHARGER AND BATTERY, follow
5 second maximum with 4 minute minimum rest duty cycle for the Start mode.
8. To start the engine, turn ignition key. ONLY KEEP CHARGER IN START MODE UP TO 5 SECONDS AT A TIME.
9. If engine fails to start, charge battery for an additional five minutes before attempting to start.
10. After the engine starts, unplug the power cord from outlet before disconnecting the DC cable clamps.
Procedures not specifically explained in this manual must be performed only by a qualified technician.
WARNING! TO PREVENT SERIOUS INJURY: Unplug the charger, disconnect any battery, and allow charger to
cool completely before performing any inspection, maintenance, or cleaning procedures. TO PREVENT SERIOUS
INJURY FROM CHARGER FAILURE: Do not use damaged equipment. If abnormal noise or vibration occurs, have
the problem corrected before further use.
Maintenance Instructions
T
roubleshooting
Problem Possible Causes Likely Solutions
Charger will not start. 1. Cord not connected.
2. No power at outlet.
3. Clamps are not securely
connected to battery terminals.
1. Check that cord is plugged in.
2. Check power at outlet.
If outlet is unpowered, turn off charger and
check circuit breaker.
If breaker is tripped,
make sure circuit is right capacity for
charger and circuit has no other loads.
3. Unplug charger and check that the clamps are
securely connected to the battery terminals.
Red Reverse Connection
LED turns on.
Clamps are attached to
wrong battery terminals.
Unplug charger if it is plugged in
and reverse the connections.
Charge Meter stays at
high end of dial for more
than 5-10 minutes.
Battery has a short circuit. Unplug the charger and discontinue use.
Have the battery checked by a qualified technician.
Charger will not
start vehicle.
Setting switch is set to Charge. Change the Setting switch to Start.
Follow all safety precautions whenever diagnosing or servicing the charger.
Disconnect power supply before service.
1. BEFORE EACH USE, inspect the general condition of the charger. Check for:
• loose hardware • cracked or broken parts • damaged electrical wiring or cable insulation, and
• any other condition that may affect its safe operation.
2. AFTER USE, wipe external surfaces of the charger with clean cloth.
3. WARNING! If the supply cord of this charger is damaged, it must be replaced only by a qualified service
technician. DO NOT OPEN CHARGER HOUSING, NO USER-SERVICEABLE PARTS INSIDE.

Limited Manufacturer Warranty
FOT makes every effort to ensure that this product meets high quality and durability
standards. FOT warrants to the original retail consumer a 1-year limited warranty
from the date the product was purchased at retail and each product is free from
defects in materials. Warranty does not apply to defects due directly or indirectly
to misuse, abuse, negligence or accidents, repairs or alterations, or a lack of
maintenance. FOT shall in no event be liable for death, injuries to persons or
property, or for incidental, special or consequential damages arising from the
use of our products. To receive service under warranty, the original manufacturer
part must be returned for examination by an authorized service center. Shipping
and handling charges may apply. If a defect is found, FOT will either repair or
replace the product at its discretion.
DO NOT RETURN TO STORE
For Customer Service:
Table of contents
