spidocook CALDOBAKE L4 User manual

CAUTION: Read the instructions before using the machine
CALDOBAKE
Instruction Manual ENGLISH


Installing the appliance 11
Electrical connections 12-13
Oven cavity smoke exhaust 14
Certication 15
Contents
Explanation of pictograms 2
Contents 3
Introduction 4
INSTRUCTIONS FOR THE USER
- Safety regulations 5-7
Appliance use instructions and Guarantee
Oven Control
INSTRUCTIONS FOR THE INSTALLER
8
9
- Safety regulations 10
3
English
CALDOBAKETM


Appliance instructions
Do not place heat source (e.g. grilles, fryers, etc.) near the oven.
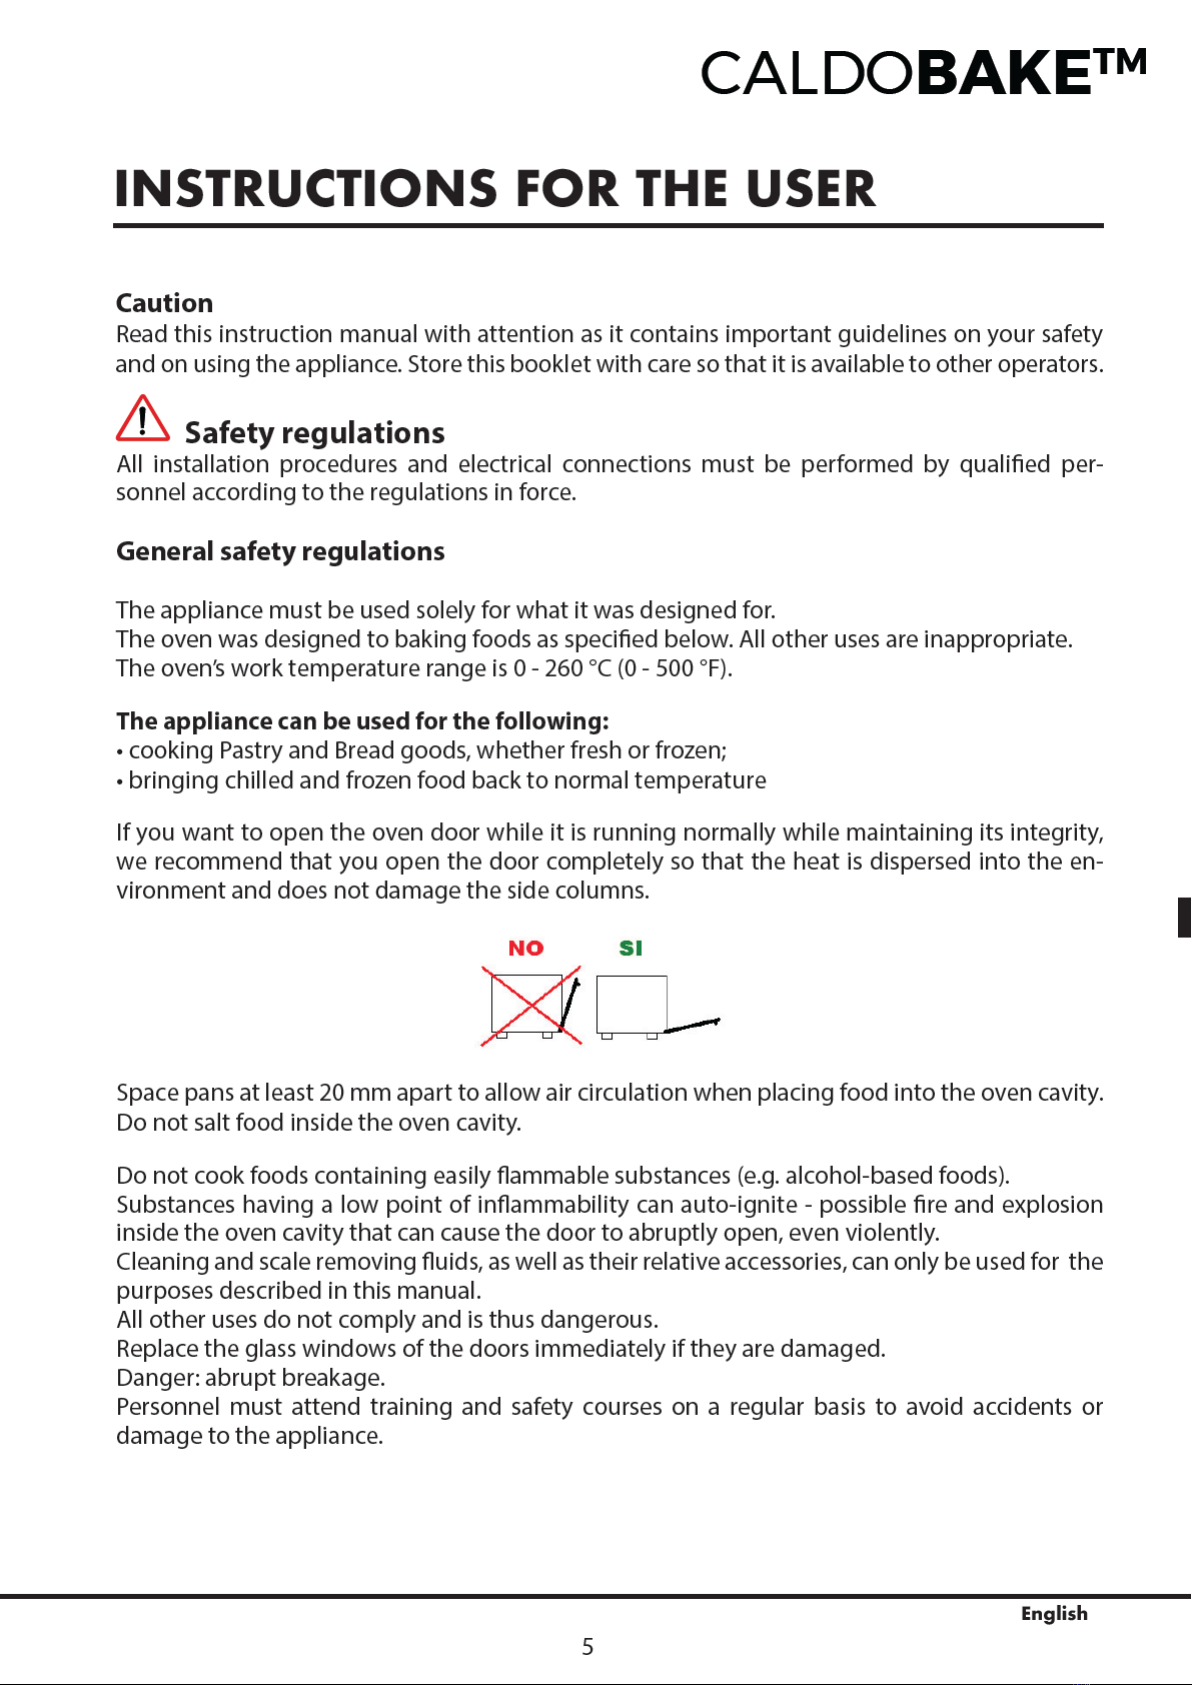
If the oven undergoes lengthy stand-by (e.g. during the night), leave the oven cavity door
slightly ajar.
If the oven is inactive for lengthy periods (e.g. non-business days), take the appliance power o
line.
The oven must not be disposed of as domestic waste or placed in the used appliance bins of
municipal waste collection centres when the oven has reached its end of life. We are glad to
help you properly dispose of the appliance.
Guarantee
Installation of the Spidocook S.r.l. product must be performed by an Authorized Spidocook
S.r.l. Assistance Service. The installation date and appliance model must be documented
by the end purchaser, by means of written conrmation or an installation invoice issued
by the dealer or the Authorised Spidocook S.r.l. Customer Assistance Service, otherwise this
guarantee will not be valid;
The Spidocook S.r.l. guarantee covers all malfunctions objectively linked to production defects.
The guarantee excludes damage due to transport, poor product storage or maintenance or
incorrect product use. Also excluded is damage due to installation not conform to the technical
specications provided by Spidocook S.r.l. and linked to the environment of use, such as,
for example, unclean and aggressive water supply, low quality gas supply, or electrical supply
failing to respect nominal voltage and power ratings. The guarantee also excludes any damage
due to power surges or tampering by unauthorized or incompetent persons. The guarantee is
also invalidated for damage to the appliance by lime scale deposits. In addition, the guarantee
does not cover consumables, such as: seals, light bulbs, glass panels, decorative parts and
parts consumed during use. Guarantee rights will also be invalidated in the event of damage
arising as a result of incorrect installation, or installation which has not been carried out by an
Authorised Customer Assistance Service.
English
8

Oven control
Setting the cooking duration
The cooking duration can be set by using the dial (dial on the left): the time can be set any-
where from 0 to 60 minutes.
Turning the dial clockwise sets cooking duration; while turning it counter-clockwise (manual
position) sets the oven to continuous mode.
Turning the dial starts the oven and activates fan rotation and any interior lights.
The dial stops on the zero and the oven switches o when the cooking cycle is over.
The oven is o only when the timer dial rests precisely on the zero“0” mark. Wait 5 minutes
before leaving the appliance unattended to ensure proper functioning.
Setting the cooking temperature
The temperature inside the oven cavity can be set by using the temperature dial (dial to the
right):
the temperature can be set anywhere between 0 to 260 °C (0 - 500 °F).
when on, the blue temperature indicator light shows that the resistor is activated, which
switches o as soon as target temperature has been reached.
9
English
CALDOBAKETM


Electrical connections
a- Connection to the power mains must be done following the regulations in force. Operate
the appliance at a room temperature between +5°C and +35°C. Make sure that voltage and
frequency values correspond to those indicated on the ratings plate on the oven before
connecting it to the power mains.
The appliance must be positioned in such a way as to allow easy access to the power plug.
As regards for ovens equipped with plug-free power cord, install a single-pole switch
between the appliance and the power mains that can be accessed after installation; the
switch contacts must have a 3 mm minimum gap and be of appropriate load capacity. We
recommend using a dierential magneto-thermal switch. Check that the power supply
voltage does not deviate from the nominal voltage value specied on the appliance rating
plate by more than ± 10%.
The safety thermostat protection must be tightly secured so that it cannot be removed
without the aide of a tool.
b- The appliance must be connected to the mains ground line.
In addition, the appliance must be included within an equipotential system, whose ecacy
must be appropriately checked according to the regulations in force. This connection must
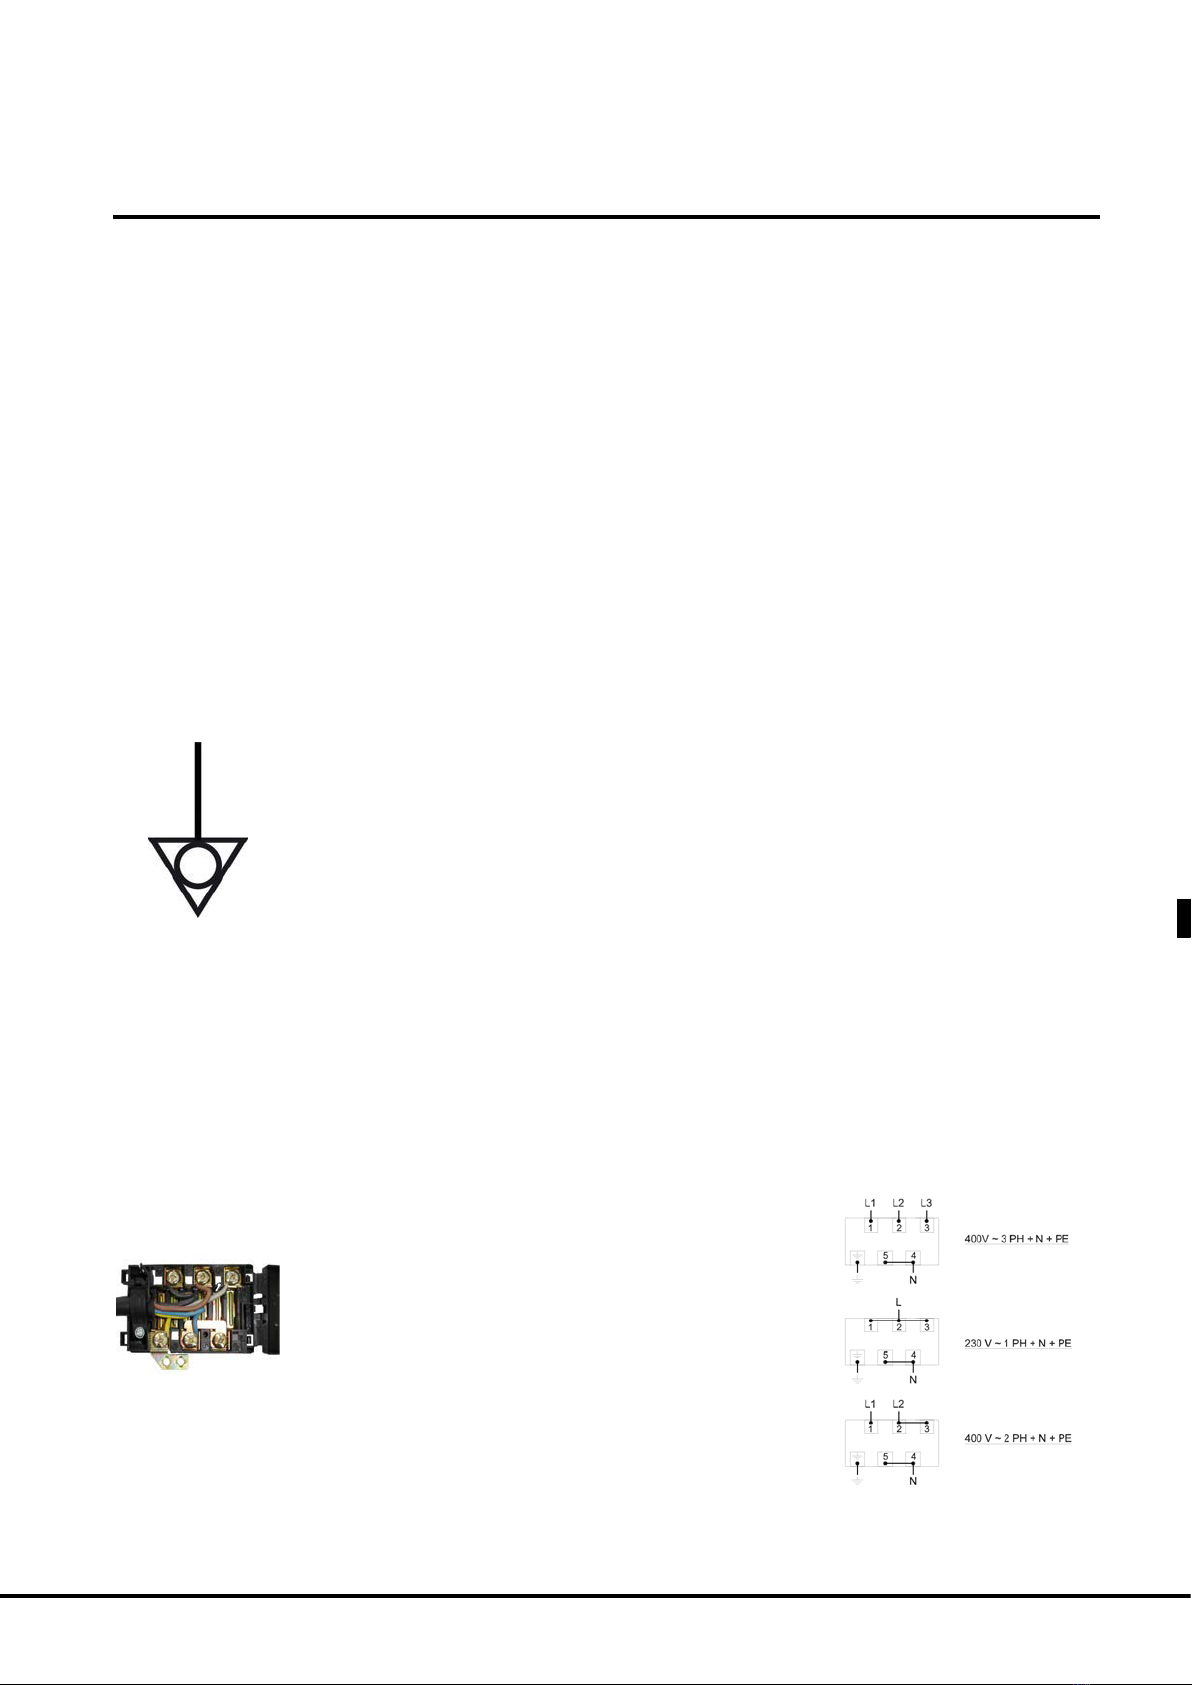
be performed between dierent appliances with the terminal marked with the symbol:
The appliance must be included within an equipotential system, whose ecacy
must be appropriately checked according to the regulations in force. Equi-
potential connection consists in connecting the oven electrically with other
electrical appliances in order to bring the dierent electrical ground lines to the
same electric potential. The equipotential connection symbol is placed near
the terminal to use for the equipotential connection. The equipotential wire
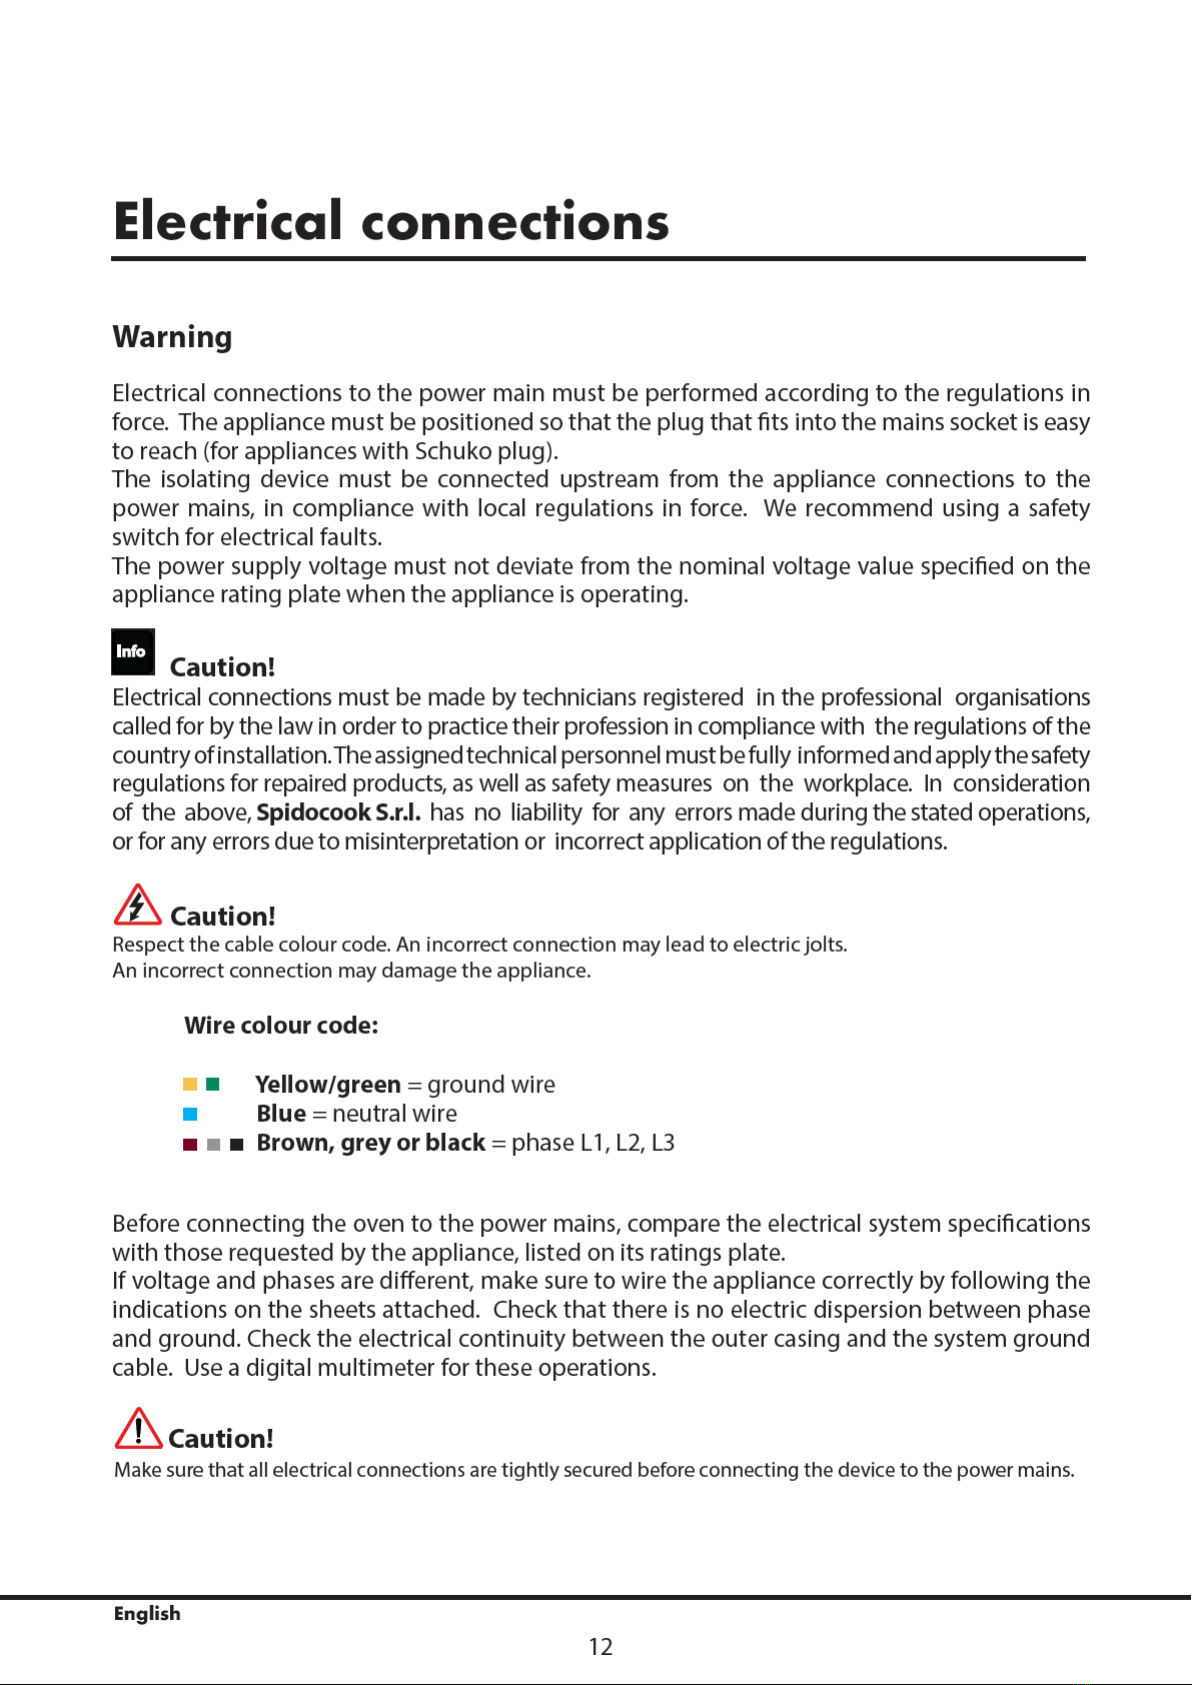
must have a minimum cross-section of 10 mm2 and be yellow-green.
1- Ovens equipped with Schuko plug (230V single-phase): simply insert the plug into the
power socket (the socket must t the power plug provided)
2- Ovens equipped with power cord (400V, 3-phase + Neutral): these ovens have a 5-wire
power cord: it is necessary to connect the appropriate 5-pole, 3-phase plug of adequate
load capacity or connect the cord directly to an electric board.
The power supply cable may be replaced for ovens equipped with a 5-pole cable in order to
adapt the oven to the type of electrical current supplied. Follow the procedures below to
replace the power supply cable:
- Open the terminal board cover by prying open
with a suitable screwdriver from the two side
aps (1)
- Undo the wire fastening screws (2) -Unscrew
the cable clamp screw (3)
- Remove the cable supplied
- Connect the wires of the cable preferred by
following the selected wiring diagram;
make sure to tightly secure the terminal screws
- Secure the cable using the cable clamp
- Close the terminal board cover again
13
English
CALDOBAKETM

Certication
Manufacturer: Spidocook S.r.l.
Address: Via dell’Artigianato n°2, 35010 Vigodarzere (PD), Padua, Italy
Declares, under its own responsibility, that the product CALDOBAKE™
complies with Directive 2006/42/EC in compliance with the following standards:
- EN60335-1:2012 + A11: 2014
- EN 60335-2-42: 2003 + A1: 2008 + A11:2012
- EN62233: 2008
complies with EM Compatibility Directive 2004/108/EC and is built in compliance with the
following standards:
- EN 55014-1: 2006 + A1: 2009 + A2: 2011
- EN 55014-2: 1997 + A1: 2001 + A2: 2008
- EN 61000-3-2: 2006 + A1: 2009 + A2: 2009
-EN 61000-3-3: 2008
- EN 61000-3-11: 2000
- EN 61000-3-12: 2011
- EN 61000-6-2: 2005
- EN 61000-6-3: 2007
SAF series ovens are compliant the following standards:
UL197
CSA C22.2 No. 109
NSF/ANSI 4-2009
15
English
CALDOBAKETM

Spidocook S.r.l.
Via dell’Artigianato n°2
35010 Vigodarzere (PD) Italy
info@spidocook.com
www.spidocook.com <http://www.spidocook.com>
SPIDOCOOK.COM | FOLLOW US ON
LI1814A1.D00-LDI-01 - Printed: 11-2018
All features indicated in this catalogue may be subject to change and could be updated without notice.
All images used are for illustrative purposes only.


