Splash-A-Round Pools CaliFun CF-18 User manual
IMPORTANT
Read this guide and follow all instructions carefully before assembling or using
this product.

Getting started:
Congratulations on the purchase of your new pool! Please read this owner’s manual before
beginning assembly. The information contained within this booklet will help ease the installation
process and extend the life of your pool. We suggest using 2-3 people during the assembly of
your pool to speed things up. Don’t forget to save this manual for future reference.

PLEASE NOTE:
It is normal for the pool to show some deflection of the top rails inward while the pool is filling. Once
the pool has filled completely, the deflection of the top rail may be slightly outward. This is common
and will not effect the structural integrity of your pool.
In some rare cases, due to different climate conditions and local water quality, your new pool may
“sweat” or “weep” slightly after being filled for the first time. This may appear around the bottom
perimeter of your pool, most often noticeable when installed on cement. This “sweating” or
“weeping” will most often stop once the outside air temperature and inside water temperature
equalize in a few weeks time or less. This is similar to condensation which occurs on the outside of
a can of cold soda on a hot day. If after several weeks, your pool continues to “sweat” or “weep”,
please contact your dealer or Splash-A-Round Pools directly for further assistance.
In some rare cases, due to the advanced design of the PVC poly-fabric reinforced heavy duty liner,
small microscopic pinholes may occur in the material due to the curing process when manufactured.
These microscopic pinholes may appear as a small “weep” in the material which can be easily
omitted by dabbing a small amount of transparent glue which is provided with your pool. Once
applied, wipe off with a dry cloth. The “weep” will immediately stop and the transparent glue will be
invisible. If you do not wish to apply a small amount of transparent glue, you may simply wait a few
weeks as most often the “weep” will stop on it’s own. This is in no way a defect which will affect or
compromise the integrity of your new pool.
To find the serial number of your pool, go to the retaining belt around your pool and you will see your
serial number SEC-#-####. The last four numbers is your serial number, and you will need this
number to properly register your product within 20 days from purchase.

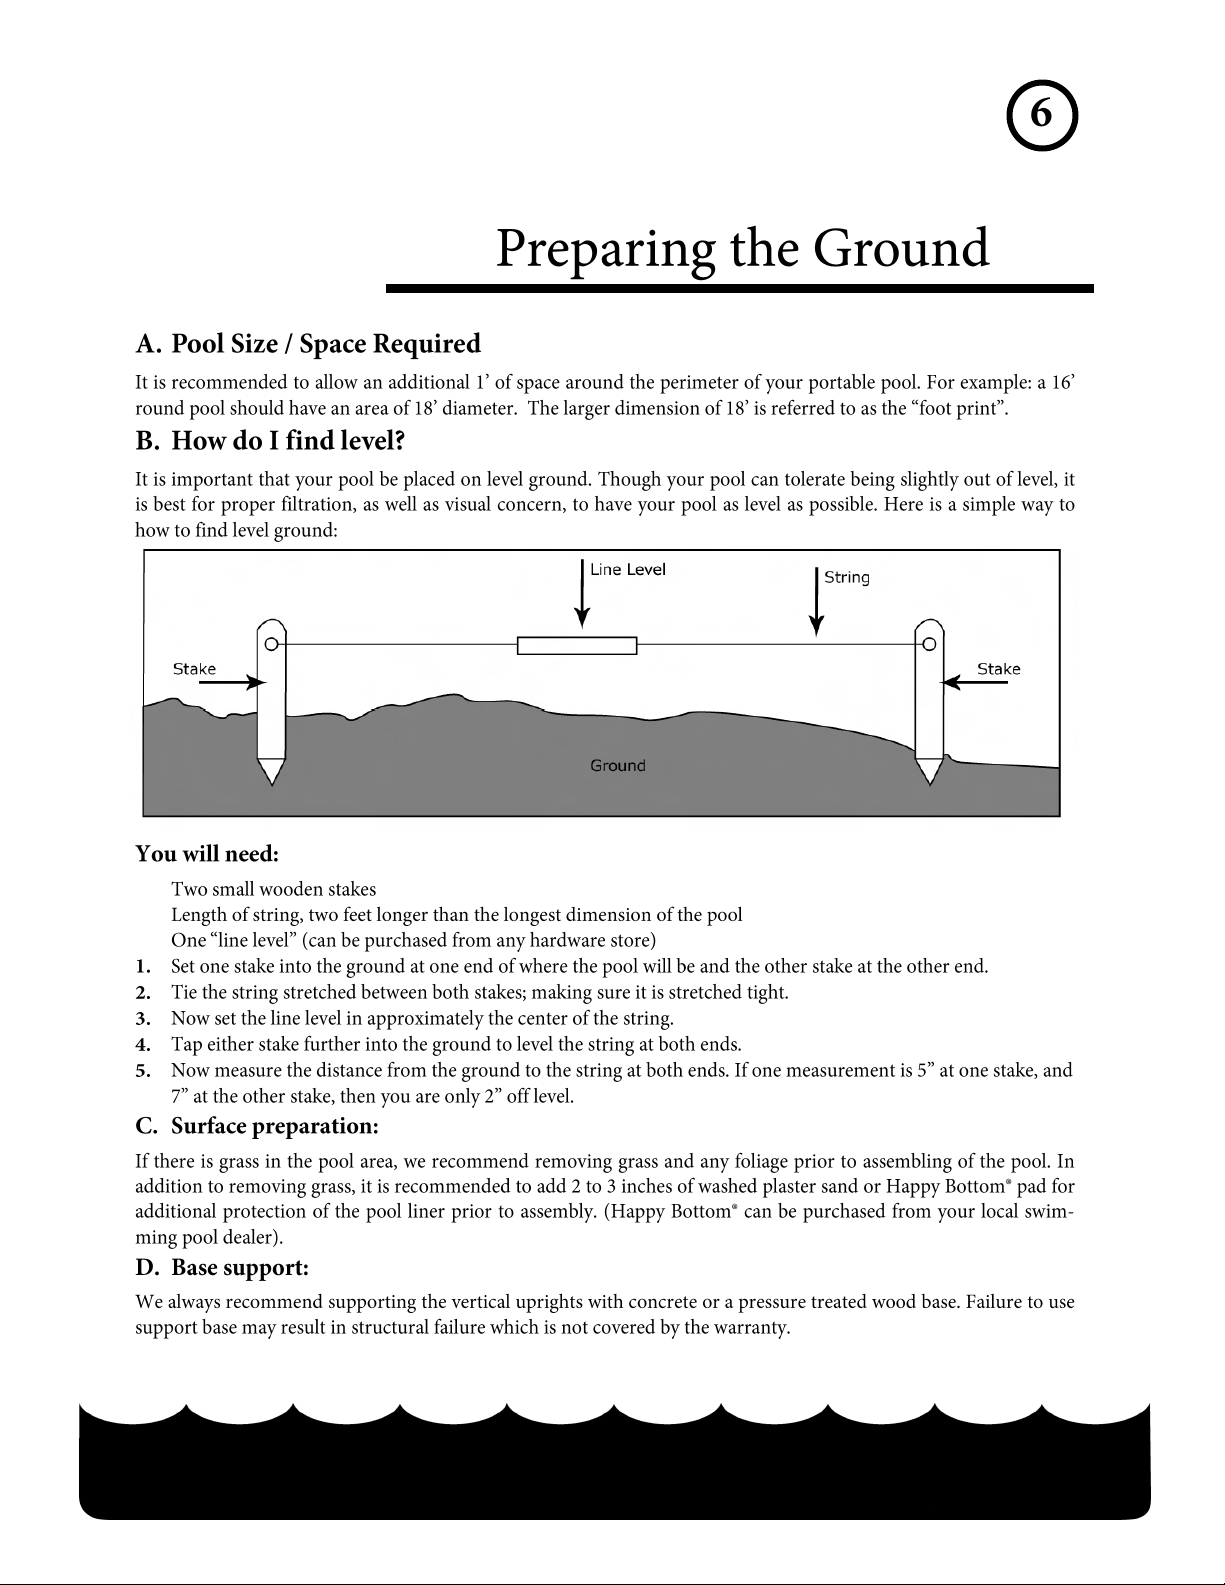

Step 1:
Locate the area most suited for setting up the pool. Clear it of any sharp objects or debris and level it to
zero as explained on the “Preparing the Ground” page. If the pool is assembled on unleveled ground, it
may suffer permanent structural warping or damage the liner.
Step 2:
Remove the liner from the box marked “Liner” and place it at the center of the area where you plan to
assemble the pool. Take care not to damage the liner when opening the box. DO NOT USE SHARP
OBJECTS TO OPEN THE BOX THAT CONTAINS THE LINER.
Step 3:
Unfold the liner. Locate the place where the pump and filter system will be connected and position the 2
circular openings on the side where you intend on placing the pump and filter.
Step 4:
Remove the frame (parts A, C) from the box marked “Frame”. Lay all of the upper frame out in the order
indicated below. Each frame piece will be clearly marked with the corresponding letter.
A
C

Step 5:
Begin inserting the upper frame rails (A) into the sleeves located at the top of the liner. Center the top rail
in the sleeve and attach a T-Connector (C) to the end of the frame rail in the open space between each
sleeve. Insert the smaller end of the top rail into the larger end of the T-Connector lining up the plastic pin
making sure you hear a “click.” Repeat this step until all of the upper frame rails and T-Connectors have
been connected.
Step 6:
Once all of the upper frame rails have been connected, it is time to attach the vertical legs. Begin by slid-
ing one vertical leg (B) through the retaining belt and attaching it to the T-Connector (C) pushing in on
the pins and aligning the holes until you hear a “click.” Double check that the vertical leg has been in-
serted in the restraining belt and proceed to the next leg repeating these steps until all of the vertical
legs are in place. Next go around the pool attaching the plastic feet (D) to each of the vertical legs (B).

Step 7:
Special note: Once you finish, make sure the liner fits comfortably on the structure. Go around the pool
to check that the framework is assembled correctly. Once you start filling the pool with water, you will not
be able to make any changes.
IMPORTANT: Make sure to place a support base of concrete or treated wood under each vertical
upright as correctly shown below.
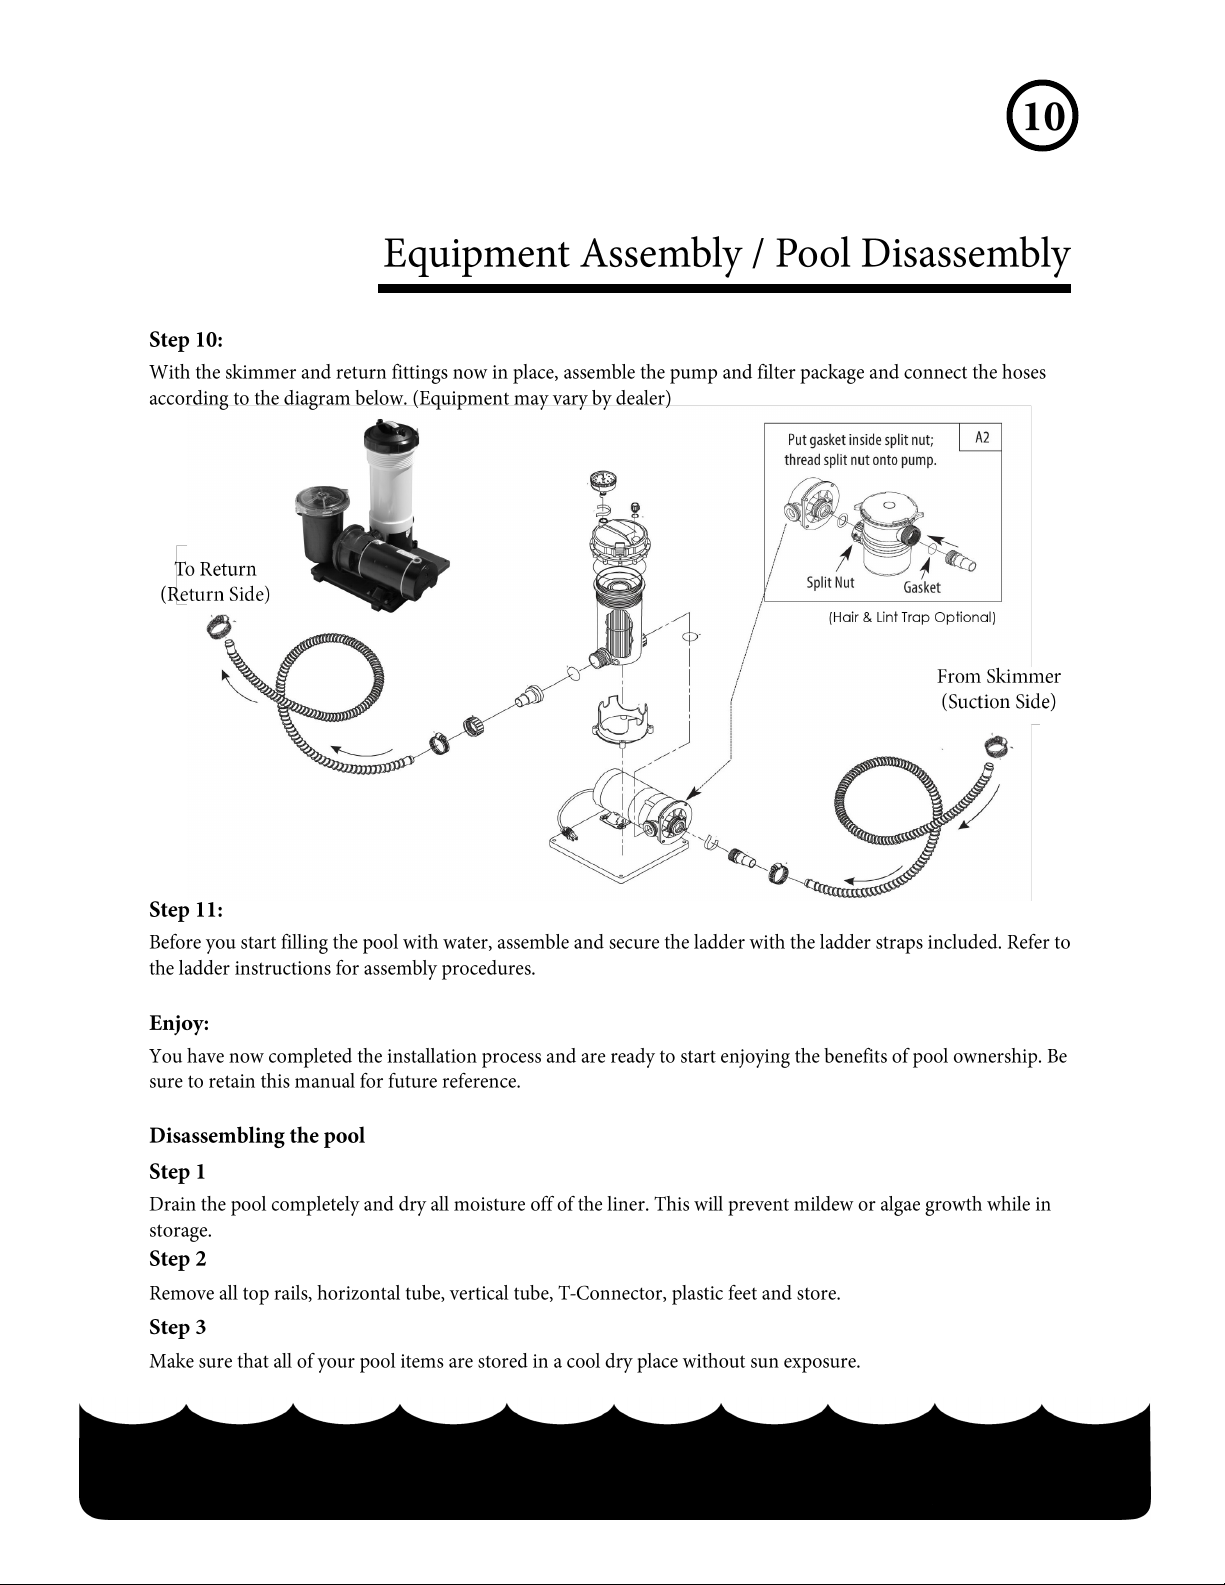
Step 8:
Now that you’ve completed the pool assembly, its time to install the skimmer and return fittings. Follow
the diagram below. Once the skimmer has been properly assembled, insert the 2 skimmer straps
through the openings on the skimmer and buckle them securely to the loops on the pool liner.
Gate Valve
(optional)
Compression
Nut Gasket Liner Compression
Face
Skimmer
Gasket
BASE
BASE
GROUND

To obtain performance under this warranty, first contact the dealer from whom the product was purchased. The
dealer is charged with the responsibility of determining, beyond a reasonable doubt, that the defect was once cre-
ated by the manufacturer. The dealer may correct the defect or arrange to send the damaged / defective component
back to SARP for repair (freight prepaid by pool owner).
SARP are designed for your swimming enjoyment. Entry and exit from your pool should only be by a proper
above ground swimming pool ladder. DO NOT DIVE OR JUMP!


