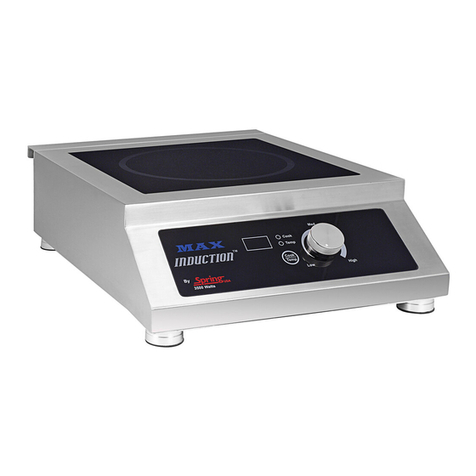
Spring USA MAX INDUCTION SM-261C User manual

Operation
Manual
By
Models: SM-261C
&
SM-263C (International)
Buffet
Induction
Cookware
The Evolution of Intelligent Design®
Spring USA®
12 Ambassador Drive
Suite 14
Naperville, IL 60540-40 9
Phone: (1) 630-52 -8600
Fax: (1) 630-52 -86
Email: springusa@springusa.com
Web: www.springusa.com
1
8
℘
℘

Before You Begin:
Read the following instructions in their entirety.
Use proper cookware. Your cookware must be induction-ready.
Check your ventilation. Your M X Induction® Range must have the
proper ventilation in order to operate correctly. There must be at least 4”
of space available around your induction range.
Ensure that you have dedicated power to the installed location. Verify the
electrical requirements for your specific model induction range, as shown
on Page 4.
2
www.springusa.com
(1) 630-52 -8600
The Evolution of Intelligent Design®
7
Reinforced,
Tempered Glass
Surface
Features SmartScan®
Technology
Surface Responds
Faster, Without
Surges or Spikes in
Temperature
Increased Efficiency
Easy to Read LCD
Panel Readout
Tempered, Black-
Smoked Glass
Faceplate
Durable, Brushed
Stainless Steel Body
Design
Features Leveling
Leg Design with Non-
Skid, Non-Scratch
Base
Removable Mesh ir
Filter
208-240 Volts ~
50-60Hz
2600 Watts
uitable erving Ware:
Your M X Induction®Range works with induction-ready serving vessels.
Visit the Spring US Website for a full line of induction-ready,
professional serve ware.
Serving pieces must have a flat bottom, in order to make full contact with
the countertop.
Serving pieces that are footed, or that have a raised ridge, are not for use on
this system, as they cannot make full contact with the counter surface.
Vessels must have a diameter greater than 9”.
Glass Cookware is not suited for use on your induction warming system.
Serving vessels must be centered on the induction warmer for optimal
heating and performance.
Cast Iron
luminum Cookware with
Induction Disc
Carbon Steel
luminum Tray With
Induction Disk
Stainless Steel Multi-Ply
Cookware
Convertible Buffet Servers

afety Precautions:
Plug the power cord into a dedicated circuit. Note: Nothing else should be
plugged into this circuit. Each M X Induction® Range must have
sufficient power supply as outlined below. Once you have plugged the unit
in, it will beep, and an ‘EO’ code will appear in the display window.
To Begin:
Turn the unit on. n ‘EO’ code will appear next in the digital window,
indicating the induction range is searching for cookware.
Turn the knob clockwise to turn the unit on. Your M X Induction® range
will always start out in the “Cook” mode. “Cook” is the default mode.
Place suitable cookware within the circle on top of the M X Induction®
Range.
elect either the “Cook” Mode or the “Temp” Mode.
In “Cook” mode, turn the dial clockwise. The LED will display cook
power levels of 1 thru 20.
In “Temp” mode, turn the dial clockwise. The LED will display
temperature levels from 110° to 400° fahrenheit.
Turn the knob clockwise to set the power level or temperature.
To shut the induction range off, turn the knob counter clockwise until you
hear the unit ‘click’ and turn off.
ctual range temperatures may vary due to a number of variables, such
as ambient temperature in the immediate surrounding area, content and
volume of food being heated or cooked, and whether or not you are
utilizing a lid on the serving vessel.
-----------------
Never attempt to service any part of your M X Induction® Range on
your own. Contact our Service Department by calling (1) 630-527-
8600. ttempting to service your Induction Range on your own, or
through an unauthorized repair facility automatically voids your
warranty. For service forms, visit the Spring US website.
For Limited Warranty Information, visit www.springusa.com
Note:
This equipment uses, generates and can radiate radio frequency energy.
If not installed correctly and used in accordance with the instructions,
may cause harmful interference to radio communications. Users or
guests with Pacemakers should contact their health care professional
prior to using this product.
pecifications:
Induction Range Error Codes:
www.springusa.com
Review your dedicated power
requirements. Each range must
operate with the power required on
Page 4.
Range will not turn on. Range is
experiencing temporary voltage
overload or is not on its own,
dedicated circuit.
E3
Remove the cookware from the
range and let the range cool. Make
sure the vents are clear. Verify you
are using induction-ready
cookware. Once the range has
cooled, restart.
The range has overheated.
E2
Clear vents, let range cool down,
then restart. If error message
continues, your range needs to be
serviced.
Range has overheated due to
blocked ventilation and has shut
down the range.
E1
Place an induction ready pan on
the range.
Induction range does not sense
induction-ready cookware has
been placed on the glass surface
E0
SolutionCauseError
4 5
CEE 7/7 16
European Plug
or BS 1363
13 U.K. Plug
1.8 m Cord
2600 Watts 50 Hz220-240 Volts
10.8 mps
SM-263C
NEM 5-15
6’ Cord
2600 Watts 50-60
Hz
208-220 Volts
11.8 mps
SM-261C
Plug TypePeak PowerVoltage /
Amps
Model #
(1) 630-52 -8600

Maintaining Your MAX Induction® Range:
Never touch the glass plate immediately after cooking. The surface of the
cooktop may remain hot due to the heat transferred from the cookware.
Do not damage the glass surface of the induction range. If the glass plate is
broken, turn the unit off and unplug it immediately. Call Spring US at
(1) 630-527-8600 for service or warranty. Be sure to have your Model #
and Serial Number available when you contact our office or when
completing the Service Form on the website.
To clean your M X Induction® Range, unplug the unit from its power
source. Wipe the unit down with a sponge or cloth with a mild
dishwashing liquid. Dry with a clean, soft cloth.
Do not immerse the induction range directly in water for cleaning – this
will damage the unit.
Remember to clean the vents located on the underside and at the back of
the unit. Inspect the mesh air filter on the underside of the induction range
each day. If it is soiled, remove the air filter and wash with dish washing
detergent. Dry and replace before operating the induction range.
Keep your induction range away from other ovens or stoves. If the
surrounding temperature is hot, your induction range may stop heating.
Never set items such as metal utensils or keys on top of an induction range,
as the range may sense the metal and begin to heat the object.
Note:
Spring US is not responsible for poor performance or damage when
ranges are used in conjunction with non-approved materials.
Our Induction ranges have been designed and tested using Spring US
Professional Cookware and Vessels. Spring US cannot guarantee the
performance of other Vendors’ equipment being used with our M X
Induction® Ranges.
6How To Operate:
Your M X Induction® Range is designed to operate in two modes: “Cook”
or “Temp”.
“Cook” Mode offers you high-speed heating, used for sautéing, omelet
stations, pasta bars or demonstration cooking.
“Temp” Mode offers you thermostatically controlled holding temperatures
for use with soups, sauces, buffets or pastry work. The LED display allows
for more accurate temperature selection.
In “Cook” Mode:
n ‘E0’ code will flash until suitable cookware is placed on the glass
surface of the range.
The LED panel will display a two-digit number indicating the power
level. Power levels run from 1 thru 20.
As a safety precaution, if no cookware is placed on the induction
range plate after 2-1/2 minutes, the unit will shut off.
Once suitable cookware has been placed on the glass induction plate, the
unit will continue to cook until the range is manually shut down, or the
mode is changed over to “Temp” mode.
Note: As a safety precaution, make sure you have at least 4” of space at
the back of the Induction range. Induction ranges need ventilation to
operate efficiently.
In “Temp” Mode:
n ‘E0’ code will flash until suitable cookware is placed on the glass
surface of the range.
The LED panel will display a three-digit number indicating the
temperature setting. To increase the temperature setting, turn the dial
clockwise. To decrease the setting, turn the dial to the counter-clockwise.
The induction range will continue to warm the food until the set
temperature has been reached. Once the temperature has been reached,
the range will maintain that pre-selected temperature setting.
Temperature settings in “Temp” mode, in Fahrenheit are:
110°, 120°, 130°, 140°, 150°, 160°, 170°, 180°, 190°, 200°, 220°, 240°,
260°, 280°, 300°, 320°, 340°, 360°, 380° & 400°.
Celsius: 43°, 49°, 54°, 60°, 66°, 71°, 77°, 82°, 88°, 93°, 104°, 116°,
127°, 138°, 149°, 160°, 171°, 182°, 193° & 204°.
www.springusa.com
3
(1) 630-52 -8600
This manual suits for next models
1
Other Spring USA Cooktop manuals
