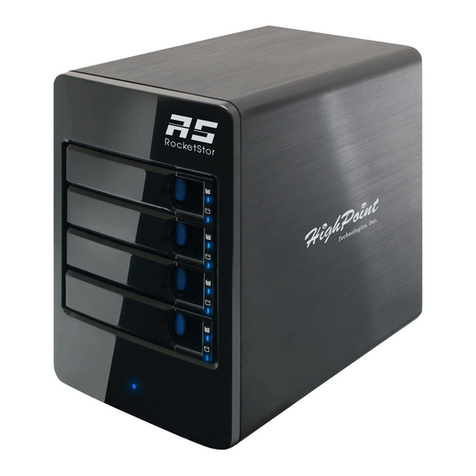
ST Engineering Electronics DigiSAFE DISKCRYPT M100 User manual

DigiSAFE
DISKCRYPT M100
USER MANUAL
Version 1.0.0

This page has been left blank intentionally

G
G-P6025-TM001
Issue B
DigiSAFE DiskCrypt M100 User Manual i
Disclaimer
Thank you for purchasing DigiSAFE DISKCRYPT M100.
DISKCRYPT M100 has been designed to be compliant with the SATA hard drive operating
specifications as well as USB 3.0 operating specifications. DISKCRYPT M100 is also
backward compatible with USB 2.0 machines.
ST Electronics (Info-Security) accepts no liability for any loss of data or the inability of
DISKCRYPT M100 to work with equipment that are not compatible with the above
operating specifications. Nor can ST Electronics (Info-Security) accept any liability or
responsibility for software which is also non-compliant.

G
G-P6025-TM001
Issue B
DigiSAFE DiskCrypt M100 User Manual ii
Contents
1About this Guide ........................................................................................1
2Introduction ................................................................................................2
2.1 About DISKCRYPT M100....................................................................2
2.2 Connection Ports .................................................................................3
2.3 Checklist..............................................................................................3
2.4 Specification ........................................................................................4
3Using DISKCRYPT M100............................................................................5
3.1 Authentication......................................................................................5
3.2 Using the built-in keypad......................................................................7
4Smart Card Security Features...................................................................8
4.1 Change Smart Card PIN......................................................................8
4.2 Administrative Functions......................................................................9
4.2.1 Smart Card Initialization.....................................................................................9
4.2.2 Smart Card Lockout mode...............................................................................10
4.2.3 Admin Smart Card Initialization........................................................................11
4.2.4 Change Admin PIN ..........................................................................................12
5Optional Accessories...............................................................................13
5.1 DigiSAFE DiskCrypt key Management Software (DMS)....................13
6Helpful Information ..................................................................................14
6.1 Partitioning and formatting your hard drive........................................14
7Care and Handling....................................................................................15
8Frequently Asked Questions...................................................................16
9Troubleshooting.......................................................................................19

G
G-P6025-TM001
Issue B
DigiSAFE DiskCrypt M100 User Manual 1
1About this Guide
This guide is designed to provide step-by-step instructions for the installation of
DigiSAFE DISKCRYPT M100 and as a reference for its operation and usage.
PLEASE READ AND FOLLOW THE INSTRUCTIONS
PROVIDED IN THIS GUIDE CAREFULLY AND
THOROUGHLY.
FAILURE TO DO SO MAY RESULT IN DAMAGE TO
DISKCRYPT M100 AND ANY OR ALL OF THE
CONNECTED DEVICES.

G
G-P6025-TM001
Issue B
DigiSAFE DiskCrypt M100 User Manual 2
2Introduction
2.1 About DISKCRYPT M100
Congratulations on your purchase of DigiSAFE DISKCRYPT M100. DISKCRYPT M100
represents the most advanced secure mobile storage solution today, utilizing smart card
authentication technology and AES 256 bits full disk encryption. With DISKCRYPT M100,
you can enjoy mobile storage with the speed and convenience of USB 3.0 in a compact
form factor and be assured that your data is safe from prying eyes.
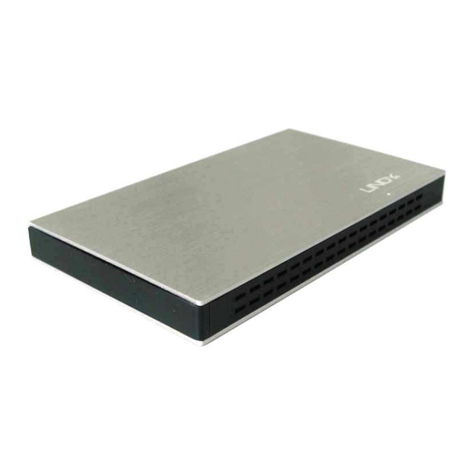
DISKCRYPT M100 is a secure portable hard drive enclosure consisting of a 2.5” SATA
hard drive enclosure and a hardware-based encryption module that performs full disk
encryption, i.e. it encrypts every byte and every sector of data that is written into the
hard drive. The device is designed to fit standard 2.5” hard drives with a SATA interface,
and communicates with the computer via standard USB 2.0 or 3.0 ports. DISKCRYPT
M100 is operating system independent and does not require any software drivers. It
encrypts every single byte and sector that includes all temporary files, as well as areas
that would normally be missed and left “in the clear” by software encryption products.
Encryption and decryption occurs transparently without any loss in disk performance.
Users simply use their computers as usual with the assurance and complete peace of
mind that their data is fully protected in the unfortunate event that their hard drives are
stolen or lost.
DISKCRYPT M100 stores the hard drive encryption key securely in smart cards (two are
provided per device). Smart card technology is well understood and represents the
highest level of security possible for secure data storage. It is vastly more secure than
other solutions that use hardware tokens, where the encryption key is stored in insecure
memory that can be easily read and duplicated. In contrast, smart cards store the
encryption key securely within, and can only be accessed upon presentation of a valid
PIN. The user will need both the smart card as well as knowledge of its PIN to be able to
access the data in the connected hard drive. By doing so, DISKCRYPT M100 enforces
two-factor authentication, which is a higher security protection by ensuring that the user
possesses both the physical smart card and the knowledge of its PIN.
The user is required to authenticate each time DISKCRYPT M100 is plugged into the
computer. After authentication, the drive presents itself to the operating system and the
user is granted normal drive access.

G
G-P6025-TM001
Issue B
DigiSAFE DiskCrypt M100 User Manual 3
2.2 Connection Ports
2.3 Checklist
The following items are included with DISKCRYPT M100. If you discover any missing
items, please contact your local reseller/distributor.
1 x DISKCRYPT M100
1 x USB 3.0 cable
2 x Smart cards
1 x Black pouch
1 x Anti-fingerprint screen protector
1 x Quick start guide
1 x User manual
Micro-B USB 3.0 receptacle

G
G-P6025-TM001
Issue B
DigiSAFE DiskCrypt M100 User Manual 4
2.4 Specifications
BUS INTERFACE
USB 3.0 (backward compatible with USB 2.0 machines)
PHYSICAL
USB 3.0 micro-B receptacle
Smart card slot
SATA 22 pin connector (internal)
HARD DISK
Any 2.5” hard disk with 9.5mm thickness
DIMENSIONS
150mm (L) x 85mm (W) x 20mm (H)
POWER
Approx 5V 300mA max (excluding power drawn by the
HDD)
AUTHENTICATION
Supports two-factor authentication via smart card and PIN
SMART CARD
Supports Common Criteria certified smart cards
ENCRYPTION
AES hardware cipher engine
Supported key strength: 256 bits
KEY MANAGEMENT
User-configurable smart card PIN
Admin password for Administrative mode
CERTIFICATIONS AND
STANDARDS
FCC, CE
RoHS compliant
OPERATING SYSTEMS
Operating System independent
Tested with Windows®10, Windows®8, Windows®7,
Windows®XP, Windows®Server 2012, Windows®Server
2008, Windows®Server 2003, Mac OS and Linux

G
G-P6025-TM001
Issue B
DigiSAFE DiskCrypt M100 User Manual 5
3Using DISKCRYPT M100
3.1 Authentication
DISKCRYPT M100 comes with the 2.5” hard drive installed. You are ready to use it with
your computer anytime. If the hard drive is not installed, simply approach your local
reseller/distributor.
DISKCRYPT M100 requires users to authenticate themselves via two-factor
authentication before they are granted access to the installed drive. In order to do so,
users must have the included smart card (something you have) and its associated PIN
(something you know). The authentication process involves inserting the correct smart
card into DISKCRYPT M100, followed by PIN entry. Upon completion of these two steps,
the connected drive will present itself to the operating system and can be used like a
normal drive.
To connect DISKCRYPT M100 to your computer via USB, follow these easy steps:
1. Insert the USB cable to your computer’s USB port with the other thinner
micro-B end to DISKCRYPT M100.
Ensure correct connector orientation to obtain a snug fit.
2. Insert the smart card with the contacts facing up.
You may insert the card before or after connecting DISKCRYPT M100 to your
computer. Once a valid card is inserted, the keypad will turn on to allow key entry.
If an invalid card is inserted, the ERROR LED will light up.
3. Enter your PIN.
Once DISKCRYPT M100 recognizes that a valid card is inserted, you may proceed
to enter your 8-digit PIN. The default factory PIN is “12345678”. At the end of
your PIN entry, press the ENTER button.
(For Enterprise deployment, the default PIN will be provided by the Administrator.)

G
G-P6025-TM001
Issue B
DigiSAFE DiskCrypt M100 User Manual 6
Insert the smart card into the smart card slot
with the contacts facing up.
Enter your 8-digit PIN, followed by the ENTER
button.
IMPORTANT:
It is recommended that the default PIN is changed for each smart card. Refer to
Section 4.1 for details.
The default mode is the “Lockout” mode. This is the recommended (higher
security) mode of usage.
In Lockout mode, DISKCRYPT M10 is automatically disconnected from the host PC
upon card removal. Do NOT remove the smart card while DISKCRYPT M10 is being
accessed as this may cause unrecoverable data loss/corruption.
If an incorrect PIN is entered, the ERROR LED will blink continuously. Press the
ESC button to restart DISKCRYPT M100. If you think you have mistyped your PIN,
press the ESC button at any time to restart the entire authentication process.
You will be locked out of your smart card after 8 consecutive incorrect PIN
attempts. Due to security implementations, it is not possible to unlock the smart
card. Please ensure that you have the correct PIN to the smart card.
Each DISKCRYPT M100 comes with two smart cards. It is recommended that you
use only one card and keep the other in a secure place. In the event that one card
is stolen/lost, you may authenticate with the other card.
Please always remove the smart card when the device is not in use or unattended.
Please perform preliminary visual inspection of the device for tamper signs before
usage.
The continuous blinking of the ERROR LED upon device boot up indicates Power-
On-Self-Test failure. Please contact your local reseller/distributor.
Users should not leave the device unattended.
NOTE:
DO NOT force the smart card into the
device. DISKCRYPT M100 is designed with
the smart card half inserted with a
purpose to remind users to remove the
smart card after use.

G
G-P6025-TM001
Issue B
DigiSAFE DiskCrypt M100 User Manual 7
3.2 Using the built-in keypad
The built-in keypad allows you to enter or change your PIN (refer to Section 4.1 on
Change Smart Card PIN) and perform other Administrative functions. It works on the
principle of capacitive sensing to provide a better user experience and can detect the
presence of a touch on the button.
Note:
The keypad turns on only when the user inserts the smart card.
Status LED
indicators

G
G-P6025-TM001
Issue B
DigiSAFE DiskCrypt M100 User Manual 8
4Smart Card Security Features
You can perform certain smart card related security functions with DISKCRYPT M100.
These functions are only available before authentication. The following functions are
available.
CAUTION:
Smart card security and Administrative functions must be performed carefully as
they cause changes in smart cards and associated PIN. Please read the following
instructions carefully and follow them when performing Administrative functions.
4.1 Change Smart Card PIN
You can change your 8-digit smart card PIN with DISKCRYPT M100. It is
recommended that you change the default factory PIN to one that only you know.
Follow these steps to change your 8-digit smart card PIN.
1. Insert smart card into DISKCRYPT M100. The keypad should turn on to allow key
entry.
2. Press the CHANGE PIN button, followed by the ‘1’ button.
3. Press ENTER. The STATUS LED will blink three times.
4. Enter the current 8-digit smart card PIN and press ENTER. The STATUS LED
blinks twice.
5. Enter the new 8-digit smart card PIN and press ENTER. The STATUS LED
blinks twice.
6. Repeat the new 8-digit smart card PIN and press ENTER. While the PIN
change process is taking place, the STATUS LED will continue to blink.
DISKCRYPT M100 will provide three ‘beep’ sounds to indicate that this operation
is successful.
Upon a successful PIN change, DISKCRYPT M100 will proceed to connect the drive. If the
PIN change is not successful, the ERROR LED will blink continuously.
Note:
Smart card PIN are specific to the physical smart card. Please be aware that you
may have different PIN for each of the two included smart cards.
The user is responsible to remember his/her smart card PIN. The smart card will
be locked after 8 consecutive incorrect PIN attempts. Due to security
implementation, it is not possible to unlock the smart card PIN.
DISKCRYPT M100 only accepts 8-digit PIN. If a shorter or longer PIN is entered,
the ERROR LED will blink continuously. Press the ESC button to restart the
authentication process again. You will need to restart the entire PIN Change
process from step 2.
Pressing the ESC button restarts the entire authentication process.

G
G-P6025-TM001
Issue B
DigiSAFE DiskCrypt M100 User Manual 9
4.2 Administrative Functions
(Note that this section is not applicable to Enterprise Users. Enterprise Users may
approach their Administrators.)
DISKCRYPT M100 provides the following Administrative functions:
1. Initialize a DigiSAFE smart card to use it with DISKCRYPT M100
2. Enable/disable the smart card Lockout mode.
3. Admin smart card initialization
4. Change the Admin PIN
Additional smart cards may be purchased from your local reseller/distributor. You will
need a supported smart card and the 8-digit Admin PIN to enter the mode. The default
factory Admin PIN is “87654321”. To exit Administrative mode, remove and reconnect
the USB cable.
Note:
It is recommended to change the default 8-digit Admin PIN. Refer to Section
4.2.4 for details.
You are responsible to remember the Admin PIN. The Administrative functions will
be locked after 8 consecutive incorrect PIN attempts.
It is NOT possible to connect to the hard disk via ANY of the above Administrative
modes. To do so, remove and reconnect the USB cable to exit the Administrative
mode and proceed to enter the smart card PIN to authenticate to DISKCRYPT M100.
4.2.1 Smart Card Initialization
This procedure allows a DigiSAFE smart card to be used with the particular DISKCRYPT
M100 device. To initialize a smart card, follow these steps:
1. Insert the new smart card into DISKCRYPT M100. The keypad will turn on to allow
key entry.
2. The ERROR LED will light up indicating an invalid card has been inserted. Ignore
the LED and continue with the steps.
3. Press the ADMIN button, followed by the ‘0’ button.
4. Press ENTER. The STATUS LED will blink three times.
5. Enter the 8-digit Admin PIN and press ENTER.
6. DISKCRYPT M100 will proceed to initialize the smart card to be used with that
particular DISKCRYPT M100 device. While the initialization process is taking place,
the STATUS LED will continue to blink. At the end of the process, DISKCRYPT
M100 will provide three ‘beep’ sounds to indicate that this operation is successful.
7. Remove and reconnect the USB cable to exit the Administrative mode.
Note:
Once a new smart card is initialized, you will need to repartition/reformat any
existing drive, as the encryption key will be different. The existing data in the drive
will be lost with the new card.

G
G-P6025-TM001
Issue B
DigiSAFE DiskCrypt M100 User Manual 10
4.2.2 Smart Card Lockout mode
This mode controls the behavior of DISKCRYPT M100 when the smart card is removed
after authentication. DISKCRYPT M100 allows the user to choose between two smart
card Lockout modes. There are two supported modes:
1. Lockout (default) –DISKCRYPT M100 is automatically disconnected from the host
PC upon smart card removal.
(The STATUS LED is GREEN in authenticated mode.)
2. No Lockout –DISKCRYPT M100 remains connected to the host PC upon smart
card removal.
(The STATUS LED is RED in authenticated mode.)
To toggle the smart card Lockout mode, follow these steps:
1. Insert the smart card into DISKCRYPT M100. The keypad will turn on to allow key
entry.
2. Press the ADMIN button, followed by the ‘1’button.
3. Press ENTER. The STATUS LED will blink three times.
4. Enter the 8-digit Admin PIN and press ENTER. DISKCRYPT M100 will proceed
to change the settings. While the change process is taking place, the STATUS
LED will continue to blink. At the end of the process, DISKCRYPT M100 will
provide three ‘beep’ sounds to indicate that this operation is successful.
5. Remove and reconnect the USB cable to exit the Administrative mode.
Note:
The default mode is Lockout mode. This is the recommended (higher security)
mode of usage.
In Lockout mode, DISKCRYPT M100 is automatically disconnected from the host
PC upon card removal. Do NOT remove the smart card while DISKCRYPT M100 is
being accessed as this may cause unrecoverable data loss/corruption.

G
G-P6025-TM001
Issue B
DigiSAFE DiskCrypt M100 User Manual 11
4.2.3 Admin Smart Card Initialization
(Note that this section is applicable only to Enterprise User. This function shall be invoke
by Administrators during DISKCRYPT M100 setup and provisioning. Administrators may
refer to the DiskCrypt key Management System Guide on preparation of the Admin smart
card)
This procedure allows a supported Admin smart card to be initialized with DISKCRYPT
M100 device. This function injects a Disk Key into DISKCRYPT M100. The Disk Key is
used in conjuncture with the User Key (stored in User smart card) to deduce a
Symmetric Key used for cryptographic functions of DiskCrypt M100. To initialize the
Admin smart card, follow these steps:
1. Insert the Admin smart card into DISKCRYPT M100. The keypad will turn on to
allow key entry.
2. The ERROR LED may light up indicating an untagged card has been inserted.
Ignore the LED if it lights up.
3. Press the ADMIN button, followed by the ‘5’ button.
4. Press ENTER. The STATUS LED will blink three times.
5. Enter the 8-digit Admin PIN and press ENTER. The STATUS LED will blink
continuously. Proceed to the next step.
6. Enter the 8-digit Admin smart card PIN and press ENTER
7. DISKCRYPT M100 will proceed to initialize the Admin smart card with the
DISKCRYPT M100 device. While the initialization process is taking place, the
STATUS LED will continue to blink. At the end of the process, DISKCRYPT M100
will provide three ‘beep’ sounds to indicate that this operation is successful.
8. Remove and reconnect the USB cable to exit the Administrative mode.
Note:
The Admin smart card shall be stored in a secure location as it contains the Disk Key.

G
G-P6025-TM001
Issue B
DigiSAFE DiskCrypt M100 User Manual 12
4.2.4 Change Admin PIN
The Admin PIN provides a layer of protection around your DISKCRYPT M100 device to
deter others from unauthorized access of the Administrative functions. It is
recommended that you change the default factory Admin PIN to another one that only
you know. To change your Admin PIN, follow these steps:
1. Insert the smart card into DISKCRYPT M100. The keypad will turn on to allow key
entry.
2. Press the CHANGE PIN button, followed by the ‘0’ button.
3. Press ENTER. The STATUS LED blinks three times.
4. Enter the current 8-digit Admin PIN and press ENTER. The STATUS LED
blinks twice.
5. Enter the new 8-digit Admin PIN and press ENTER. The STATUS LED blinks
twice.
6. Repeat the new 8-digit Admin PIN and press ENTER. While the Admin PIN
change process is taking place, the STATUS LED will continue to blink.
DISKCRYPT M100 will provide three ‘beep’ sounds to indicate that this operation
is successful.
7. Remove and reconnect the USB cable to exit the Administrative mode.
If you have mistyped your PIN, press the ESC button at any time to restart the entire
authentication process.
Note:
Like the smart card user PIN, DISKCRYPT M100 only accepts 8-digit ADMIN PIN. If a
shorter or longer PIN is entered, the ERROR LED will blink continuously. Press the
ESC button to restart the authentication process again. You will need to restart the
entire PIN Change process from step 2.

G
G-P6025-TM001
Issue B
DigiSAFE DiskCrypt M100 User Manual 13
5Optional Accessories
5.1 DigiSAFE DiskCrypt key Management Software (DMS)
DigiSAFE DMS provides a way for enterprises to provision their own smart cards for
usage with DISKCRYPT M100. System administrators may also use this software to back
up the encryption keys that are pre-loaded in the two smart cards that comes with
DISKCRYPT M100.
DMS comes with the general features:
1. Generation and loading of encryption key into a smart card
2. Duplication of smart card with the same encryption key
3. Editing smart card record
4. Reading smart card and backup of encryption keys
5. Delete smart card record
(For Enterprise users, please refer to DMS guide document for details)
Note:
Please contact your reseller/distributor for any enquiries or purchase of the software
and/or additional smart cards.

G
G-P6025-TM001
Issue B
DigiSAFE DiskCrypt M100 User Manual 14
6Helpful Information
6.1 Partitioning and formatting your hard drive
Note that in most cases, it is not necessary to do this because the hard drive will be
shipped, completely formatted.
In any case, if you wish to partition and format the drive, simply follow these steps.
CAUTION:
Performing partition and format operations will erase all data in the drive.
Windows XP and above
1. Connect and authenticate into DISKCRYPT
M100.
2. Right click on My Computer and Select
Manage.
3. From the Computer Management
window, select Disk Management.
4. Right click on the drive and choose
Initialize.
5. Right click on the drive and select New
Partition.
6. Follow the New Partition Wizard to create
as many partitions as desired.
7. Right click on each partition and select
Format to format the drive.
8. The drive is ready to be used once
formatting completes.
Note:
You must have Administrator privileges to use the Disk Management utility.
Mac
1. Connect and authenticate into DISKCRYPT
M100.
2. Enter the Applications folder, followed by
the Utilities folder
3. Run Disk Utility.
4. Select DISKCRYPT M100 on the left hand
column and click on the Partition tab.
5. Choose the number, size and names of
the desired partitions.
6. Mac OS will then format the drives
automatically.
7. The drive is ready to be used once
formatting completes.

G
G-P6025-TM001
Issue B
DigiSAFE DiskCrypt M100 User Manual 15
7Care and Handling
The following are some important information on the proper care and handling of
DISKCRYPT M100. Please take a moment to review these instructions.
As with any storage solution, it is recommended that the data of the connected
drive be backed up regularly.
Ensure that you follow the proper removal procedure to disconnect DISKCRYPT
M100.
Do not move or disconnect this device from your computer while it is reading or
writing data. This may cause damage to DISKCRYPT M100 and it is possible that
the data that is read from or written to the device becomes corrupted.
Do not place this device near a heat source or expose to direct flame or heat.
Do not place the device near to equipment generating strong electromagnetic
fields. Exposure to strong electromagnetic fields may cause the device to
malfunction or data to be corrupted.
Do not drop or cause shock to your DISKCRYPT M100.
Do not expose DISKCRYPT M100’s internals to water.
Do not attempt to disassemble and service DISKCRYPT M100 yourself.

G
G-P6025-TM001
Issue B
DigiSAFE DiskCrypt M100 User Manual 16
8Frequently Asked Questions
What is DiskCrypt M100?
DISKCRYPT M100 is a USB 3.0 encryption hard disk enclosure for 2.5” SATA hard drives.
It provides access control via two-factor authentication using a smart card and data-at-
rest security via hardware-based full disk encryption.
How easy it is to use DiskCrypt M100?
It is very simple and straightforward. After installing the hard drive into DISKCRYPT
M100, it is as simple as connecting DISKCRYPT M100 to your computer, inserting your
smart card and entering a PIN. You may access your data just like any other normal USB
enclosures. No software installation is required at all.
What are the advantages of using DiskCrypt M100 over other USB drive
enclosures?
DISKCRYPT M100 provides state of the art security via two-factor authentication and
hardware-based full disk encryption. It utilizes smart card technology for two-factor
authentication through a built-in keypad to enter smart card PIN, hence, it is very
secure.
Unlike other solutions, encryption keys are stored inside the smart card, not in memory
based tokens or hard disk. Other than security, it also means if DISKCRYPT M100 really
malfunctions, simply remove the hard disk and install in the replacement device and you
may continue accessing your data using that smart card. This point highlights the next
advantage of DISKCRYPT M100 –the hard disk is easily replaceable or upgradeable.
DISKCRYPT M100 is also operating system (OS) independent, unlike some existing
solutions which only work on certain OS.
What are the advantages of smart card authentication over hardware
keys/tokens?
Smart cards are a proven technology for secure storage of information. DISKCRYPT
M100 stores the encryption key in smart cards. While other encrypted drive enclosures
make use of hardware keys to store the encryption key, these keys are not secure, and
can be easily duplicated if they are lost/stolen, hence compromising the encryption key
and the data within the hard drive. Smart cards however require a PIN to access data
within. Even if the cards and enclosure are both lost or stolen, your data is still secure as
the PIN is only known to you.
What is two-factor authentication?
Two-factor authentication is an authentication protocol that requires two independent
methods to establish one’s identity and privileges. DISKCRYPT M100 implements two-
factor authentication by requiring that the user have the associated smart card
This manual suits for next models
1
Table of contents
