manuals.online logo
Brands
  1. Home
  2. •
  3. Brands
  4. •
  5. STEELTECH
  6. •
  7. Furnace
  8. •
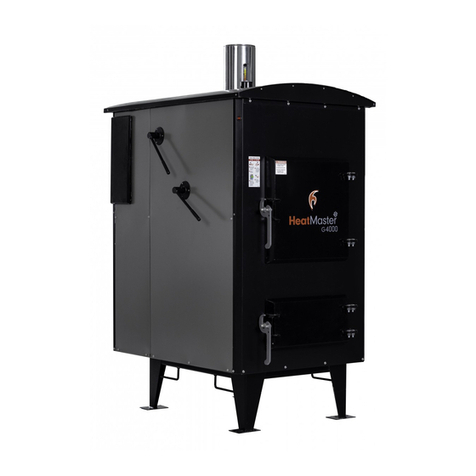
  9. STEELTECH HeatMasterss G Series User manual

STEELTECH HeatMasterss G Series User manual

By SteelTech Inc.
Version 1
UL 2523-2009
CAN/CSA B366.1-2011
GWIRELESS
INSTALLATION
MANUAL
2Heatmasterss G Series Furnace Operating Manual
HOME NETWORK CONNECTION
For Your HeatMasterSS Furnace
This instruction applies to G-Series furnaces that were manufactured as a part
of the 2020 model lineup using the Siemens Logo Control.
These instructions will guide you in setting up a wireless connection to your G-Series furnace. A hardwired connection to
your furnace is the preferred and recommended method, but a wireless connection is a good option when hardwiring is not
possible. See your furnace’s owner’s manual for more information on the hardwired method. Either method will allow you to
access the furnace controls on your home network.
This wireless method requires the installation of a wireless access device. This is available as part of the HeatmasterSS Wireless
Access Kit. Please contact your dealer for more information.
Program your wireless access point.
See page 3for these instructions.
Aer you have setup the wireless connection you will need to find an IP address on your home
network that is available to assign to your furnace.
See page 8for these instructions.
Mount the wireless access radio.
See page 10 for these instructions.
Assign your furnace an IP address.
See page 11 for these instructions.
Once you have followed these steps you should be able to access your furnace on your home network
via an internet browser.
See page 13 for these instructions.
Step 1
Step 2
Step 3
Step 4
Step 5
Heatmasterss G Series Furnace Operating Manual 3
GSERIES
WIRELESS CONNECTION KIT
This kit contains the components needed to establish a wireless connection from your outdoor furnace to a nearby wireless
network. The following instructions illustrate how to set up this equipment to allow you to monitor your furnace from your home
network.
Connecting the access point to your wireless network.
The first step in connecting your new wireless access point is
to connect it to your home network. Layout the hardware and
cables as shown in Figure 1.
Once you have connected the wireless access point as shown
in Figure 1, connect the LAN cable to your computer to
configure the wireless access point.
Figure 1
Figure 2
First, we need to make a change on your computer to allow
you to connect and configure this wireless access point. Open
your Network Connections settings window by opening the
following screens.
Settings, see Figure 2
4Heatmasterss G Series Furnace Operating Manual
Network & Internet, See Figure 3 Ethernet, see Figure 4
Change adapter options, see Figure 5 Right click the Ethernet connection and select Properties, see
Figure 6
Figure 3
Figure 5
Figure 4
Figure 6
Figure 7
In this next window, see Figure 7, select the line “Internet
Protocol Version 4 (TCP/IPv4)” and then select Properties.
Heatmasterss G Series Furnace Operating Manual 5
GSERIES
In this window, see Figure 8, you need to select and enter, as
shown.
• Select “Use the following IP address”
• Enter both the IP address as well as the Subnet mask
numbers shown in Figure 8
Select OK aer you made these changes
Figure 8
Use a web browser to connect and configure the wireless
access point.
• Turn off your computer’s WiFi connection before
proceeding to the next step.
• Load a web browser (i.e. Google Chrome/FireFox/
Internet Explorer), see Figure 9
• Enter the IP address of the wireless radio in the URL bar.
192.168.1.20
• The window you see in Figure 9 should load.
Note: you may get a security warning message before this
window loads, if this happens, you should be able to select an
option to go to an advanced option and then accept the risk and continue.
• Enter the User Name: ubnt
• Enter the Password: ubnt
• Select the Country and Language
• Select the checkbox to agree to the terms and Login
Figure 9
6Heatmasterss G Series Furnace Operating Manual
Next, you should see the main window load, see Figure 10
• Select the Wireless tab from the top tabs
In the Wireless tab we connect this wireless access point to
your wireless home network, see Figure 11.
• Select the “Select” button in the SSID: line
The radio will scan for the wireless networks in your area and
display them in this window, see Figure 12.
• Once you see your WiFi network in the window, select
the button next to your WiFi line, then select the “Lock to
AP” button. In our example below we select the button to
the le of the “Heatmaster Home” network and then the
button “Lock to AP”.
You should see your WiFi connection in the SSID field as
shown in figure 13.
• In the WPA Preshared Key field, enter the password for
your home WiFi.
• Select the Change button aer you have entered your
password.
Figure 10
Figure 12
Figure 11
Figure 13
Heatmasterss G Series Furnace Operating Manual 7
GSERIES
Figure 14
Figure 15
Next, you will be prompted and forced to change the
password for the wireless access point you are configuring,
see Figure 14.
• In the “Current Password” field enter the password “ubnt”
that you used initially to log onto this wireless access point.
• Enter a new password for this radio device.
• Take note of this new password as you will need it in order
to log back into this radio if required.
Next select “Apply” as shown in Figure 15, saving the changes
you made in this screen.
At this point you need to change your Network Connections
settings on your computer back to the settings that you
started out with.
• Load the same screen that you loaded earlier, see Figure 16
• Select properties for the line “Internet Protocol Version 4
(TCP/IPv4)”.
• Select “Obtain an IP address automatically”, see figure 17
• Select OK
Figure 16
8Heatmasterss G Series Furnace Operating Manual
Unplug the wireless access point from your computer.
Turn your computer’s WiFi back on.
The wireless access point is now ready now to be installed on
your furnace.
Figure 17
Figure 1
FINDING AN IP ADDRESS FOR YOUR FURNACE
These instructions will guide you in finding an available address on your home network to assign to your HeatMaster furnace.
Using a windows PC that is running on your home network,
we’ll use the command prompt app. Using the search bar in
the lower le corner of your Windows home screen, enter
the letters “cmd”, and then hit enter as shown in Figure 1, the
command prompt app loads.
Heatmasterss G Series Furnace Operating Manual 9
GSERIES
Enter the command “ipconfig”. You’ll see a screen with similar
data as shown in figure 3.
Paying attention to the addresses that we’ve highlighted
within the square (in figure 3), you’ll need to take note of
three addresses.
The line “IPv4 Address” is the IP address of the computer
that you are currently working on. the IP address that you’ll
be assigning to your furnace will be in the same range as this
number.
The line “Subnet Mask” is the same Subnet address that you’ll
be assigning to your furnace.
The line “Default Gateway” is an address that you need to
confirm or assign to your furnace.
Note these three addresses, as you’ll need them later.
Figure 2
Next you will see a window similar to the one in figure 2.
Figure 3
In this same window we will ping a few addresses and find one
available to use for your furnace.
Start by pinging your computers IP address that you found in the
previous window (in our case this is 192.168.1.101).
Enter the ping command as shown in the first box in figure 4, using
your computers IP address (ping ***.***.**.***.). The following
lines (as shown in the second box in figure 4) show that the
computer is getting a reply from that address, indicating that this IP
address is already in use and can’t be used for your furnace.
Figure 4
10 Heatmasterss G Series Furnace Operating Manual
Ping an address with a higher number than 192.168.1.101 as your
router is less likely to assign an address within this range. We
suggest a number between 200-250. Only change the last three
numbers in the address as shown on Figure 5.
Figure 6
Figure 5
Change These
192.168.1.101
(Antenna/Mount)
(b)
(a)
(c)
Secure the antenna mount (a) to the back corner of the furnace
by driling 3/16” holes through the back corner post of the
furnace, using the antenna mount holes as a template for the
hole locations.
Rivet the mount to the corner post, using the supplied rivets.
Mount the wireless access point (b) to the top of the anntena
post using the supplied pipe clamp. Turn the wireless access
point so that it’s facing the direction of your home wireless
signal.
Drill a 5/8” hole through the back of the furance at (c) to route
the cable that will be coming from the wireless access point to
the network jack that’s inside the back cabinet of your furnace.
Zip tie the cable to the anntena post.
MOUNTING THE WIRELESS ACCESS RADIO
You may need to try a few different numbers before you will
find an available address. Once you find an IP address that is
available you will see a message saying “Request timed out”,
as shown in Figure 6.
Write down this IP address (in our case 192.168.1.250).
This will be the address we will assign to your furnace in the
“Addressing Your Furnace” step of this instruction.
Heatmasterss G Series Furnace Operating Manual 11
GSERIES
Select Yes. Select Network
ADDRESSING YOUR
FURNACE
Now that we have obtained an available IP address, we will
assign this address to the furnace control.
Power on the furnace.
Press the down arrow key repeatedly to scroll to the last
available screen displaying date and time as shown above.
Press the ESC key, you should see the screen shown above.
We need to stop the Logo’s program to make this IP address
change. Select STOP and press the OK button.
12 Heatmasterss G Series Furnace Operating Manual
Using the four arrow keys, change the IP address to the one
you found to be available on your network in the previous
section. Also change the subnet mask, and the gateway
addresses to match the numbers you wrote down earlier.
Aer you have set these three addresses, scroll back and
restart the furnace by selecting start
Select IP Address
Select Yes to start the Logo’s program again.
At this point you should be able to access your furnace on your home network.
Go to the “Viewing your furnace on your computer”. See page 13 for these instructions.
Heatmasterss G Series Furnace Operating Manual 13
GSERIES
VIEWING YOUR FURNACE IN A WEB BROWSER
The last step in these instructions is loading and viewing your furnace control system on your computer.
• Load a web browser on a device connected to your home network.
• As shown in figure 1, enter the IP address that you programmed into your furnace control, in our case this is 192.168.1.250.
Enter this in the browser URL and hit enter.
• Leave the name field as Web User.
• Enter the password “heatmaster”, then click “log on”.
The Screen that you see in figure 2 should load
Figure 2
Figure 1
14 Heatmasterss G Series Furnace Operating Manual
Select the menu option "LOGO! BM" on the le side of the screen.
You can use the control buttons on the screen to navigate the furnace control just as if you were standing at your furnace.
This page can be accessed from any web browser enabled device connected to your home network.
Bookmark this page in your web browser, allowing you quick access to this page at any time.
Figure 3
Heatmasterss G Series Furnace Operating Manual 15
GSERIES
HeatMasterSS carries a full line of high-quality
parts for your furnace including pumps, ttings
and heat exchangers.For more information
on our parts or to arrange product installation
please contact your local HeatMasterSS dealer.
HeatMasterSS
Box158
Winkler, Manitoba, Canada
R6W 4A4
Phone: (204) 325-9792
Fax: (204) 325-9803
Toll Free: 1-877-325-9792
Email: [email protected]
heatmasterss.com

Other STEELTECH Furnace manuals

STEELTECH HeatMaster G Series User manual

STEELTECH

STEELTECH HeatMaster G Series User manual

STEELTECH HeatMaster G Series User manual

STEELTECH

STEELTECH HeatMaster G Series User manual

Popular Furnace manuals by other brands
Lennox G41UF Series User's information manual

Lennox

Lennox G41UF Series User's information manual

Carrier 58SG Installation, Start-Up and Service Instructions

Carrier

Carrier 58SG Installation, Start-Up and Service Instructions

Carrier GAS FURNACE 58MXA Installation, start-up, and operating instructions

Carrier

Carrier GAS FURNACE 58MXA Installation, start-up, and operating instructions

York G8C Series Technical guide

York

York G8C Series Technical guide

Stelpro SFECM2321 installation guide

Stelpro

Stelpro SFECM2321 installation guide

Lennox G21 V SERIES installation instructions

Lennox

Lennox G21 V SERIES installation instructions

Comfortaire GUH97M Service manual

Comfortaire

Comfortaire GUH97M Service manual

Fire Chief FC1500 manual

Fire Chief

Fire Chief FC1500 manual

Fire Chief FCOS2200D owner's manual

Fire Chief

Fire Chief FCOS2200D owner's manual

Blue Ridge BG802UHV installation instructions

Blue Ridge

Blue Ridge BG802UHV installation instructions

Blue Ridge BG802 installation instructions

Blue Ridge

Blue Ridge BG802 installation instructions

Bryant 345MAV Service and maintenance procedures

Bryant

Bryant 345MAV Service and maintenance procedures

Bryant 398AAZ Quick manual

Bryant

Bryant 398AAZ Quick manual

VERDER CARBOLITE GERO VST 12/900 Installation, operation and maintenance instructions
VERDER

VERDER CARBOLITE GERO VST 12/900 Installation, operation and maintenance instructions
Coleman TG9S Technical guide

Coleman

Coleman TG9S Technical guide

Sterling outdoor rooftop gas-fired duct furnace Installation and service manual

Sterling

Sterling outdoor rooftop gas-fired duct furnace Installation and service manual

Barnstead F46110CM Operation manual

Barnstead

Barnstead F46110CM Operation manual

SUPREME FEM10-M2301CM-B installation instructions and home owner's guide

SUPREME

SUPREME FEM10-M2301CM-B installation instructions and home owner's guide

manuals.online logo
manuals.online logoBrands
  • About & Mission
  • Contact us
  • Privacy Policy
  • Terms and Conditions

Copyright 2025 Manuals.Online. All Rights Reserved.